


1/5 scale K2 black panther tank
 07-09-2023, 10:53 PM
#101

Thread Starter

This episode describes the process of making gears and sprockets inside the tank and installing them to Caterpillar.

Prepare to reassemble gearbox dedicated to sprockets that power Caterpillar

Process the round bar that connects the various safts and create a snap ring

It also makes room for the key

Completed Gear Shaft

Prepare square hardware to make the key

Produce and store keys by size

Separate the shaft and the key by size and use

gearbox spacer

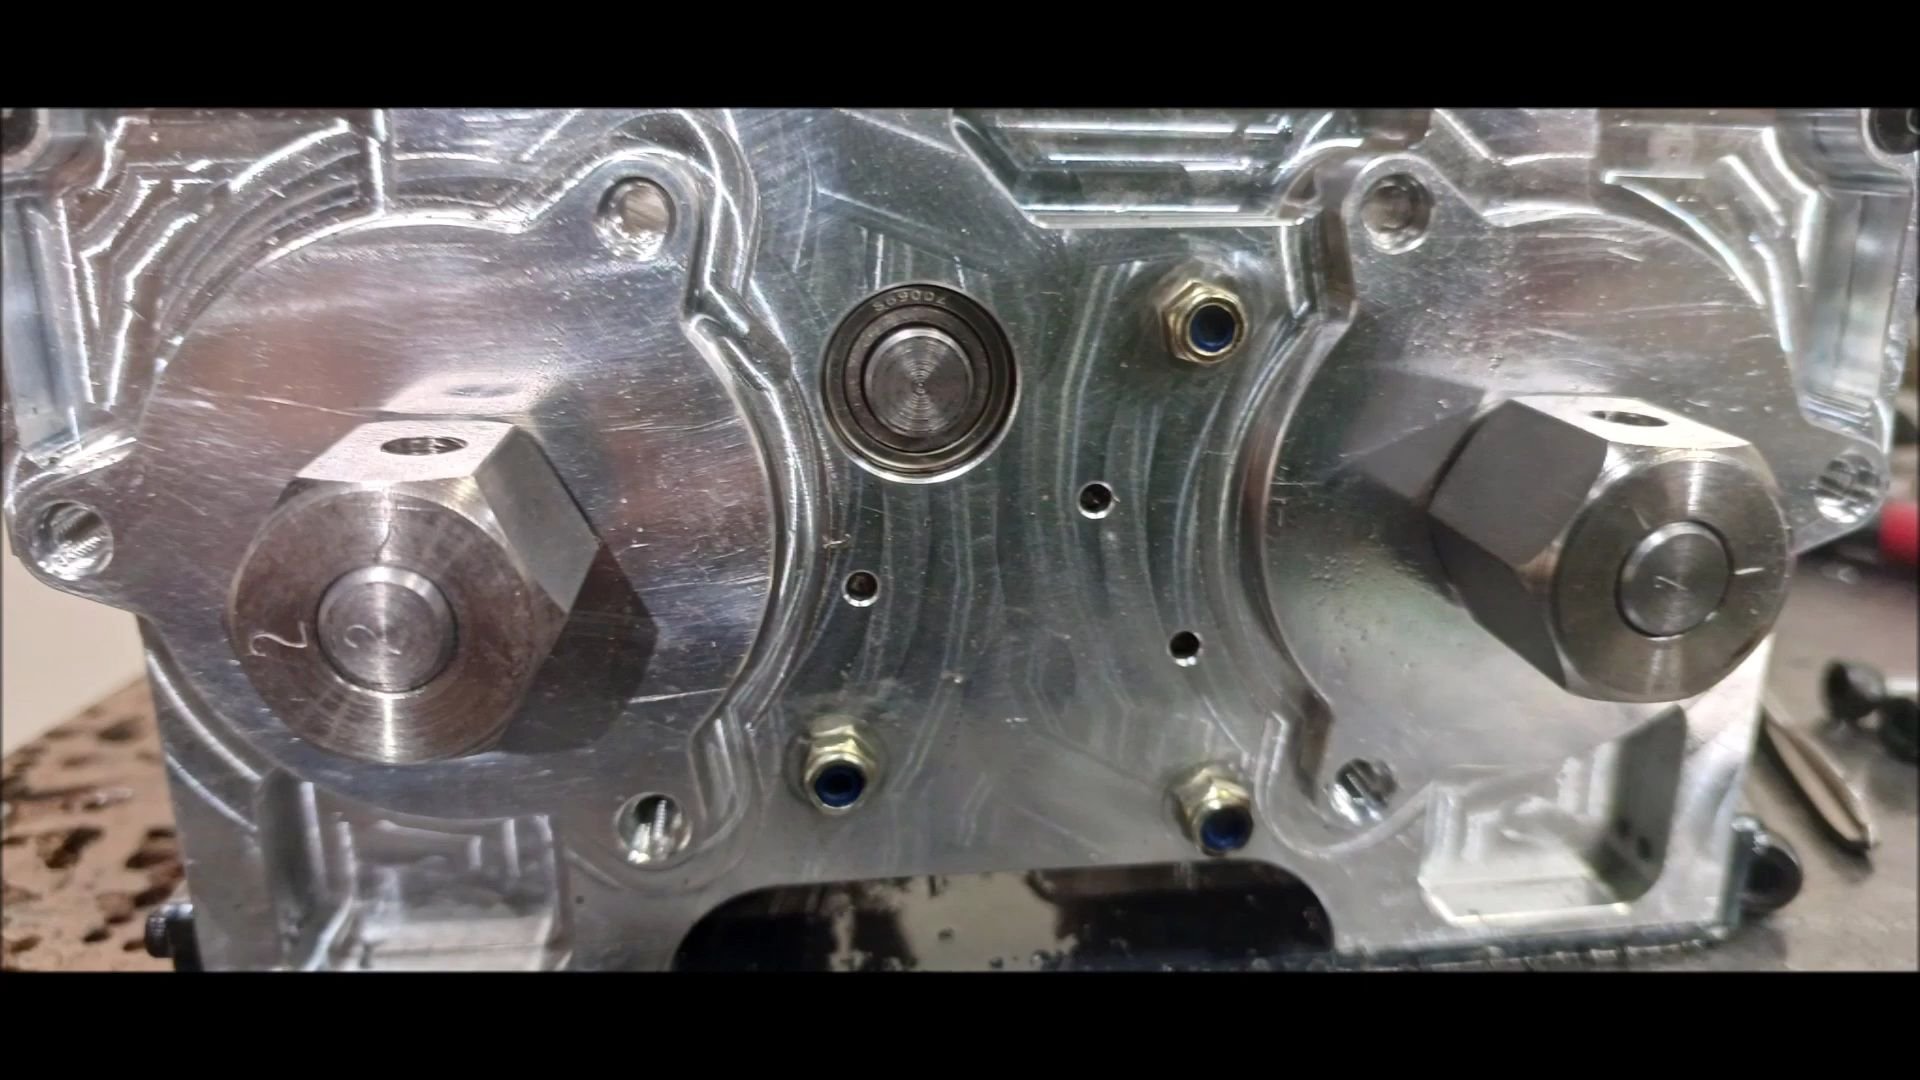
Gearbox fabrication

Insert Bearing

Assembly

Spacer assembly

Addition and operation of lubricating oil

Gearbox Assembly

Gearbox Assembly

Left and right gearbox assembly

Left and right gearbox assembly

Preparation for hydraulic motor gearbox fabrication (assembly in next episode)

Preparation for hydraulic motor gearbox fabrication (assembly in next episode)

Preparation for hydraulic motor gearbox fabrication (assembly in next episode)

Reassemble Steel Gearbox

Reassemble Steel Gearbox

Reassemble Steel Gearbox

Temporary Arrangement of Gearbox and Shaft

Temporary Arrangement of Gearbox and Shaft
Prepare to reassemble gearbox dedicated to sprockets that power Caterpillar
Process the round bar that connects the various safts and create a snap ring
It also makes room for the key
Completed Gear Shaft
Prepare square hardware to make the key
Produce and store keys by size
Separate the shaft and the key by size and use
gearbox spacer
Gearbox fabrication
Insert Bearing
Assembly
Spacer assembly
Addition and operation of lubricating oil
Gearbox Assembly
Gearbox Assembly
Left and right gearbox assembly
Left and right gearbox assembly
Preparation for hydraulic motor gearbox fabrication (assembly in next episode)
Preparation for hydraulic motor gearbox fabrication (assembly in next episode)
Preparation for hydraulic motor gearbox fabrication (assembly in next episode)
Reassemble Steel Gearbox
Reassemble Steel Gearbox
Reassemble Steel Gearbox
Temporary Arrangement of Gearbox and Shaft
Temporary Arrangement of Gearbox and Shaft
Last edited by PE YOUNG; 07-09-2023 at 10:57 PM.
 07-09-2023, 11:34 PM
#102
Thread Starter

Installation of gear box for sprocket drive

Removal of paint from gearbox installation site

Secure with hex bolt from outside

Gear shaft machining for sprocket

Gear shaft machining for sprocket

Sprine sleeve and gear welding

machining of hexagon shaft sleeve for sprocket

machining of hexagon shaft sleeve for sprocket

machining of hexagon shaft sleeve for sprocket

Aligning the position of the hexagon shaft sleeve for sprocket drive

Hexagon shaft sleeve weld for sprocket drive

Complete shaft for sprocket

Replace the bolt head inside the sprocket with a flat head bolt due to interference

Perform a sink operation to ensure that the dish head bolts are inserted in a wall

Assemble the inside of the sprocket with a dish head bolt

Spring and support for fixing slide gear valves

Gearbox after assembly

Complete the sprocket shaft

Complete the sprocket shaft

Complete the sprocket shaft

Complete the sprocket shaft

Installing a Sprocket

Installing a Sprocket

Distance measurement inspection after installing sprocket
07-09-2023, 11:47 PM
#103
Thread Starter

Gearbox Assembly for sprocket driving completed

Gearbox Assembly for sprocket driving completed

Gearbox Assembly for sprocket driving completed

Gearbox Assembly for sprocket drive completed (left and right)

Sprocket, auxiliary wheel, idler wheel, bogie wheel complete

Temporary installation of caterpillar on the right side

Temporary installation of caterpillar on the right side

Check for interference or impact when driving the caterpillar

Check for interference or impact when driving the caterpillar

Check for interference or impact when driving the caterpillar

Check for interference or impact when driving the caterpillar

Check for interference or impact when driving the caterpillar

Check for interference or impact when driving the caterpillar
That's it for this episode, and the tank is expected to be completed by August.
Regards,
Young
Last edited by PE YOUNG; 07-09-2023 at 11:54 PM.
The following 2 users liked this post by PE YOUNG:
Pcomm1.v2 (07-19-2023),
rb67mustang (08-18-2023)
07-11-2023, 03:54 AM
#104
Thread Starter

The left caterpillar is also fitted in the same way as last week

The left and right caterpillar of the k2 tank has been temporarily installed. Adjust the drive system when it is complete.
07-12-2023, 04:10 AM
#105
Thread Starter

We have a 35cc four-cycle gasoline engine, the heart of the tank.

We have oil reservoirs, hydraulic motors, hydraulic pumps and engines

We tried to match the design and found that one hydraulic motor weighed about 5 kg.

We ordered additional piping parts for connecting hydraulic motors and are waiting for their arrival.

Since there is no separate brake, we have a list of the characteristics that will appear during the commissioning.

Hydraulic cooling is intended to be mounted on the underside of the turret.
07-16-2023, 02:24 AM
#106
Thread Starter
It is the summer rainy season in Korea, and the heat has come down with a lot of rain. This week, the operation of the K2 tank's drive system was carried out.
Young
Young
07-17-2023, 05:28 PM
#107
Thread Starter
We connected the hydraulic system and tested it yesterday.
The results of the test showed that there was a softness at the start, but when the flow rate distribution was less precise and turned left or right, the inner track was not fixed and there was a problem of turning along the outer track.
Although a lot of efforts were made to correct this, it took only four years, so eventually,
we decided to give up the hydraulic driving method and change it to a driving method using a gearbox as in the past.
Currently, we have requested aluminum outsourcing processing and gear manufacturing to make a new gearbox, and we have ordered parts and are on standby.
The video below shows the production process of the 2022 K2 Black Panther made in a gearbox manner.
The difference from this version is that due to the increased weight, the gear ratio will be slightly changed,
so the ability to take the mound will be better than the previous version,
but the maximum speed will be slightly reduced.
07-18-2023, 01:37 AM
#108
Just out of curiosity, how many of the 2022 versions have you sold? Do you have anyplace close to you where they have model shows or hold tank battles? I think that's my biggest problem with the hobby, I build all this cool stuff and I don't have anywhere to show it off. 
 07-18-2023, 03:46 PM
#109
Thread Starter
The 2022 K2 Black Panther is a first-time work and has one built and stored.
We don't do mass production professionally because we work in the workshop from time to time.
However, if there is a model required by the customer, it is produced.
We've built Merkabah tanks, IS3 tanks, M551 tanks, and so on, and we've also made models that the Defense Science Institute of Korea needs.
They also made exhibition models and delivered them to tanks and self-propelled gun manufacturers.
Every year, we display our work at an exhibition held by soldiers, and we have to demonstrate our model at a special event made outside.
In most cases, our work is limited to places because we can travel together at a speed similar to the speed at which tank owners usually take a walk in a small local park.
Young
The following users liked this post:
Pcomm1.v2 (07-19-2023)
07-23-2023, 02:47 AM
#110
Thread Starter
The hydraulic system was configured and tested to find problems and record the process to make decisions to solve them.
08-04-2023, 05:45 AM
#111
Thread Starter
We are assembling the transmission box through emergency design and manufacturing of CNC outer peripheral machining gear and bearings for two weeks


08-05-2023, 10:31 AM
#113
Wow...that is a highly engineered solution.
The following users liked this post:
tankme (08-12-2023)
08-15-2023, 03:23 AM
#115
Thread Starter
Since the last episode, the driving method of the K2 tank has been changed from hydraulic to gear, and this is the production process of this episode.

In the last episode, we finished assembling the gearbox that was continuing to be produced and made a shape except for the brake.

The object you see is a picture of a spring that holds the gap between the discs.

Before installing a spring between the discs

Installing a spring between the discs

Installing a spring between the discs

Installing a spring between the discs

Install the end with lock tights on the fixing bolts.

Install the end with lock tights on the fixing bolts.

Tighten the ends tightly

Tighten the ends tightly

a gear system with springs and fixed bolts

Make a brake at the end of the gear stage divided into 1 and 2.
Make a brake at the end of the gear stage divided into 1 and 2.

Make a brake at the end of the gear stage divided into 1 and 2.

Disc Finishing Components for Brake

Completed brake disc system

Carry out operation test using hands

Carry out operation test using hands

Drive gear system completed up to the brakes, forward gear ratio is greater than previous version and is equal to the proportion of previous Merkava tanks built.

It was connected to the servo and made a lever to press the brake plate.

A location was selected to mount the newly built gear system on the bottom of the tank.

A location was selected to mount the newly built gear system on the bottom of the tank.

Holes were drilled in the new location.

Secure the lower plate of the gear system

Production of a lever connected to the servo to handle left and right forward and backward movement
In the last episode, we finished assembling the gearbox that was continuing to be produced and made a shape except for the brake.
The object you see is a picture of a spring that holds the gap between the discs.
Before installing a spring between the discs
Installing a spring between the discs
Installing a spring between the discs
Installing a spring between the discs
Install the end with lock tights on the fixing bolts.
Install the end with lock tights on the fixing bolts.
Tighten the ends tightly
Tighten the ends tightly
a gear system with springs and fixed bolts
Make a brake at the end of the gear stage divided into 1 and 2.
Make a brake at the end of the gear stage divided into 1 and 2.
Make a brake at the end of the gear stage divided into 1 and 2.
Disc Finishing Components for Brake
Completed brake disc system
Carry out operation test using hands
Carry out operation test using hands
Drive gear system completed up to the brakes, forward gear ratio is greater than previous version and is equal to the proportion of previous Merkava tanks built.
It was connected to the servo and made a lever to press the brake plate.
A location was selected to mount the newly built gear system on the bottom of the tank.
A location was selected to mount the newly built gear system on the bottom of the tank.
Holes were drilled in the new location.
Secure the lower plate of the gear system
Production of a lever connected to the servo to handle left and right forward and backward movement
08-15-2023, 03:41 AM
#116
Thread Starter

It produced a gear control lever to handle the front and rear movements.

Install gear control lever on left and right side of gearbox to handle forward and backward movement

Install gear control lever on left and right side of gearbox to handle forward and backward movement

Install gear control lever to handle forward and backward movement and conduct hand test

Install gear control lever to handle forward and backward movement and conduct hand test

The holes in the previously manufactured tank body were mashed by welding.

The holes in the previously manufactured tank body were mashed by welding.

The holes in the previously manufactured tank body were mashed by welding.

The holes in the previously manufactured tank body were mashed by welding.

The holes in the previously manufactured tank body were mashed by welding.

The holes in the previously manufactured tank body were mashed by welding.

Unnecessary neutral clutch removed

The position of the gear has also been slightly modified.

The position of the gear has also been slightly modified.

The holes in the previously manufactured tank body were mashed by welding.

Arrange all unnecessary holes and prepare for lower paint

Arrange all unnecessary holes and prepare for lower paint

Bottom floor finished with oily black paint

Bottom floor finished with oily black paint

Installing the Sprocket Drive Gearbox

Rotate the spring to make black paint invisible

The strength of the spring can be adjusted to a stronger one after the field test

A gear drive test was performed using an electric drill.

A gear drive test was performed using an electric drill.

The gear drive test was conducted using an electric drill, and the test result was very good.
08-15-2023, 04:02 AM
#117
Thread Starter

The gear drive test was conducted using an electric drill, and the test result was very good.

Installing servo mount support

Installing the servo anchor plate from the supporting part

Secure the servo fixing plate from the top of the iron gearbox

Installation of left and right lever for brake operation

Operation test after installation of left and right lever for brake operation

Secure the servo fixing plate from the top of the iron gearbox

Temporary servo installation at servo location

Reseat the engine

Engine first start after re-installing engine after system change

Conduct a motion test instead of an electric drill

Successful forward reverse test after engine running

Successful forward reverse test after engine running

Construction of black paint on Caterpillar

Construction of black paint on Caterpillar

Even after painting, rust occurs naturally. (Photo by merkava tanks)

Install the pin-fixing bolts to complete the caterpillar

Construction of black paint on Caterpillar

A 3mm wrench bolt was used for convenience of management.

Move the position to the hoist for assembly of the caterpillar to the tank

Positioned for the assembly of the caterpillar in the tank.

The tensioner has been modified.

Installing the Caterpillar

Installing the Caterpillar

Installing the Caterpillar
08-15-2023, 04:11 AM
#118
Thread Starter

Installing the Caterpillar

Installing the Caterpillar

An indoor test was prepared by connecting a gear control lever to a temporary rod.

Indoor test scene (see video)

Indoor test scene (see video)

Indoor test scene (see video)

Indoor test scene (see video)

Indoor test scene (see video)

Indoor test scene (see video)

Indoor test scene (see video)

Indoor test scene (see video)

Check condition after indoor test

Check condition after indoor test

Check condition after indoor test

Check condition after indoor test

Check condition after indoor test

Check condition after indoor test

Check condition after indoor test

Check condition after indoor test

Check condition after indoor test

Check condition after indoor test
The explanation of this episode ends here, and next time, a servo and receiver will be installed to conduct a radio adjustment test, and a field test will be conducted within two weeks.
We plan to complete the top plate work of the body before the field test.
It will continue next.
The following 2 users liked this post by PE YOUNG:
Hackworth (09-22-2023),
rb67mustang (08-18-2023)
08-18-2023, 08:48 PM
#119
OMG, what a project!!! How much time and money do you have in the building of this tank do date? Your work is very impressive. Did you design this by yourself? I am a retired machinist, and I know what it takes to make these parts. This is amazing.
08-20-2023, 04:39 AM
#120
Thread Starter
Thank you for your sincere interest and encouragement. We're working on this project on a very small budget, and we're taking the time to produce it while doing other things. Our design was designed by referring to the plastic model of Academy Science and 3D drawing data released on the Internet.We can complete it in two months if we don't do anything else and focus on the production of the work, but we expect it to be done in the next five weeks because we're working on something else.Below is the 25th episode video that we worked on this week.
Thank you.
Thank you.
The following 2 users liked this post by PE YOUNG:
Hackworth (09-22-2023),
rb67mustang (08-20-2023)
08-20-2023, 11:31 AM
#121
I see you have chosen a very reliable power plant for your 1/5 scale Black Panther. It easily climbed over the obstacle. I have seen 4 nylon straps being used to pick it up. How much does it weigh? What do you expect the final weight will be when it's finished? What is the large tank off to the side, is it a Merkava?
08-20-2023, 06:23 PM
#122
Thread Starter
I see you have chosen a very reliable power plant for your 1/5 scale Black Panther. It easily climbed over the obstacle. I have seen 4 nylon straps being used to pick it up. How much does it weigh? What do you expect the final weight will be when it's finished? What is the large tank off to the side, is it a Merkava?
We also estimate that the weight so far will be about 85 kg.
After completion, the weight will not exceed 130kg.
This is the weight considering the power and speed of the engine that can go over the hill.
For your information, Armortek's 1/6 scale KingTiger tank weighs about 120kg and Chieftain weighs about 130kg.
I appreciate your keen eyes.
The tank you can see is Israel's main battle tank, the 1/5 scale Mercava.
08-20-2023, 08:09 PM
#123
Thread Starter

Following last week, we will start installing servo for indoor testing using the wireless carrier's transmission and reception system.

Process wire fasteners (road-end adjusters) to connect to the servo arm.

Process the thread of the load end adjuster

Process the through hole of the load end adjuster

Load End adjuster Complete

Heat treatment complete

Prepare the spring and cut it to the required length

Prepare the spring, cut it to the required length, and assemble it

Left and right steering servo installed

Servo installed for left and right brakes

Four servo motion tests (see video)

The operating distance of the left and right forward servo is set to be large

Connect the wire to the left and right brake servo

The left and right brake servo has wires set to control engine throttle output respectively

The battery, receiver connection, and receiver battery were developed from the engine and charged.

Initial power to the radio system

First adjustment of the percussion distance (before starting the engine)

Second adjustment of the percussion distance (after engine start)

Indoor test drive (see video)

Indoor test drive (see video)

Obstacle Breakthrough and Suspension Performance Test (Finished confirming the need to apply a stronger die spring in the future)

Indoor test drive (see video)

Indoor test drive (see video)

We decided to prepare for the outdoor test in the future. The outdoor test is carried out by manufacturing the upper hull of the vehicle body, and the side skirt is not installed at this time.
The following 2 users liked this post by PE YOUNG:
Hackworth (09-22-2023),
rb67mustang (08-21-2023)
08-21-2023, 03:46 AM
#124
I stand corrected! What looked like four nylon straps is just two long straps. I'm guessing the gray pipe I see in some of your photos is maybe what I would call a Jib Crane. The machine shop I worked for had jib cranes throughout their building and they had tow bridge cranes on each side of the building that could pick up 5 Tons each. Having the tools to do the job at hand is the best way to get the job done without causing injury to yourself, your equipment and what you're working on. I really enjoy watching you create all the parts you're making. It's what I did my whole time as a machinist.