


My Ultima ST GP "Type-R/EVO" 20th anniversary project with 3D printed "CF" parts.
 02-26-2020, 05:21 AM
#1
The more i try to make this post work, the more messed up it just goes. wth
Hi all. I bought Prusa i3 MK3S printer couple of months ago, and i thought to start a learning project with CAD. So. I shaked off the years of dust from my old Ultima ST GP, which i left to the shelf because of the stripped spur gear, which was discontinued.
I started the project with modeling the spur gear:

Printed prototype:

Slipper clutch parts were also missing, so i needed to model and print them as well:
Then i saw that there was lots of play in the steering linkage, so i started to model new parts, that are actually better than stock Type-R parts (because these have ball bearings). These also have same lock to lock angle on both sides, which the stock ST doesnt have.
And printed:
Custom -R style model rear axle hub (first prototype):
Stiffer steering servo mount:
Rear lower control arm inner hubs:
I also drawed those parts with ball bearings, i dont know if it works, but im going to test it.
Front lower control arm parts:
-R style thorttle servo mount/receiver box, that goes directly to the stock ST chassis plate (second prototype):
I used this picture to draw my own model:
First proto and the stock part:
I also modeled the gearbox gears. I dont know if they will last, even if printed with CF, but yea, its nice to have everything modelled. These gears width is maximised, so they will still fit to stock gearbox housing, but the gears teeth part is still wider than stock:
Example about the width difference:
-R style gearbox housing (basically the only difference is the brake system. The brake pads are at angle, in normal ST they are in "level". This -R part is also discontinued, cant find it anywhere):
Hi all. I bought Prusa i3 MK3S printer couple of months ago, and i thought to start a learning project with CAD. So. I shaked off the years of dust from my old Ultima ST GP, which i left to the shelf because of the stripped spur gear, which was discontinued.
I started the project with modeling the spur gear:
Printed prototype:
Slipper clutch parts were also missing, so i needed to model and print them as well:
Then i saw that there was lots of play in the steering linkage, so i started to model new parts, that are actually better than stock Type-R parts (because these have ball bearings). These also have same lock to lock angle on both sides, which the stock ST doesnt have.
And printed:
Custom -R style model rear axle hub (first prototype):
Stiffer steering servo mount:
Rear lower control arm inner hubs:
I also drawed those parts with ball bearings, i dont know if it works, but im going to test it.
Front lower control arm parts:
-R style thorttle servo mount/receiver box, that goes directly to the stock ST chassis plate (second prototype):
I used this picture to draw my own model:
First proto and the stock part:
I also modeled the gearbox gears. I dont know if they will last, even if printed with CF, but yea, its nice to have everything modelled. These gears width is maximised, so they will still fit to stock gearbox housing, but the gears teeth part is still wider than stock:
Example about the width difference:
-R style gearbox housing (basically the only difference is the brake system. The brake pads are at angle, in normal ST they are in "level". This -R part is also discontinued, cant find it anywhere):
Last edited by HiTec90; 02-26-2020 at 11:45 AM.
 02-26-2020, 07:56 AM
#2
I dont know what the h is wrong, but i cant remove attachments and i cant modify the picture links to get them work here. It automatically adds those height and width specs to links.
Anyways. Im slowly dropping some of the parts to thingiverse. Free to download and use for personal, non commercial use. Please read the licence for parts im publishing in thingiverse. In short: You cant use my files to make money or you are breaking the licence and there could be some consequences. This hobby gave me so much in younger age, that this shall be my small contribution to the hobbyists.
Link to first part, rear bulkhead:
https://www.thingiverse.com/thing:4180155
Link to second part, -R/EVO style ball bearing steering linkages:
https://www.thingiverse.com/thing:4181519
Link to third part, stock, little reinforced Racing Sports front bumper:
https://www.thingiverse.com/thing:4181613
Rear bumper (reinforced stock Racing Sports GP version):
https://www.thingiverse.com/thing:4181620
Rear shock mount/tower:
https://www.thingiverse.com/thing:4181641
Thingiverse link where to get all the parts i�m publishing:
https://www.thingiverse.com/JiiPeee/designs
02-26-2020, 11:05 AM
#3

that is really cool! really hoping more people follow your lead and re-create parts for older discontinued models that you cant find parts for, especially with the technology nowadays to be able to re-design stronger, and adjust geometry to work better.
many, many rigs are put on shelves because parts cant be found like spur gears, hub carriers, etc. i know i very hesitantly bring out my evader because spurs are so hard to find.
great work!
many, many rigs are put on shelves because parts cant be found like spur gears, hub carriers, etc. i know i very hesitantly bring out my evader because spurs are so hard to find.
great work!
02-26-2020, 11:26 AM
#4
Thanks for the reply!
Yea! And the limitations of FDM prints can be easily overcome, because SLS prints are pretty cheap nowadays. I just couple of days ago asked some finnish industry 3D printing/designing company called materflow to print me some gearbox gears that are discontinued, with their SLS printer. They said it will be about 5 euros per gear, printed with the best plastic material for gears, which is reinforced with glass. I think it was "PA12" or something. But i will first test my own prints. All the gearbox gears are designed to be as wide as possible. They are much wider than originals. But yea, the goal is to design and modify parts, so they can be printed with our FDM printers and their durability is good.
Example pic with my ST:st gearbox gears (and diff assembly), printed with CF/PETG filament (the final version will be CF/Nylon):

And heres the front lower plate. Modified design. I stole the idea for reinforcement area from RB5 plate.

I still cant get the pictures to work here without crazy amount of work. My picture service has all the pics about the parts i�ve designed and printed:
https://hitecmods.kuvat.fi/kuvat/RC/
Yea! And the limitations of FDM prints can be easily overcome, because SLS prints are pretty cheap nowadays. I just couple of days ago asked some finnish industry 3D printing/designing company called materflow to print me some gearbox gears that are discontinued, with their SLS printer. They said it will be about 5 euros per gear, printed with the best plastic material for gears, which is reinforced with glass. I think it was "PA12" or something. But i will first test my own prints. All the gearbox gears are designed to be as wide as possible. They are much wider than originals. But yea, the goal is to design and modify parts, so they can be printed with our FDM printers and their durability is good.
Example pic with my ST:st gearbox gears (and diff assembly), printed with CF/PETG filament (the final version will be CF/Nylon):
And heres the front lower plate. Modified design. I stole the idea for reinforcement area from RB5 plate.
I still cant get the pictures to work here without crazy amount of work. My picture service has all the pics about the parts i�ve designed and printed:
https://hitecmods.kuvat.fi/kuvat/RC/
Last edited by HiTec90; 02-26-2020 at 11:34 AM.
02-27-2020, 04:23 AM
#5
Newer Ultima style rear body mounts and rear modified rear shock tower to accept new body mounts.
This is just a prototype, quickly printed with PLA.


This whole rear package is now available on thingiverse. Its on separate downloads. Rear bulkhead, rear shock tower and Type-R/EVO style rear body mount.

Edit: Just gotta love how good this JDM EVO chassis plate looks. The best part is that its also 0,5mm thicker than normal Racing Sports/Type-R chassis plate.

My "beater" ST with stock chassis plate and some Type-R style mods. The receiver box/throttle servo plate has been completely re-designed. I copied the design from Type-R part and modified it to fit perfectly to stock Racing Sports chassis plate. I designed the part to be compatible with Inferno MP9 fuel tank, because they are easy and cheap to get.


This is just a prototype, quickly printed with PLA.
This whole rear package is now available on thingiverse. Its on separate downloads. Rear bulkhead, rear shock tower and Type-R/EVO style rear body mount.
Edit: Just gotta love how good this JDM EVO chassis plate looks. The best part is that its also 0,5mm thicker than normal Racing Sports/Type-R chassis plate.
My "beater" ST with stock chassis plate and some Type-R style mods. The receiver box/throttle servo plate has been completely re-designed. I copied the design from Type-R part and modified it to fit perfectly to stock Racing Sports chassis plate. I designed the part to be compatible with Inferno MP9 fuel tank, because they are easy and cheap to get.
Last edited by HiTec90; 02-27-2020 at 04:33 AM.
02-27-2020, 08:22 AM
#6
Got the original adjustable servo saver shaft pretty cheap and found out that i had 5x8x2,5mm bearings, so i thought to draw the plastic parts for it:

It took couple of tries, but now it should be smooth (final test print ongoing, 30min to go).
It took couple of tries, but now it should be smooth (final test print ongoing, 30min to go).
Last edited by HiTec90; 02-27-2020 at 10:16 AM.
The following users liked this post:
D3MON (02-27-2020)
02-27-2020, 09:34 AM
#7
this is really awesome to see!
had a question though, these parts you are making, are you making from scratch in your program? or is there a way to "scan" them in or something? or already have blueprint files that you are modifying? have a few items that eventually i want to have 3d printed, but dont know the process really. its really amazing what people can do nowadays especially with the availability of tools such as 3d printers.
had a question though, these parts you are making, are you making from scratch in your program? or is there a way to "scan" them in or something? or already have blueprint files that you are modifying? have a few items that eventually i want to have 3d printed, but dont know the process really. its really amazing what people can do nowadays especially with the availability of tools such as 3d printers.
02-27-2020, 09:42 AM
#8
looking through your pics that you have in the link above think that answered my question that you do start from scratch in design.
that is some amazing work!
(sorry im not all that tech savvy with all this new 3d printer stuff, ive seen some of what they can do, but not much into the process of getting it there.)
that is some amazing work!
(sorry im not all that tech savvy with all this new 3d printer stuff, ive seen some of what they can do, but not much into the process of getting it there.)
02-27-2020, 09:54 AM
#9
Thanks for the reply and compliment!
I�m creating them from scratch. I use my stock ST Racing Sports parts as a base model and i have printed the Type-R and EVO manuals so i can see the differences from there. I also google -R/Evolution parts if theres images available that i can use to help the drawing process. Example:
When i started to draw the shock towers (very easy to draw) i use "engineers paper" i dont know what you call it, but its basically a millimeter paper.

From there, i can easily check angles and some of the dimensions. I always double check them from the actual part also, with caliper.
After that, just draw the part in 2D to sketch and after that, extrude it to 3D.

After extrude and some "corner cleaning":

These are easy to draw. Other parts like gearbox covers etc are much harder.
-R/EVO style gearbox cover (work in progress):

In any means, im not any kind of professional. Im just a hobbyist. Still lot to learn.
For some parts, i first draw the stock version, like this steering hub:

And then "beef it up". You really need to think where to reinforce the part and which way to print it. FDM prints weak spot is the spot between the layers. So you need to think what direction the forces are affecting to the part:
Beefed up -R Style part:

For the gears, the FMGears script for Fusion360 is a lifesaver. Just put gear specs on it and it generates the basic structure of the gear. Then just modify it (add diff cover, holes, etc).
32deg kickup whole front suspension setup (with added swaybar attachment point that stock or even -R/EVO front bulkhead didnt have):


I�m creating them from scratch. I use my stock ST Racing Sports parts as a base model and i have printed the Type-R and EVO manuals so i can see the differences from there. I also google -R/Evolution parts if theres images available that i can use to help the drawing process. Example:
When i started to draw the shock towers (very easy to draw) i use "engineers paper" i dont know what you call it, but its basically a millimeter paper.
From there, i can easily check angles and some of the dimensions. I always double check them from the actual part also, with caliper.
After that, just draw the part in 2D to sketch and after that, extrude it to 3D.
After extrude and some "corner cleaning":
These are easy to draw. Other parts like gearbox covers etc are much harder.
-R/EVO style gearbox cover (work in progress):
In any means, im not any kind of professional. Im just a hobbyist. Still lot to learn.
For some parts, i first draw the stock version, like this steering hub:
And then "beef it up". You really need to think where to reinforce the part and which way to print it. FDM prints weak spot is the spot between the layers. So you need to think what direction the forces are affecting to the part:
Beefed up -R Style part:
For the gears, the FMGears script for Fusion360 is a lifesaver. Just put gear specs on it and it generates the basic structure of the gear. Then just modify it (add diff cover, holes, etc).
32deg kickup whole front suspension setup (with added swaybar attachment point that stock or even -R/EVO front bulkhead didnt have):
Last edited by HiTec90; 02-27-2020 at 09:58 AM.
The following users liked this post:
D3MON (02-28-2020)
02-28-2020, 07:17 AM
#10
Experimental reinforcement idea for the C-hubs. You can see the reinforcement screw location on the Left C-hub (R-is just "normally beefed up"). Because the orientation this part needs to be printed, the weakest part between the layers will be on the vertical hinge pin area.

Edit: Simple UM113 collar set released. Newer Ultimas also use this same collar set:
https://www.thingiverse.com/thing:4190358
 '
'
Printed with Fillamentum Wizard�s Voodoo
Edit: Simple UM113 collar set released. Newer Ultimas also use this same collar set:
https://www.thingiverse.com/thing:4190358
'Printed with Fillamentum Wizard�s Voodoo
Last edited by HiTec90; 02-28-2020 at 09:28 AM.
The following users liked this post:
D3MON (02-28-2020)
02-28-2020, 09:41 AM
#11
Adjustable servo saver arms, part nr. 92922 released. I think this is also a discontinued part from Kyosho, because the local Kyosho spare part shops cant get it:
https://www.thingiverse.com/thing:4190409

Spur gear RS-147:
https://www.thingiverse.com/thing:4190508
Ultima ST rear wheel, part nr: RS-22:
https://www.thingiverse.com/thing:4190754
https://www.thingiverse.com/thing:4190409
Spur gear RS-147:
https://www.thingiverse.com/thing:4190508
Ultima ST rear wheel, part nr: RS-22:
https://www.thingiverse.com/thing:4190754
Last edited by HiTec90; 02-28-2020 at 12:52 PM.
02-29-2020, 04:49 AM
#12
First test print for modified C-hub (also my new UMW115 front suspension arms):


This should support the weak area nicely. Wheel inner support ribs need to be lowered a little (1mm), so they wont hit the reinforced area on full lock.
I just realized that i could use this same screw to lock the vertical hinge pin on place if i move it slightly towards the hinge pin hole. The plan is that once i got my 3mm, 5mm and 6mm titanium shafts, i will mill small groove to the 3mm shaft. Once the vertical hinge pin is installed, this support screw will be screwed in and as it goes through the groove on the shaft, it prevents the hinge pin from dropping out and in a same time it supports the C-hub weak point.
Now the next thing to think is how i create the upper king pin attachment. Original Ultima ST Type-R and Evolution front upper arm attachment to the hub was done with long 3mm shaft, that had integrated 4,8mm ball joint in one end and E-clip groove on the lower part of the shaft. Both of these upper models also had different front axles. The axles had tapped holes where to screw the 3x3mm set screw, that locks hinge pin in place. This differs from the Racing Sports version.
It seems almost impossible to find those kind of looooong king pins today. ebay only has one for sale and yea, you can imagine the price:
https://www.ebay.com/itm/RC-Kyosho-R...sAAOSwTQtaB4Ty
I bought some short Lazer king pins. Theres one version of the hub assembly already in printing stage. I dont know if its going to be a durable one, but these are cheap prints to test.
It is not possible to create Racing Sports version of the C-hub, that has a same suspension geometry in upper arm that Type-R/EVO has. Theres just not enough space for that. In -R/EVO the upper arm goes in absolutely straight line with the lower arm. In RS version the upper arm distance to the lower arm increases from the inner attachment point towards the wheel. So the angle isnt correct.
This could be fixed with modifying the upper arm inner attachment point location in front shock tower, but im not too interested with going on that route.
Last edited by HiTec90; 02-29-2020 at 07:27 AM.
03-01-2020, 05:43 AM
#13
Here�s the latest version with short style kingpin:

With modified front wheel design (C-hub reinforcements no more hitting the wheels inner ribs during full lock):


With modified front wheel design (C-hub reinforcements no more hitting the wheels inner ribs during full lock):
Last edited by HiTec90; 03-01-2020 at 05:45 AM.
The following users liked this post:
D3MON (03-02-2020)

The following users liked this post:
D3MON (03-02-2020)
03-02-2020, 08:24 AM
#15
love seeing this come together, do have a thought though. the duratrax evader does use king pins sort of like that, part number DTXC8199
might be something to look at.
found a set for 5$ on ebay.
i do have an evader, so if you need, i can measure the overall length of the part.
might be something to look at.
found a set for 5$ on ebay.
i do have an evader, so if you need, i can measure the overall length of the part.
The following users liked this post:
HiTec90 (03-04-2020)
03-04-2020, 11:06 AM
#16
Hey!
Just checked out that! Thanks for the tip!
Duratrax specs for that seems to be (if the ebay listing has correct specs):
Length: 35mm (1.378")
Diameter: 2.4mm (0.096")
Ball Diameter: 4.3mm (0.172")
So, length is more than enough, diameter is 0,6mm too thin, but its easy to re-design holes to 2,4mm diameter (and it actually helps with durability).
The ball diameter is 0,5mm smaller than Kyosho, so i would need duratrax ball end joints on the outer side. Not a big deal though, i can live with that.
This actually seems a very nice alternative part for overpriced and hard to get Kyosho part, big thanks D3MON!
The following users liked this post:
D3MON (03-04-2020)
03-04-2020, 02:46 PM
#17
hope it works for you! i do have an evader parts car so if you need me to double check some of those dimensions i certainly can get my calipers out.
iirc i have RPM rod ends hooked up to them, but there is a chance that i had some TLR ones i put on, kinda have a grab box of rod ends and i know i have both in there. TLR at least the old stuff is known for using SAE hardware not metric, which the DTX evader was a redesign/copy of the XX series Losi rigs.
iirc i have RPM rod ends hooked up to them, but there is a chance that i had some TLR ones i put on, kinda have a grab box of rod ends and i know i have both in there. TLR at least the old stuff is known for using SAE hardware not metric, which the DTX evader was a redesign/copy of the XX series Losi rigs.
The following users liked this post:
HiTec90 (03-05-2020)
03-05-2020, 05:42 AM
#18
When you have time, please do check those dimensions! I have had bad luck some times with ebay orders. Last time with idler gear.
Here�s the final prototype of SP107V rear wheel hub against the original SP107V that i had bought earlier.


Keep in mind this second last prototype part is still missing some reinforcements, and printing orientation is "prototype" orientation (not the strongest one, but fastest and cheapest to print with minimal supports). This proto was just the final one to check that the hinge pin, balljoint and wheel axles have 1:1 the same geometry than the original part.
I also took my chances and bought those aluminum crimp wheel hubs. Great design when compared to the original plastic.
RS-148 gearbox gear set released in two separate .STL:s.
Input gear (0,4mm wider than original): https://www.thingiverse.com/thing:4202956
Idler gear (1,4mm wider than original): https://www.thingiverse.com/thing:4202937
You need both of these. You cant use stock input gear with my idler gear because of the wider teeths. Stock diff gear is fine. And my input gear with stock idler gear is also fine, but not recommended.
If you want the best gearbox input gear you can buy to replace your plastic one, ARRMA part nr. AR310762 is direct swap. Its steel gear with full width teeths, goes straight to the 5mm axle Kyosho uses. You only need to slightly shim its level to the input axles gear locking pin level.
I have the other gear set thats SUPER WIDE, that uses all the benefits that ARRMA input gear offers.
If you are using ARRMA input gear, the idler gear you want is my version of super wide idler (only for ARRMA input gear):
https://www.thingiverse.com/thing:4203055
Here�s the final prototype of SP107V rear wheel hub against the original SP107V that i had bought earlier.
Keep in mind this second last prototype part is still missing some reinforcements, and printing orientation is "prototype" orientation (not the strongest one, but fastest and cheapest to print with minimal supports). This proto was just the final one to check that the hinge pin, balljoint and wheel axles have 1:1 the same geometry than the original part.
I also took my chances and bought those aluminum crimp wheel hubs. Great design when compared to the original plastic.
RS-148 gearbox gear set released in two separate .STL:s.
Input gear (0,4mm wider than original): https://www.thingiverse.com/thing:4202956
Idler gear (1,4mm wider than original): https://www.thingiverse.com/thing:4202937
You need both of these. You cant use stock input gear with my idler gear because of the wider teeths. Stock diff gear is fine. And my input gear with stock idler gear is also fine, but not recommended.
If you want the best gearbox input gear you can buy to replace your plastic one, ARRMA part nr. AR310762 is direct swap. Its steel gear with full width teeths, goes straight to the 5mm axle Kyosho uses. You only need to slightly shim its level to the input axles gear locking pin level.
I have the other gear set thats SUPER WIDE, that uses all the benefits that ARRMA input gear offers.
If you are using ARRMA input gear, the idler gear you want is my version of super wide idler (only for ARRMA input gear):
https://www.thingiverse.com/thing:4203055
Last edited by HiTec90; 03-05-2020 at 07:05 AM.
03-07-2020, 06:50 AM
#19
Alright, just a small update.
Got my titanium (Ti6Al4V) Grade 5 5 and 6mm shafts yesterday.
I already made servo saver shaft prototypes (EVO style, with M3 threads) from 5mm shaft. And holy shhh they dont weigh nothing! Im asking a local metal working company to make the final versions of the servo saver shafts, upper chassis posts and receiver box/throttle servo posts. Im then heat treating them with torch to give them some bling.
The stock brake piston specs: 6mm diameter/ 5mm long. Super easy to make and should be a nice upgrade over the stock brass piston.
Im currently doing the gearbox input shaft from titanium. Should be pretty easy to make.
I just wish i had lathe.
No pics yet, sorry.
Edit:
Racing Sports chassis plate compatible WIP Type-R/Evolution style radio plate released. This part is designed around Inferno MP9 fuel tank:
https://www.thingiverse.com/thing:4207202
Edit: Small tip. The EVO lower suspension arm hinge pins seems to be actually a 3mm shock absorber shafts. I accidentally found this out when i saw that some of the suspension arm hinge pins have almost the same part number than the shock absorber shafts.
Last edited by HiTec90; 03-07-2020 at 07:51 AM.
03-08-2020, 10:27 AM
#20
Test fit. Titanium input axle with 15T pinion (steel in picture, will be aluminum in final version) as a input gear, along with custom design Type-R/EVO style slipper parts. Prototypes are printed from PLA filament. I like how the Type-R/EVO slipper was designed. With the design it has, it is easy to change spur gear without touching the slipper setting. In basic model, the spur gear is part of the slipper system.

Im trying to do a bulletproof gearbox for this EVO car. Im still waiting my RB5 ball diff set to arrive, so i cant start to design gearbox covers until the set arrives from Japan. I also need to fiddle around with gear ratios.
Stock Racing Sports had 13T clutch bell, 53T spur gear (mod 1). 15T input gear in gearbox, 20T idler and 37T (all mod 0.8).
EVO has 17t clutch bell, 67T spur gear (mod 0.8) and i have no idea what was inside the gearbox, as the gears cant be found anywhere. I only know that the input shaft gear was either 20T or 21T.
And I dont have any clue what the RB5 gearbox gears will be.
Edit: Okay, received the Ultima RB5 ball diff set today. And well well well... Any bought parts wont seem to work in this build. The gears seems to be mod 0.6 gears....
The basic Racing Sports gearbox is already done, so i will now focus on the EVO style gearbox.
Edit 2: Type-R Evolution gearbox design process starts here. Assembled RB5 ball diff test fit on Ultima ST chassis:

For size, its perfectly okay. The whole package has about the same wideness as original RS gear diff. Also the diameter is okay. So it is possible.
I also finally received the rest of the balljoints, so i assembled the steering arms. Full setup of CF infused PETG, with genuine Kyosho 4,8mm balljoints, ball end cups, adjustable steering and upper arms, adjustable servo saver, DIY dust covers and DIY titanium servo shafts and also with cat hair:

TIP: For the adjustable servo saver, you dont need to try to find 92921 servo saver shaft, spring and nut assembly. I just received my package with Kyosho DBX servo saver shaft/spring/nut, and its 100% the same part as the discontinued 92921. Part nr. TR133.
I also bought this, as it was only 4 euros:

Edit 4: Some good luck also. Previously ordered small ARRMA idler gear is my new gearbox input gear. 20T, same modulus as RB5 gearbox gears, uses 5mm shaft and has a groove for locking pin and its also a metal gear. Part nr. AR310016
Its not absolutely perfect, as its teeths are 1,8mm narrower than in Kyosho gears, but it will do for now. At least i can design the gearbox covers now.
Im trying to do a bulletproof gearbox for this EVO car. Im still waiting my RB5 ball diff set to arrive, so i cant start to design gearbox covers until the set arrives from Japan. I also need to fiddle around with gear ratios.
Stock Racing Sports had 13T clutch bell, 53T spur gear (mod 1). 15T input gear in gearbox, 20T idler and 37T (all mod 0.8).
EVO has 17t clutch bell, 67T spur gear (mod 0.8) and i have no idea what was inside the gearbox, as the gears cant be found anywhere. I only know that the input shaft gear was either 20T or 21T.
And I dont have any clue what the RB5 gearbox gears will be.
Edit: Okay, received the Ultima RB5 ball diff set today. And well well well... Any bought parts wont seem to work in this build. The gears seems to be mod 0.6 gears....
The basic Racing Sports gearbox is already done, so i will now focus on the EVO style gearbox.
Edit 2: Type-R Evolution gearbox design process starts here. Assembled RB5 ball diff test fit on Ultima ST chassis:
For size, its perfectly okay. The whole package has about the same wideness as original RS gear diff. Also the diameter is okay. So it is possible.
I also finally received the rest of the balljoints, so i assembled the steering arms. Full setup of CF infused PETG, with genuine Kyosho 4,8mm balljoints, ball end cups, adjustable steering and upper arms, adjustable servo saver, DIY dust covers and DIY titanium servo shafts and also with cat hair:
TIP: For the adjustable servo saver, you dont need to try to find 92921 servo saver shaft, spring and nut assembly. I just received my package with Kyosho DBX servo saver shaft/spring/nut, and its 100% the same part as the discontinued 92921. Part nr. TR133.
I also bought this, as it was only 4 euros:
Edit 4: Some good luck also. Previously ordered small ARRMA idler gear is my new gearbox input gear. 20T, same modulus as RB5 gearbox gears, uses 5mm shaft and has a groove for locking pin and its also a metal gear. Part nr. AR310016
Its not absolutely perfect, as its teeths are 1,8mm narrower than in Kyosho gears, but it will do for now. At least i can design the gearbox covers now.
Last edited by HiTec90; 03-09-2020 at 06:47 AM.
03-09-2020, 11:40 AM
#21
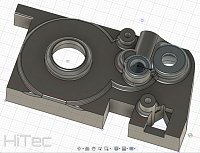
Type-R Evolution gear box covers WIP:

I already printed just a box with diff, idler and input gear ball bearing recesses. Tooth tolerances were spot on. I then started to make it pretty, add screw holes, brake mechanism etc.
I dont know how this was supposed to do by the books, but i first modelled the gears, angled them correctly (measured how much the spur gear needs to have room over the chassis plate), set gear tolerances, then just draw a blank box, where i then modelled the bearing recesses etc. Then just mirrored the whole thing etc.
Last edited by HiTec90; 03-09-2020 at 11:45 AM.
The following users liked this post:
D3MON (03-09-2020)
03-09-2020, 12:02 PM
#22
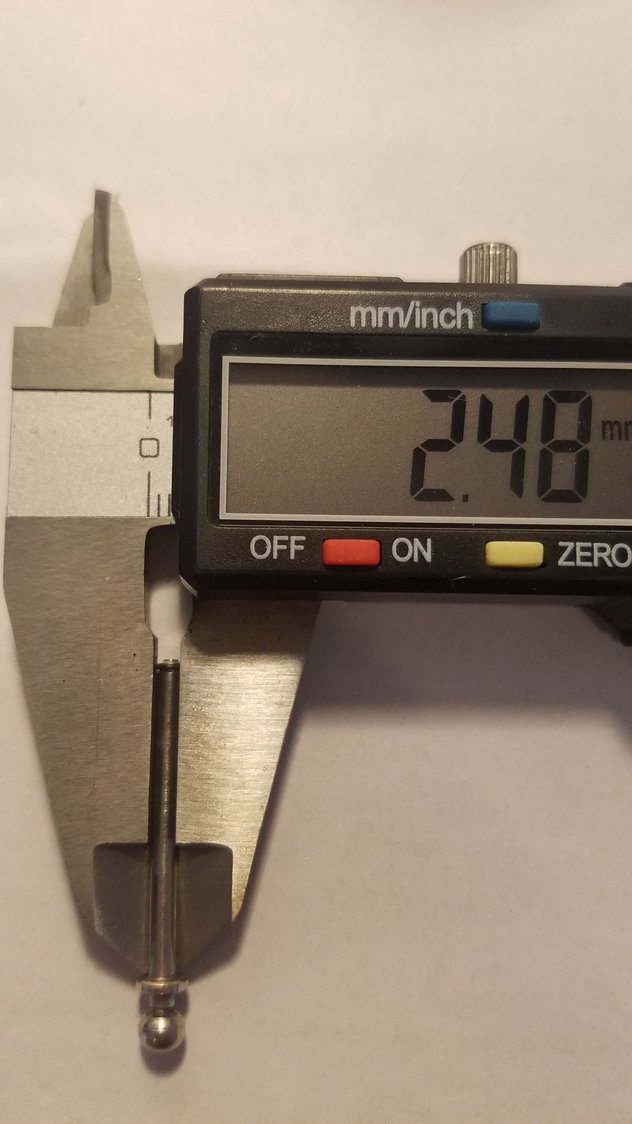
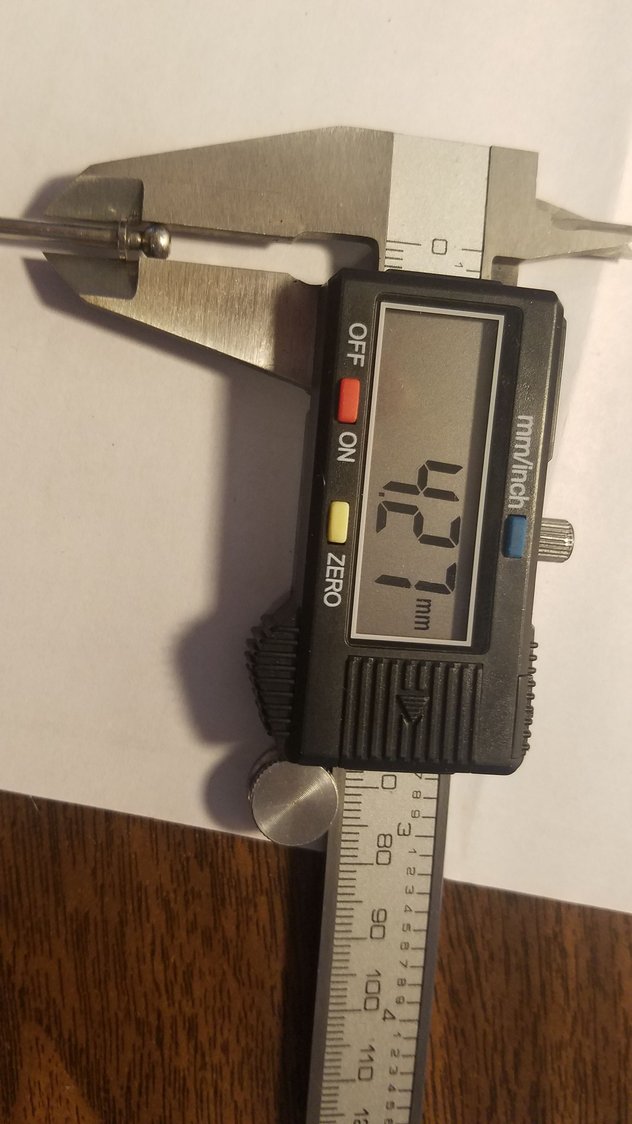
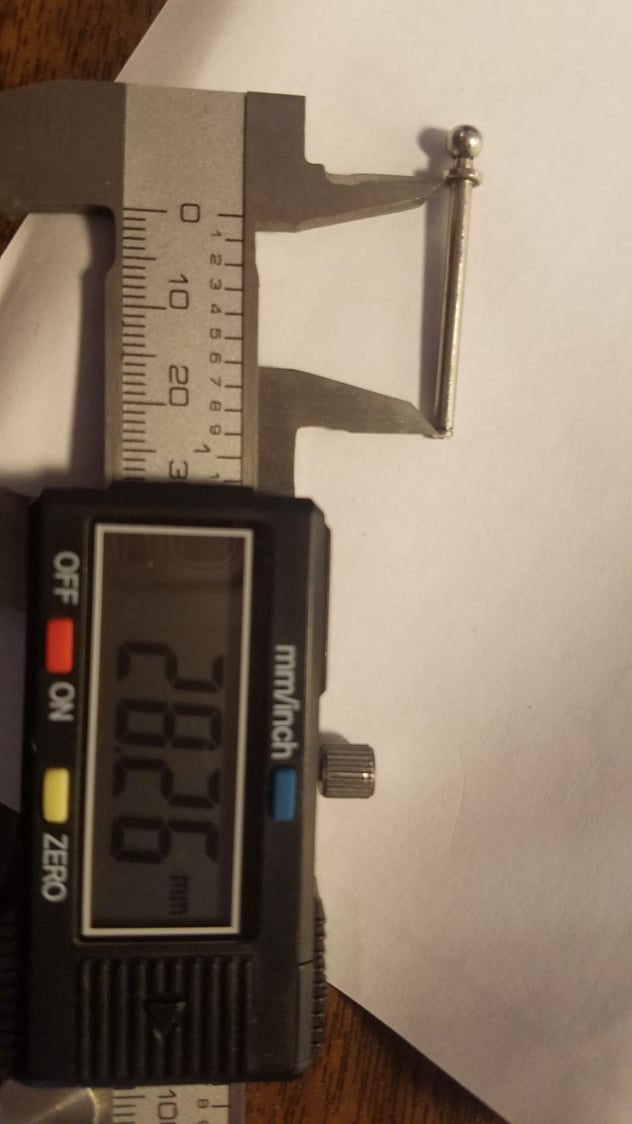
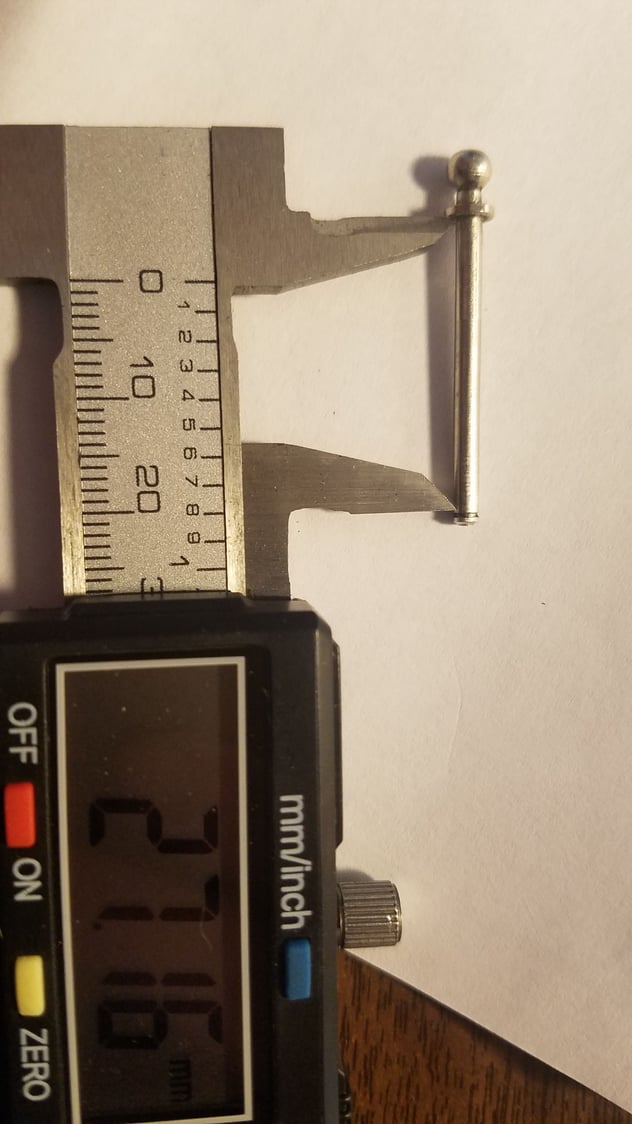
Duratrax kingpin measurements,
please note there are 2 length measurements, one to the slot for e-clip, one total length.
hope that helps!
sorry for the delay in getting those to you.
please note there are 2 length measurements, one to the slot for e-clip, one total length.
hope that helps!
sorry for the delay in getting those to you.
The following users liked this post:
HiTec90 (03-09-2020)
03-09-2020, 12:22 PM
#23
just realized i did not get an overall length, if you need that let me know and ill see what i can do to get that to you.
FWIW, on the evader model, there are 2 shims/washers that sit between the top of the c-hub, and the base of the ball stud.
FWIW, on the evader model, there are 2 shims/washers that sit between the top of the c-hub, and the base of the ball stud.
03-09-2020, 12:47 PM
#24
No need to apologise! We all have our hurrys that disturb hobbies  I do 12 hour shifts for 4 days (2 morning shifts, 2 nightshifts), and then i have 6 days off, before going back for 4 days.. Those 6 days off feel luxury.
But yea, as for the topic; that helps greatly! Overall length is not needed, i can see that the balljoint stud has enough space for the balljoint ends to turn freely on full suspension compression.
Big thanks! Im ordering those right away.
This Kyosho also has spacers sitting between the C-hub and king pin. If i recall correctly on Ultima ST -R/EVO, the spacer was 2mm thick. Ultima ST C-hub needs 23mm of King pin length (without ball joint end and bottom c-clip groove). So these duratrax king pins should be perfect.
Edit: Latest:


Still missing some screw points, usual cleaning and brake mechanism. Im also modifying a diff adjuster groove to the left side of the gearbox cover.
I just realized a funny thing from the genuine Kyosho Ultima ST Racing Sports gearbox covers (i have new covers, ordered them to the RS version of the car, just in case if something happens). Designers changed the gear tolarances somewhere in the process. The idler gear shaft has a clear offset to the gearbox cover outer side reinforcement. They just changed the shaft recess, but didnt bother to move the reinforcement. There is also something strange going on with the diff bearing recess...
Edit 2:
First test print with added brake mechanism. I lowered it as much as i could. The rear upper screw post must be moved about 5mm more rear (to balance the screw positions). But thats one mod for next version.:

And here is one pic taken from previous test version where i tested some fitment etc (and more cat hair):

I do 12 hour shifts for 4 days (2 morning shifts, 2 nightshifts), and then i have 6 days off, before going back for 4 days.. Those 6 days off feel luxury.But yea, as for the topic; that helps greatly! Overall length is not needed, i can see that the balljoint stud has enough space for the balljoint ends to turn freely on full suspension compression.
Big thanks! Im ordering those right away.
This Kyosho also has spacers sitting between the C-hub and king pin. If i recall correctly on Ultima ST -R/EVO, the spacer was 2mm thick. Ultima ST C-hub needs 23mm of King pin length (without ball joint end and bottom c-clip groove). So these duratrax king pins should be perfect.
Edit: Latest:
Still missing some screw points, usual cleaning and brake mechanism. Im also modifying a diff adjuster groove to the left side of the gearbox cover.
I just realized a funny thing from the genuine Kyosho Ultima ST Racing Sports gearbox covers (i have new covers, ordered them to the RS version of the car, just in case if something happens). Designers changed the gear tolarances somewhere in the process. The idler gear shaft has a clear offset to the gearbox cover outer side reinforcement. They just changed the shaft recess, but didnt bother to move the reinforcement. There is also something strange going on with the diff bearing recess...
Edit 2:
First test print with added brake mechanism. I lowered it as much as i could. The rear upper screw post must be moved about 5mm more rear (to balance the screw positions). But thats one mod for next version.:
And here is one pic taken from previous test version where i tested some fitment etc (and more cat hair):
Last edited by HiTec90; 03-09-2020 at 03:52 PM.
03-10-2020, 06:15 AM
#25
Update.
Final prototype (hopefully) in printing stage now. Next should be the final CF/PETG printed part:


This version has 4x8x3mm ball bearing recess on top side of the brake shaft. The brake piston is 6 x 5mm titanium and the shaft will also be made from 4mm diameter titanium rod. I also tried to replicate the Type-R/EVO models separate front support for gearbox. The support isnt the prettiest, but it will do. Its so small part anyway, that theres no point of focusing on the details too much. I already printed that from CF/PETG.
Also the axle for idler is 5mm, when the basic Racing Sports had 3mm axle. I will also do that from titanium.
Final prototype (hopefully) in printing stage now. Next should be the final CF/PETG printed part:
This version has 4x8x3mm ball bearing recess on top side of the brake shaft. The brake piston is 6 x 5mm titanium and the shaft will also be made from 4mm diameter titanium rod. I also tried to replicate the Type-R/EVO models separate front support for gearbox. The support isnt the prettiest, but it will do. Its so small part anyway, that theres no point of focusing on the details too much. I already printed that from CF/PETG.
Also the axle for idler is 5mm, when the basic Racing Sports had 3mm axle. I will also do that from titanium.
Last edited by HiTec90; 03-10-2020 at 06:19 AM.
The following users liked this post:
D3MON (03-13-2020)