


Royal Zero Kit Build into Rufe
 01-27-2020, 02:24 PM
#276

Thanks Chad! Good to hear from you and sincerely hope you get through your health issues soon and in fine order. One of the ideas I have to elevate the small status of this plane is to literally display it on a waist-high table rather than having it judged on the ground, spectators walking past. At or near eye level, the more that is seen, the more that is to be seen. More photos ( and hopefully accompanying texts ) to resume later this week. Be well my friend. G.D.
 01-27-2020, 02:48 PM
#277

My Feedback: (60)
Join Date: Dec 2001
Location: Litchfield Park,
AZ
Posts: 7,677
Likes: 0
Received 25 Likes
on
23 Posts
Thanks Chad! Good to hear from you and sincerely hope you get through your health issues soon and in fine order. One of the ideas I have to elevate the small status of this plane is to literally display it on a waist-high table rather than having it judged on the ground, spectators walking past. At or near eye level, the more that is seen, the more that is to be seen. More photos ( and hopefully accompanying texts ) to resume later this week. Be well my friend. G.D.
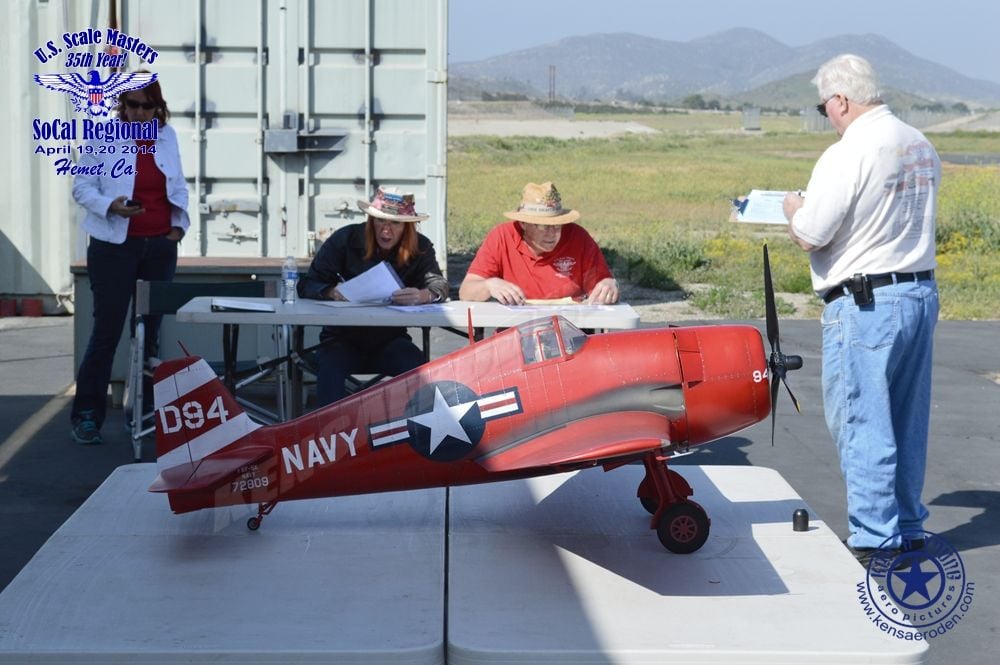
Thank you for the well wishes southpaw, much appreciated. If you compete in a Scale Masters Qualifier or other similar competition then the airplane will be judged on a table so that it is approximately eye level to the seated jugdes. I have never had an airplane judged while it was sitting on the ground. Here is my Hellcat on the judging table at a Qualifier in Hemet, CA. I will say they do not normally have it set up so that half the airplane is in shadow while the other half is in sunlight!
 01-27-2020, 06:16 PM
#278
Join Date: Nov 2002
Location: stoughton, MA
Posts: 134
Likes: 0
Received 0 Likes
on
0 Posts
Hi
coming along great.
would you consider bringing the aircraft to the northeast nasa scale qualifier in goshen ny around mid July ?
I don�t Know the exact date yet but is a very nice event.
ray
coming along great.
would you consider bringing the aircraft to the northeast nasa scale qualifier in goshen ny around mid July ?
I don�t Know the exact date yet but is a very nice event.
ray
01-27-2020, 07:25 PM
#280
Thanks Bunsen (Ray?) For the time being, I'm going to see how things go at events in eastern Mass. & R.I. Most scale events mandate an actual flight at the meet so unless I provide a flight photo or video, chances are I'd be a spectator, watching others flying & having fun unless I brought along another plane to fly. The other caveat is I'm not a big fan of driving long ( 1 1/2 hrs. ) distances but that may change, depending on other factors. We'll see. G.D.
02-04-2020, 09:29 AM
#281
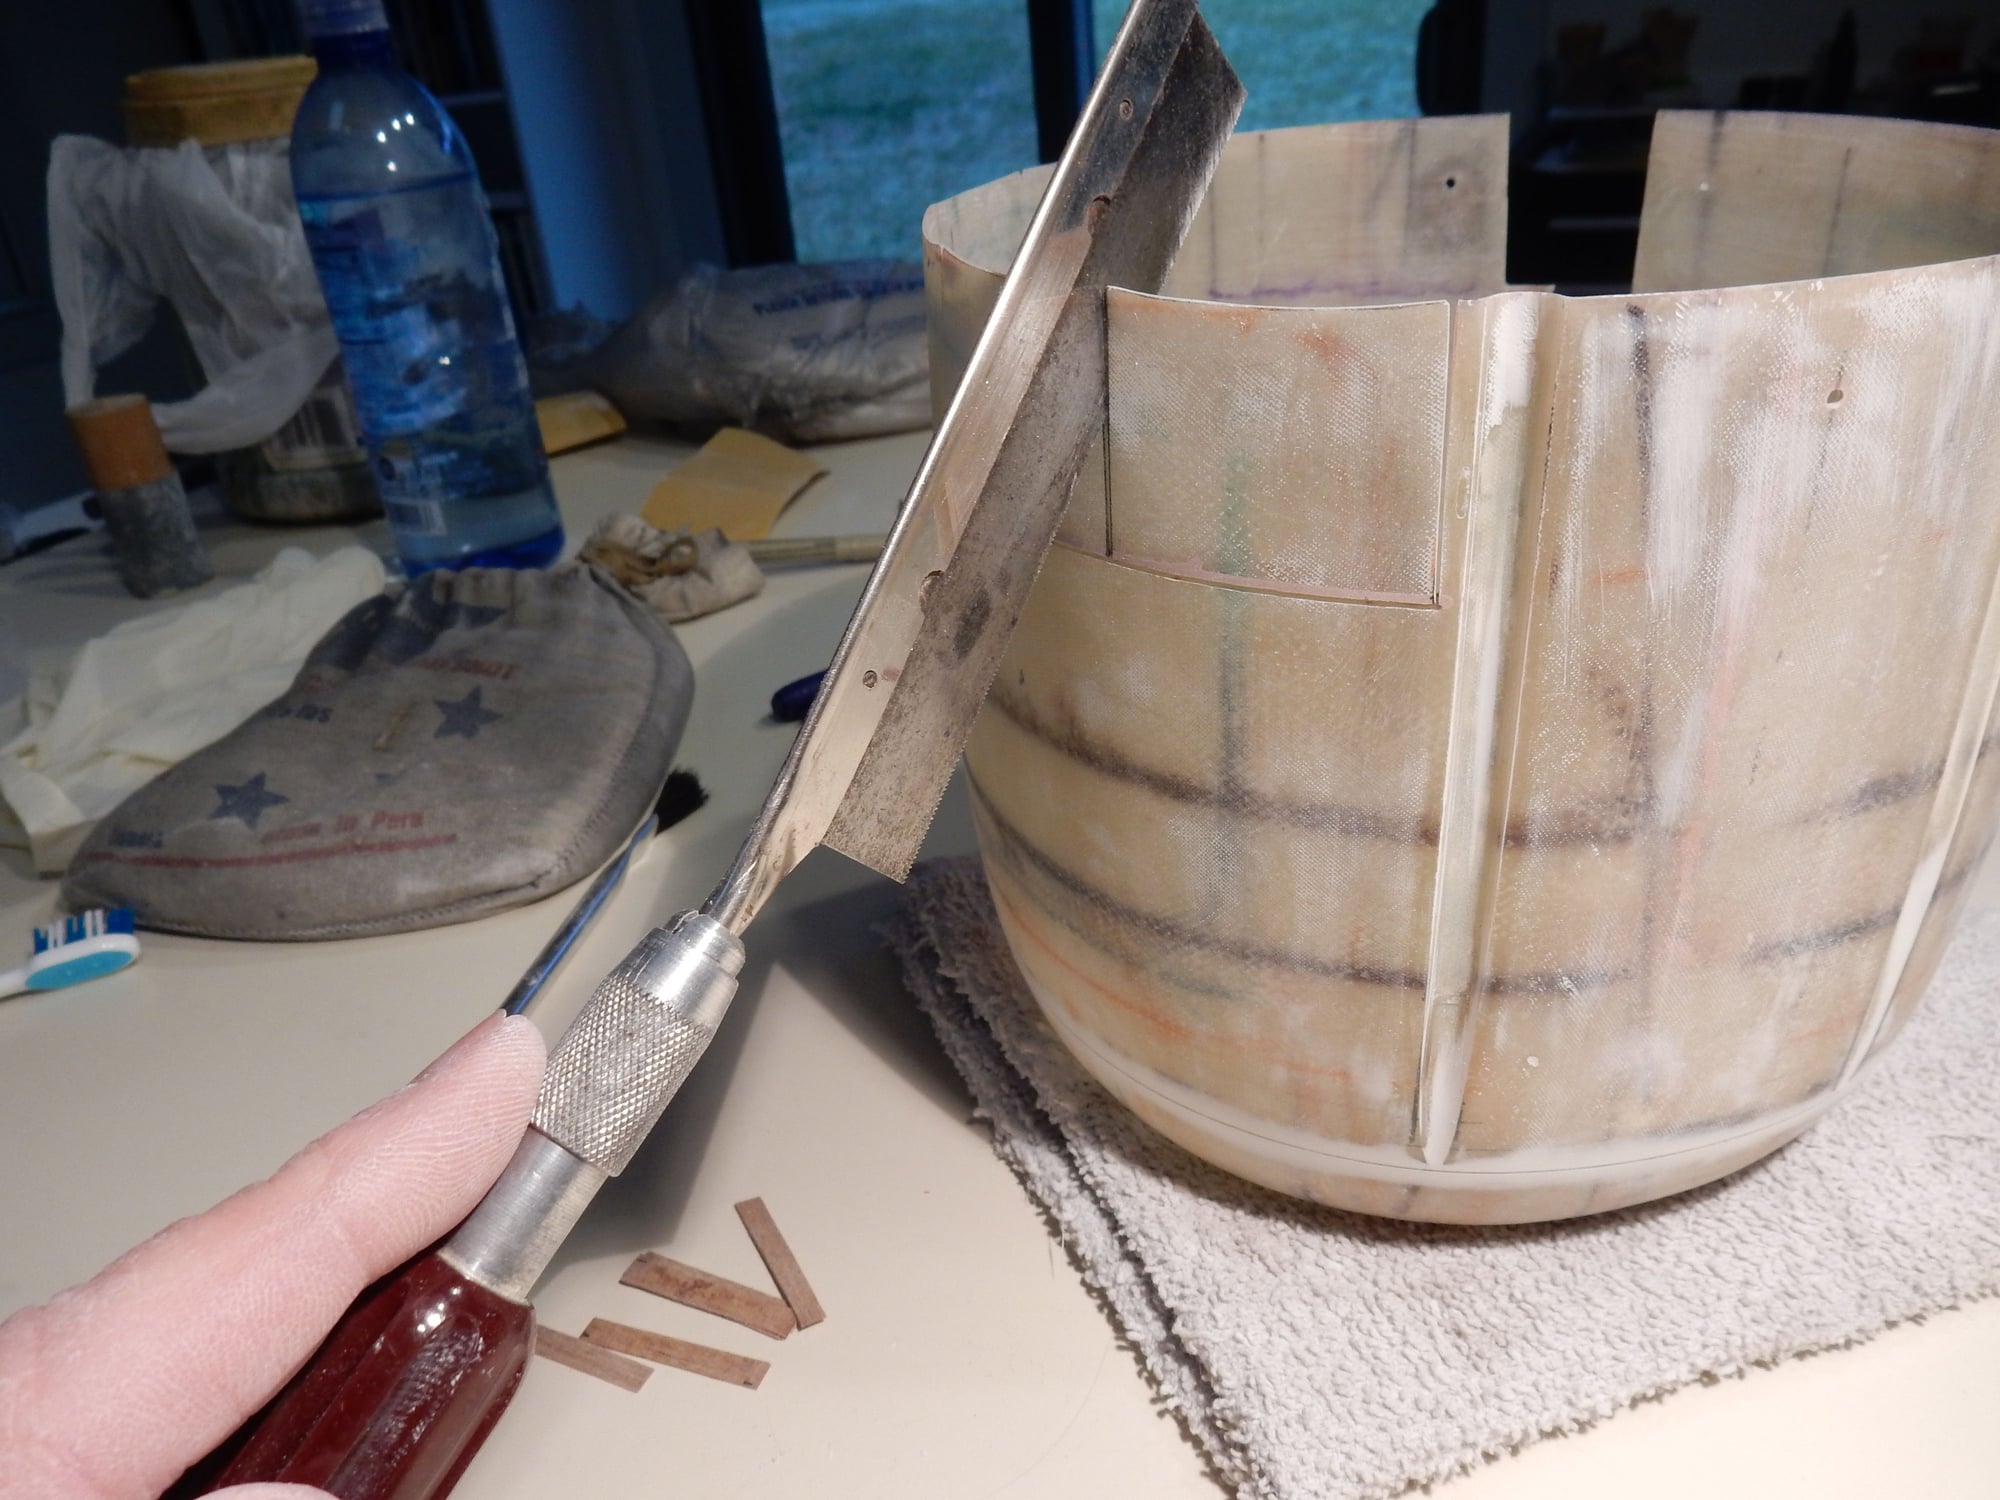
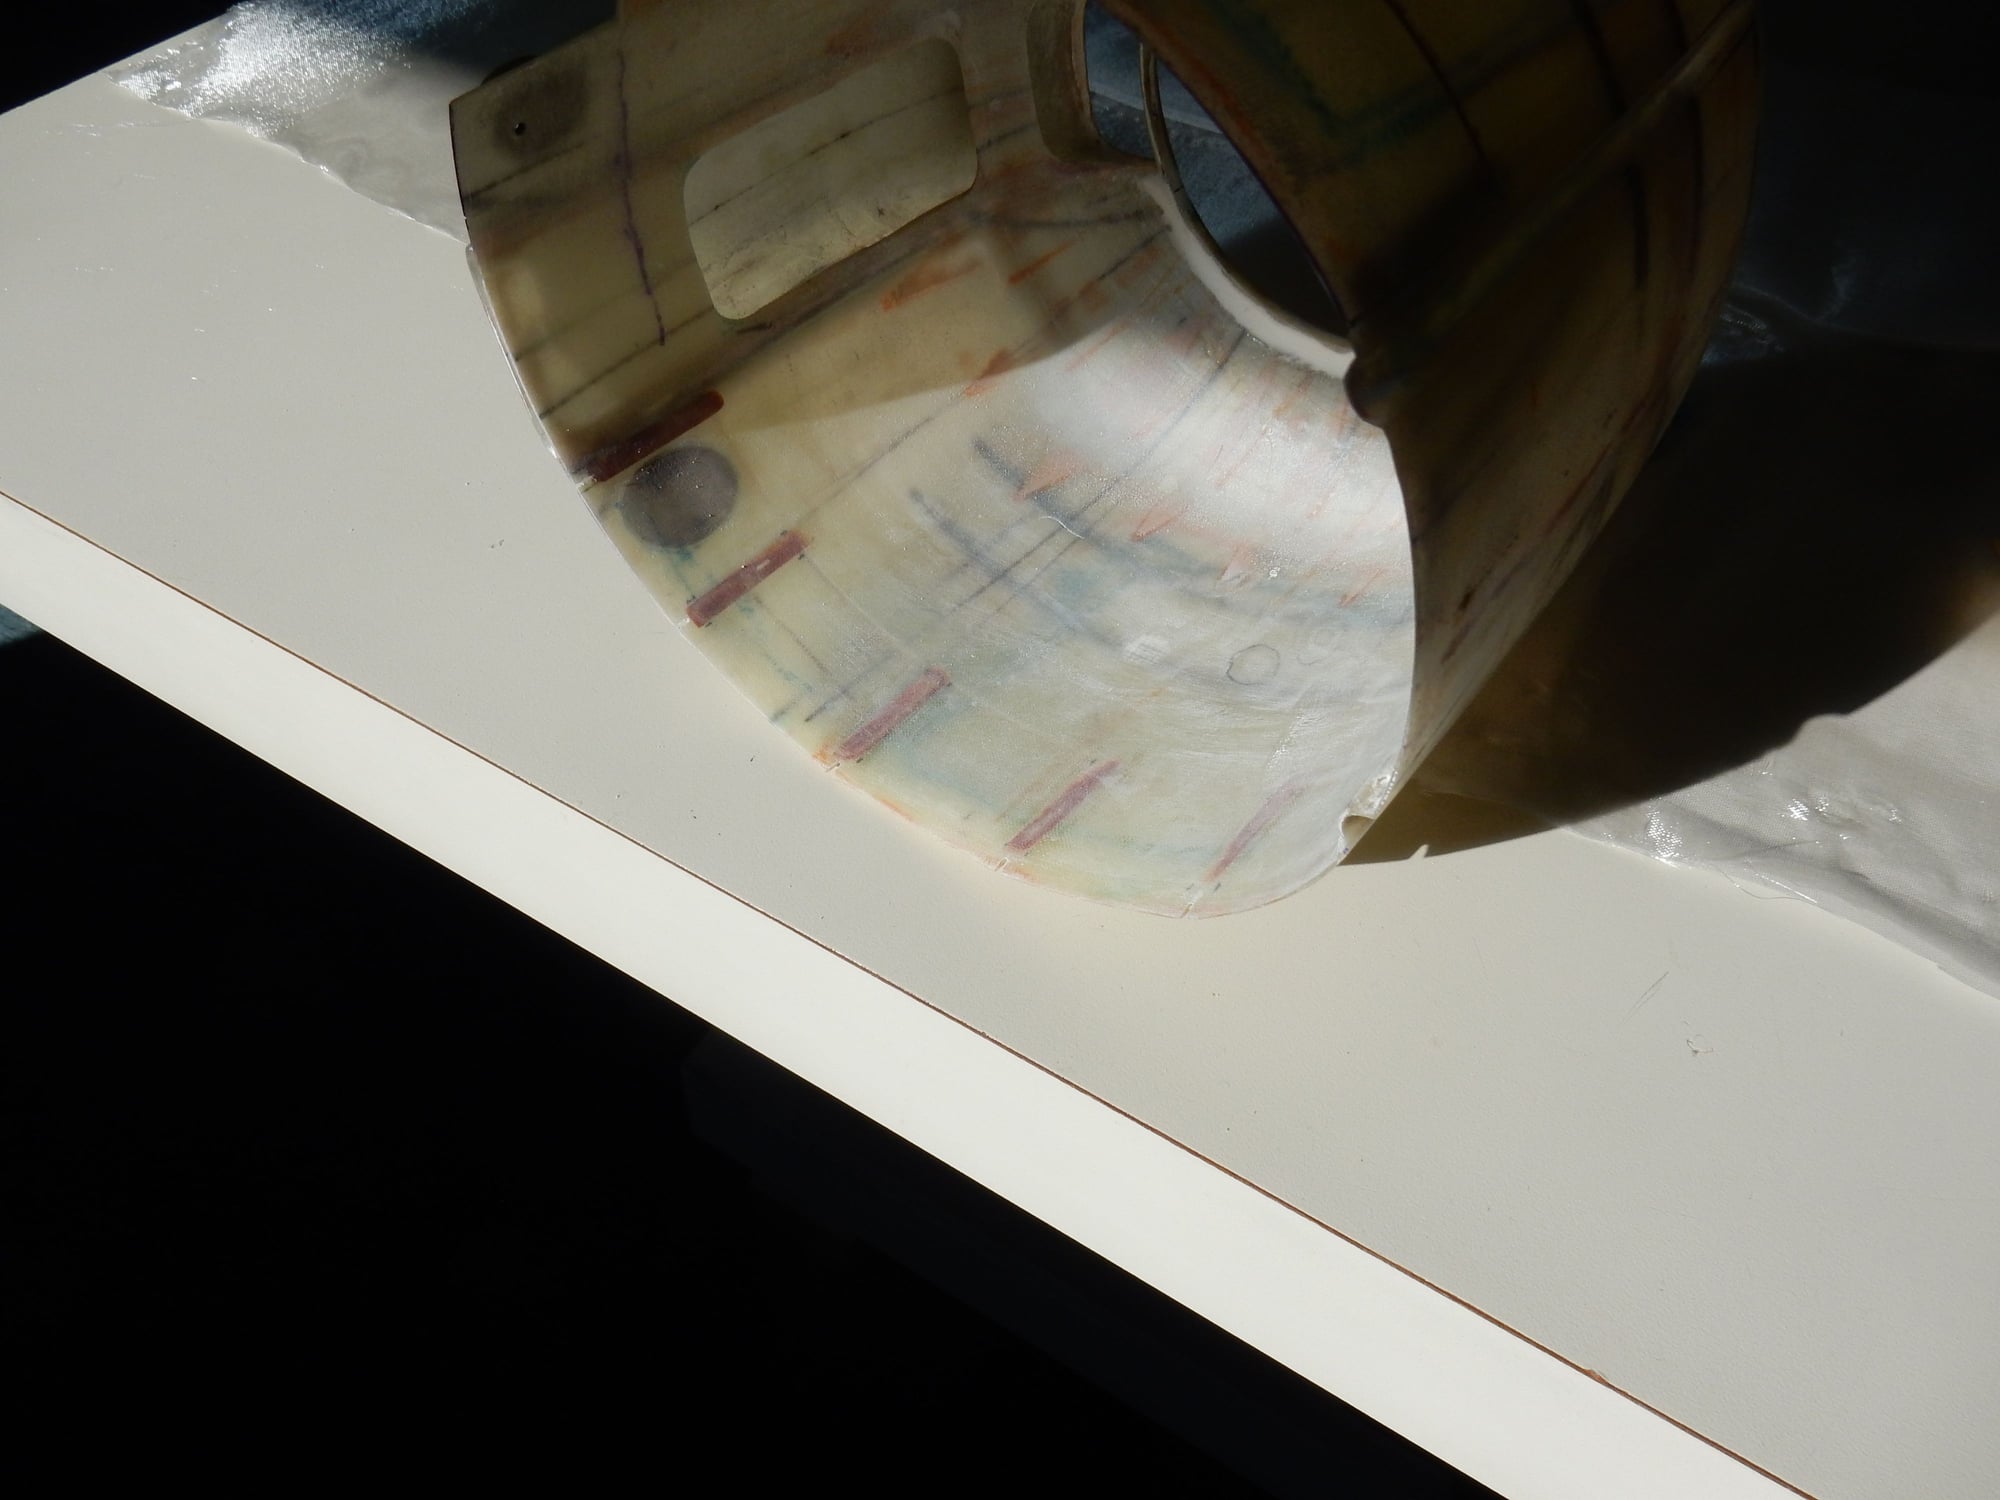
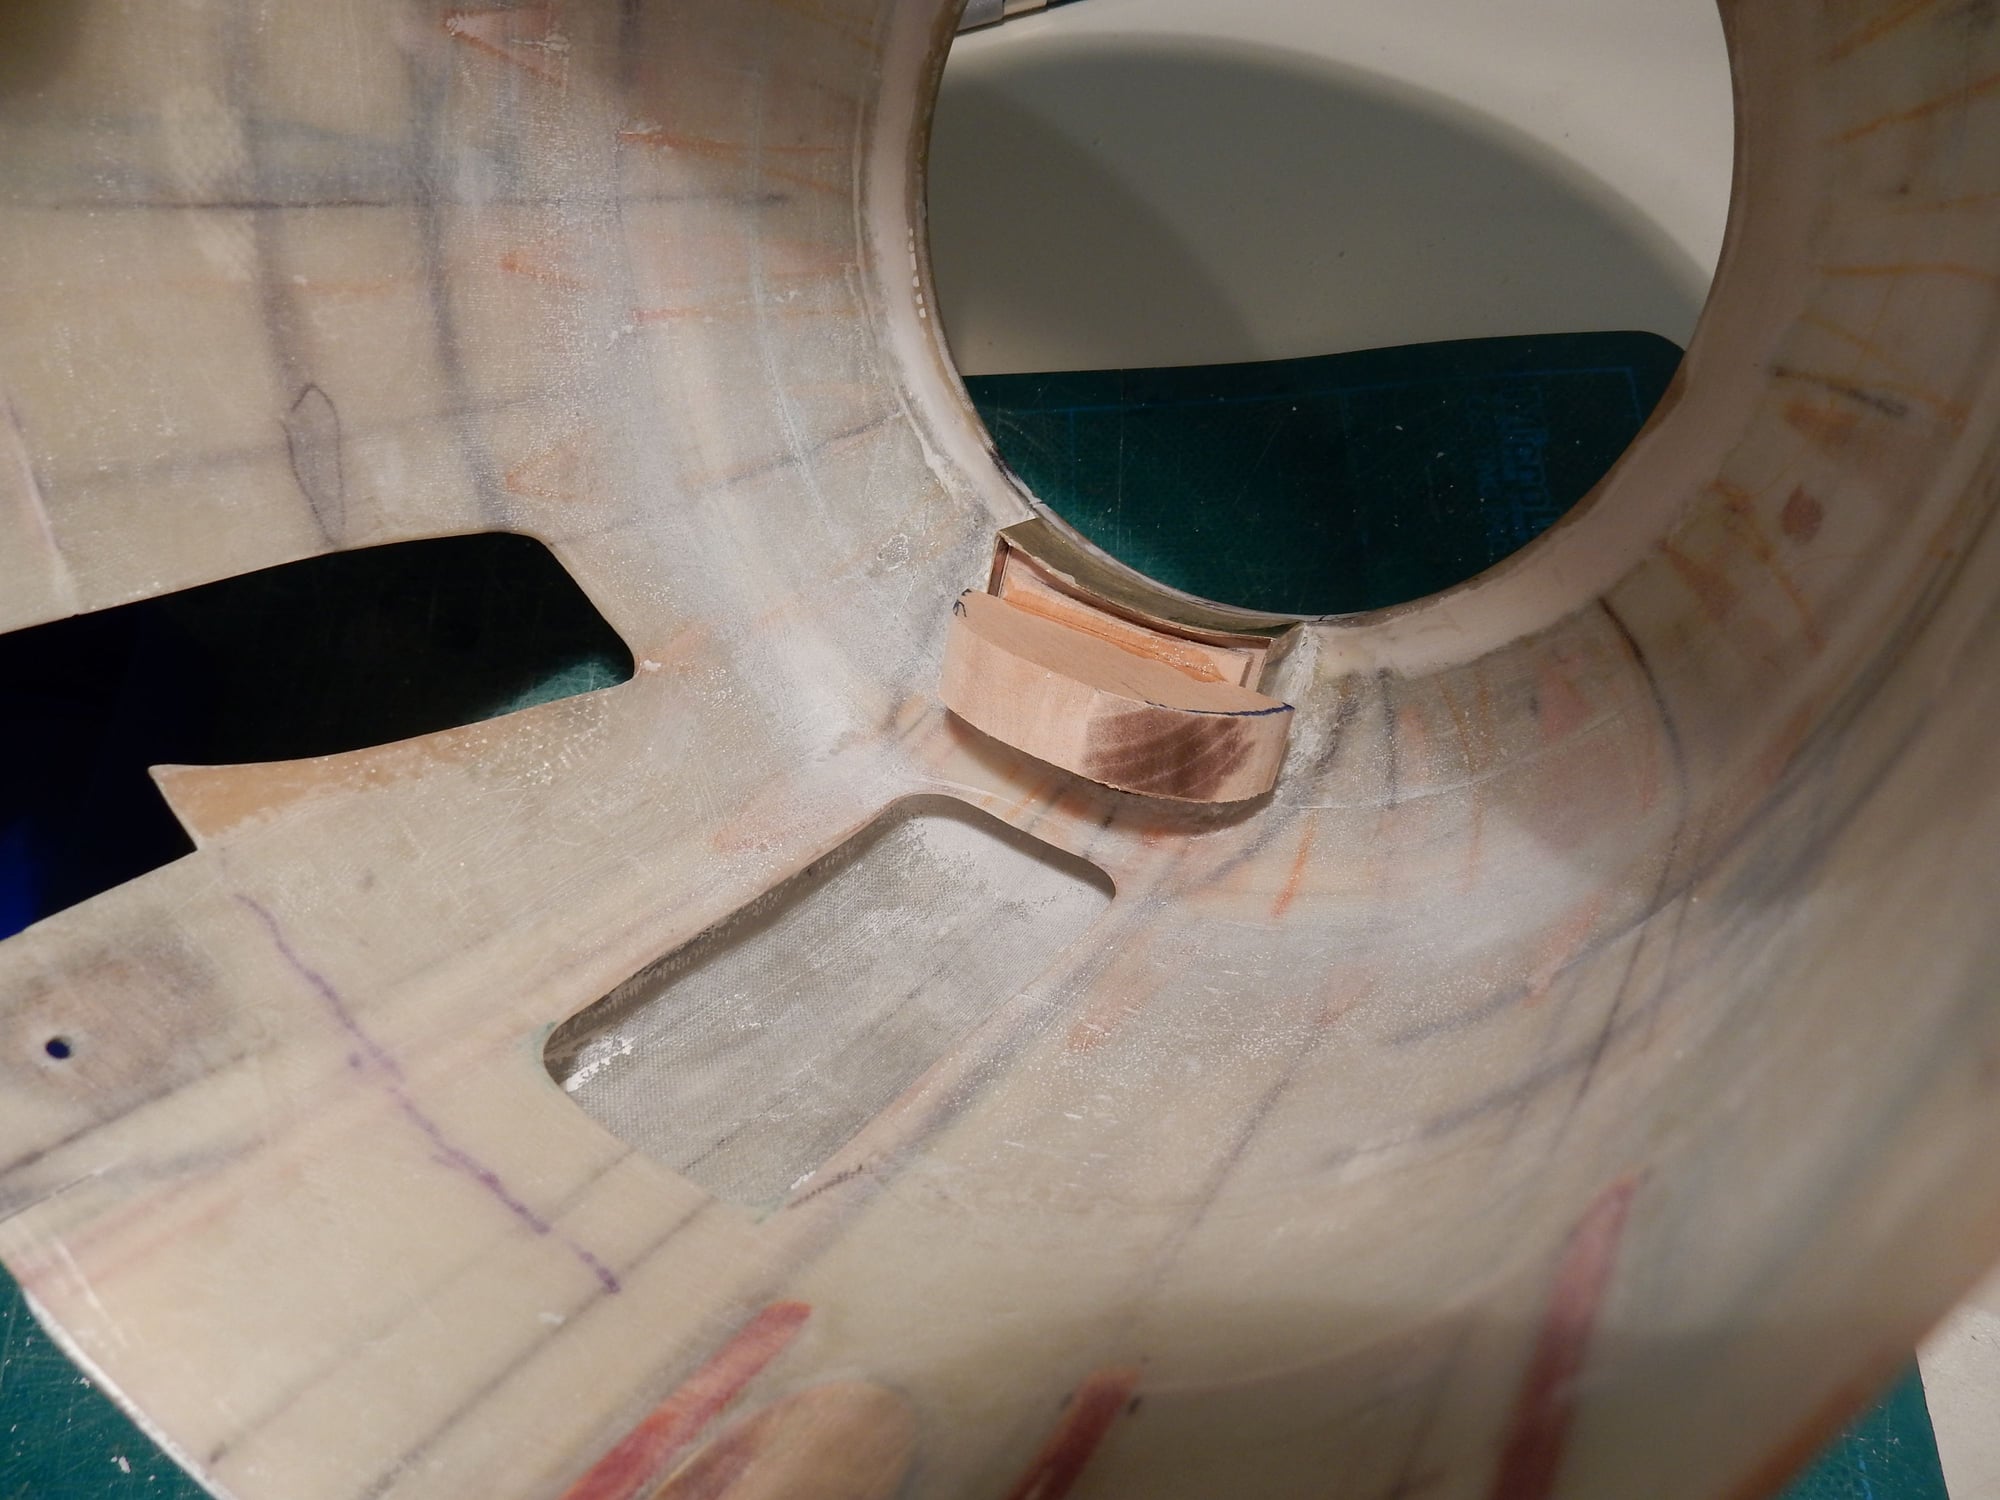
COWL FLAPS: Razor saw cutting & separating ( as opposed to painting on lines.)
Sanding edged to smooth things over.
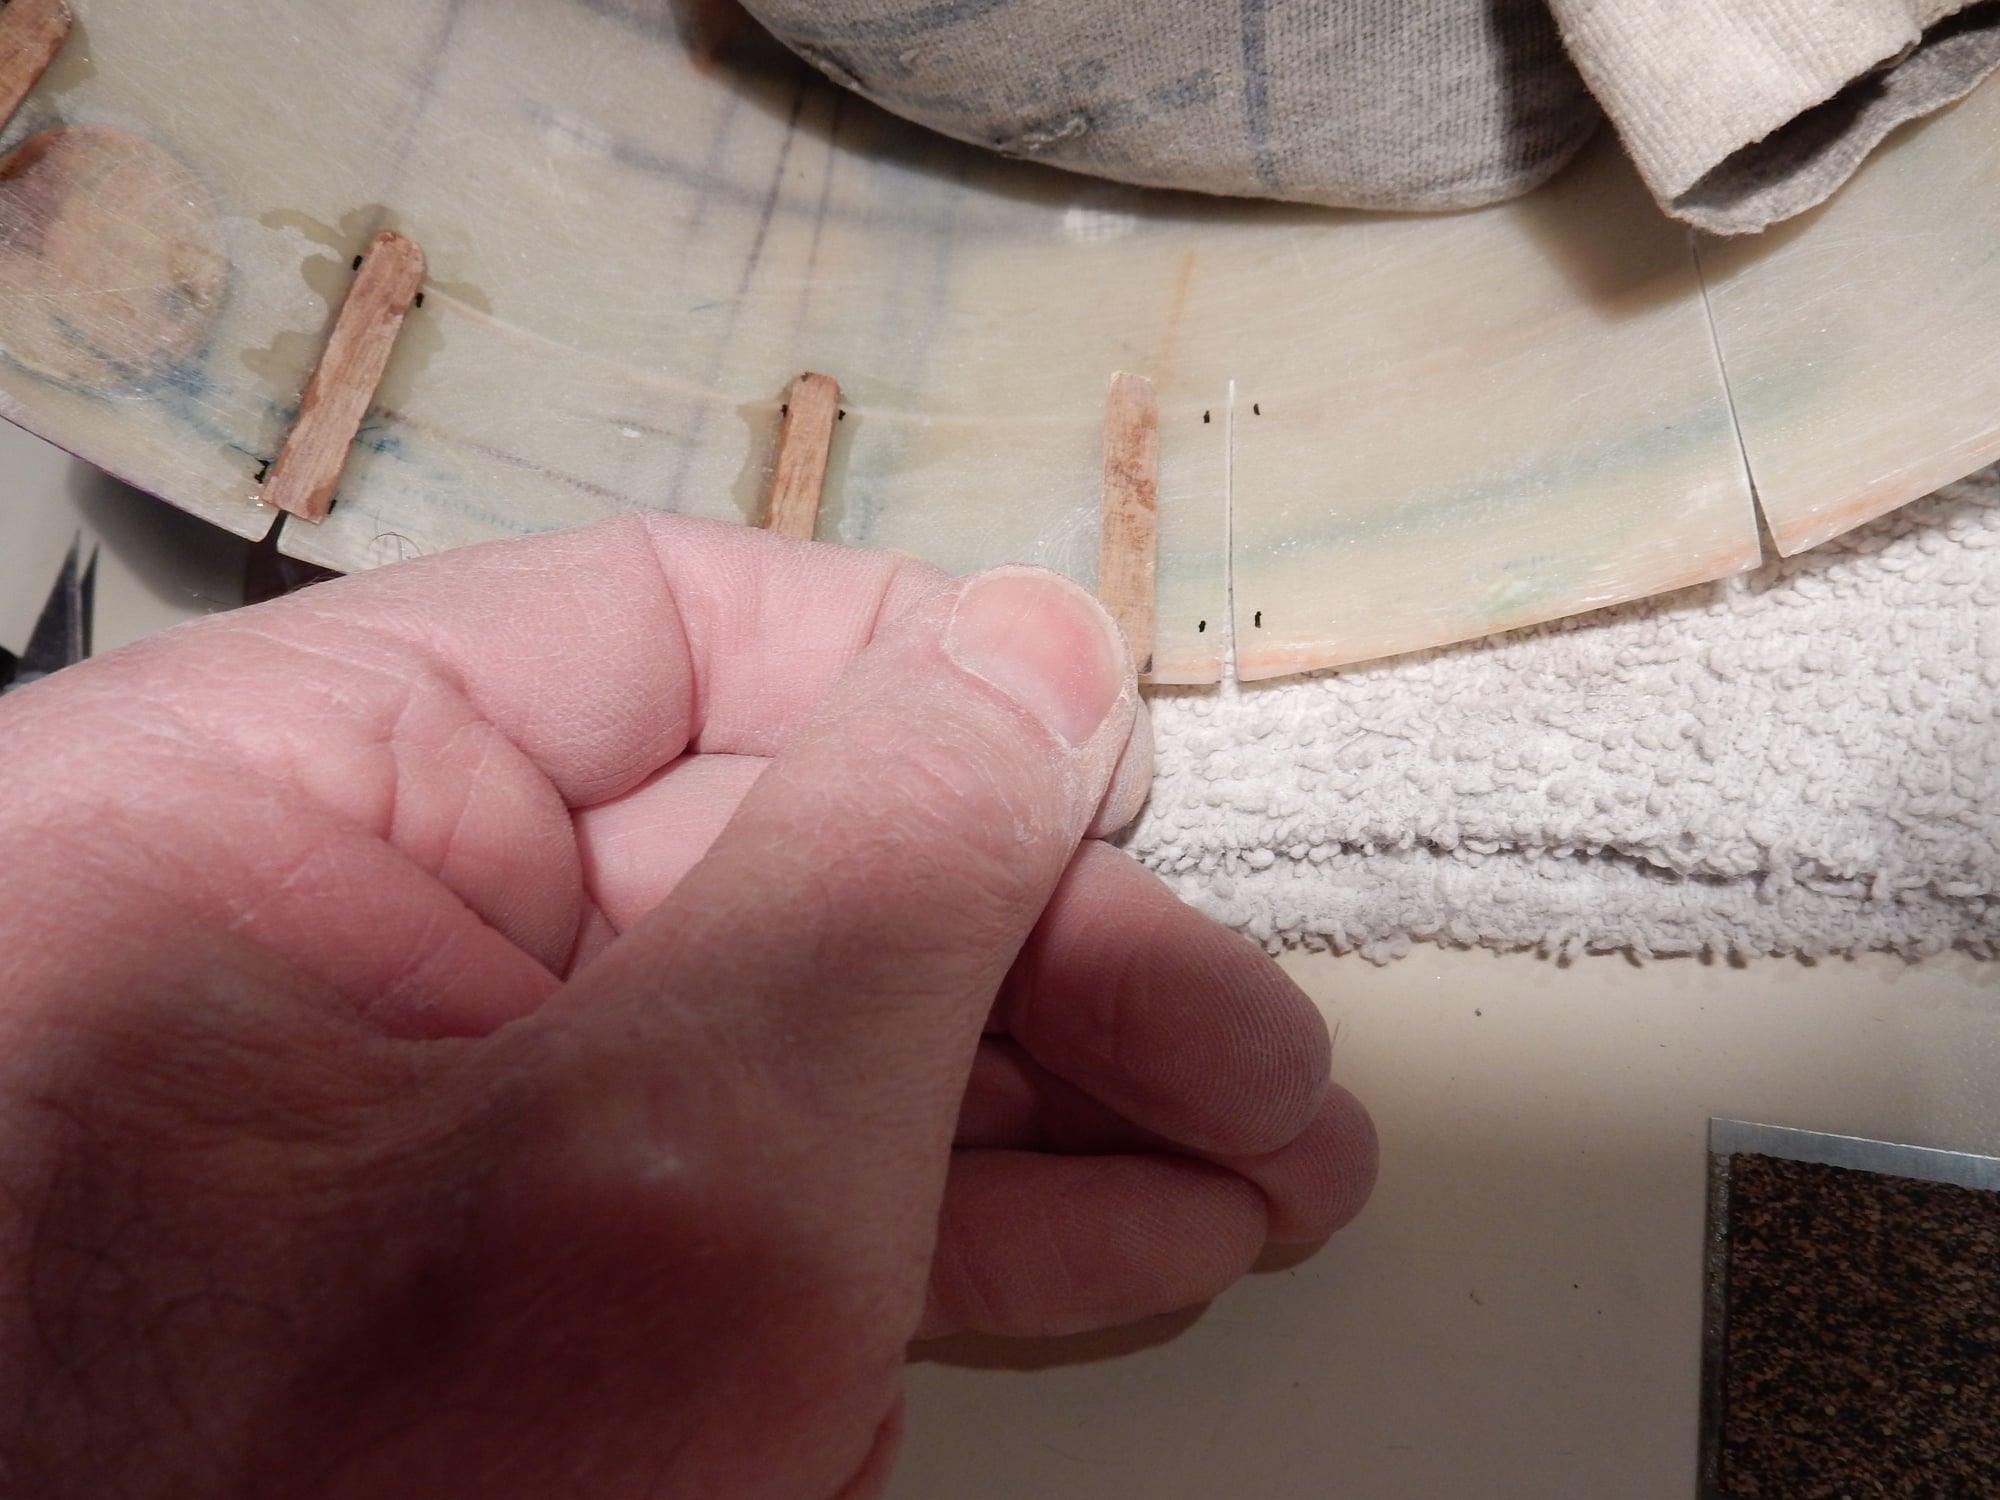
64th ply strips cemented over separation cuts, then edges sanded and glassed over for strength to reinforce cowl flaps. ( Strips cemented in first so excess resin doesn't flow past fiberglass and fill spaces between cowl flaps.)
02-04-2020, 10:09 AM
#282
Project continued.... Carburetor screen installation �.
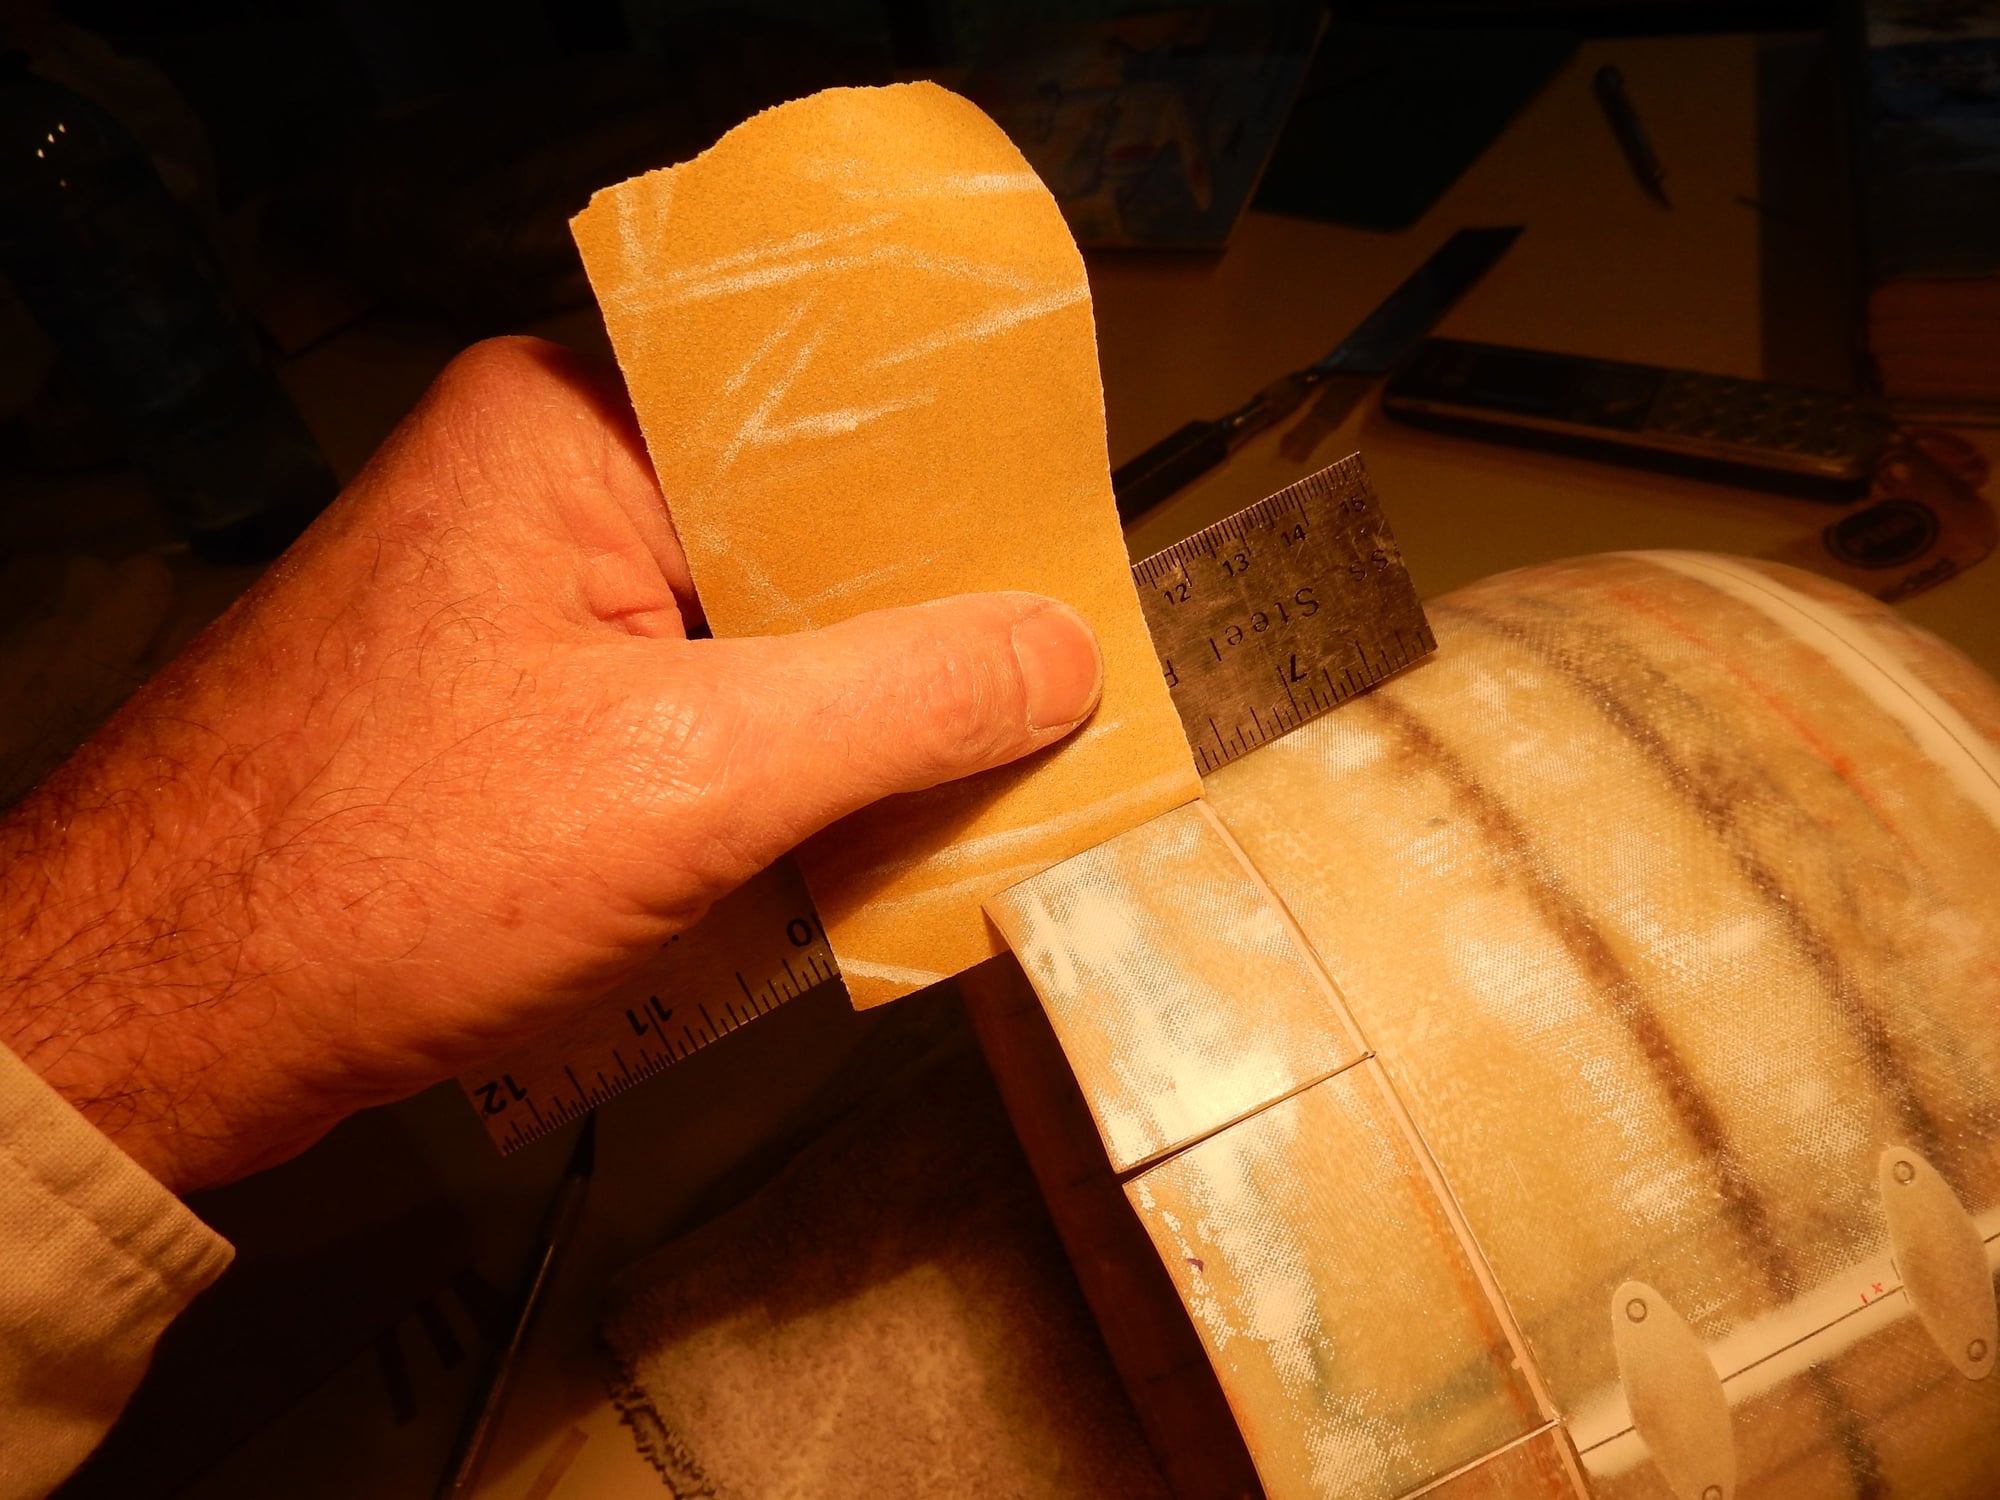
Five layers of .75 oz. glass & resin over strips, sanded smooth, job finished.
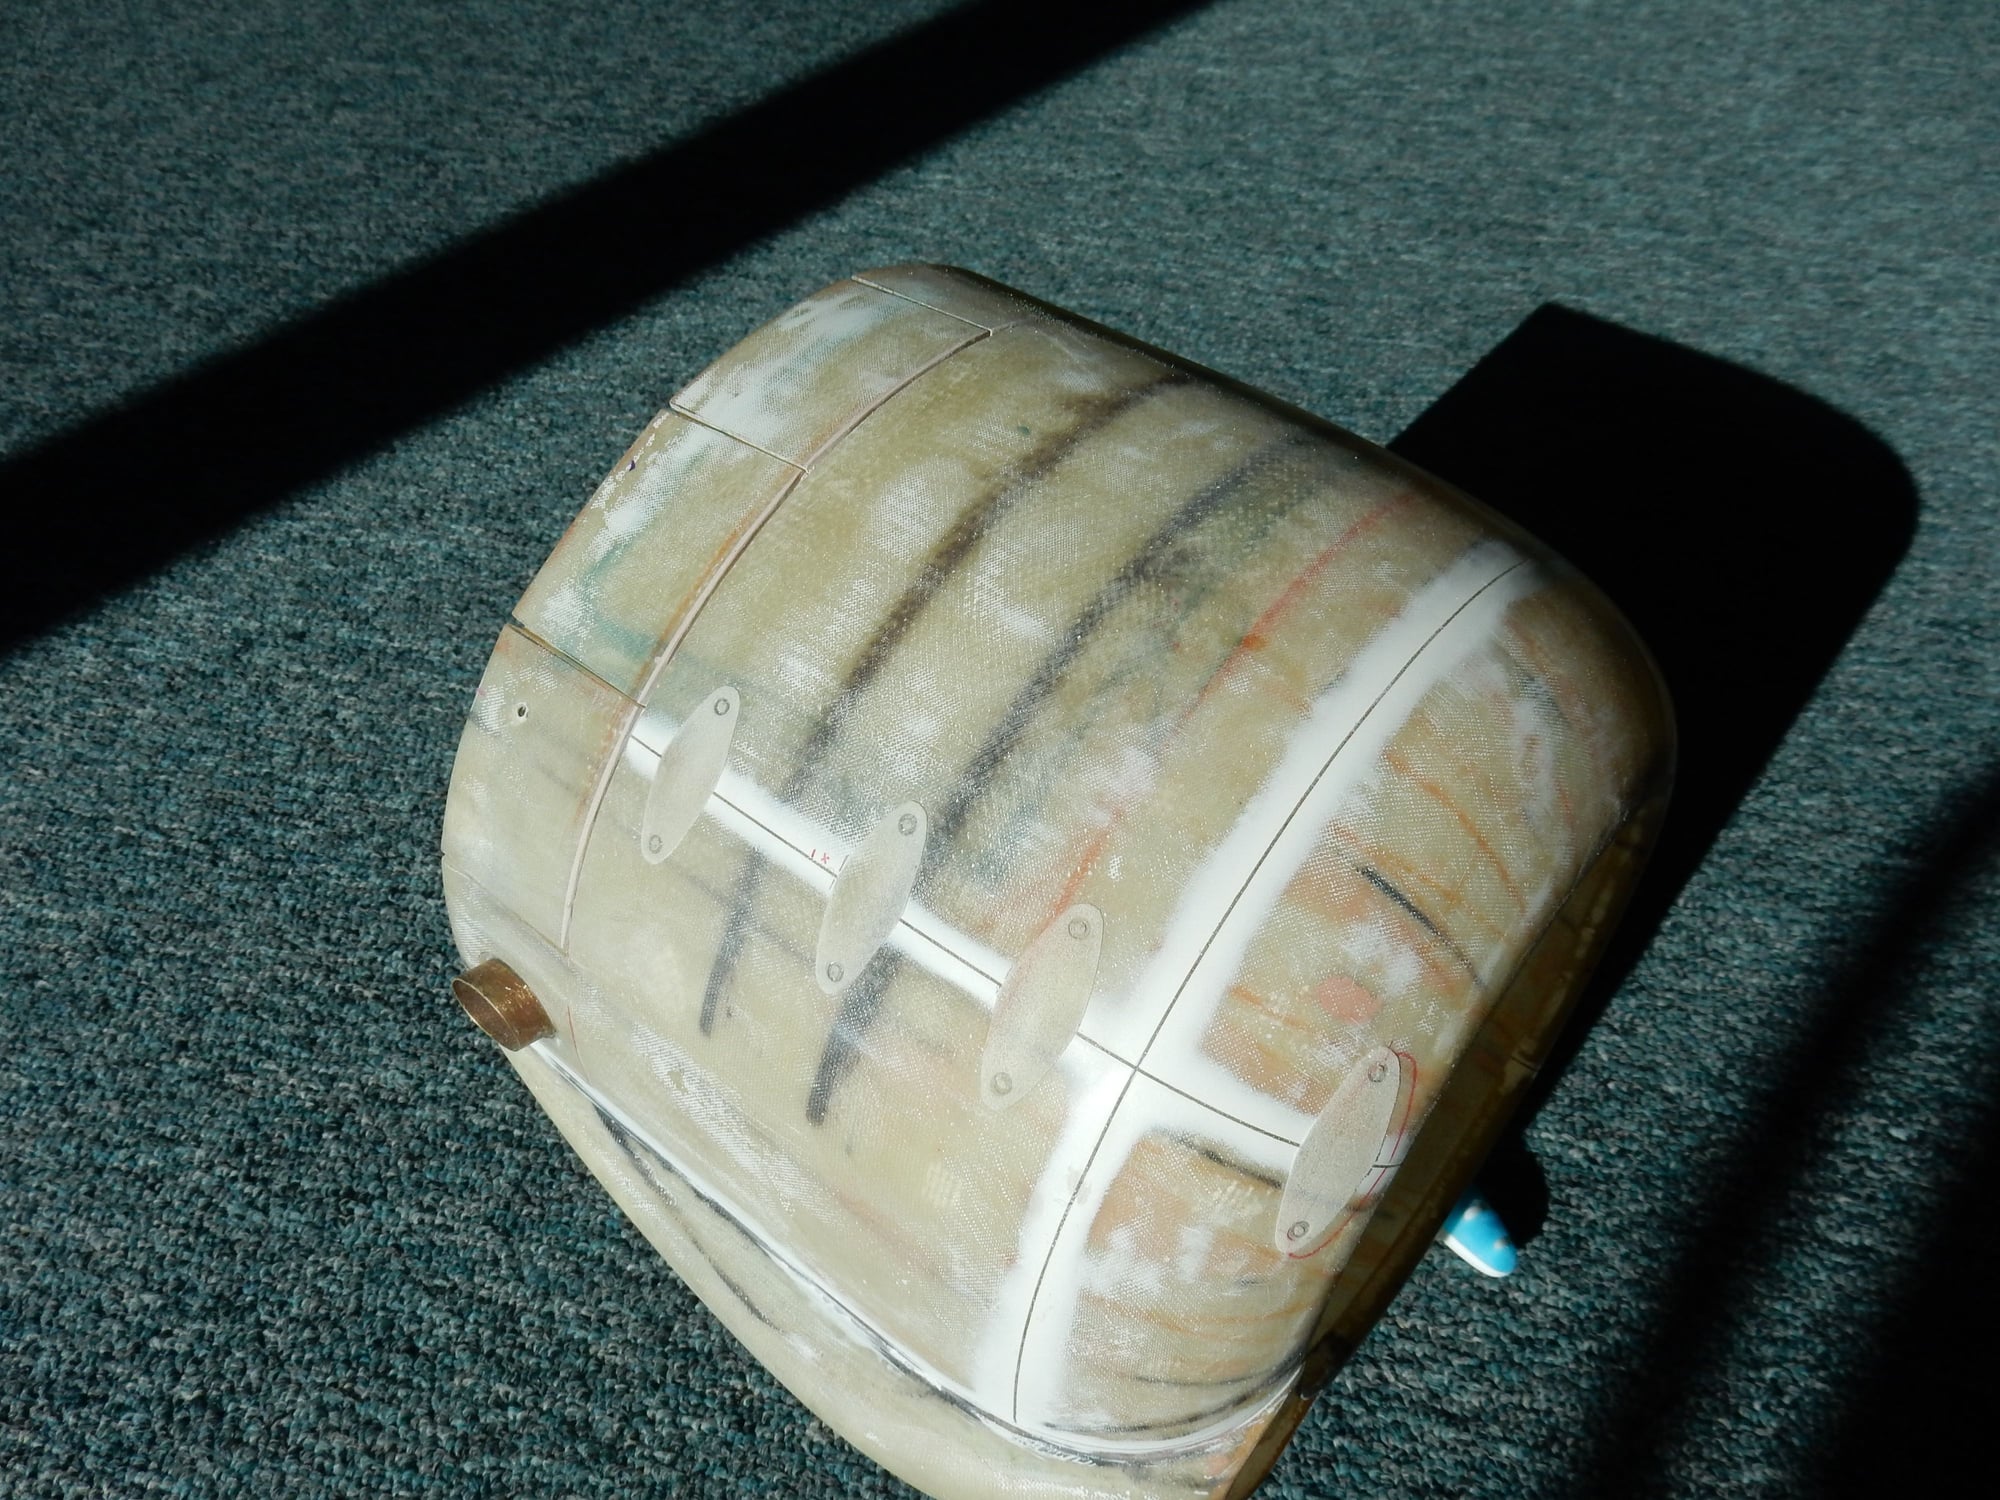
Cowl flap separation. Careful filing & sanding yields acceptable results.
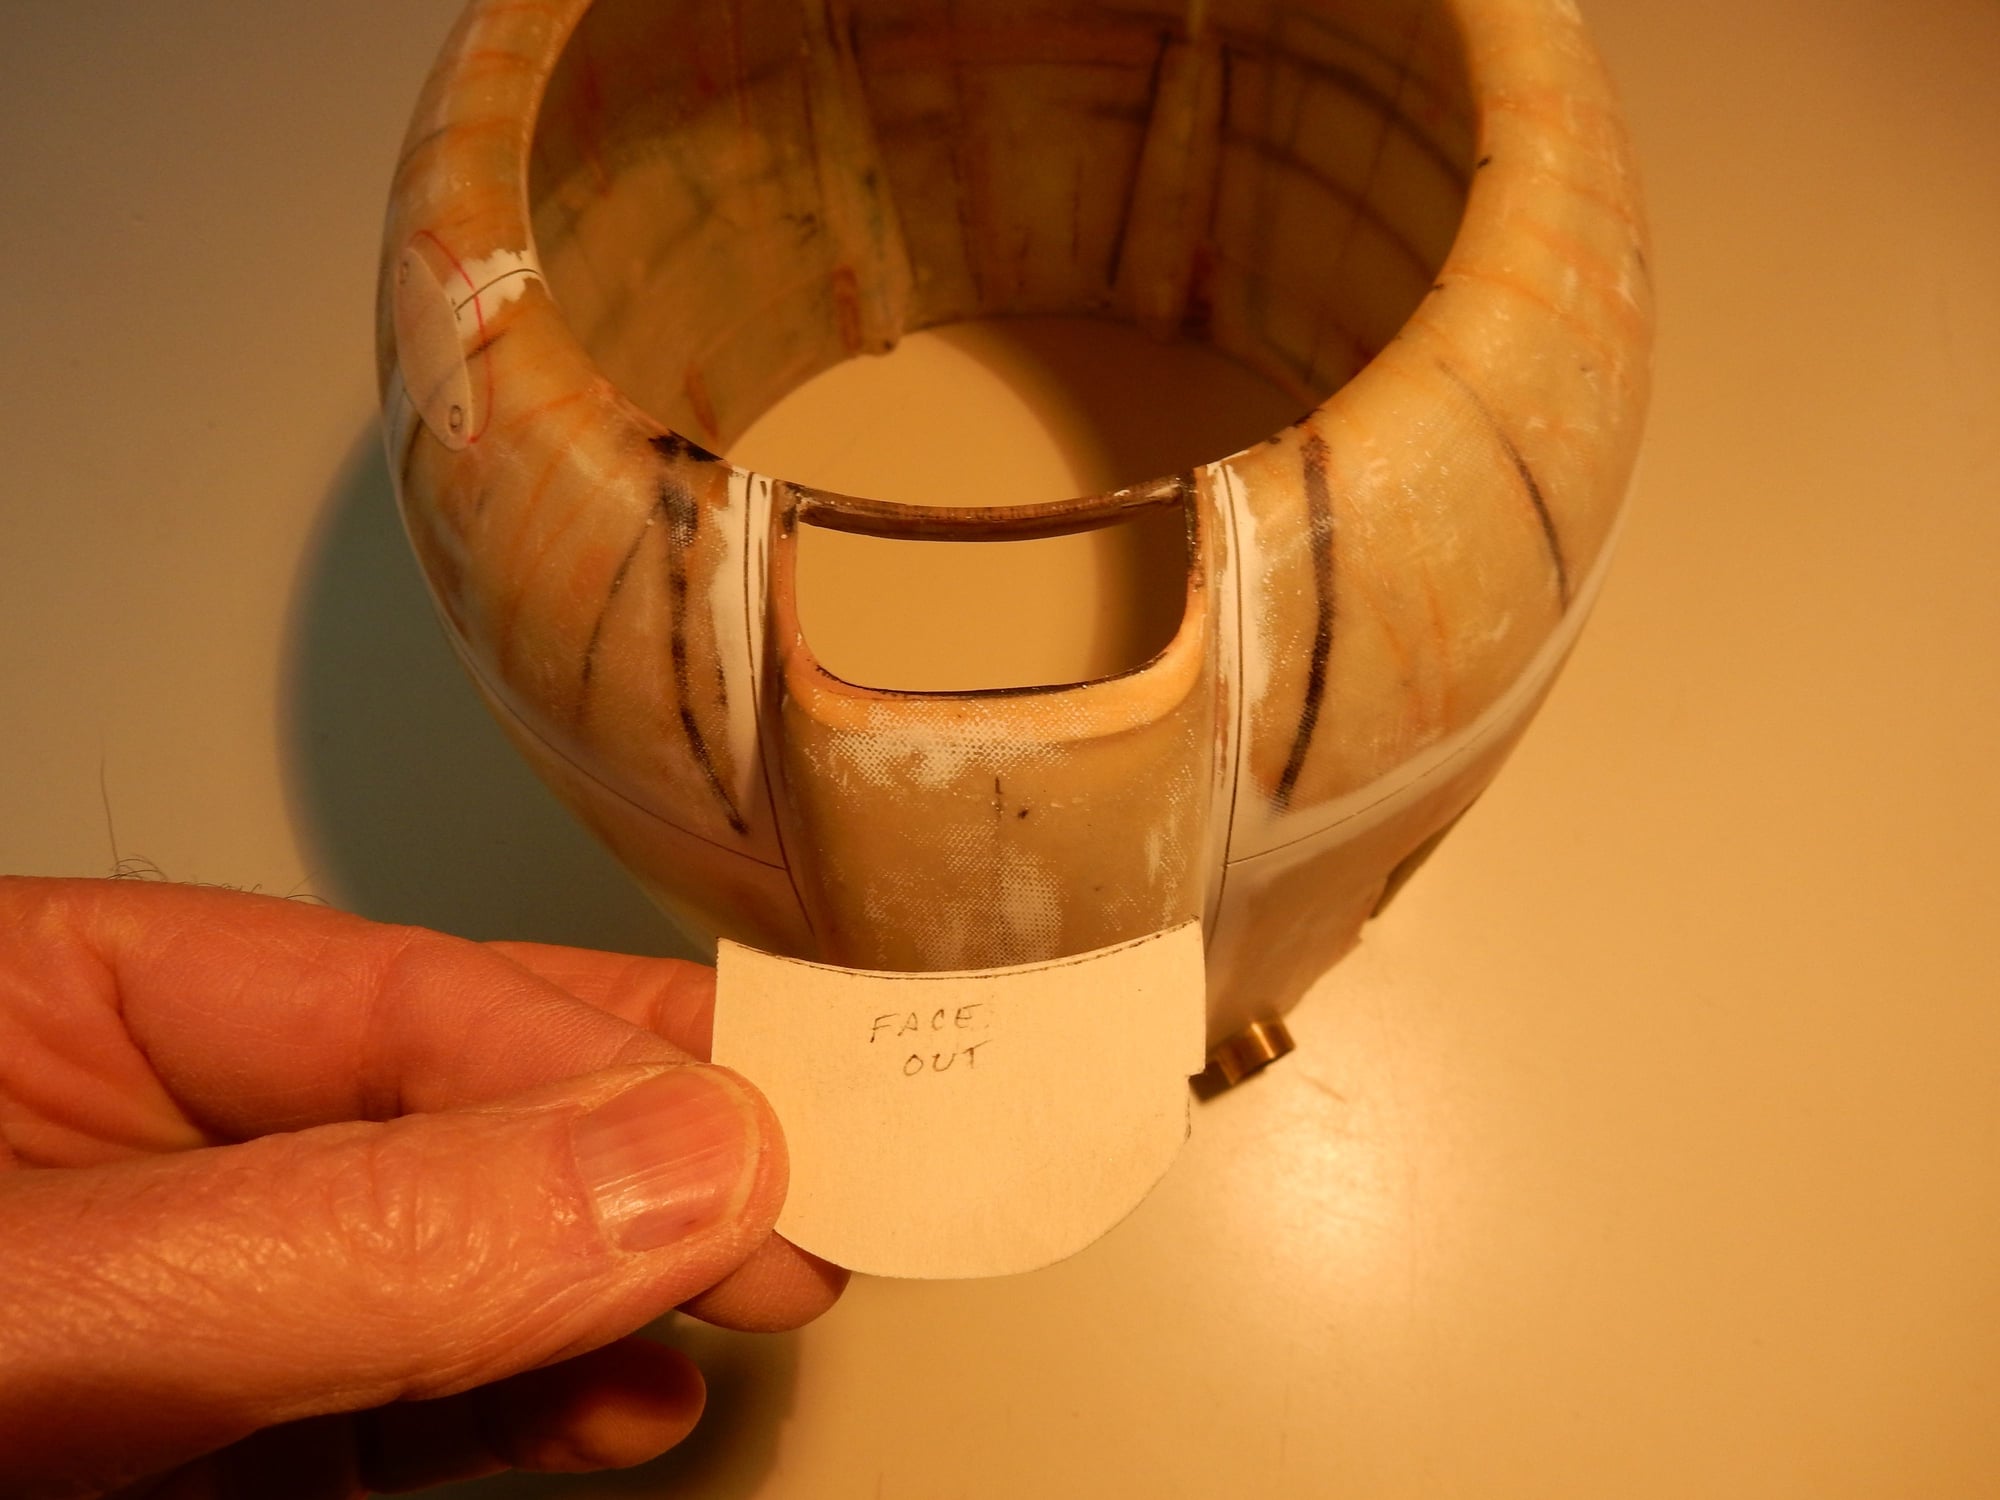
File stock outline of carburator screen frame opening for inside carb lip area.
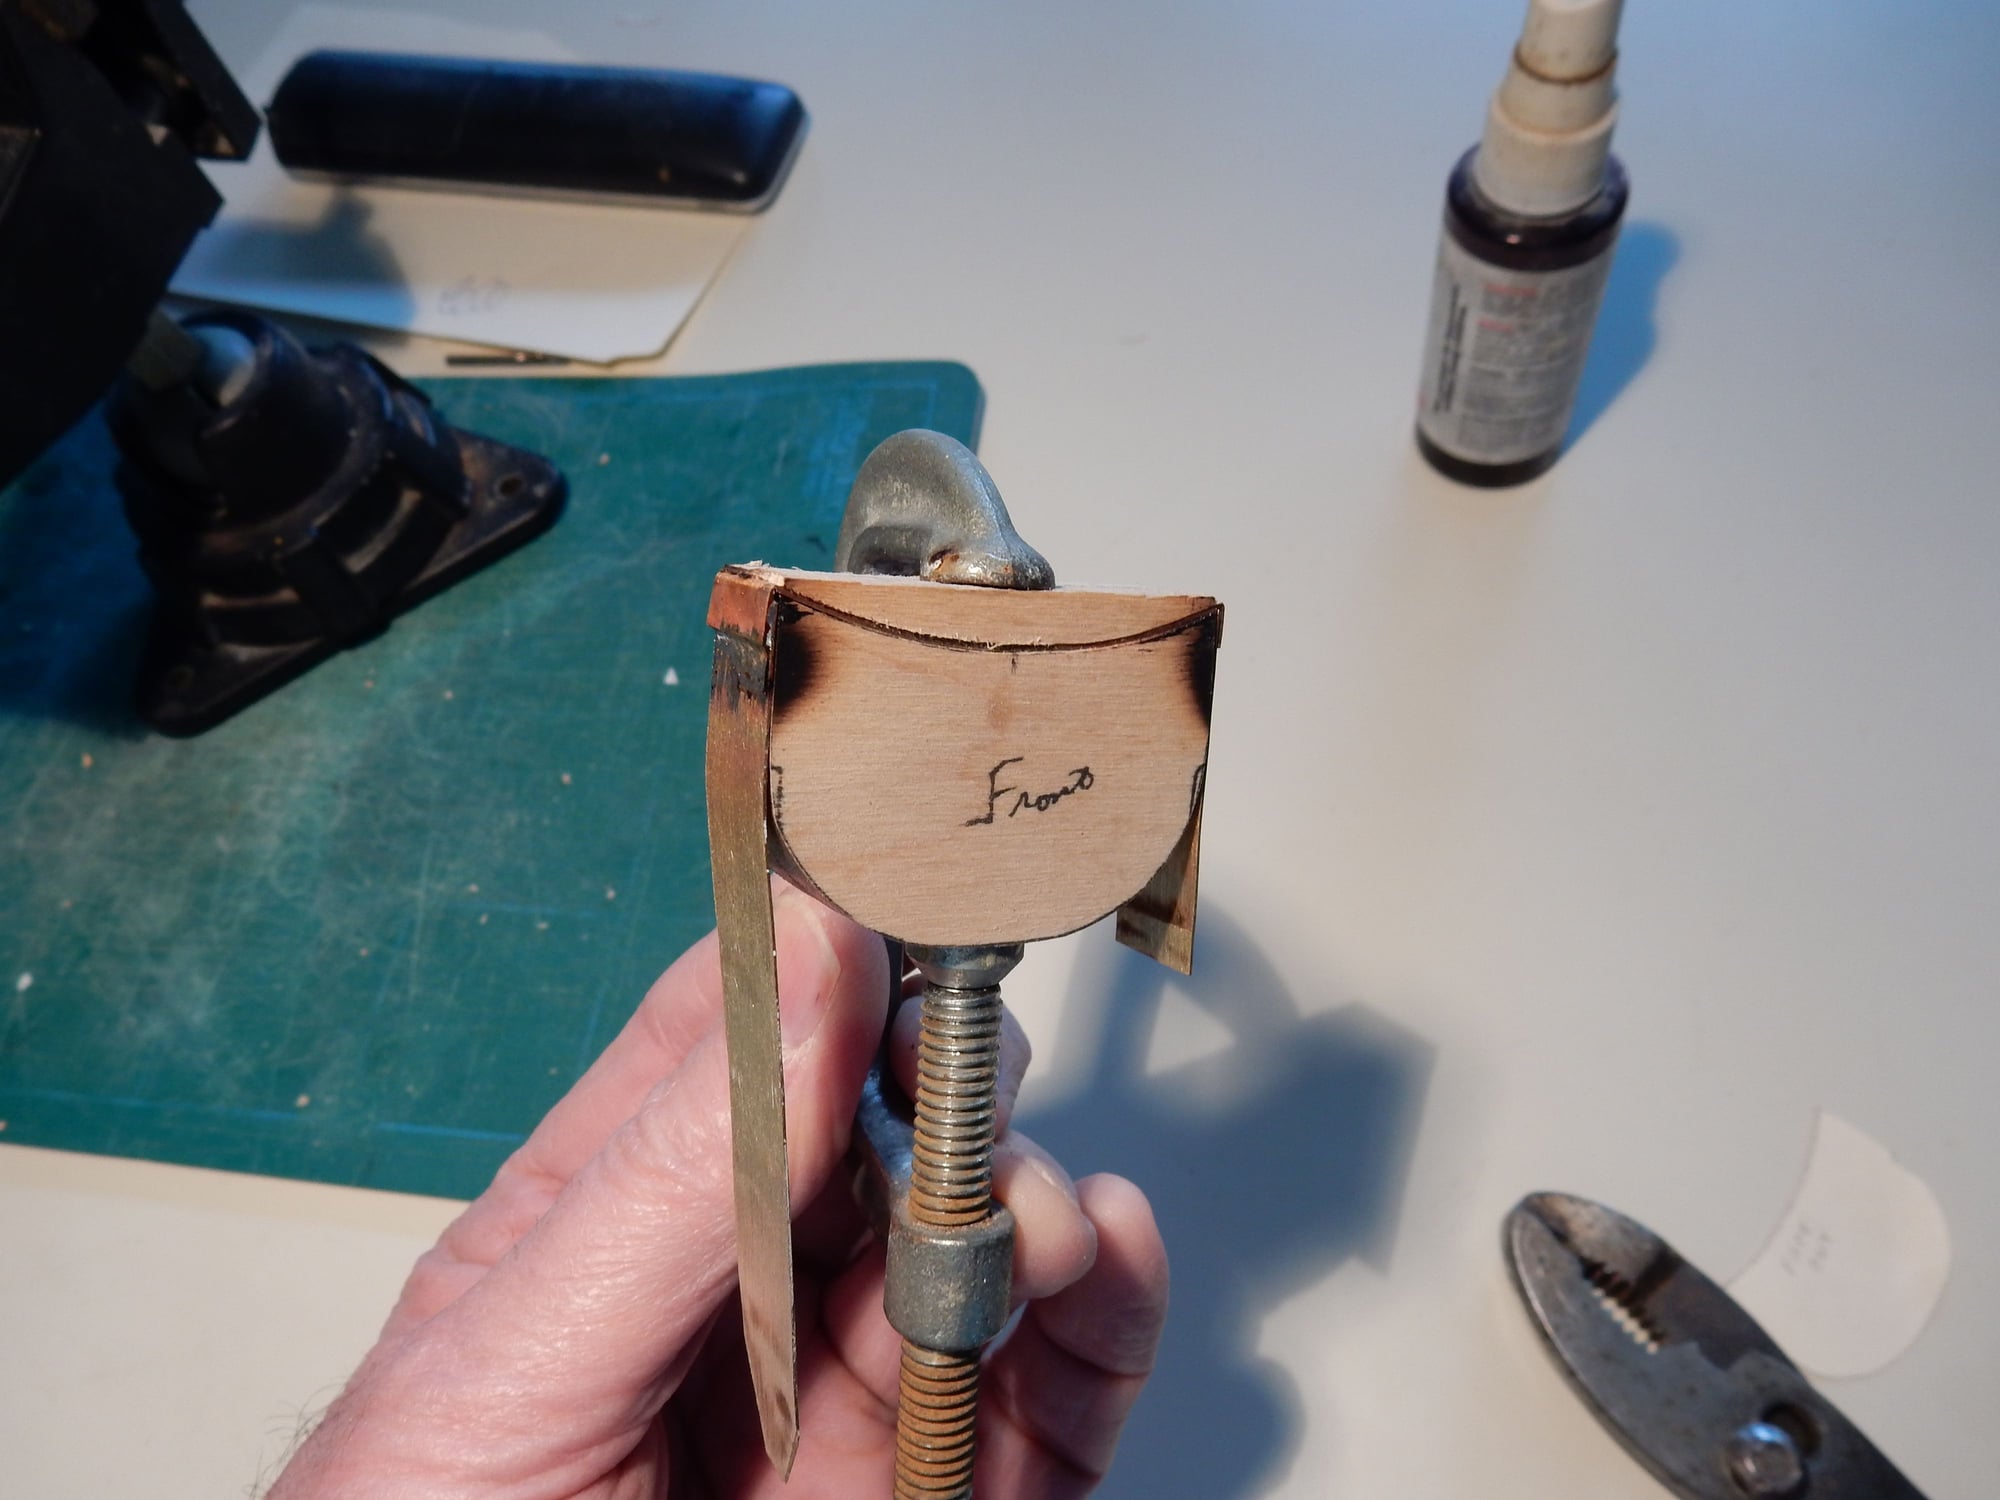
Outline transferred to 1/2" ply. Brass already in place at top w/ wood cut-out used to keep top piece clamped in place. Sides just soldered in place.
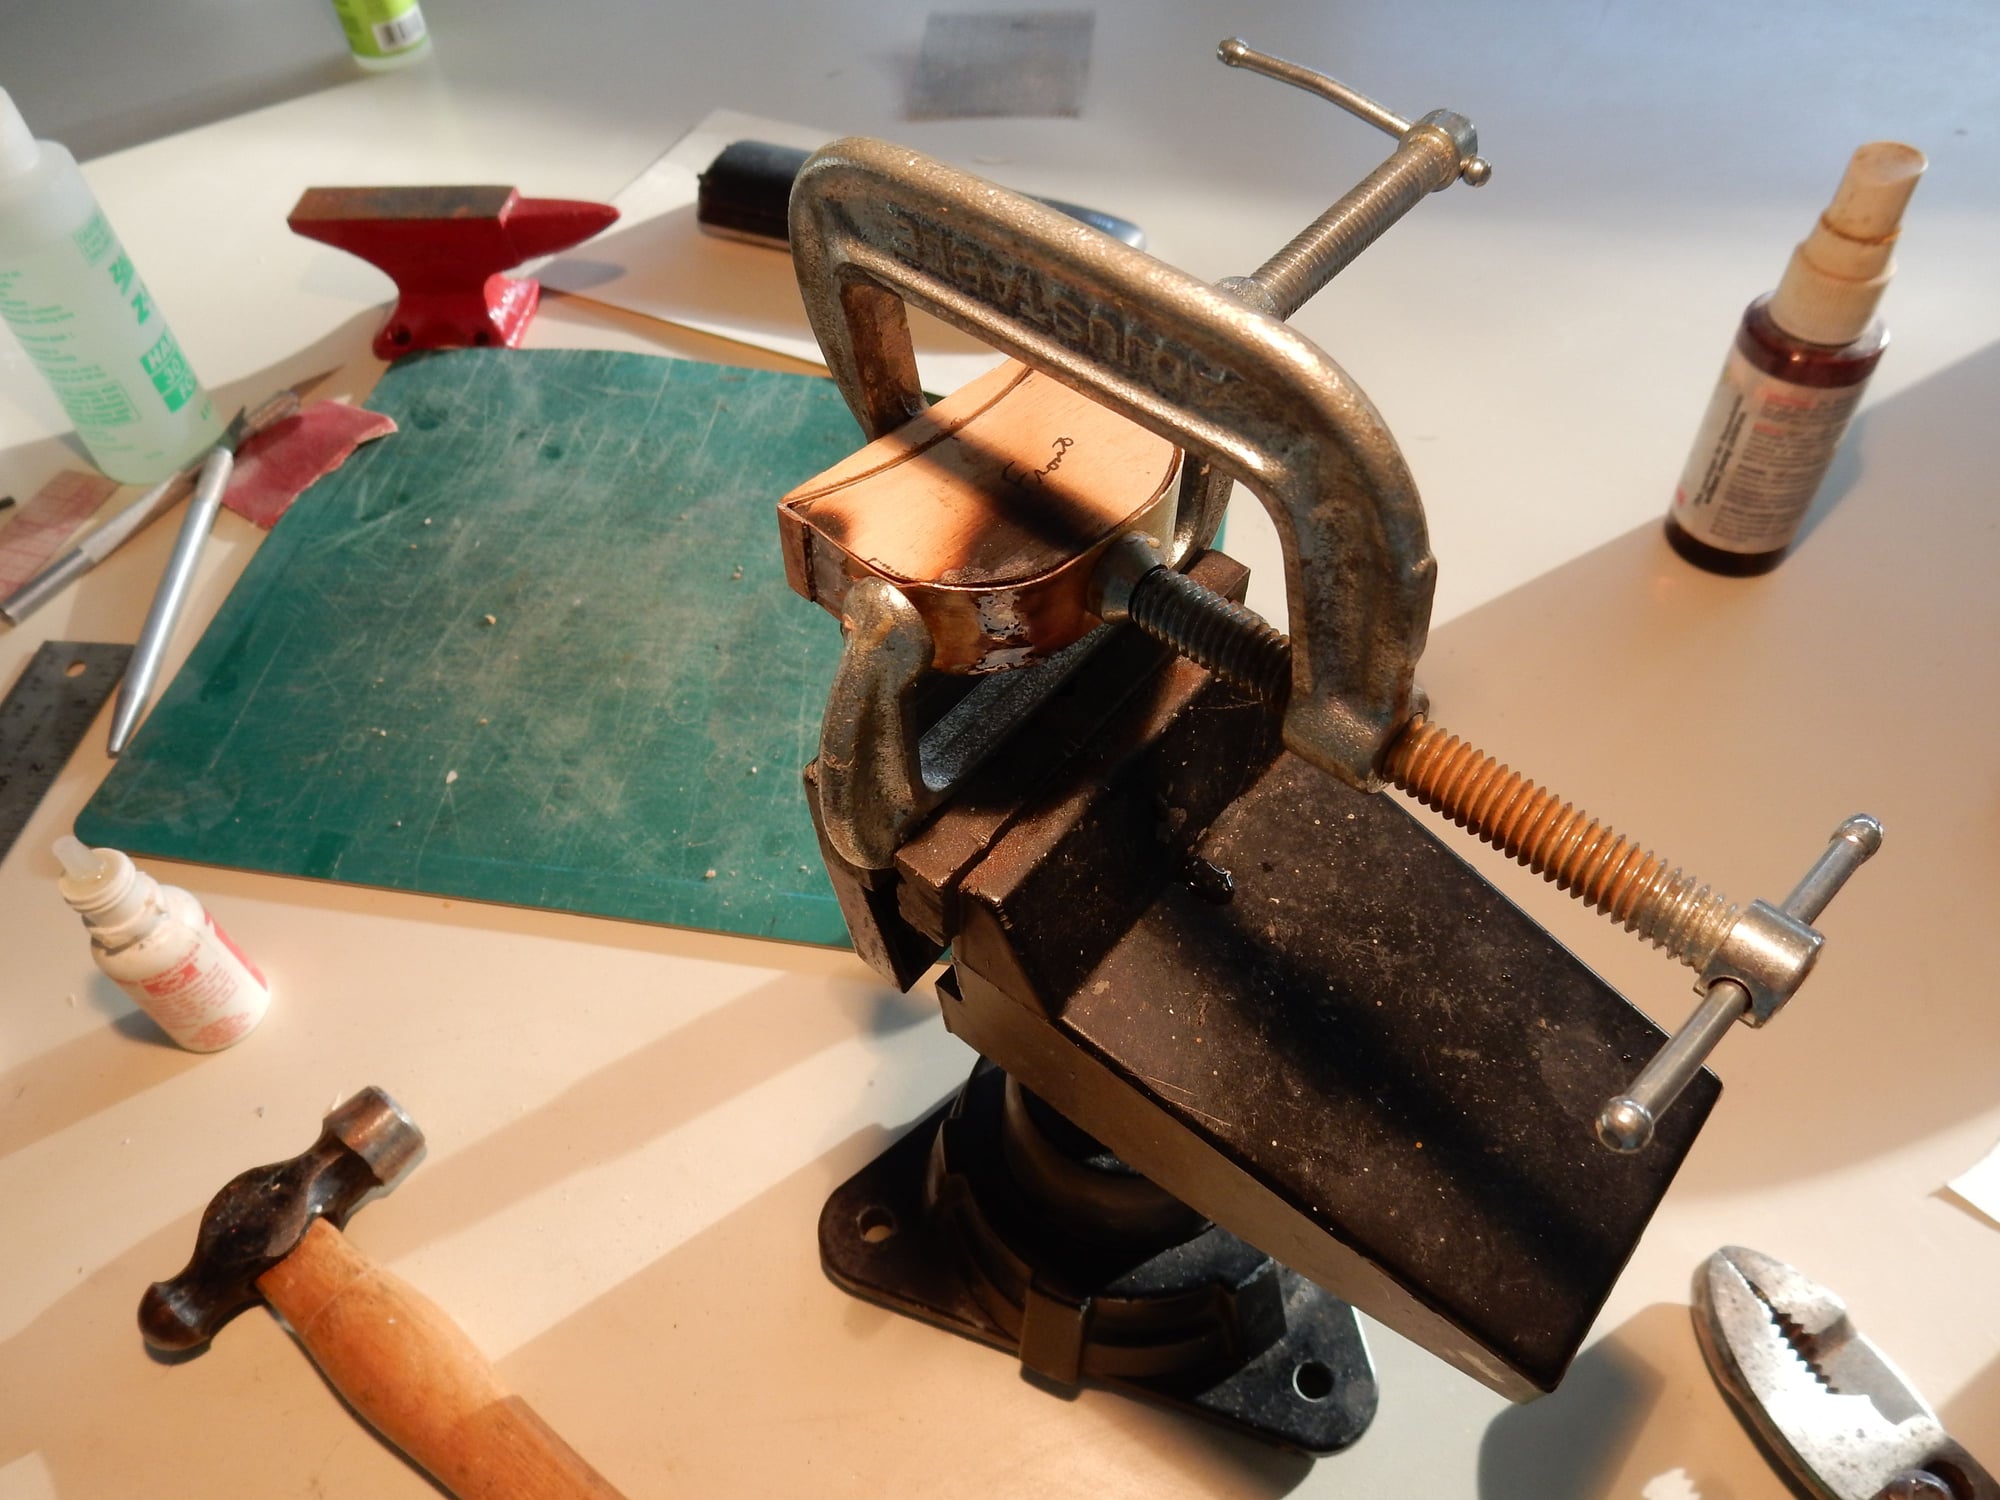
Remaining side pieces clamped down & soldered.

Finished frame w/ ply core still in place. Core was then removed and 1/2 MM sanded off perimeter to allow for double screen's width.
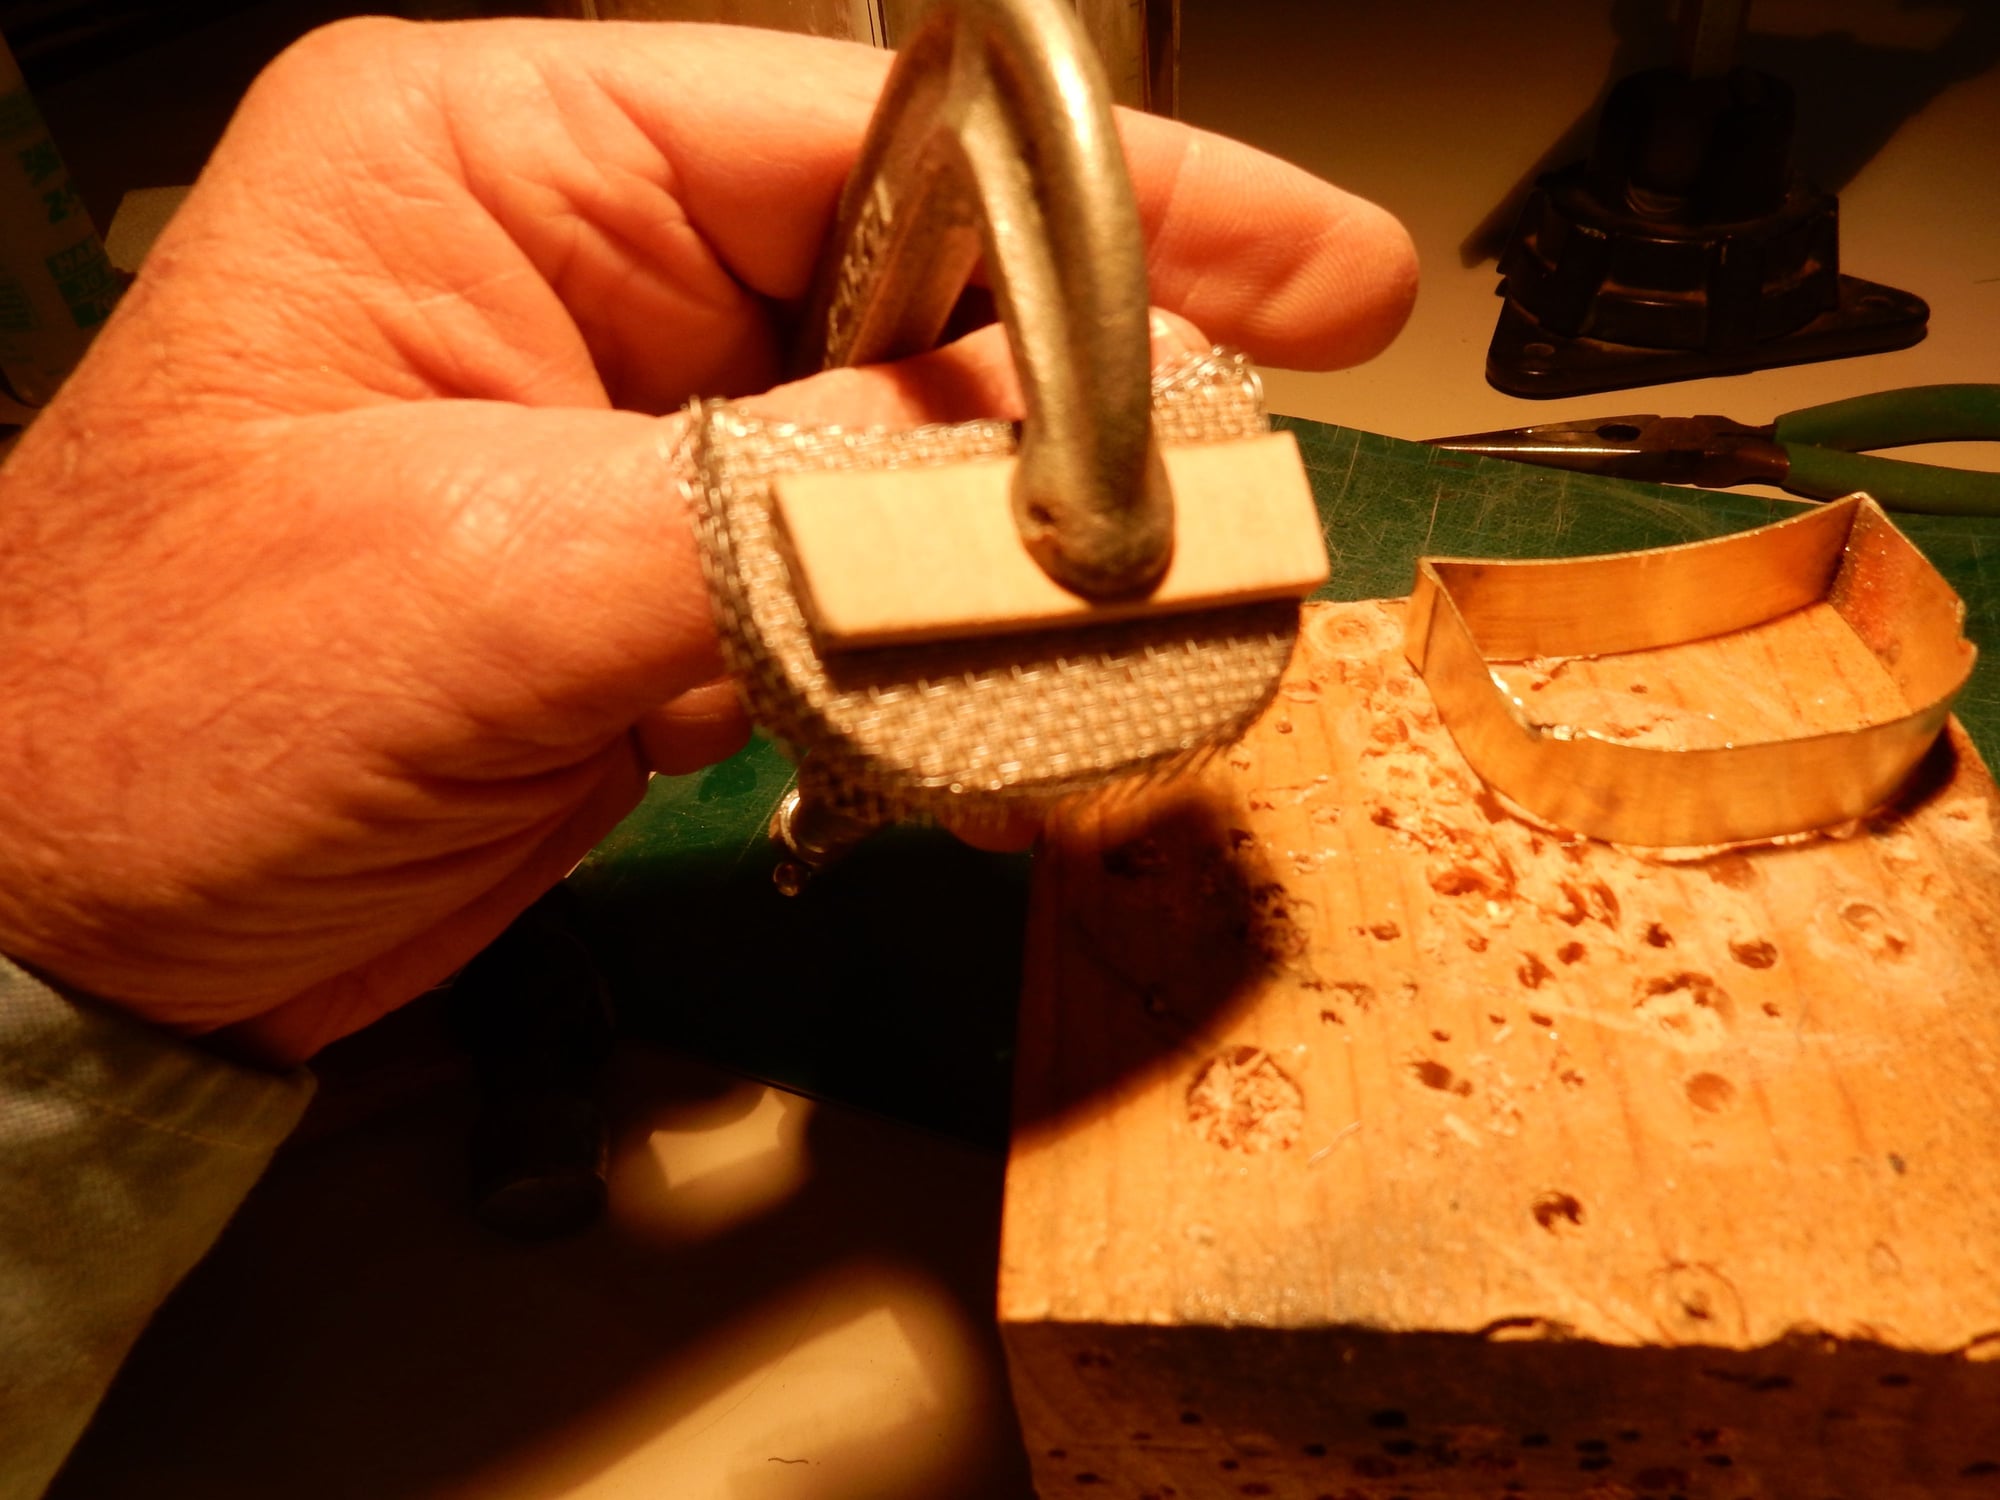
Screen's perimeter med. C/A'd in register and placed over form and edges bent over. Everything clamped in place to maintain shape. Form will later be used to push screen into frame in background & then glued in place after frame is cemented inside cowl chin.
Five layers of .75 oz. glass & resin over strips, sanded smooth, job finished.
Cowl flap separation. Careful filing & sanding yields acceptable results.
File stock outline of carburator screen frame opening for inside carb lip area.
Outline transferred to 1/2" ply. Brass already in place at top w/ wood cut-out used to keep top piece clamped in place. Sides just soldered in place.
Remaining side pieces clamped down & soldered.
Finished frame w/ ply core still in place. Core was then removed and 1/2 MM sanded off perimeter to allow for double screen's width.
Screen's perimeter med. C/A'd in register and placed over form and edges bent over. Everything clamped in place to maintain shape. Form will later be used to push screen into frame in background & then glued in place after frame is cemented inside cowl chin.
The following users liked this post:
Joe. (02-04-2020)
02-04-2020, 05:55 PM
#284
At this point, with what I've left to do to finish this 7 winter's project, the thought never entered my mind. Quite honestly, I wouldn't know how to do it and pushing 70 yrs. old, I've more planes to build & fly before bailing out! I'm nonetheless flattered by your interest. G.
02-10-2020, 05:24 PM
#286
Third attempt!!!
Carburator screen cemented in place.
Exact fitting intake form w/ backstop depth stop.
Form vaselined and inserted up to stop.

Bondo troweled in. After curing, everything sanded and faired in to a smooth inlet transition after this photo was taken.
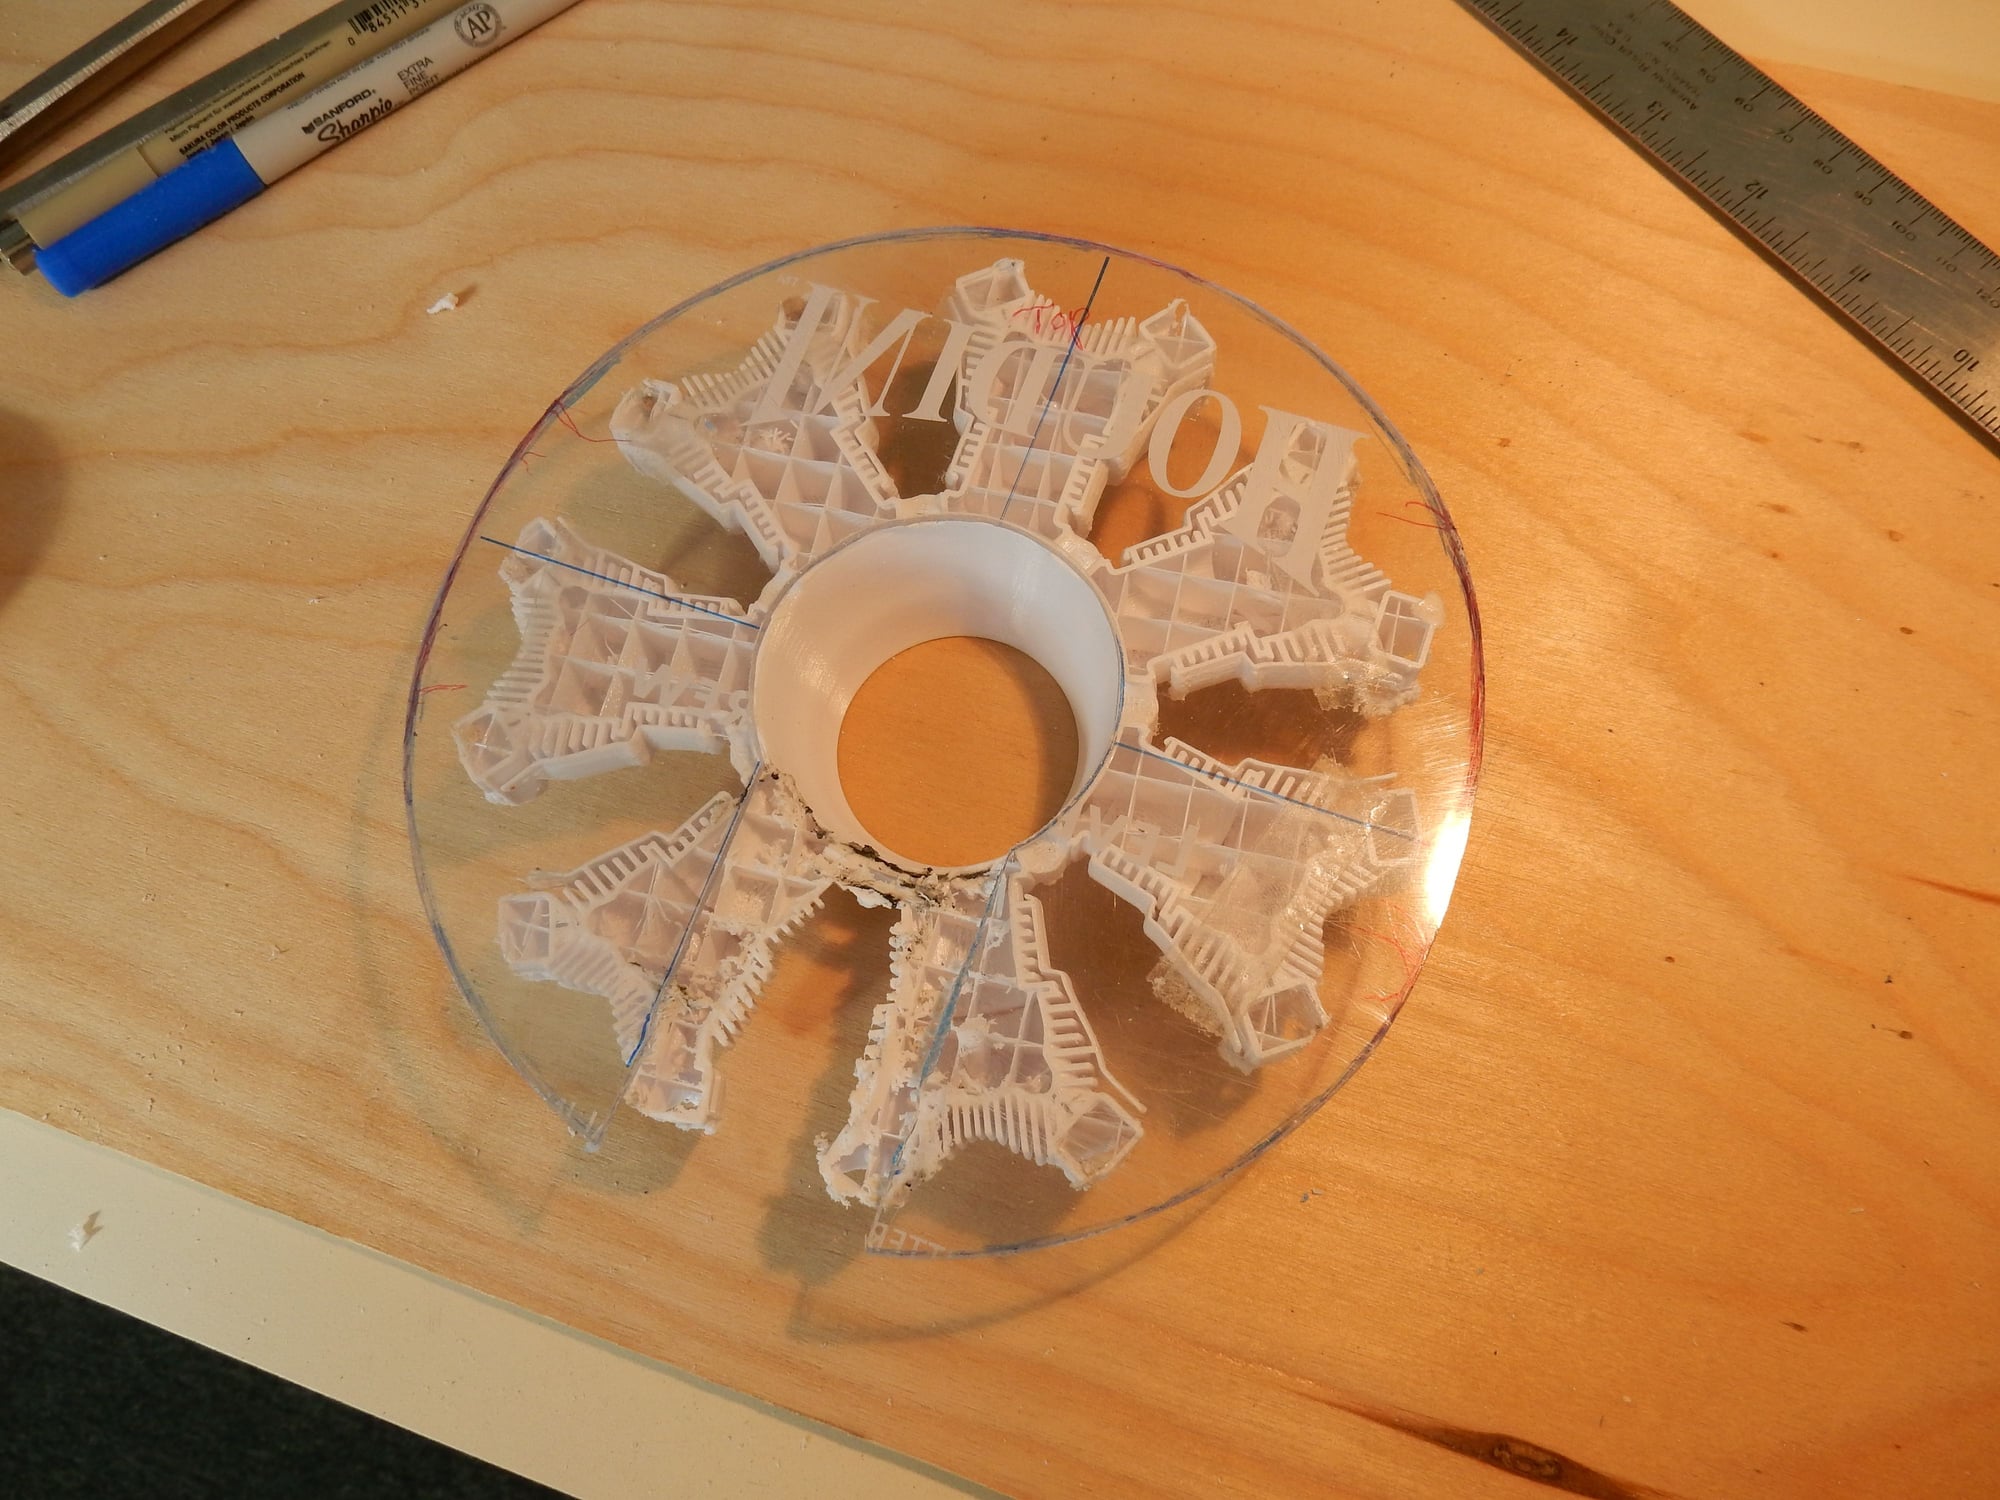
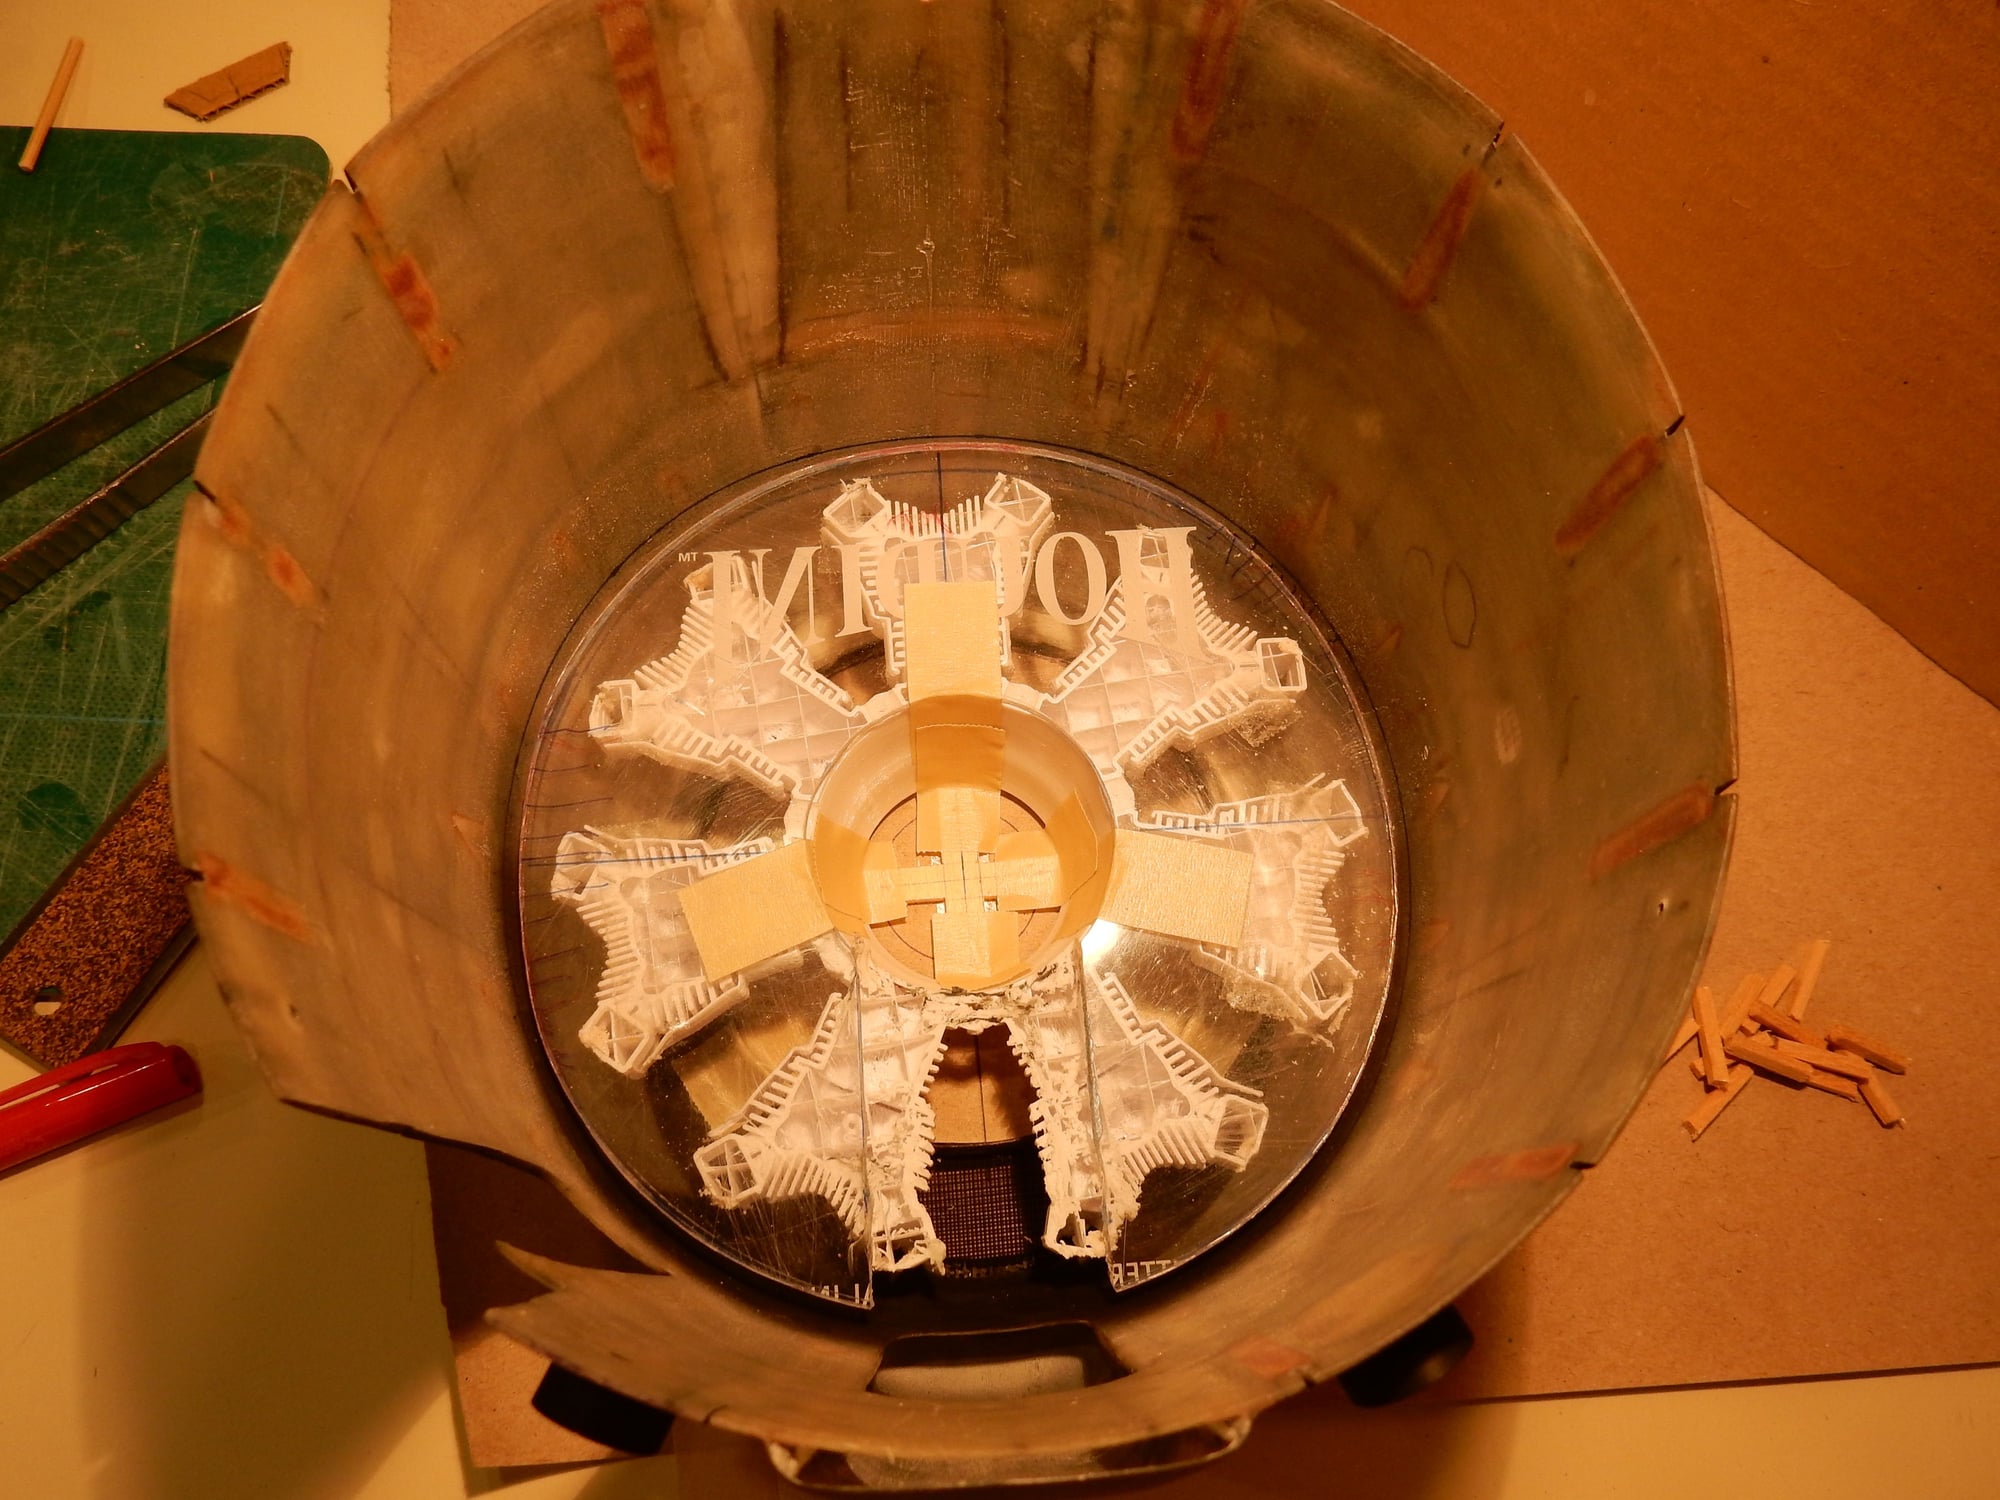
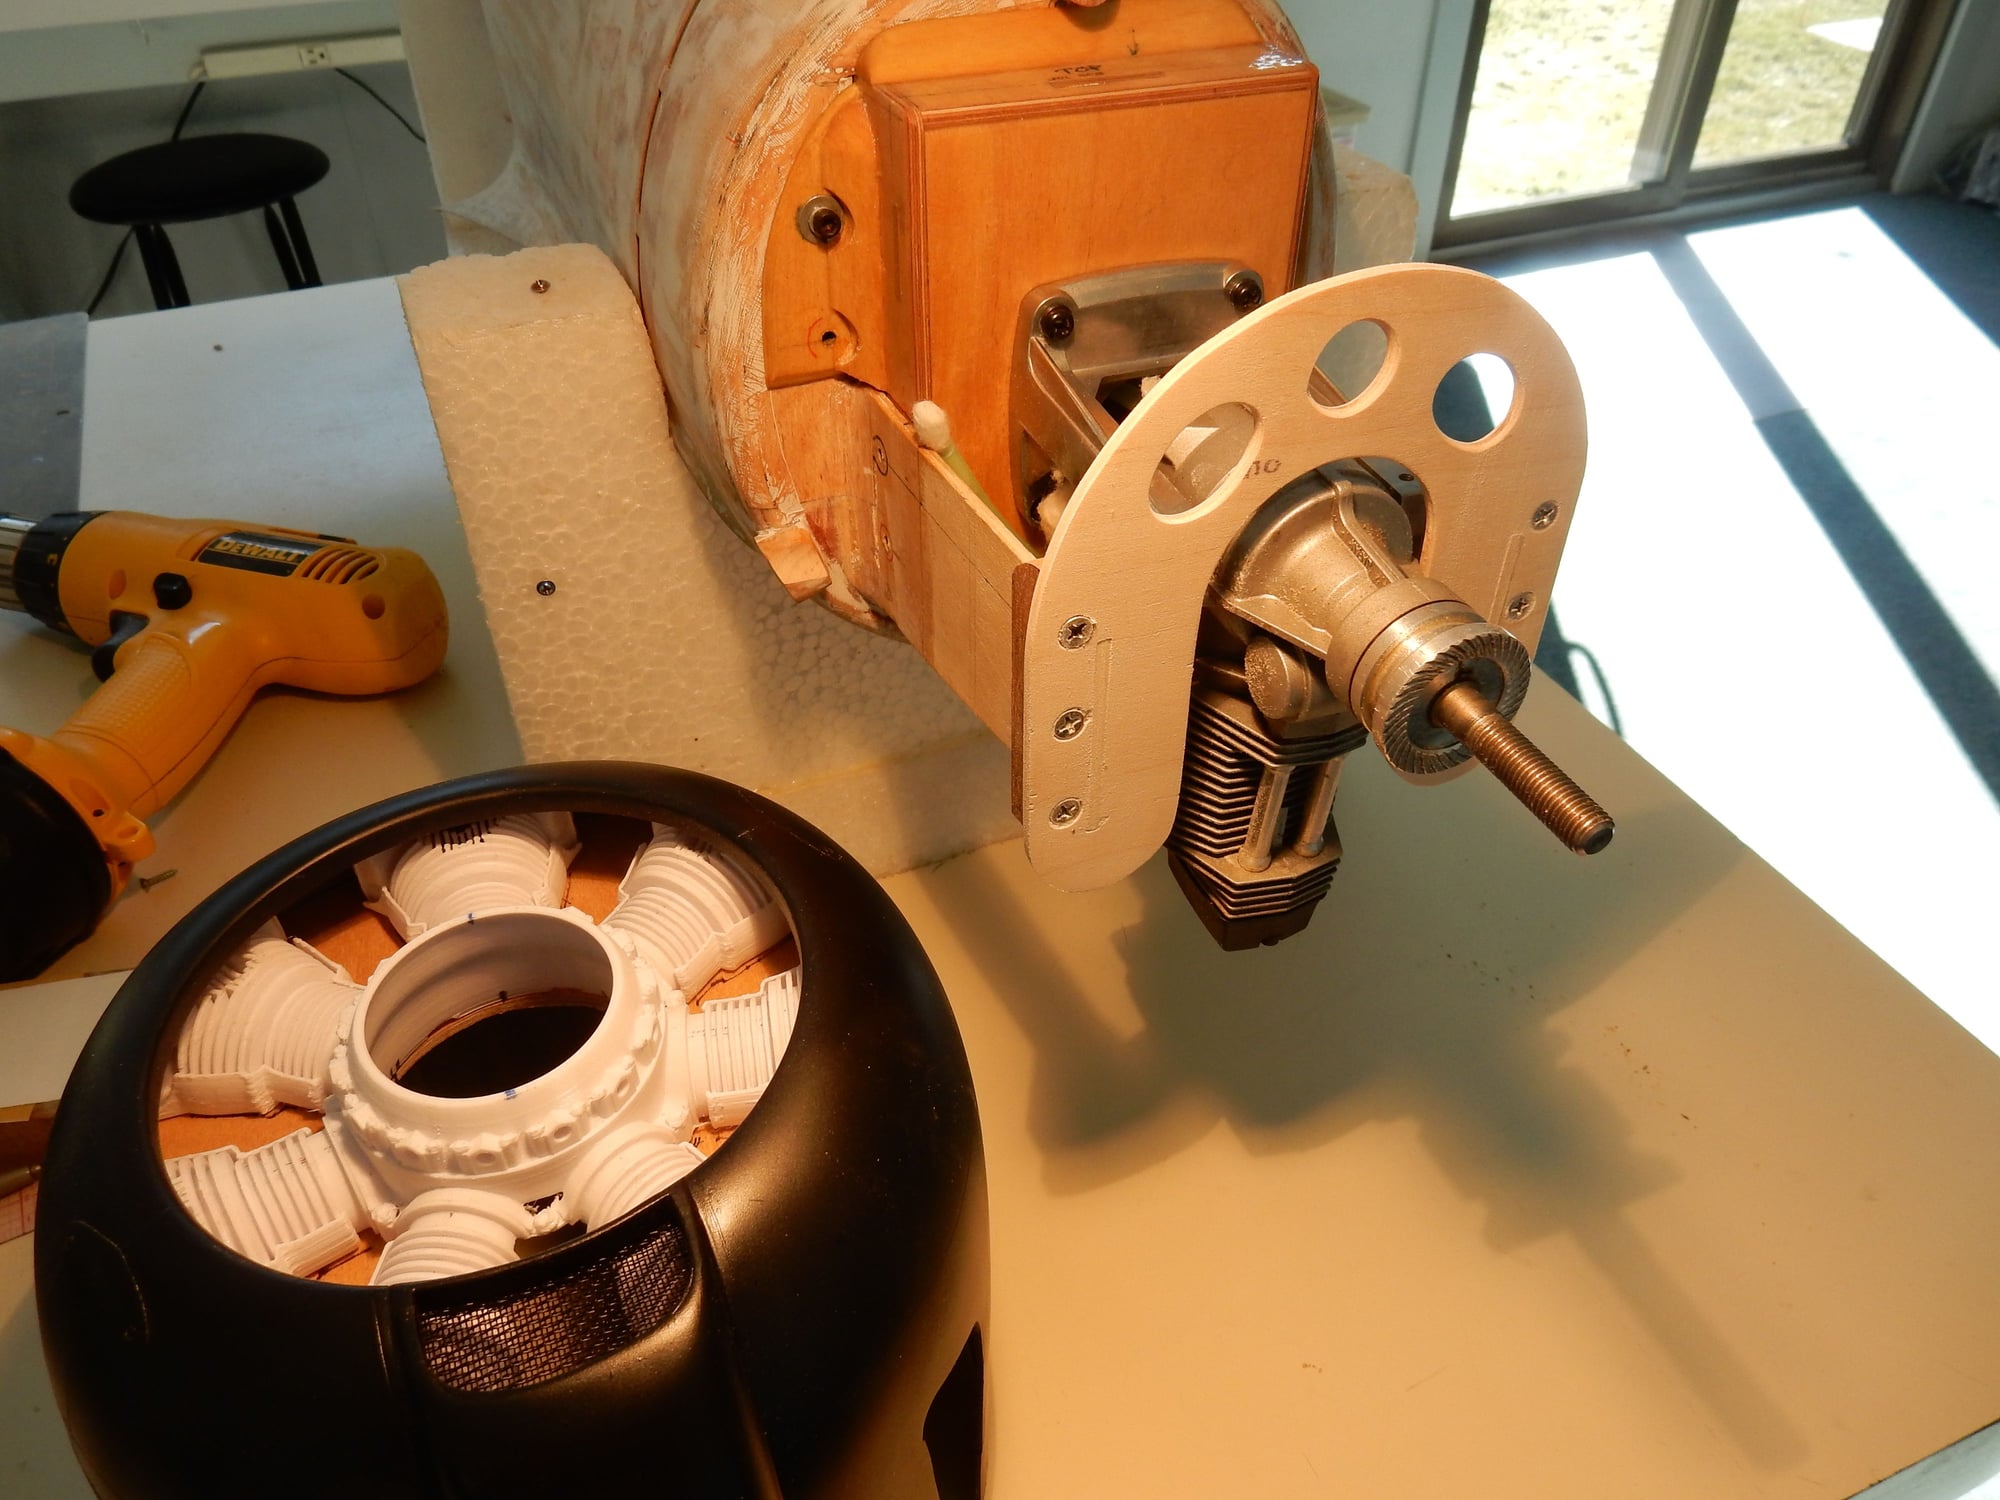
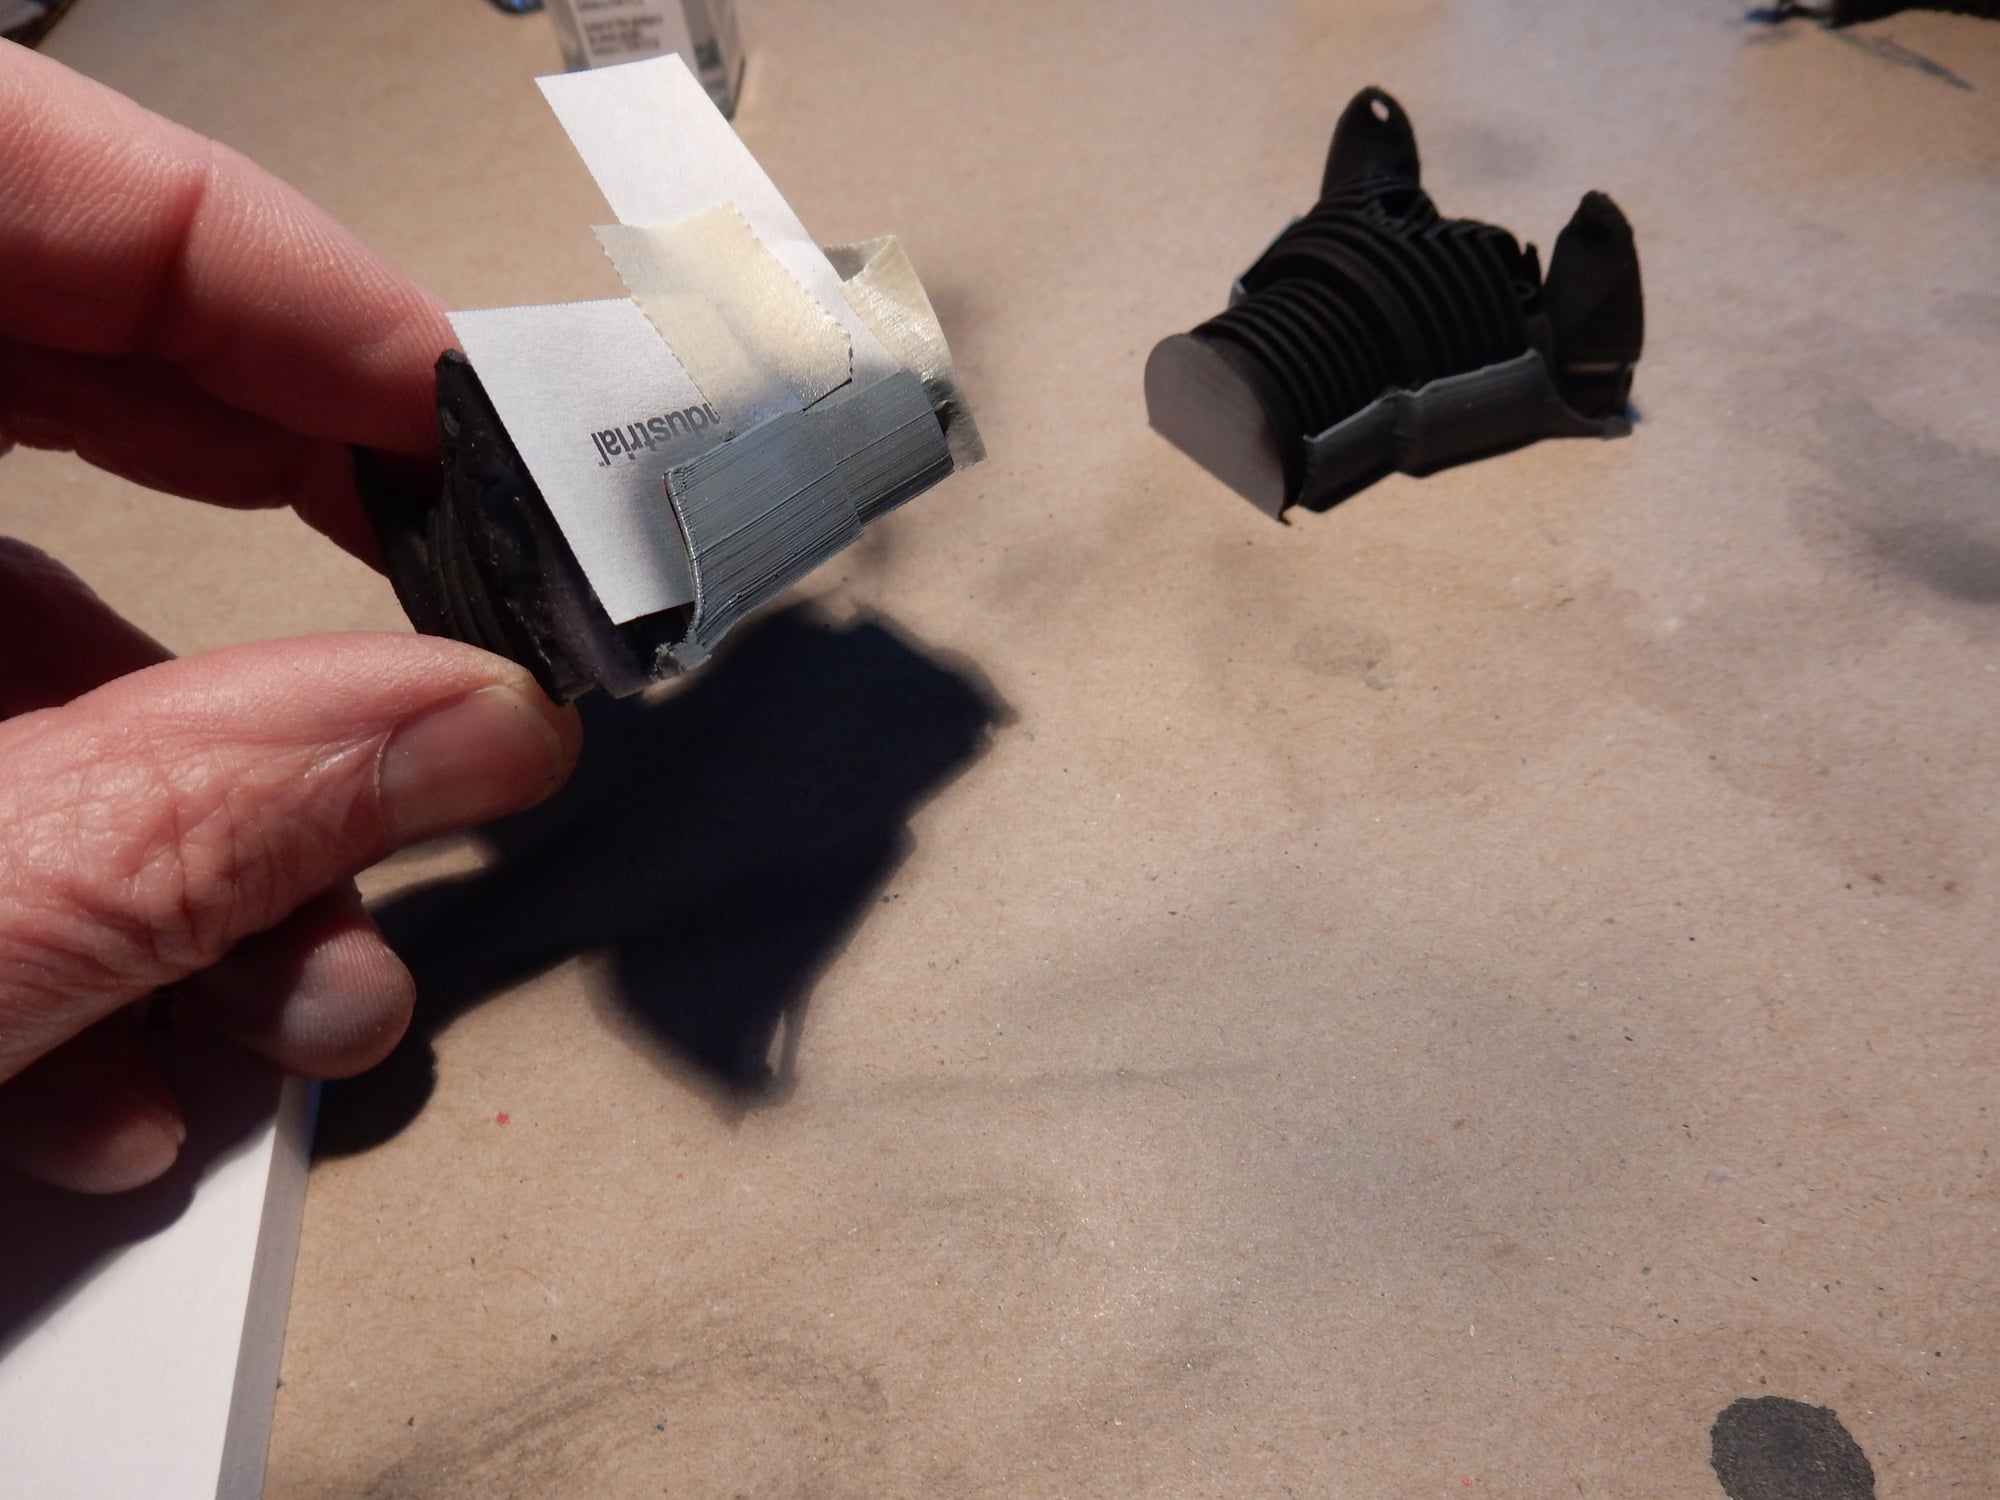
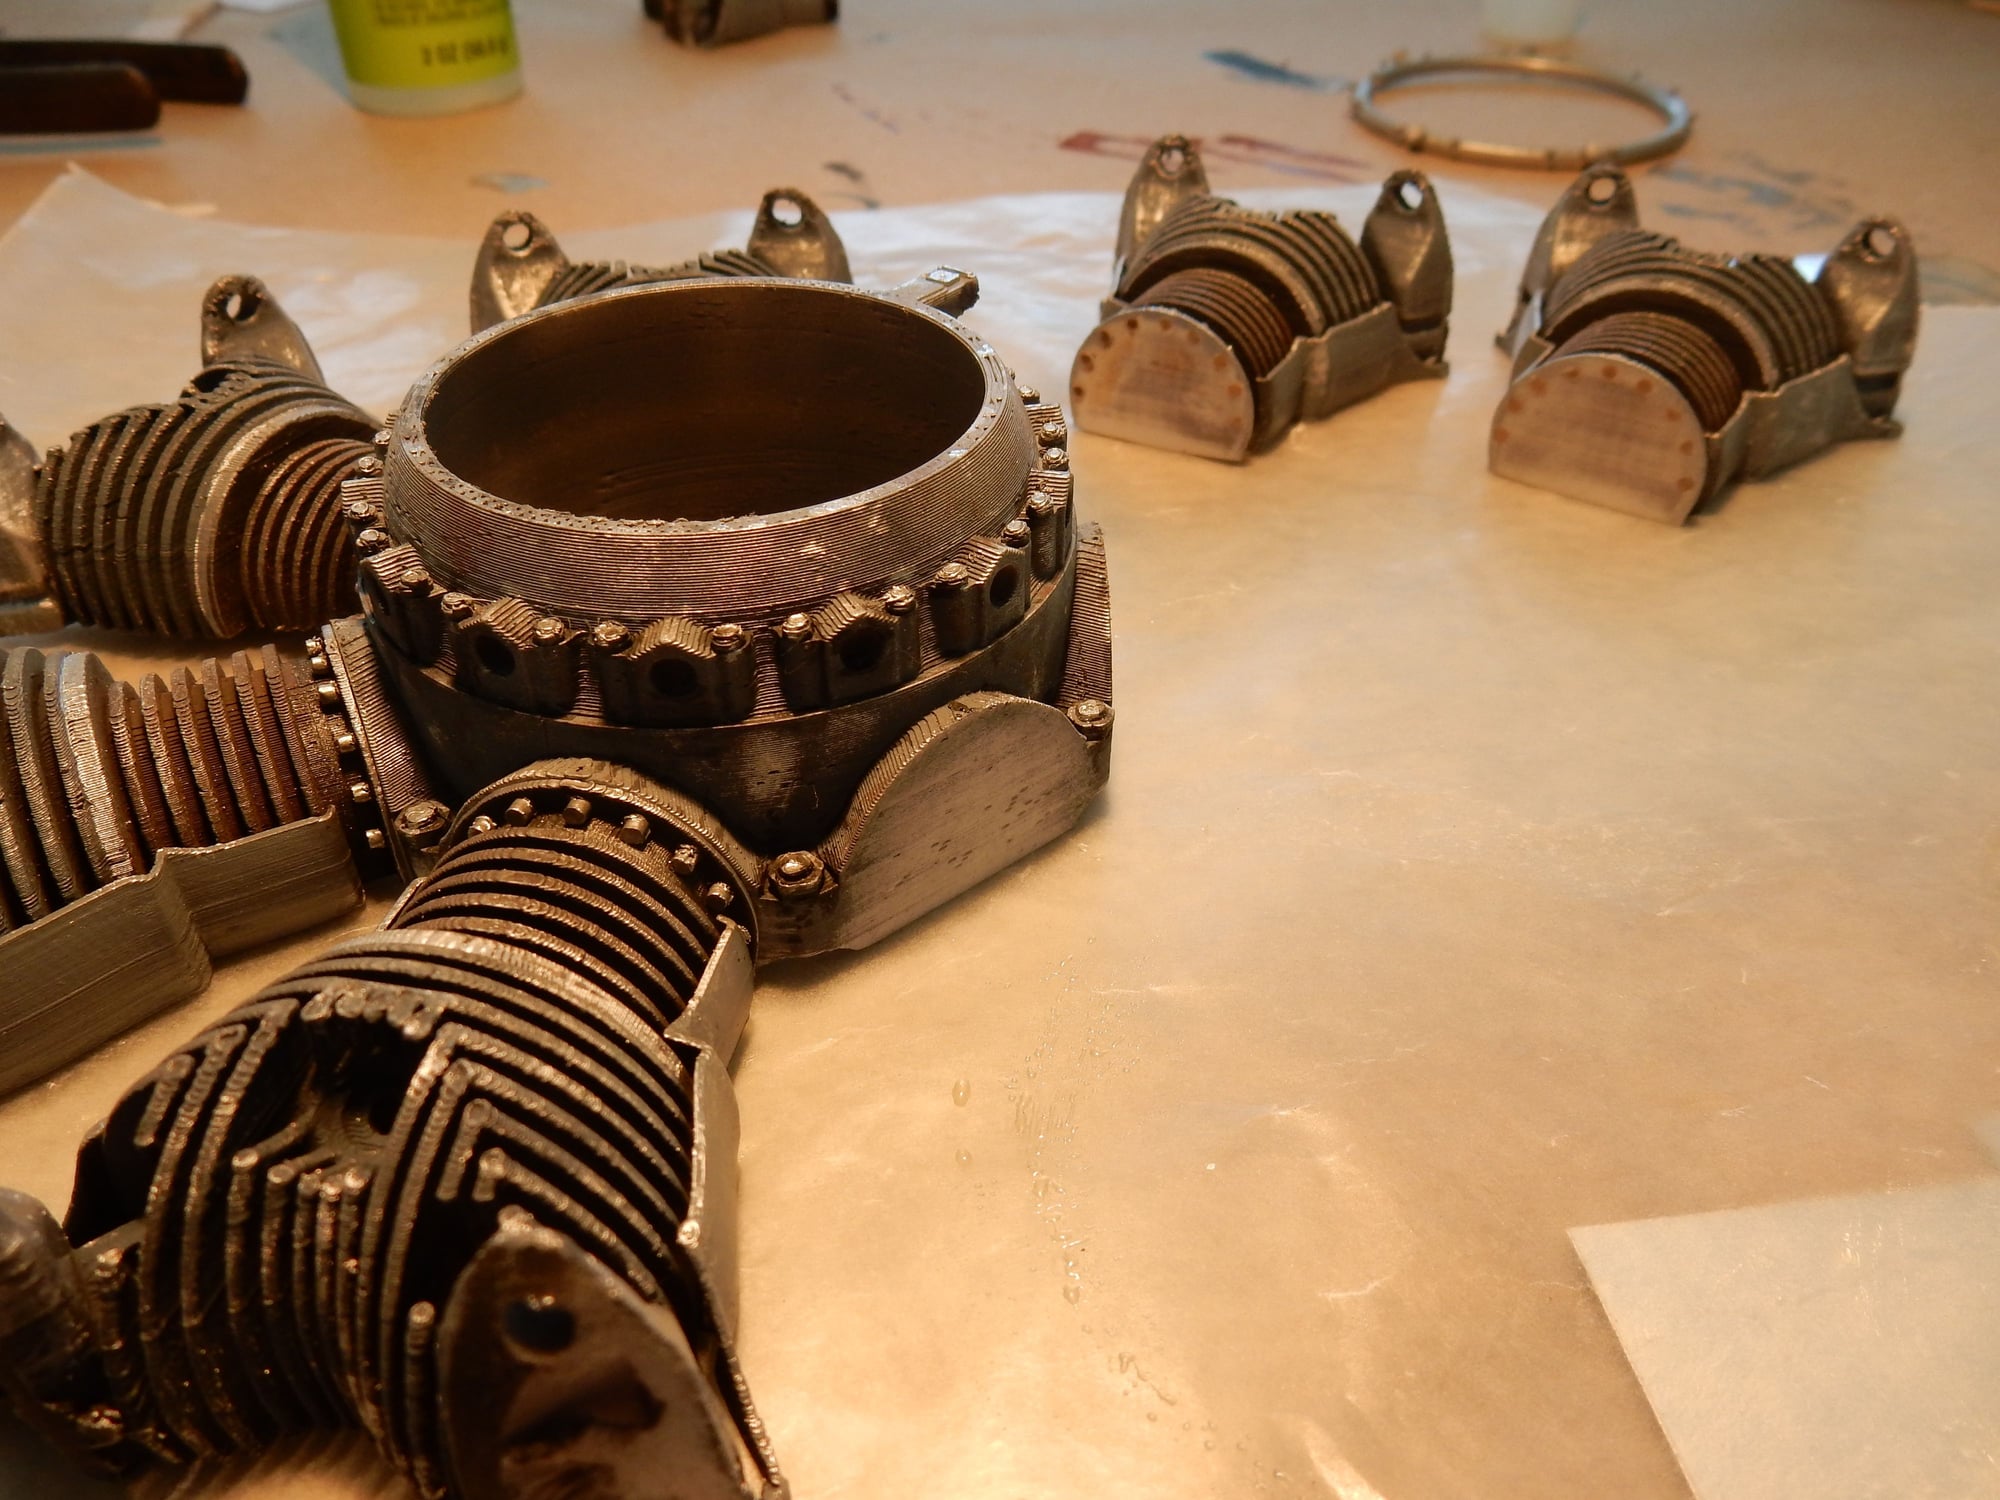
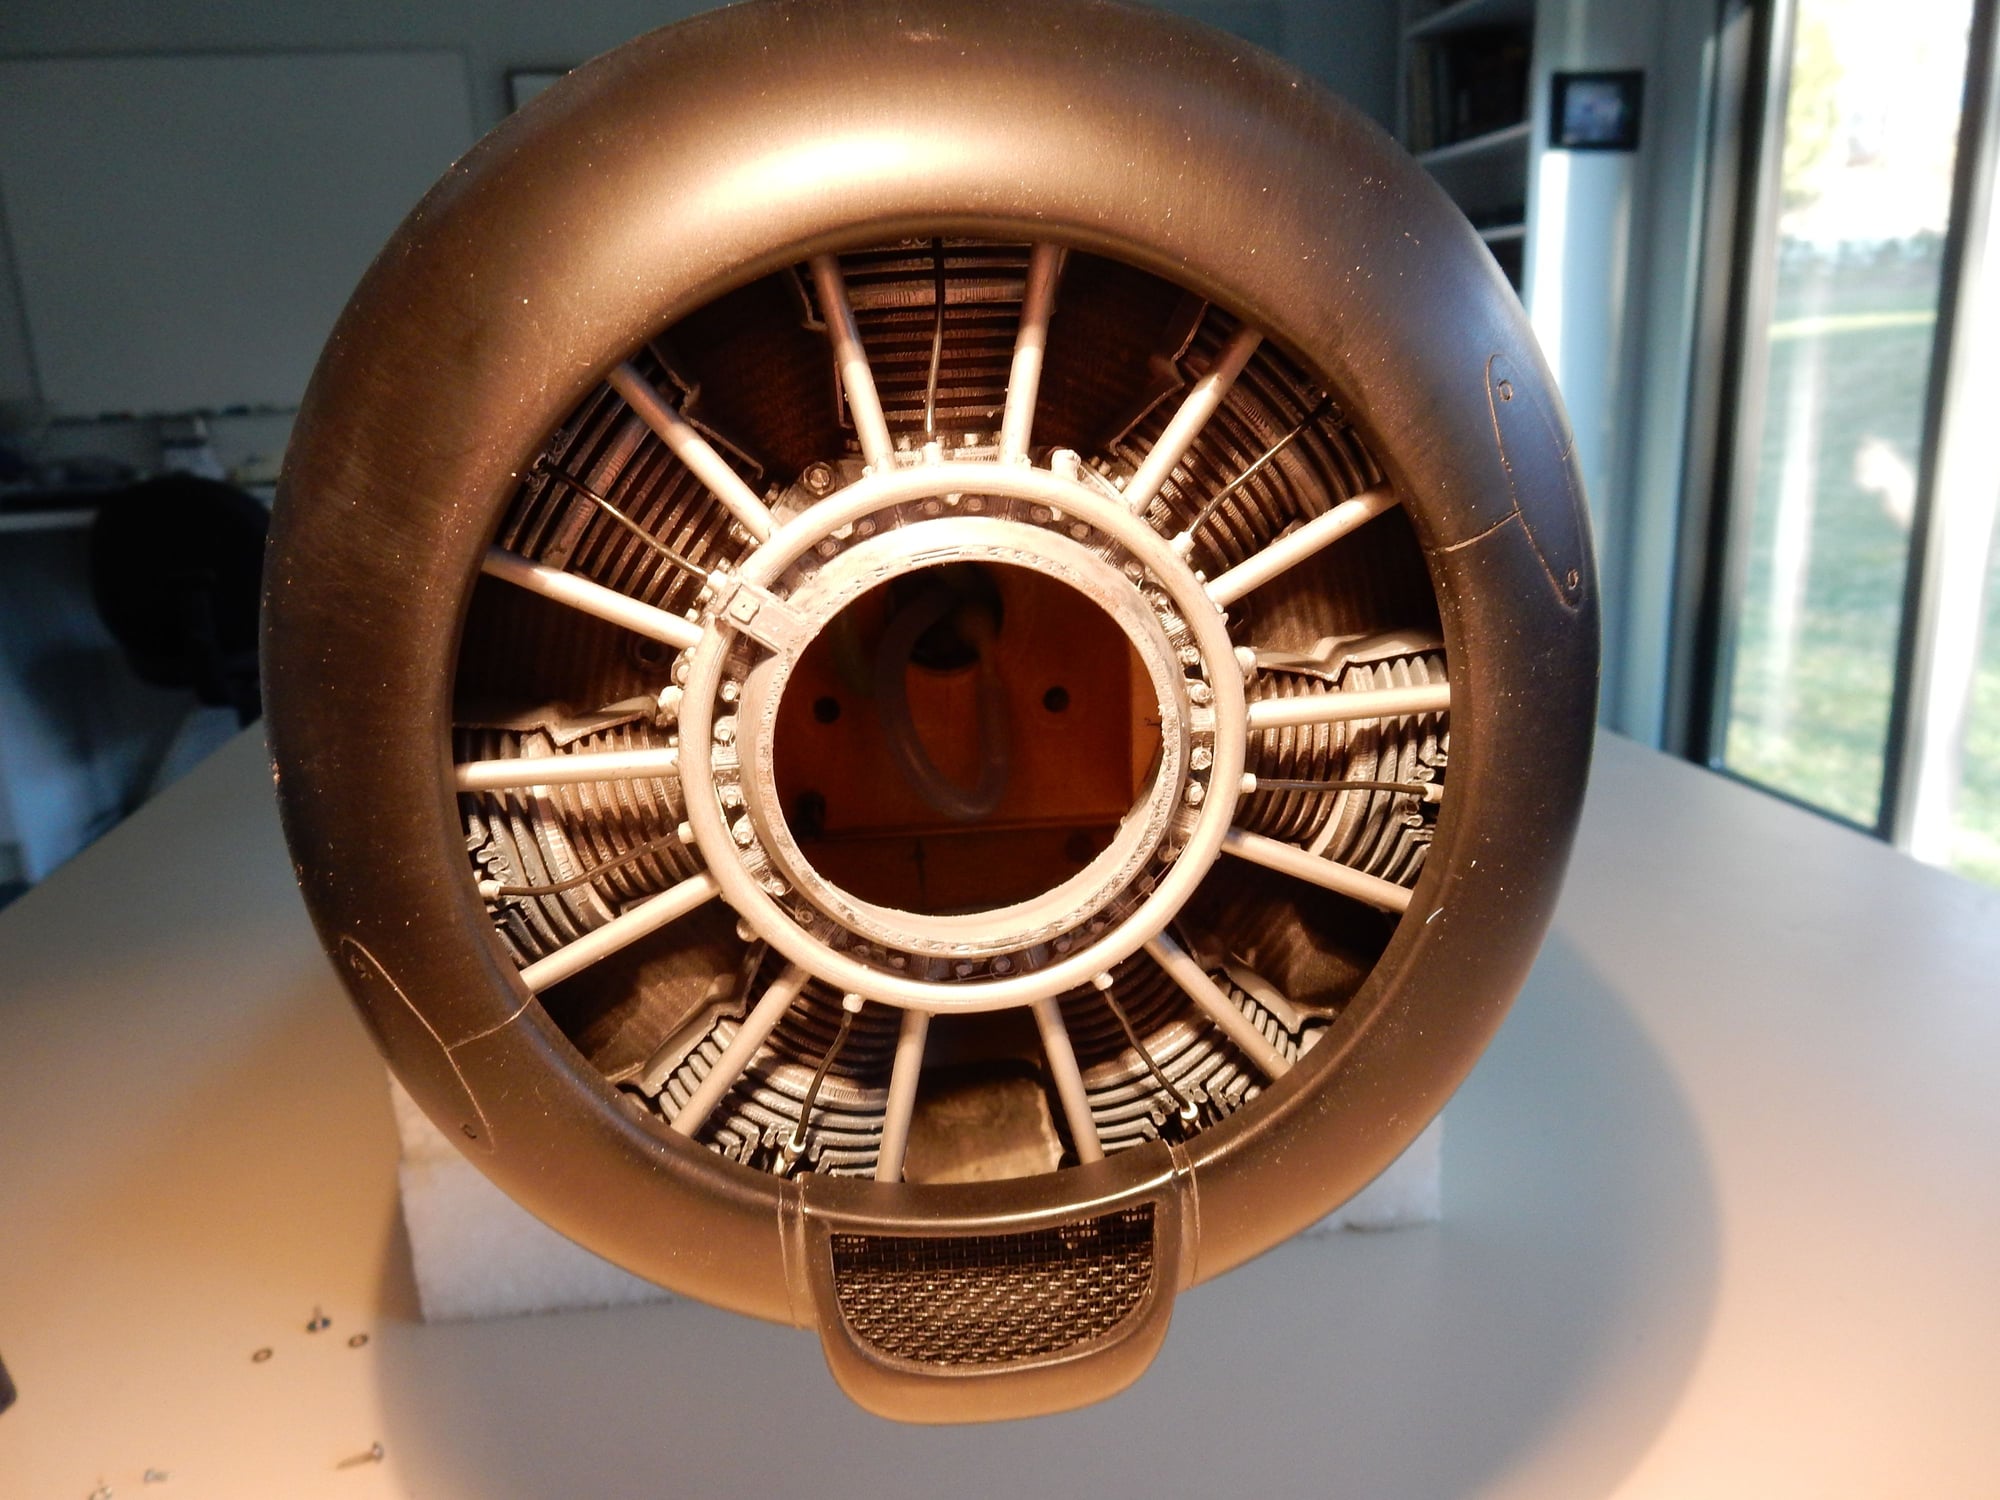
Faux 3-D printed Sakae radial ( Thanks Joe Martinez!) taped in place on clear styrene backing to adjust fit to inner cowl and see where best to drill forward attachment holes. ( All measurements, etc. to be transfered to final 1/8th ply backing.)

1/4" ply frame to push screen against sides & front lip when epoxied in place. Saran Wrap facilitates frame removal afterwards.
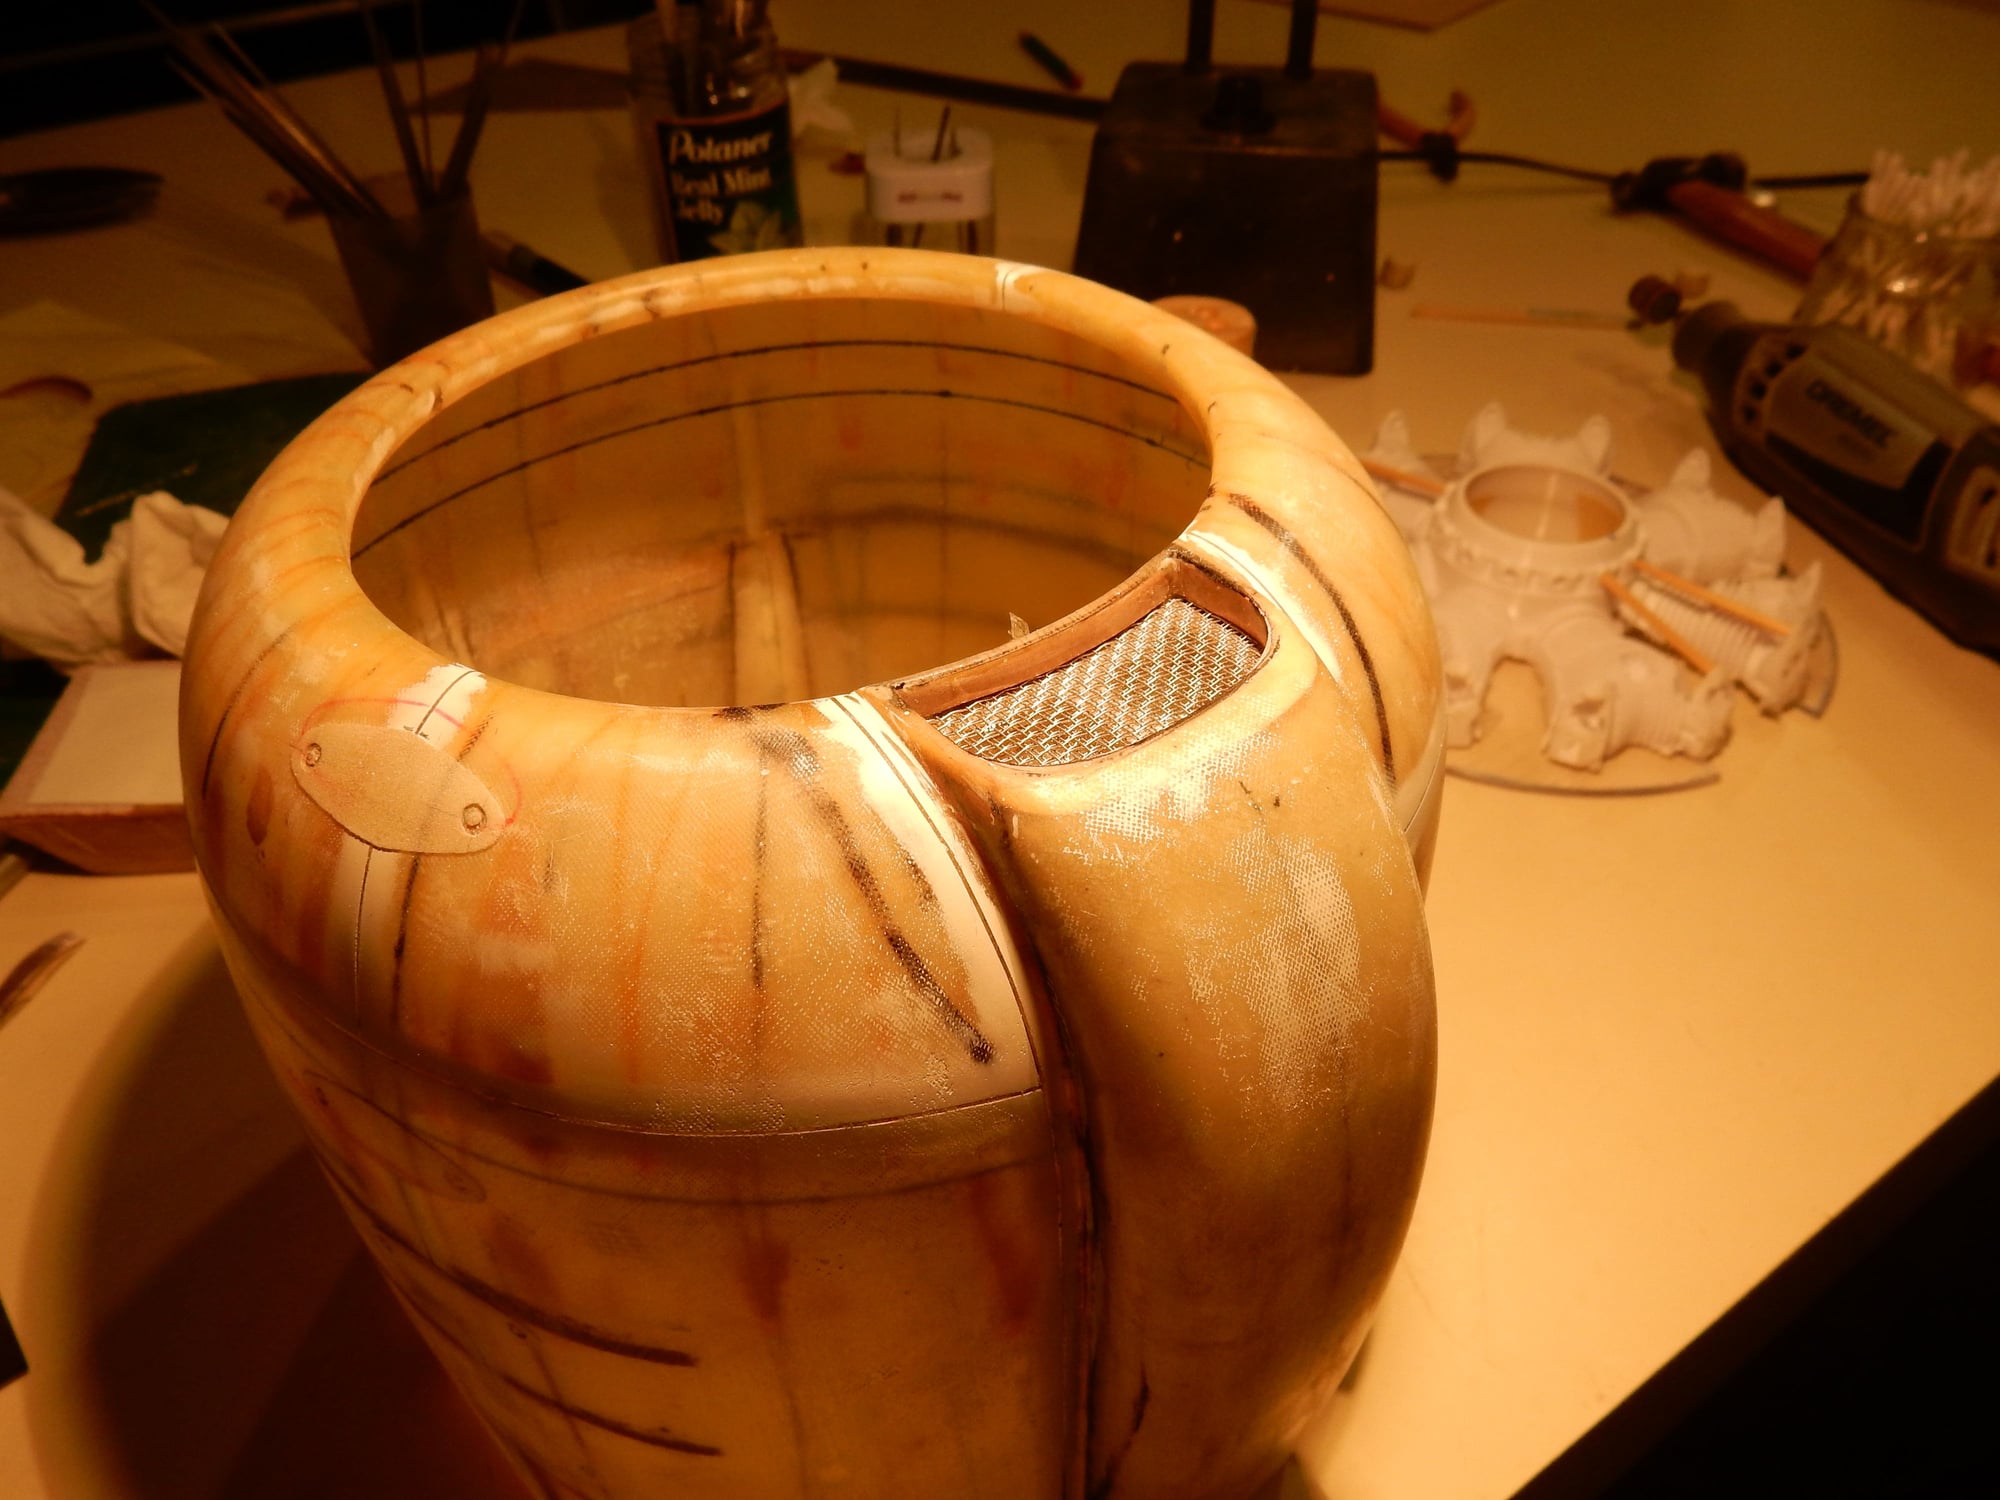
Carb screen in place.
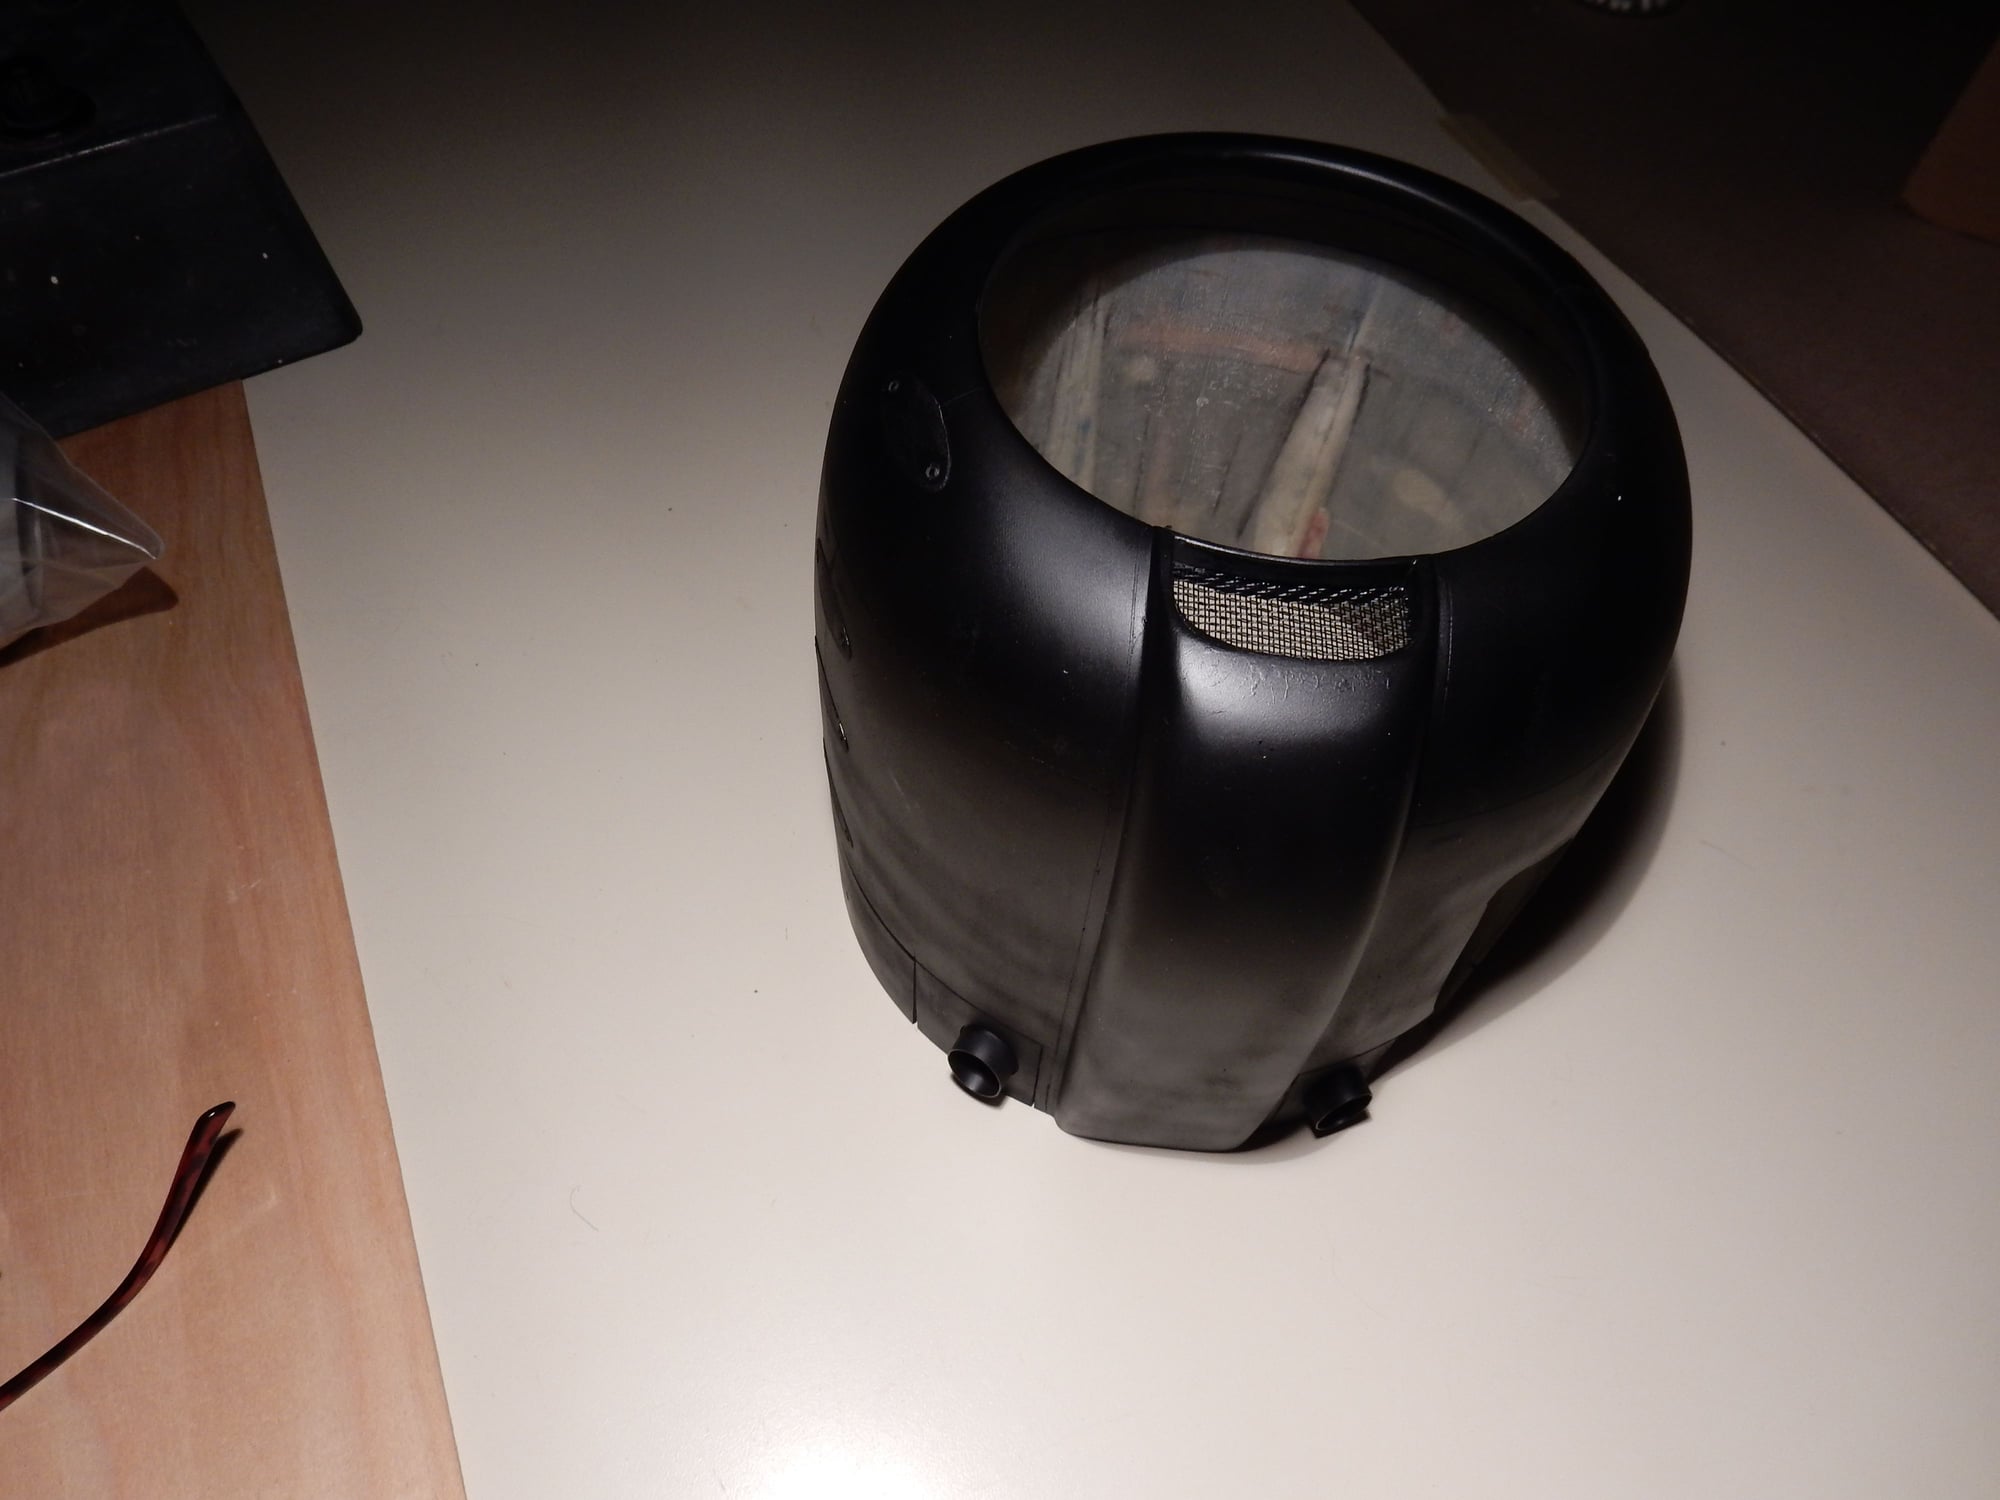
Painted black and ready for Sakae facade.
Carburator screen cemented in place.
Exact fitting intake form w/ backstop depth stop.
Form vaselined and inserted up to stop.
Bondo troweled in. After curing, everything sanded and faired in to a smooth inlet transition after this photo was taken.
Faux 3-D printed Sakae radial ( Thanks Joe Martinez!) taped in place on clear styrene backing to adjust fit to inner cowl and see where best to drill forward attachment holes. ( All measurements, etc. to be transfered to final 1/8th ply backing.)
1/4" ply frame to push screen against sides & front lip when epoxied in place. Saran Wrap facilitates frame removal afterwards.
Carb screen in place.
Painted black and ready for Sakae facade.
The following users liked this post:
Joe. (02-11-2020)
02-19-2020, 02:23 PM
#287
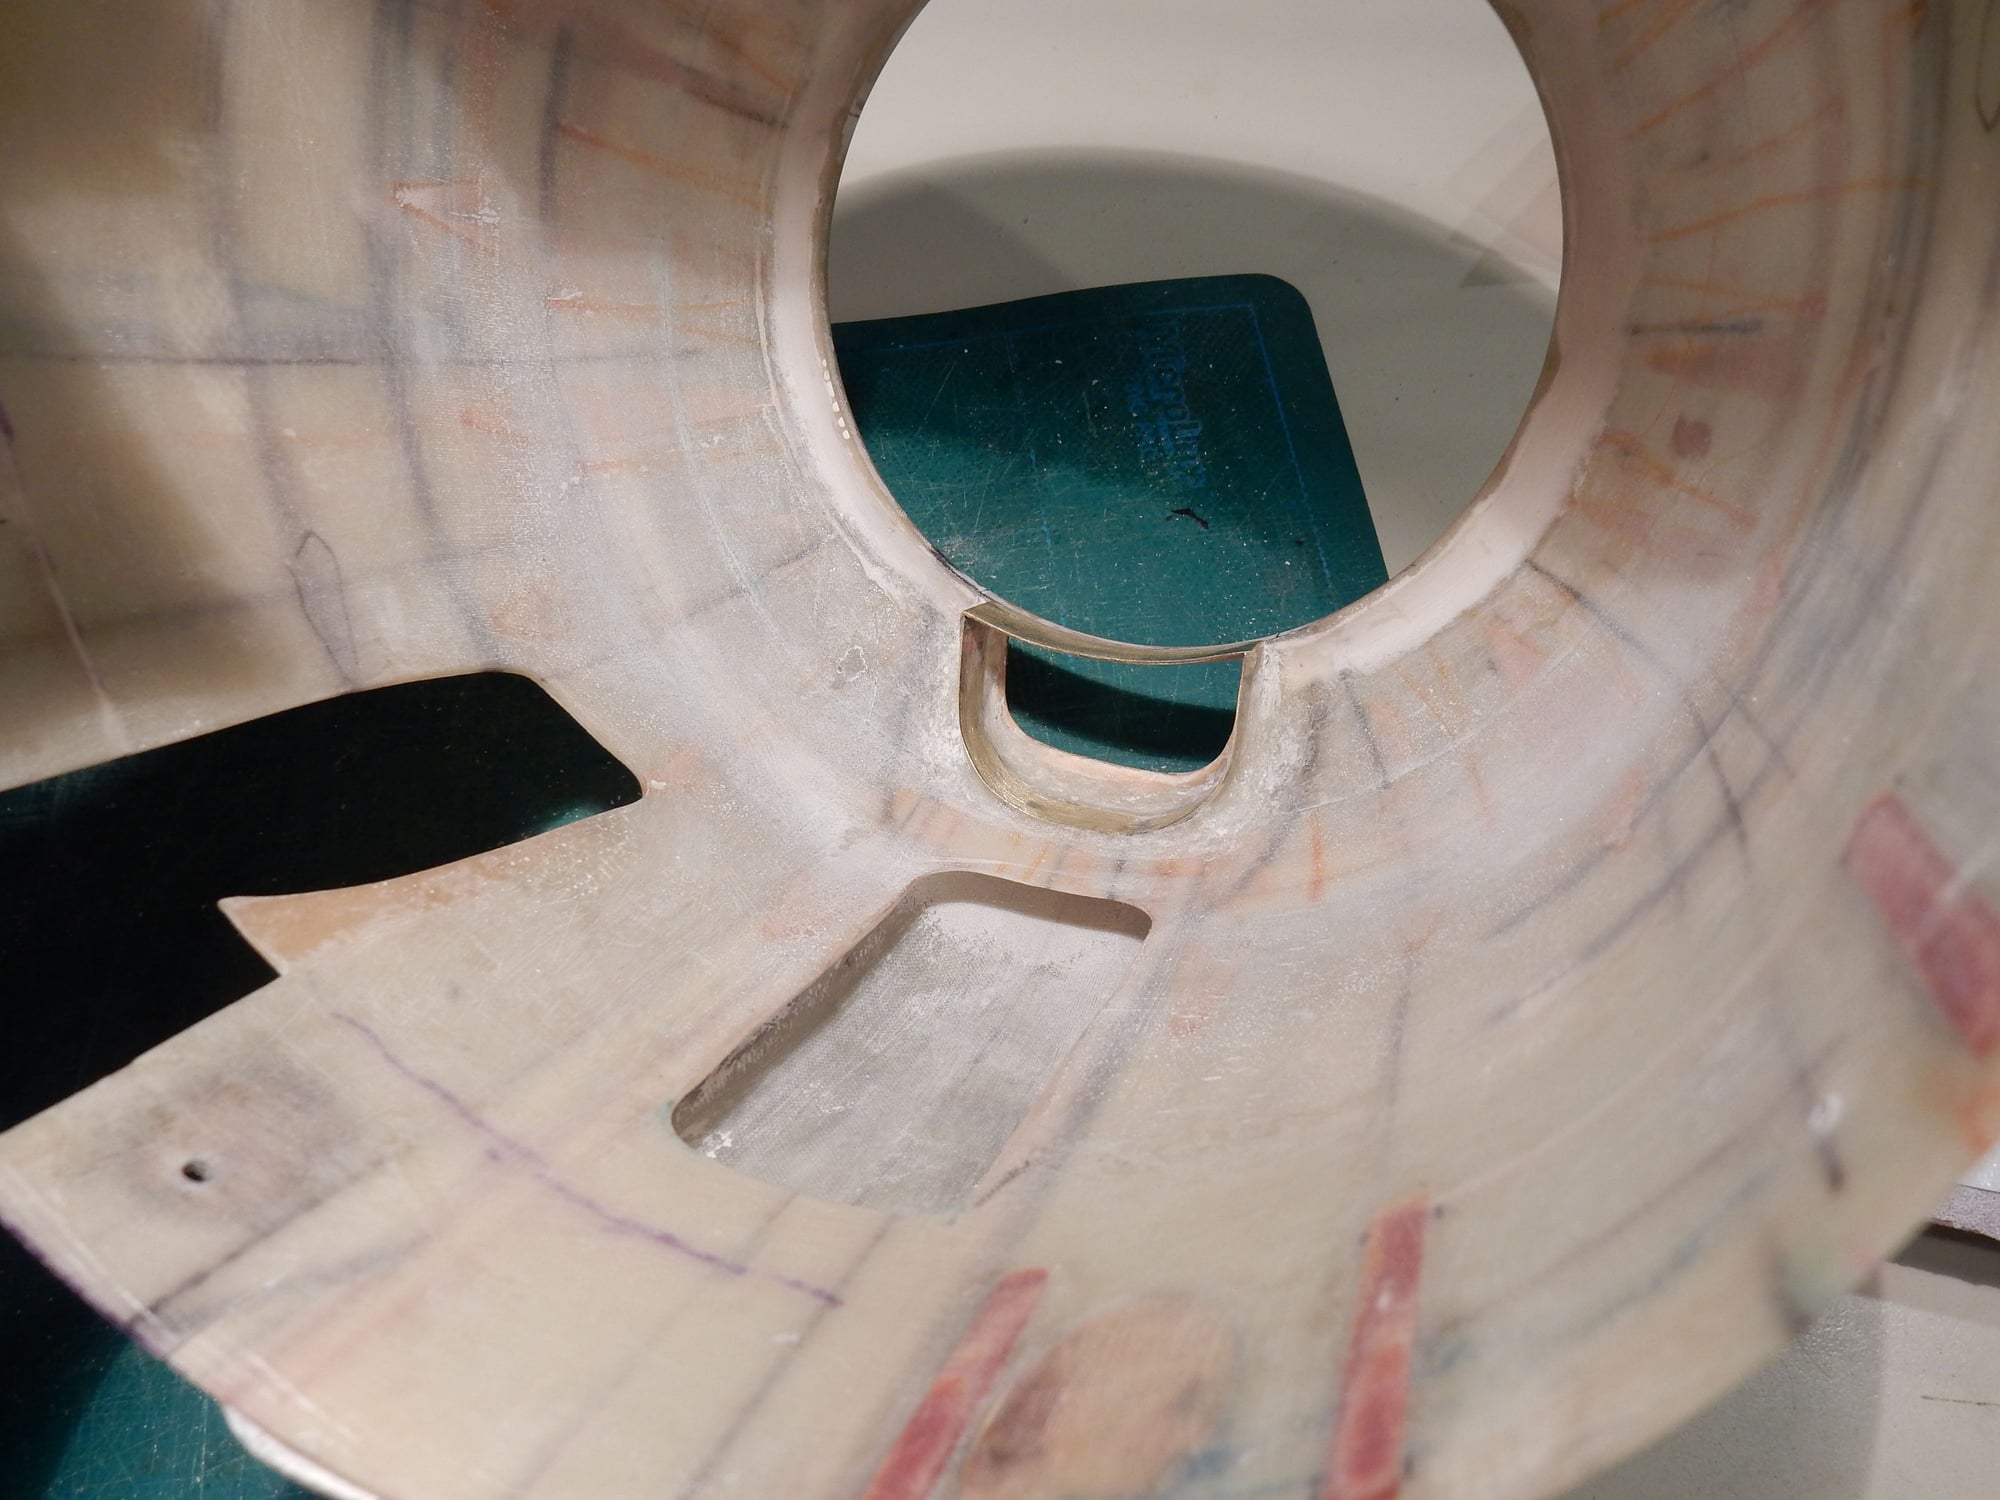
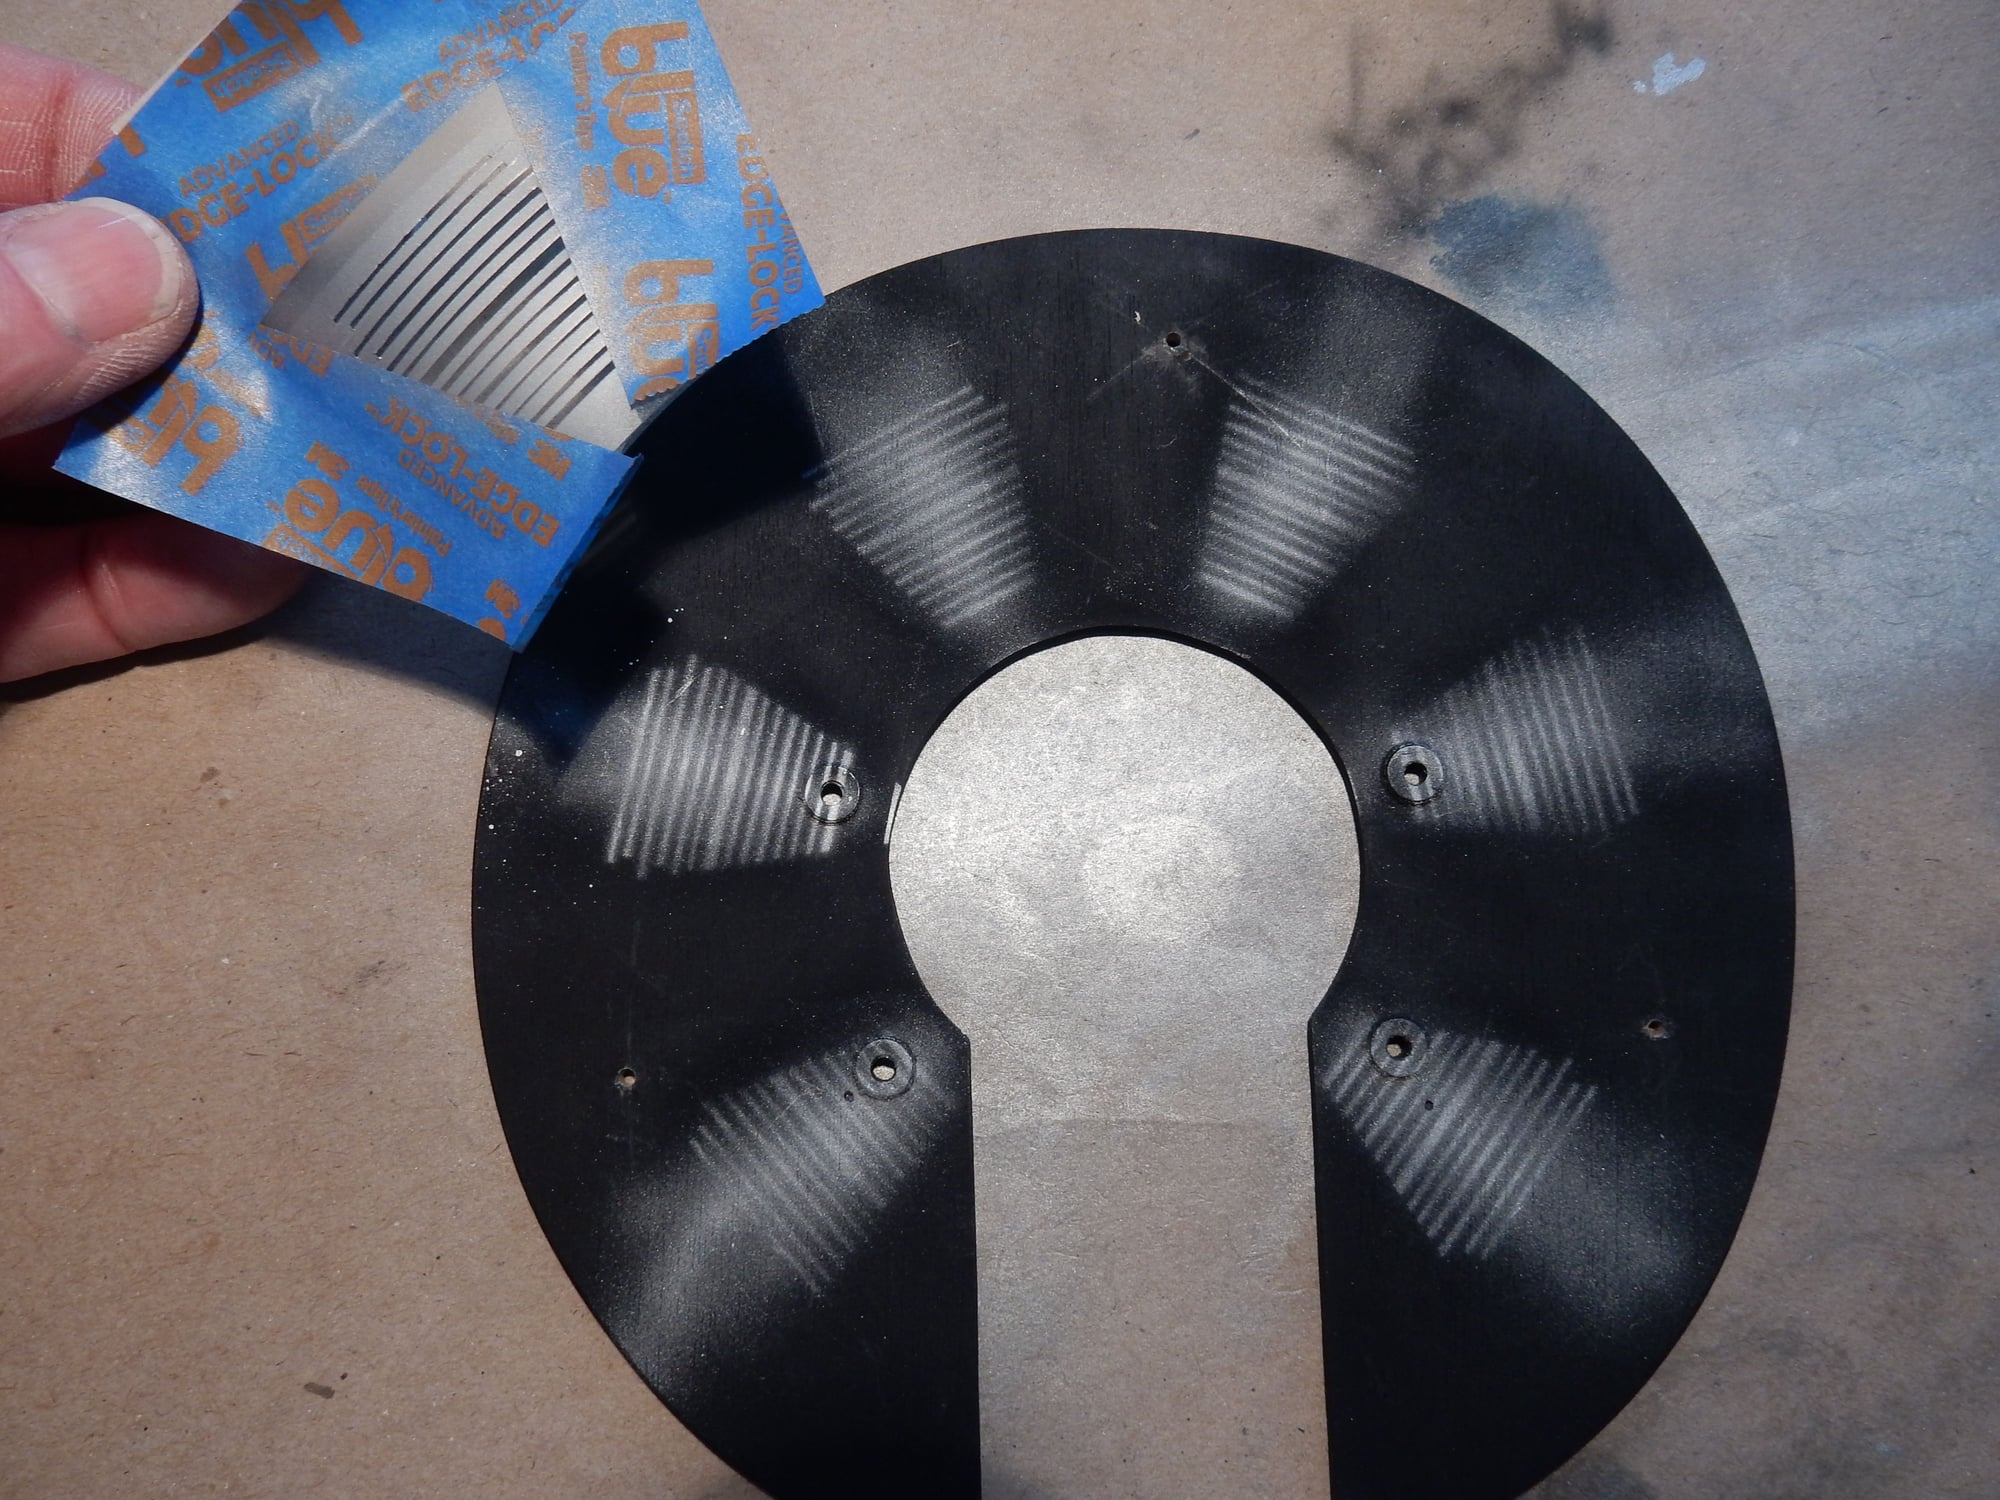
Clear styrene backing with cylinder row taped in place to determine exact center location in cowl.
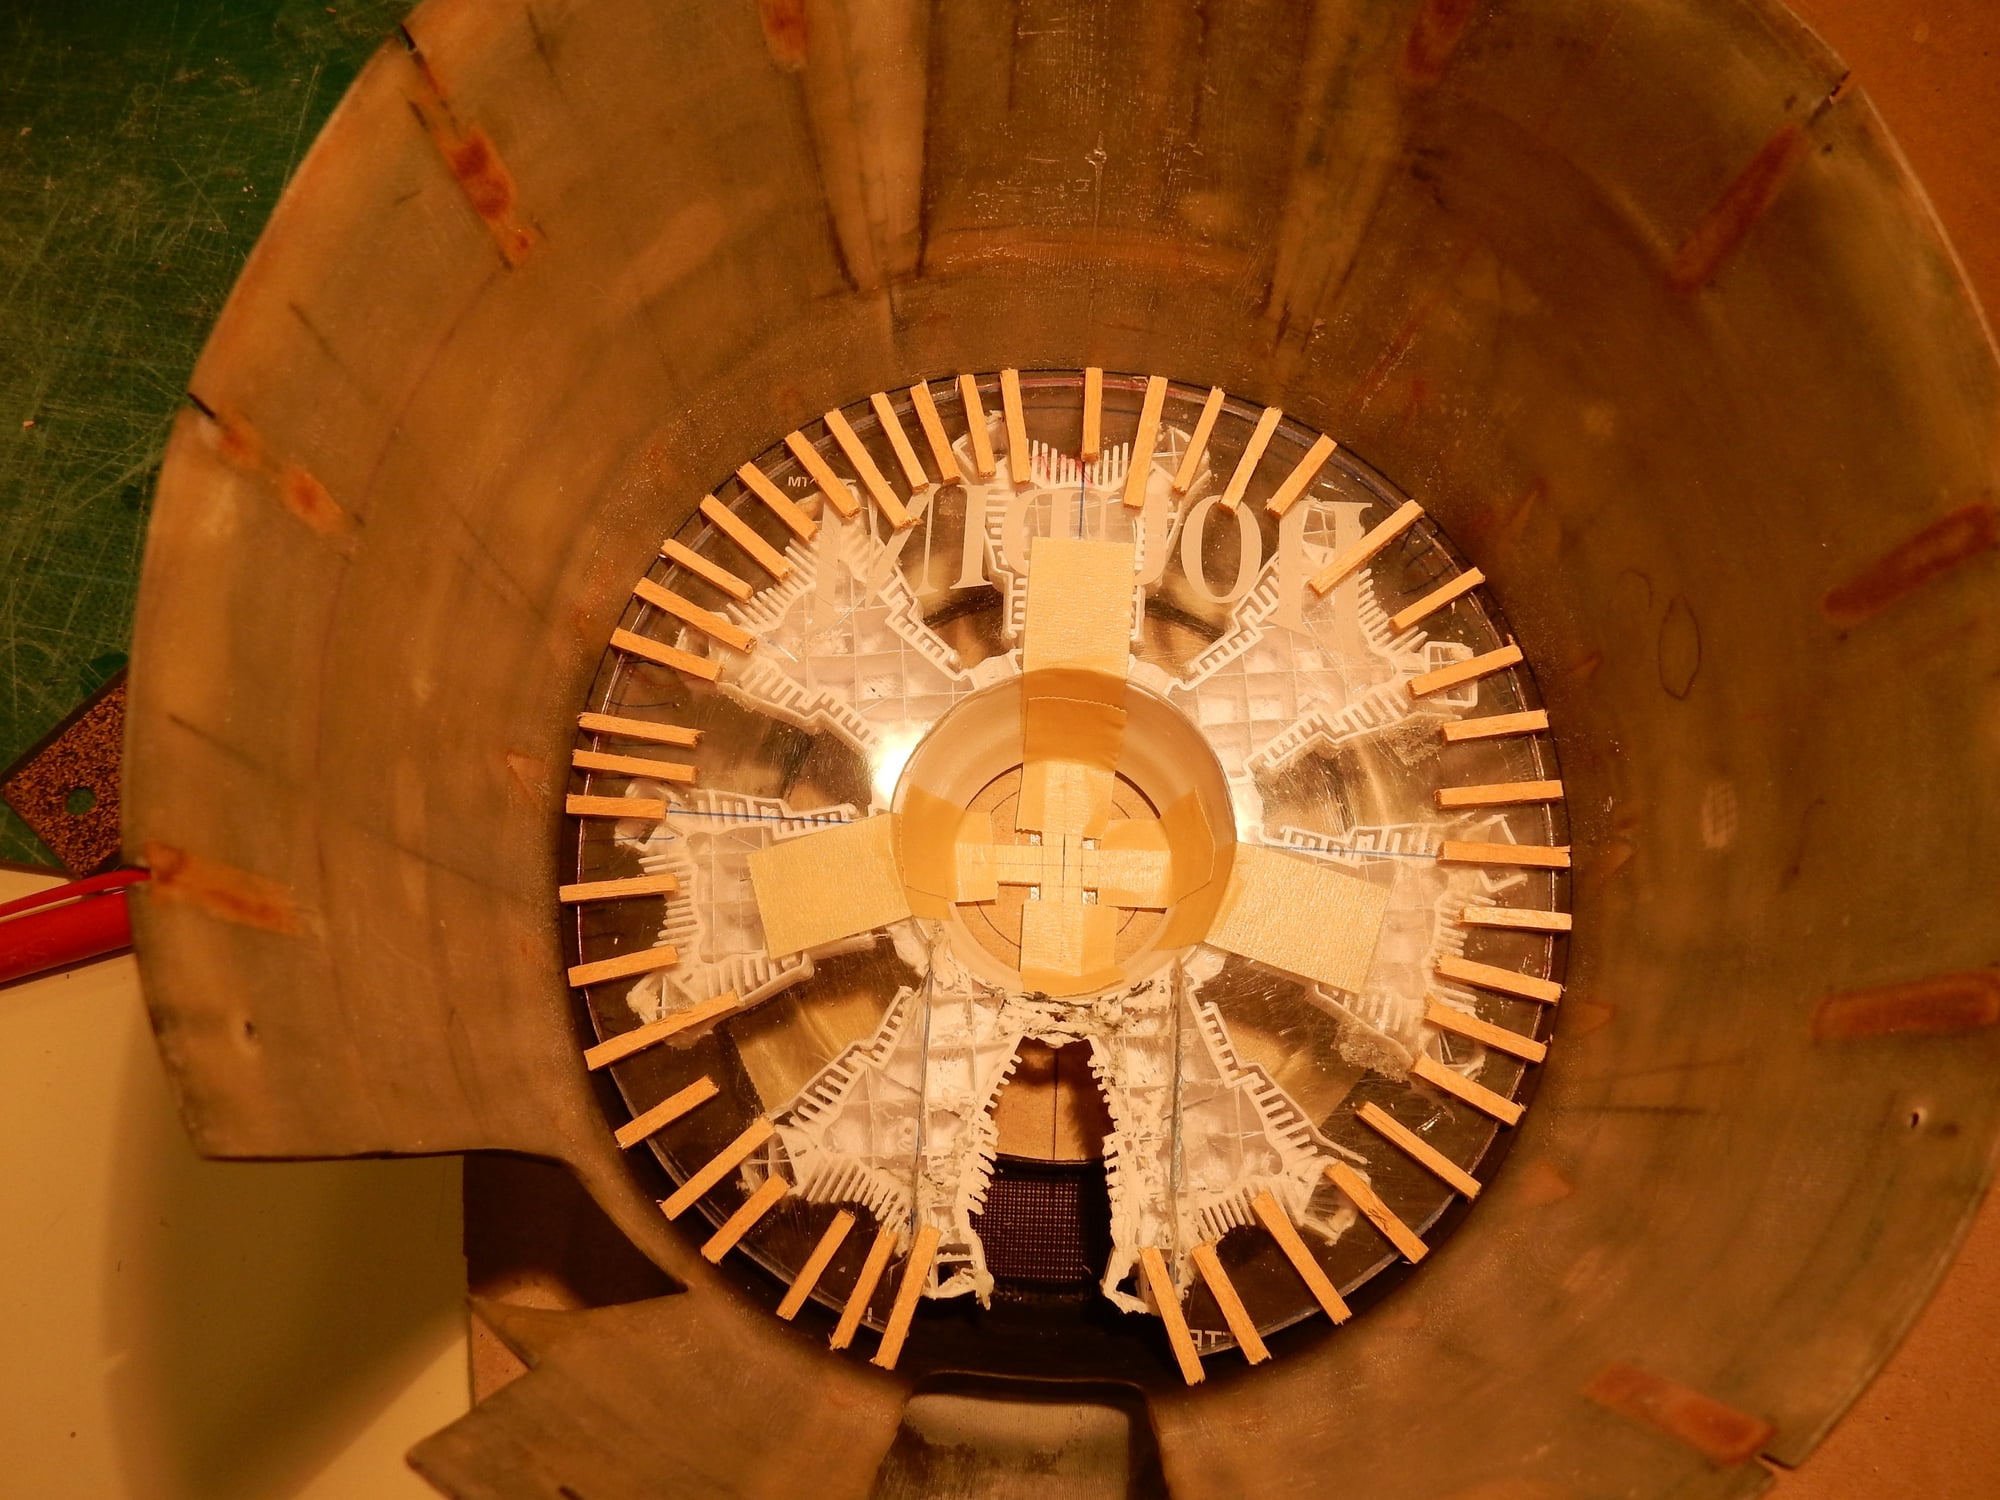
Once dead center was found, small pieces of balsa sticks glued to styrene when they touched cowl inside. Once pulled, outline was transferred to 1/8th ply to serve as cylinder backing.
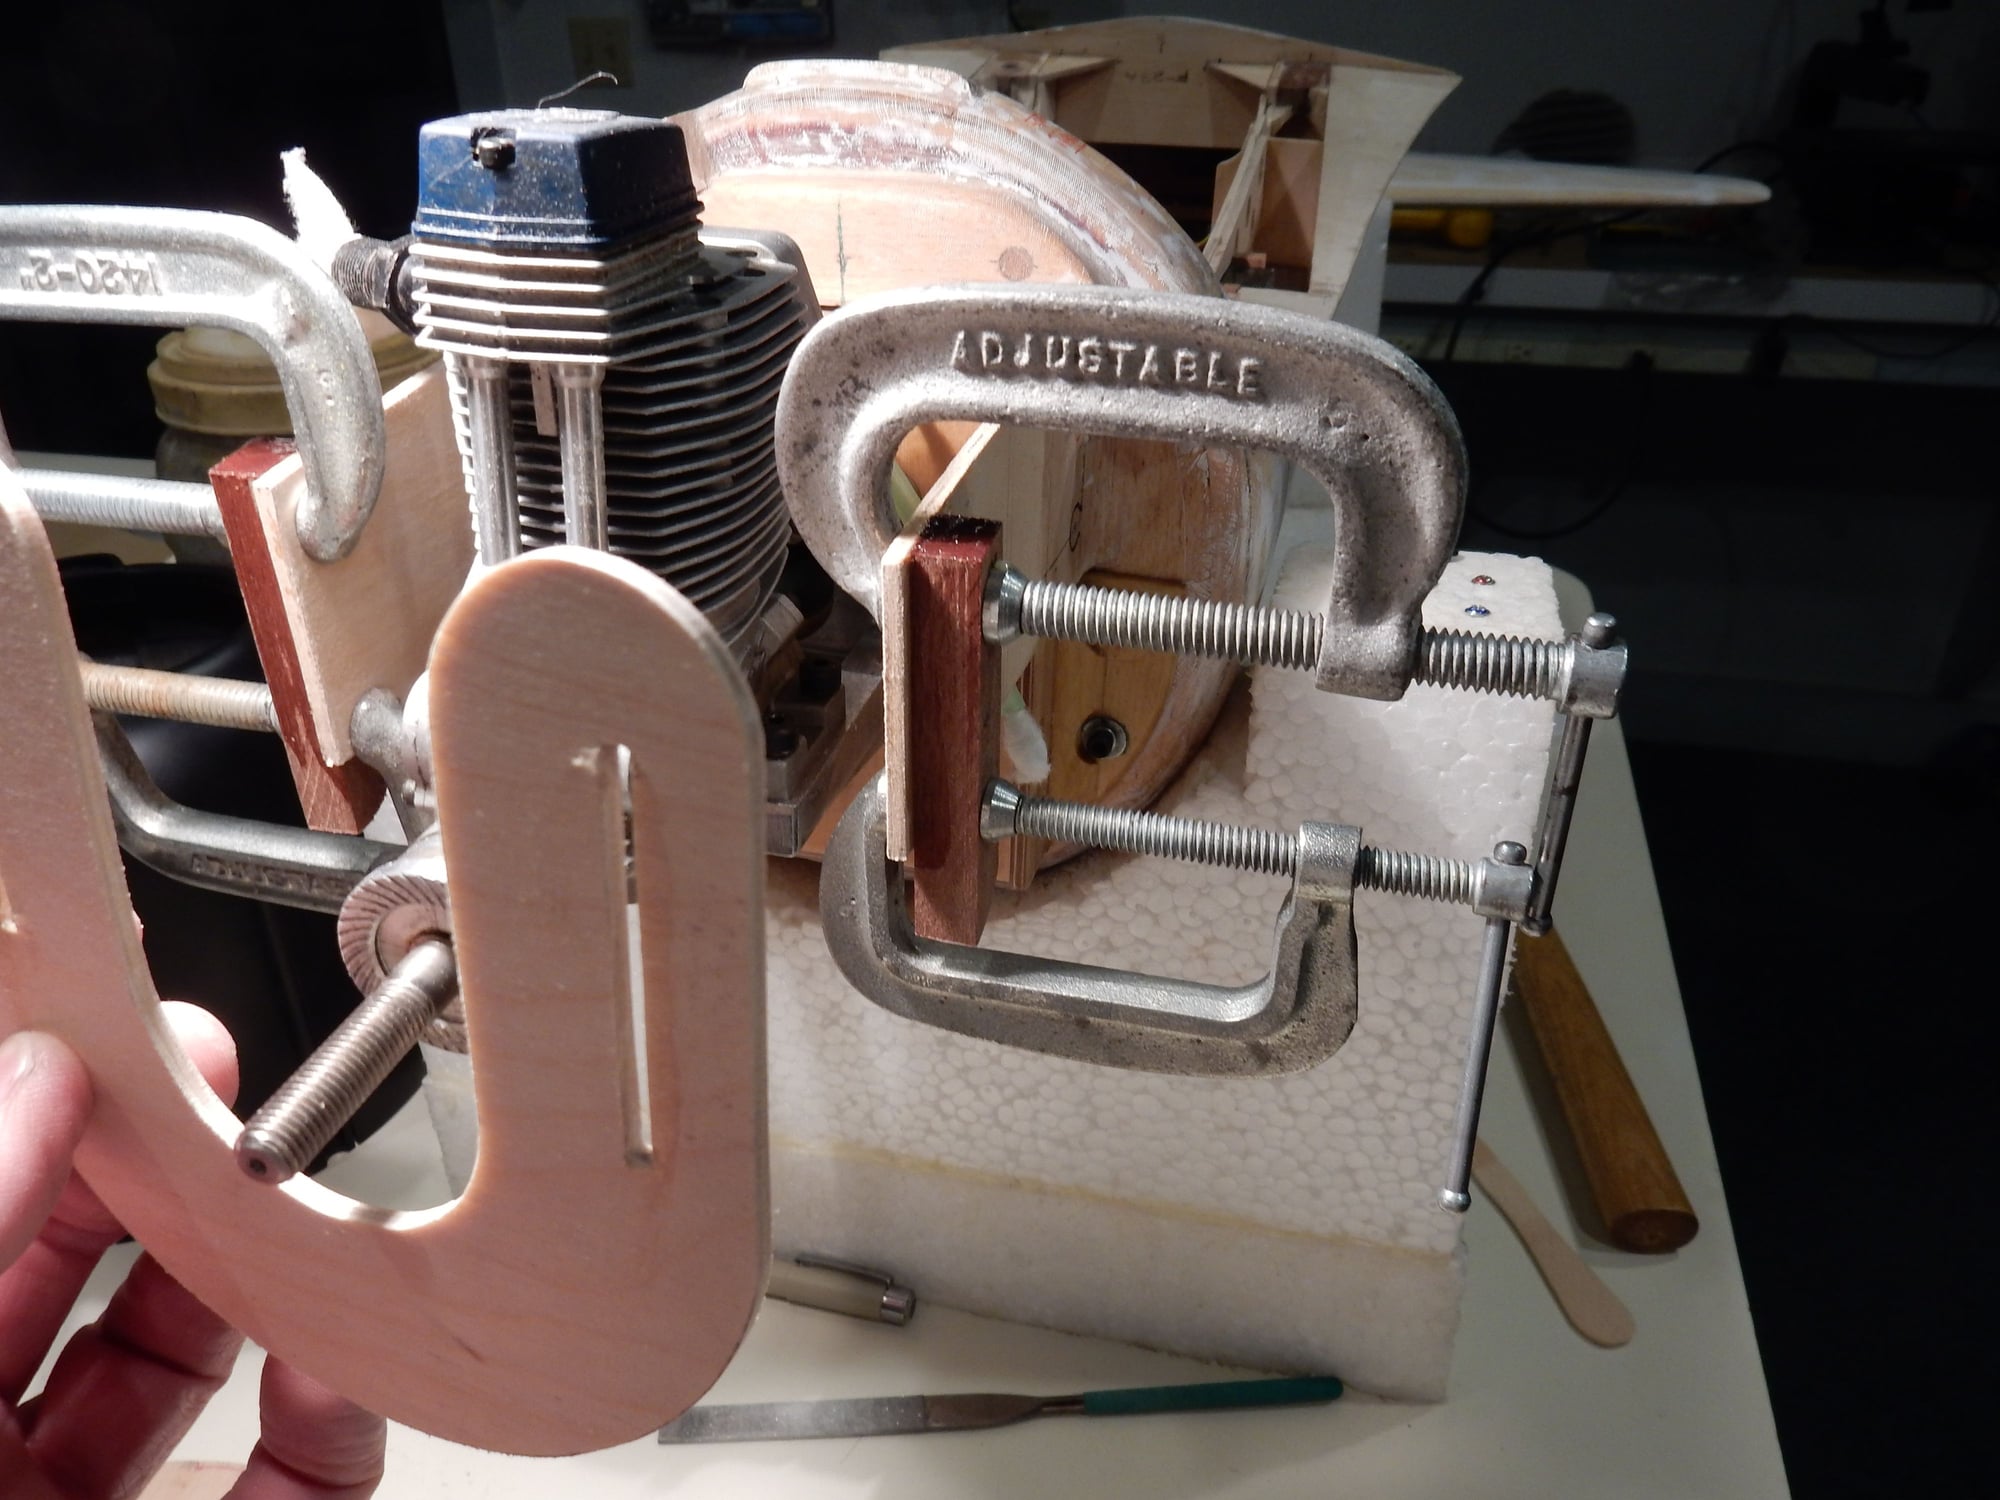
"U" shaped sub-backing to mount ply cylinder backing. Maple "cheek" blocks epoxied & clamped in place. This whole set-up is removable to allow engine, etc. to be removed for engine & fuel tank servicing.
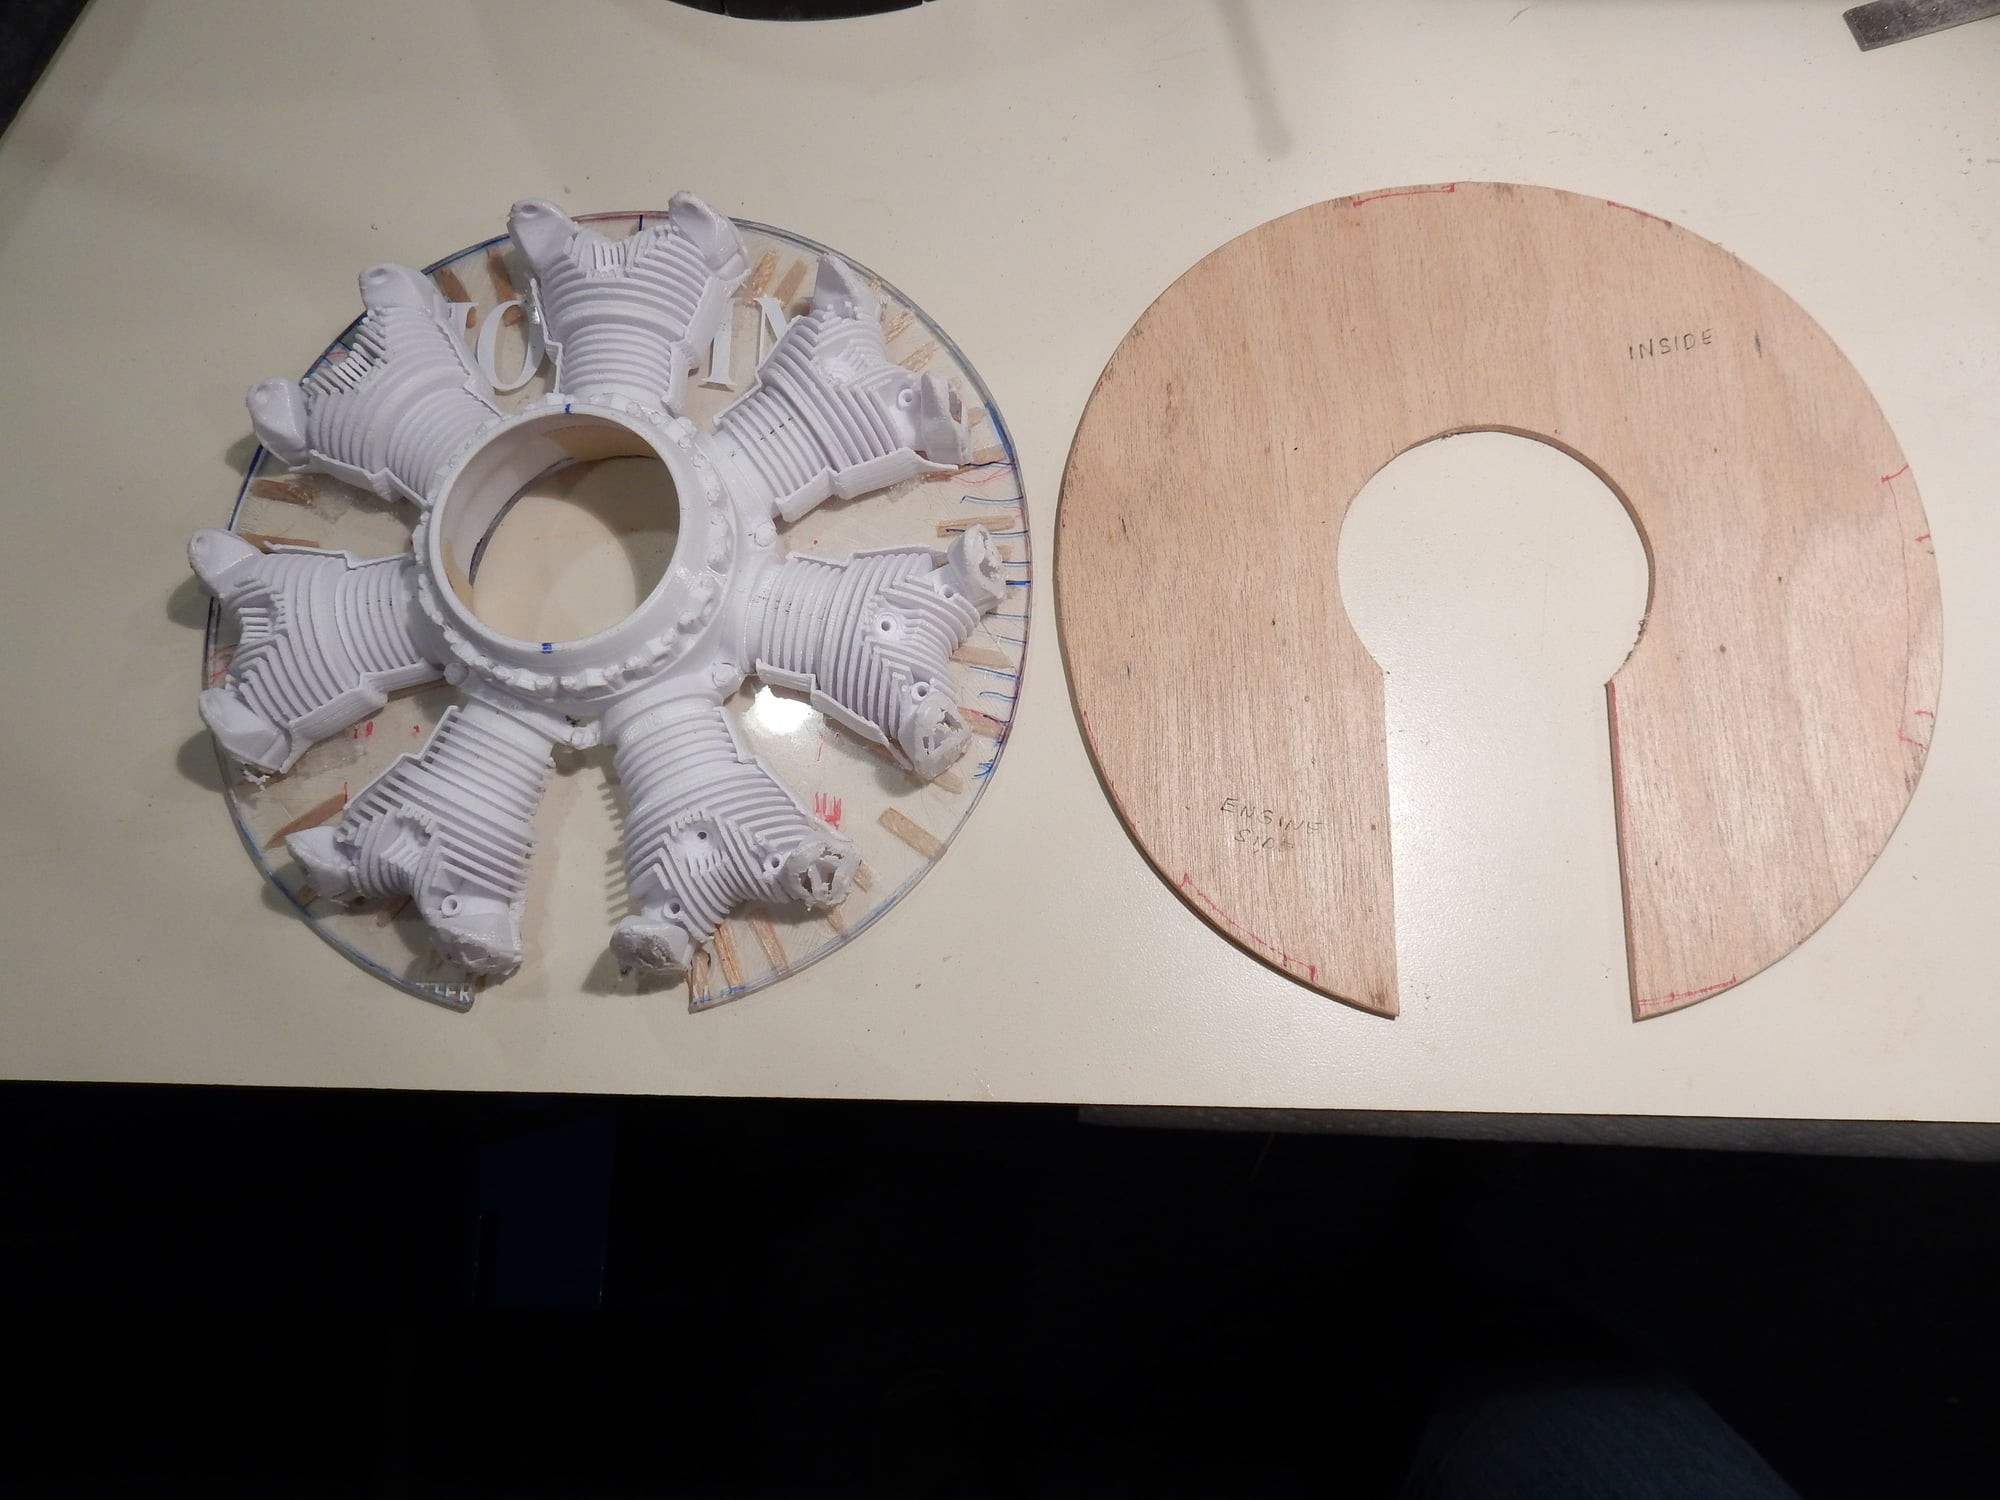
Finished custom-fitted ply cylinder backing ring. ( Styrene backing to be discarded. )
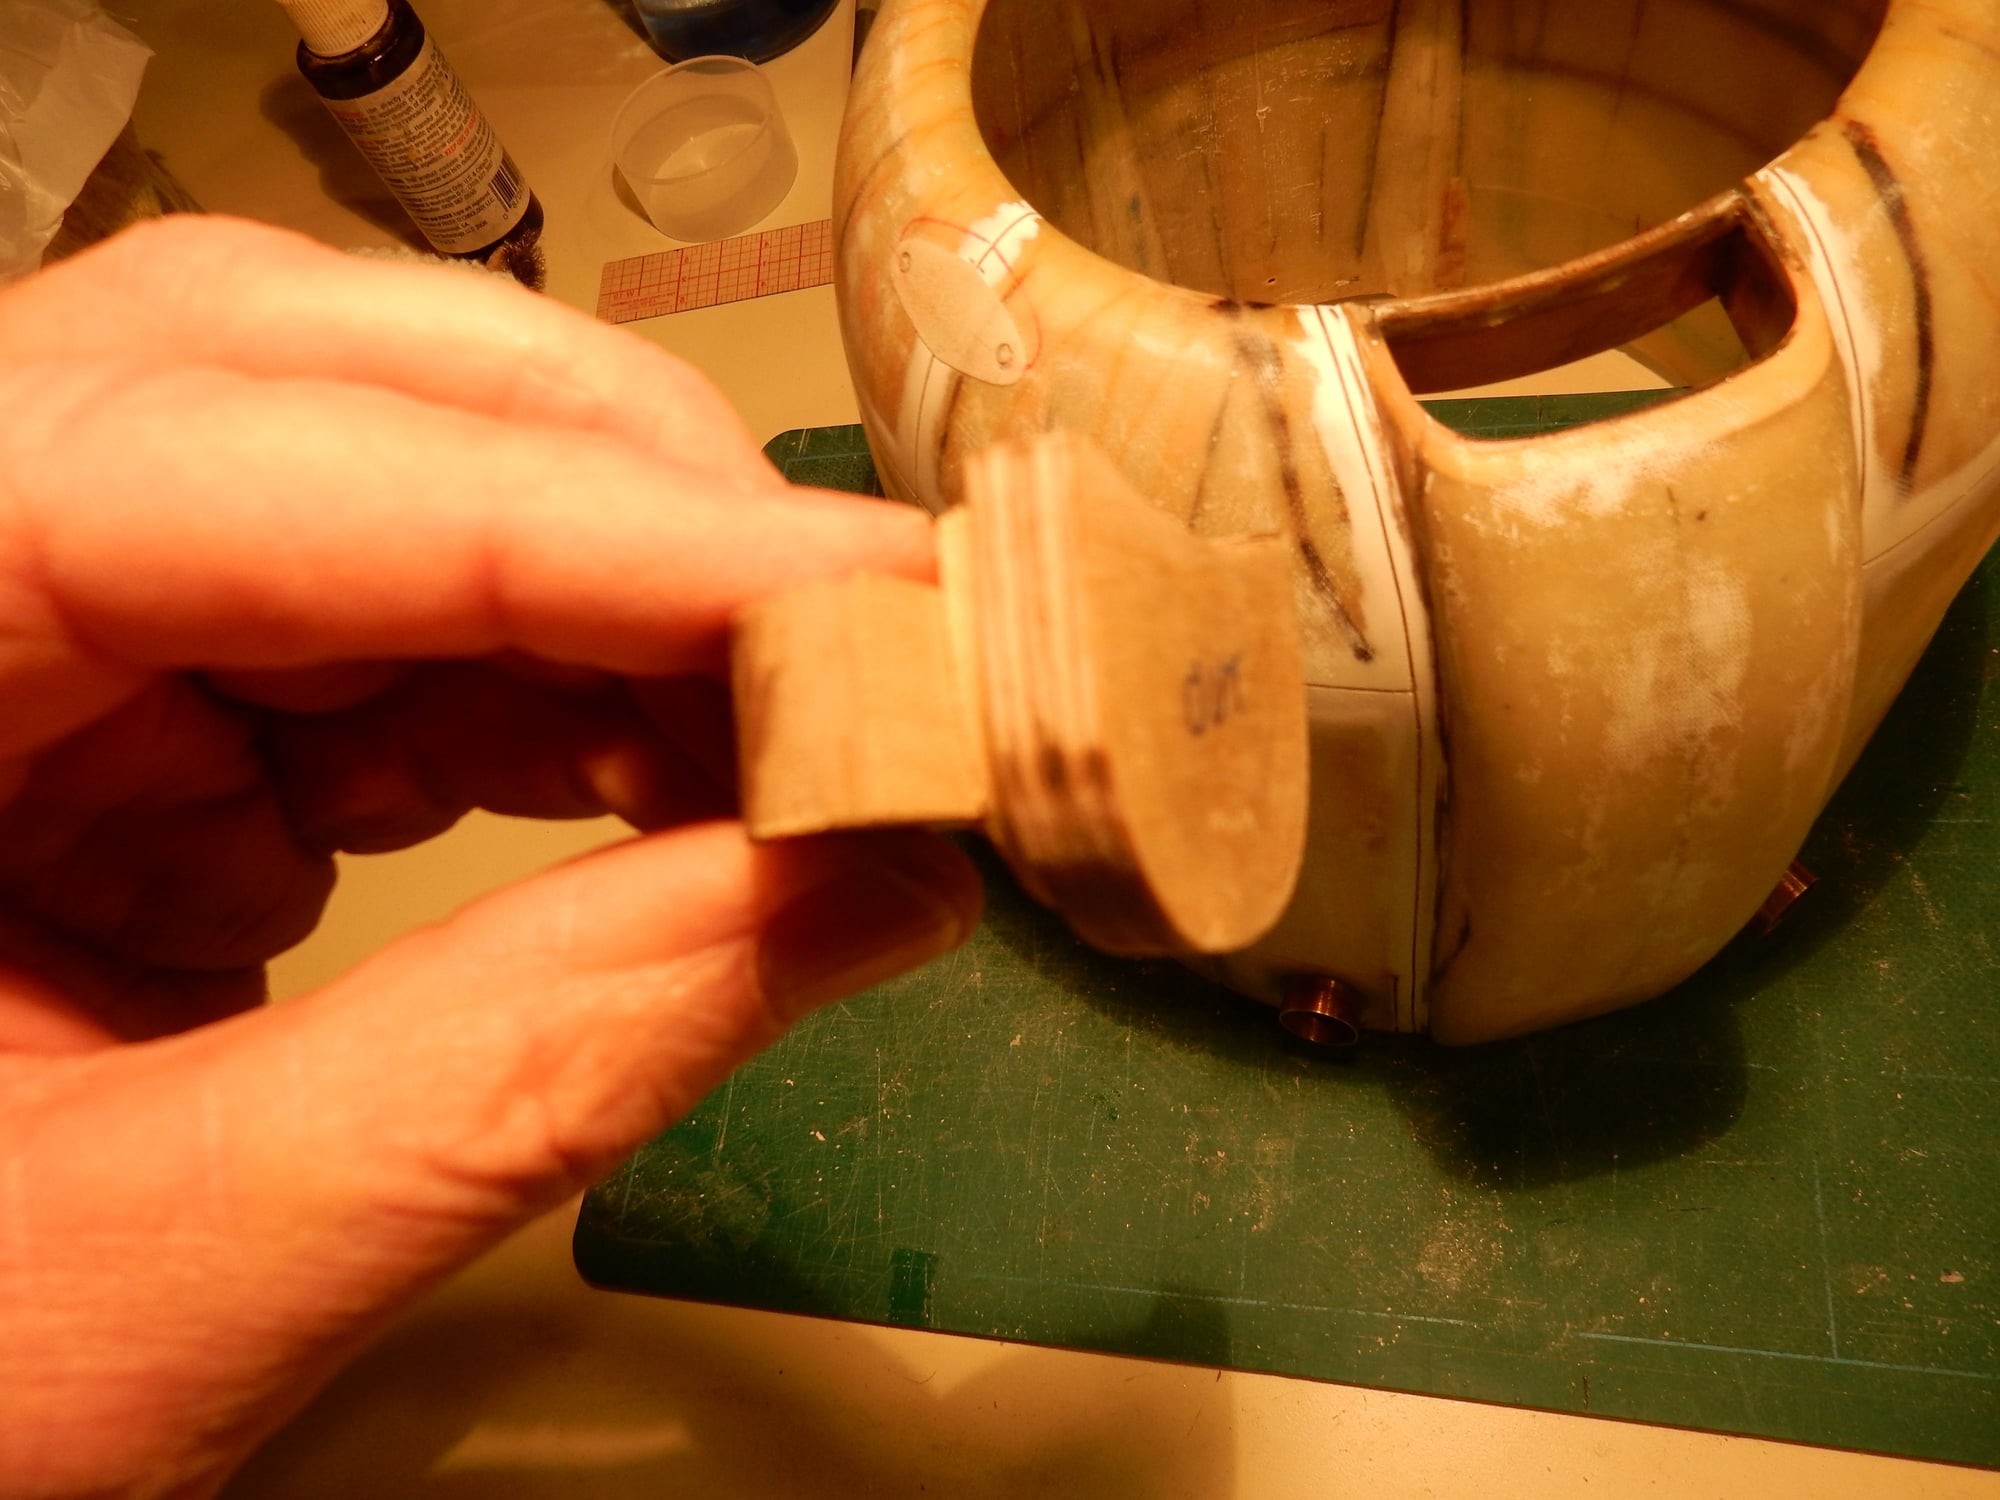
"U"-shaped sub-mount tab & slot mounted.
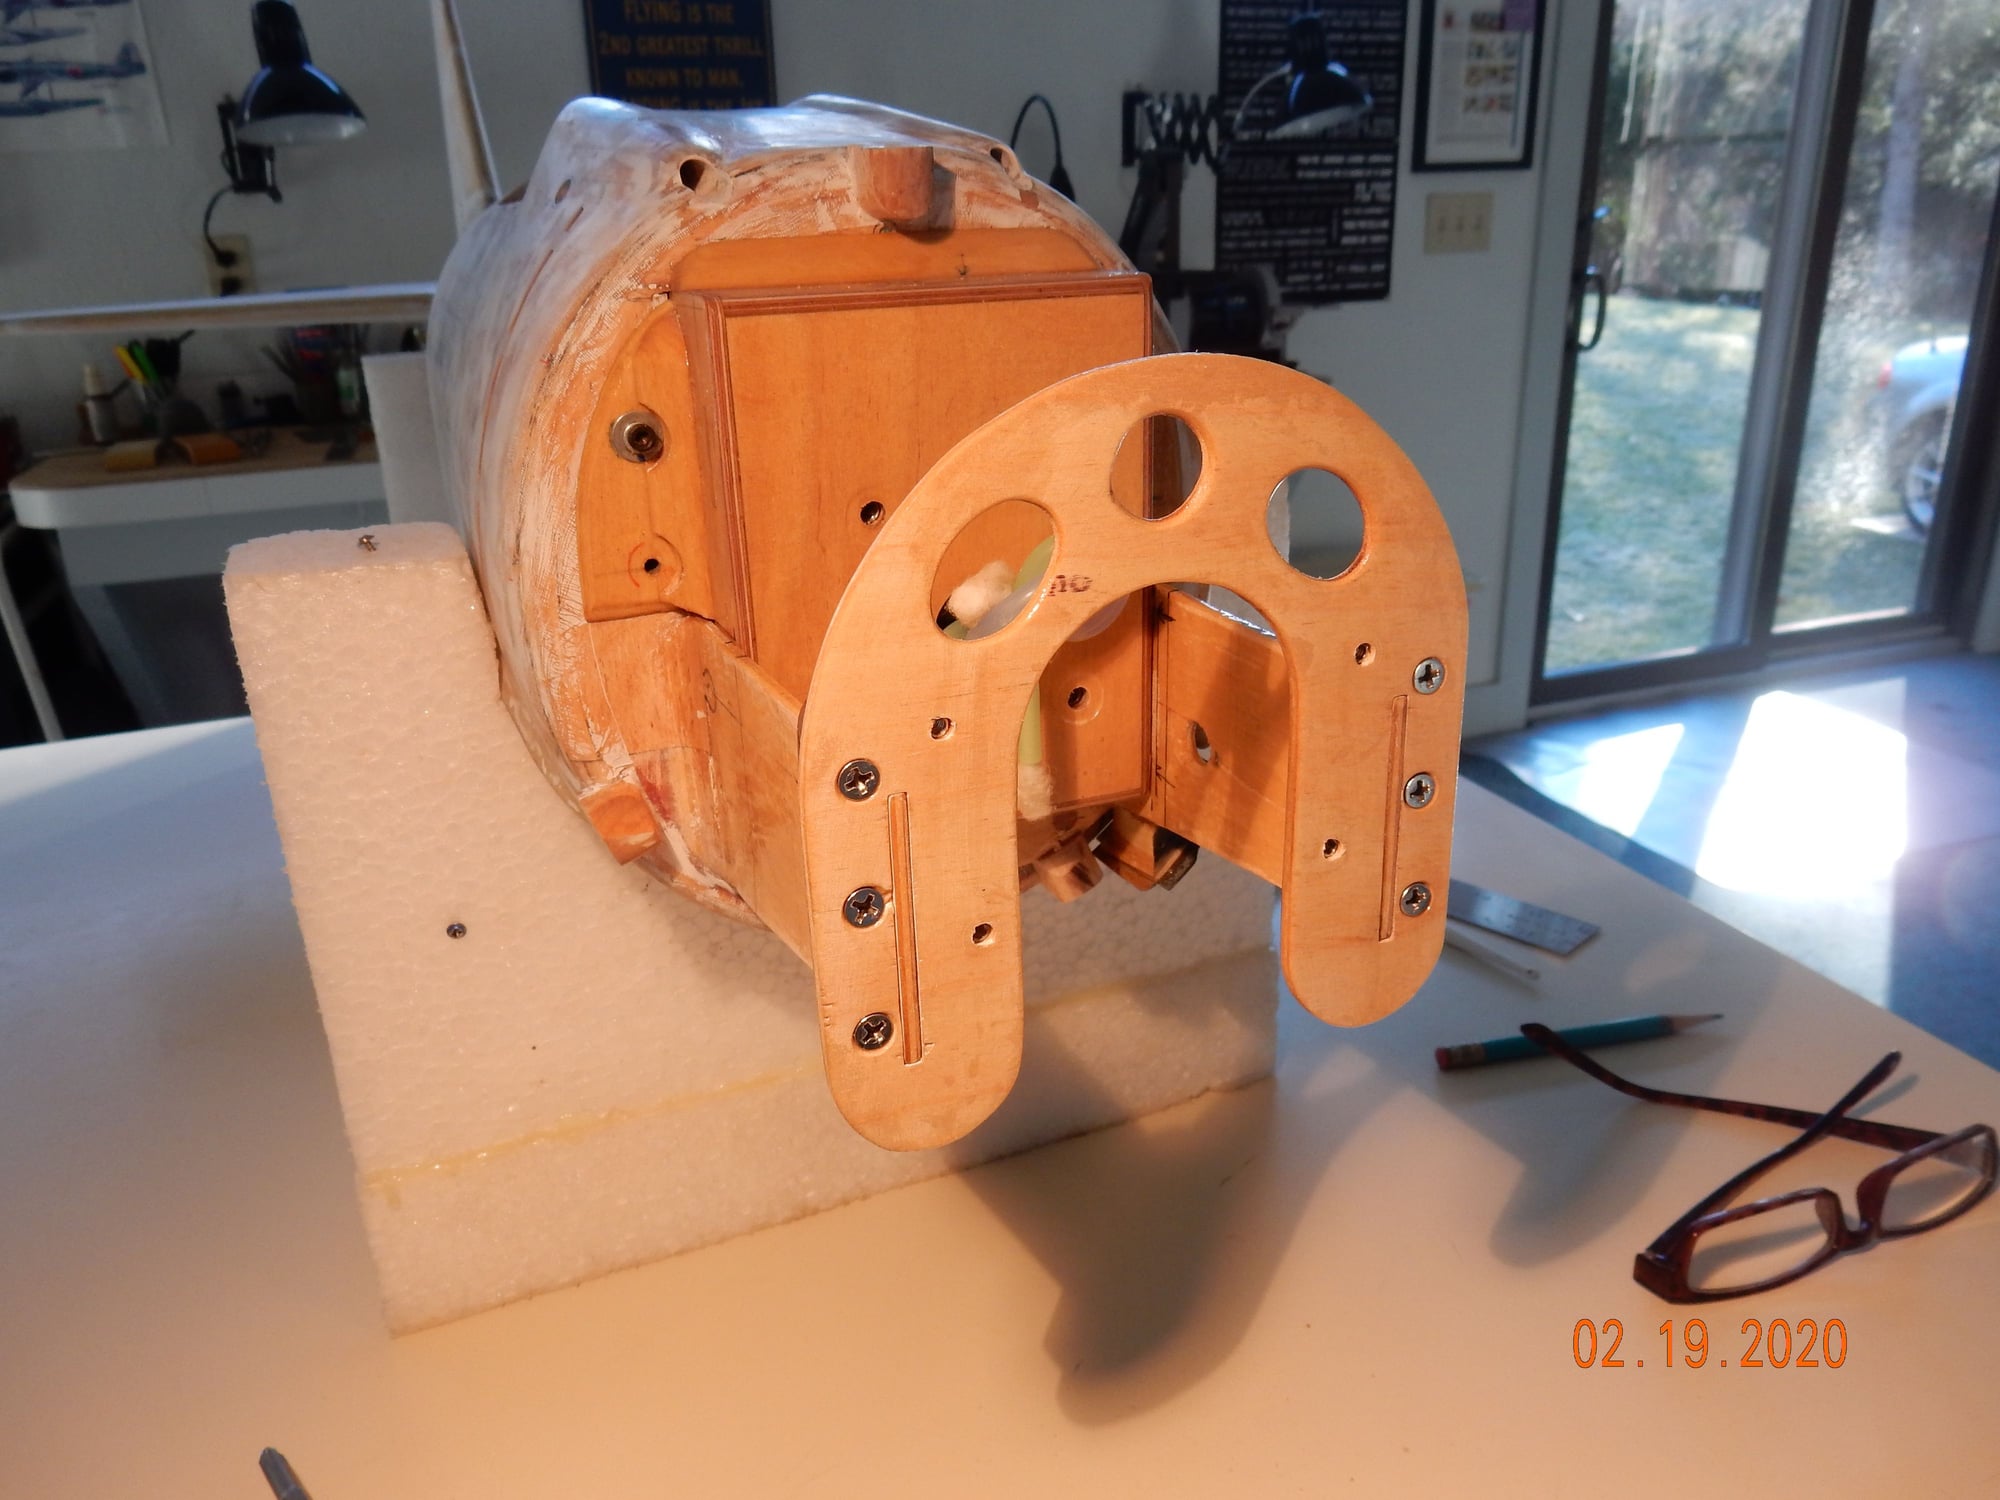
Inner mount in place w/ screws. ( Note 4/40 holes on each side of "U" opening. Blind nuts installed on backside of sub-mount.)
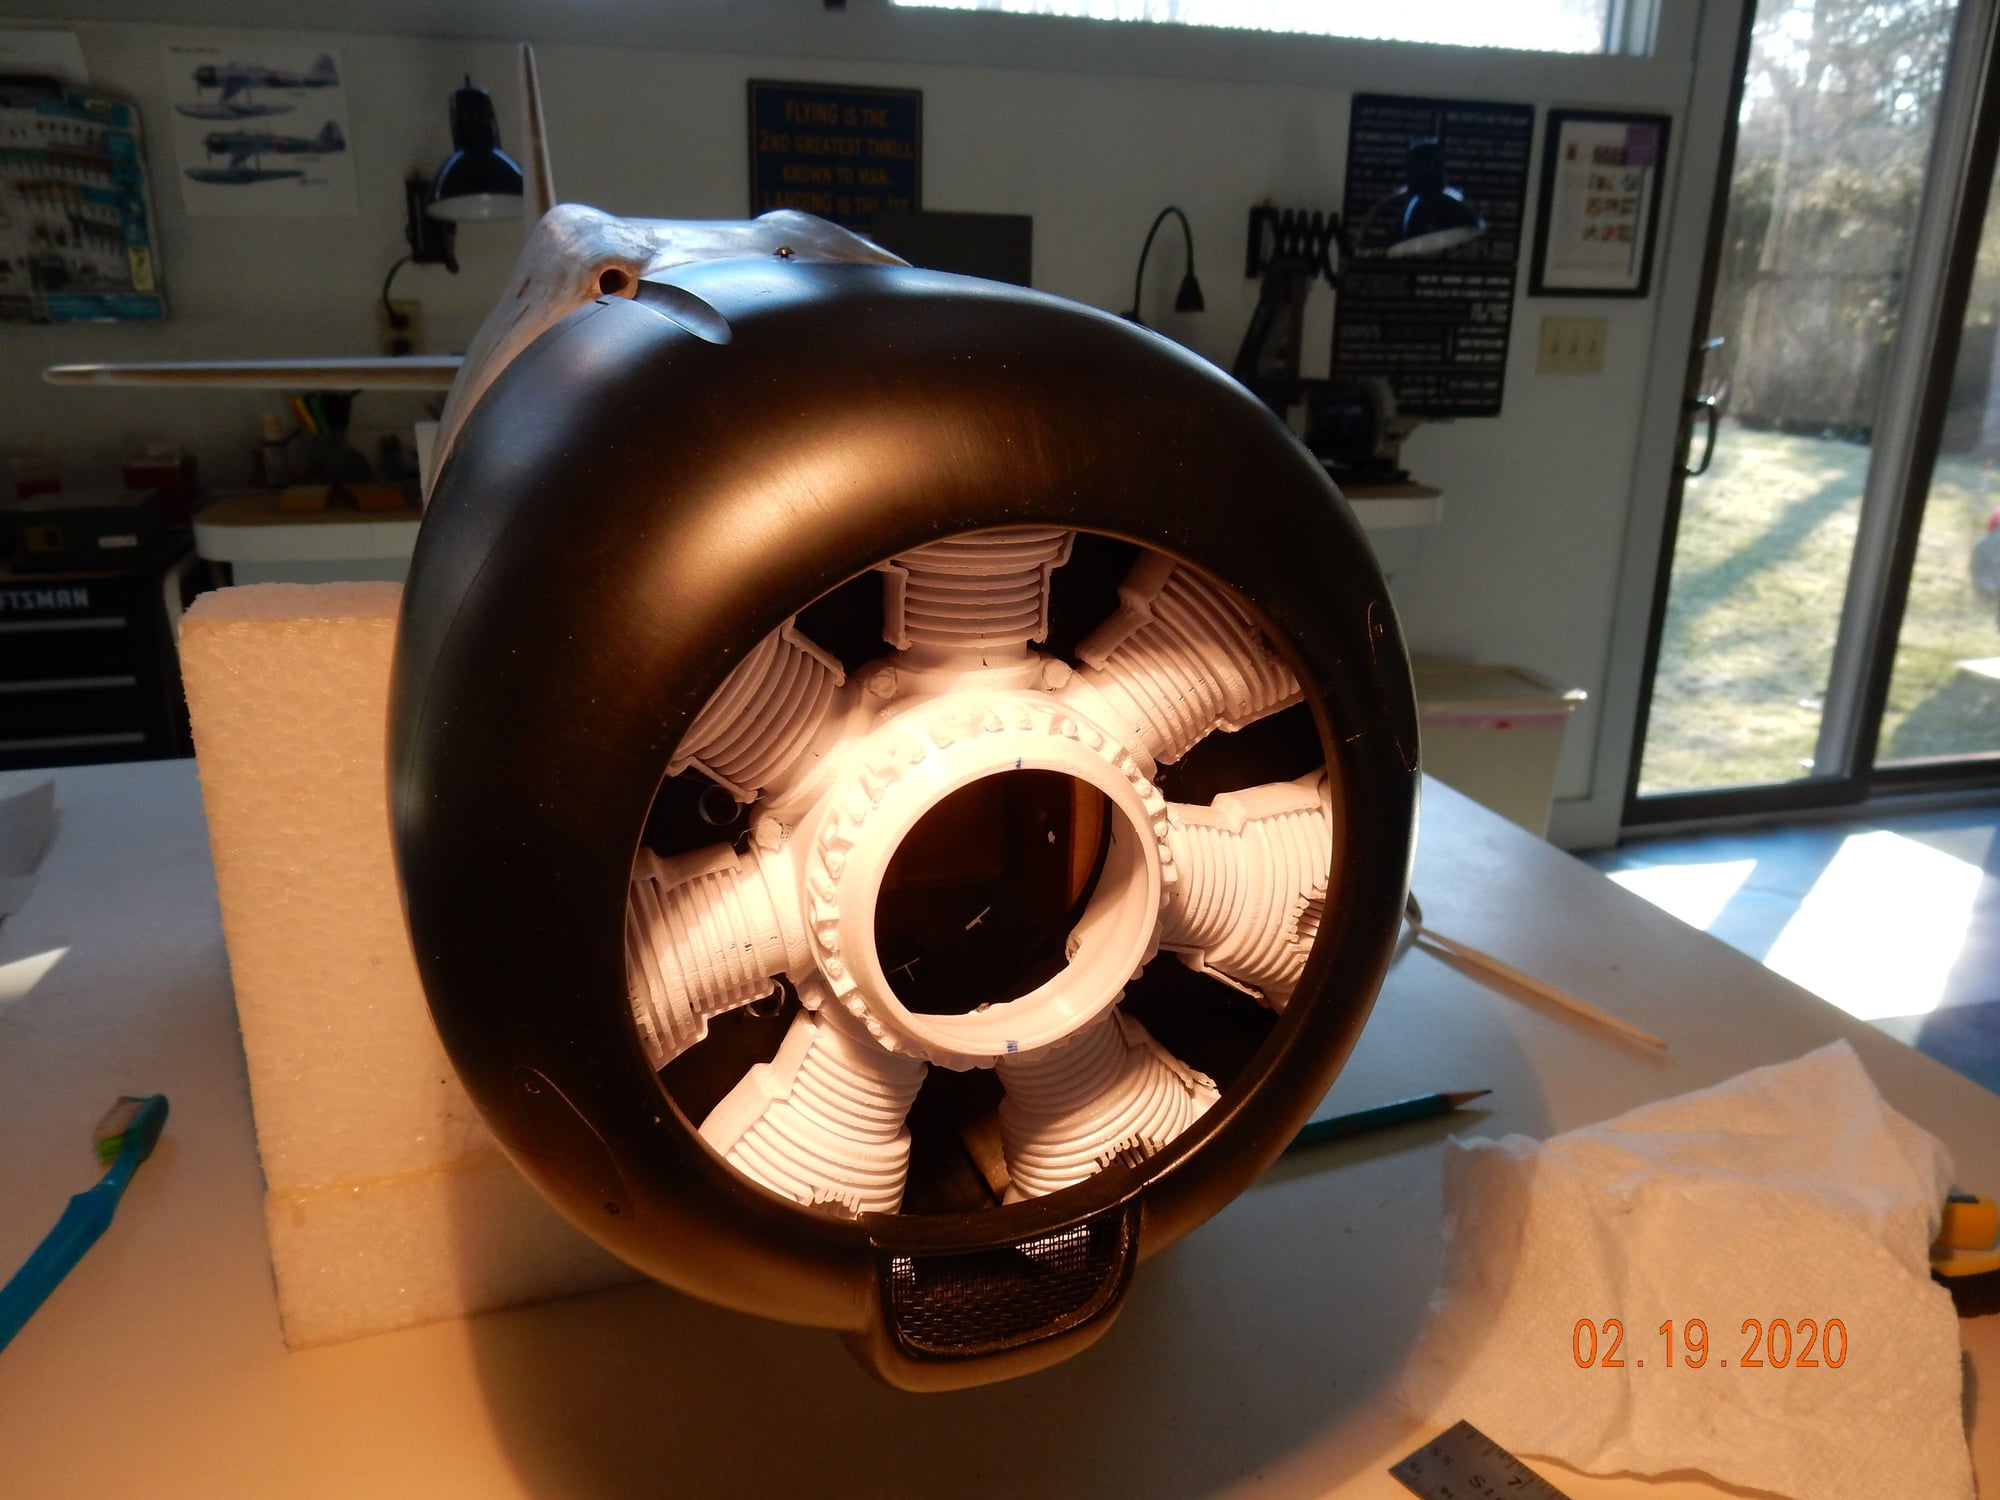
Ply cylinder backing, painted black and screwd to sub-ring. Cylinder row lying in place for camera shot. Once painted, cylinders & ply backing will be cemented to cowling.
The following users liked this post:
Joe. (02-19-2020)
02-22-2020, 11:41 AM
#289
I'm keeping a schedule of doing at least something everyday to keep the momentum going, cross the finish line on this 7 winter's long project and see this baby in the air.
Thanks for the compliment! G.
Thanks for the compliment! G.
 03-16-2020, 07:26 AM
#292
More cowl progress...
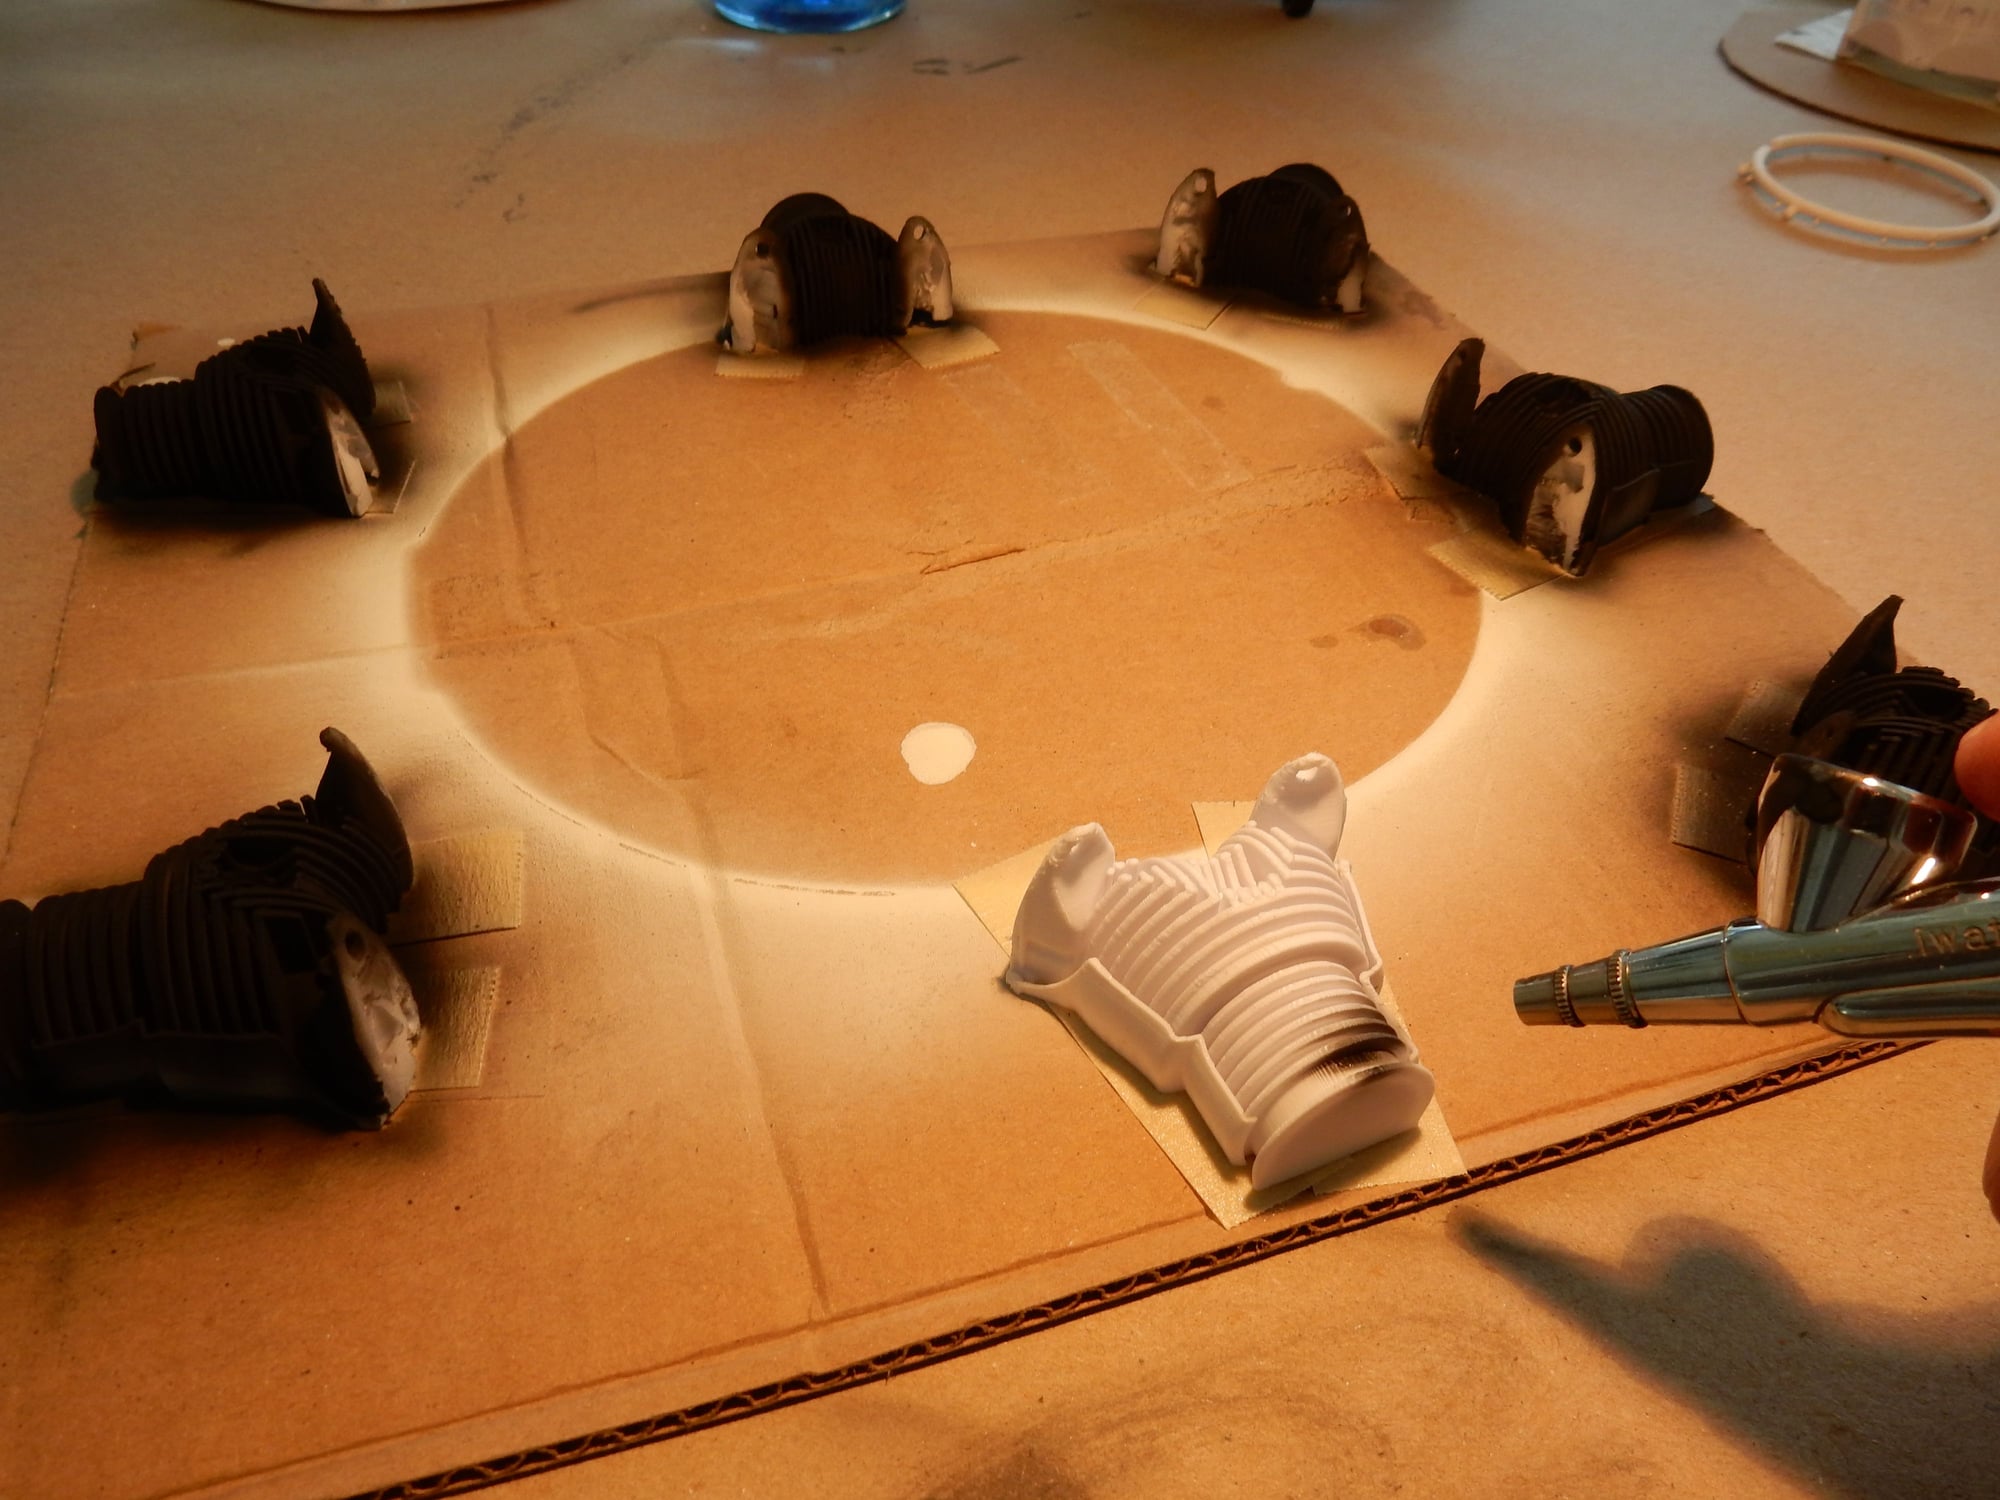
Cylinders getting first color treatment of airbrushed flat black.
Air-cooling baffles sprayed flat gray.
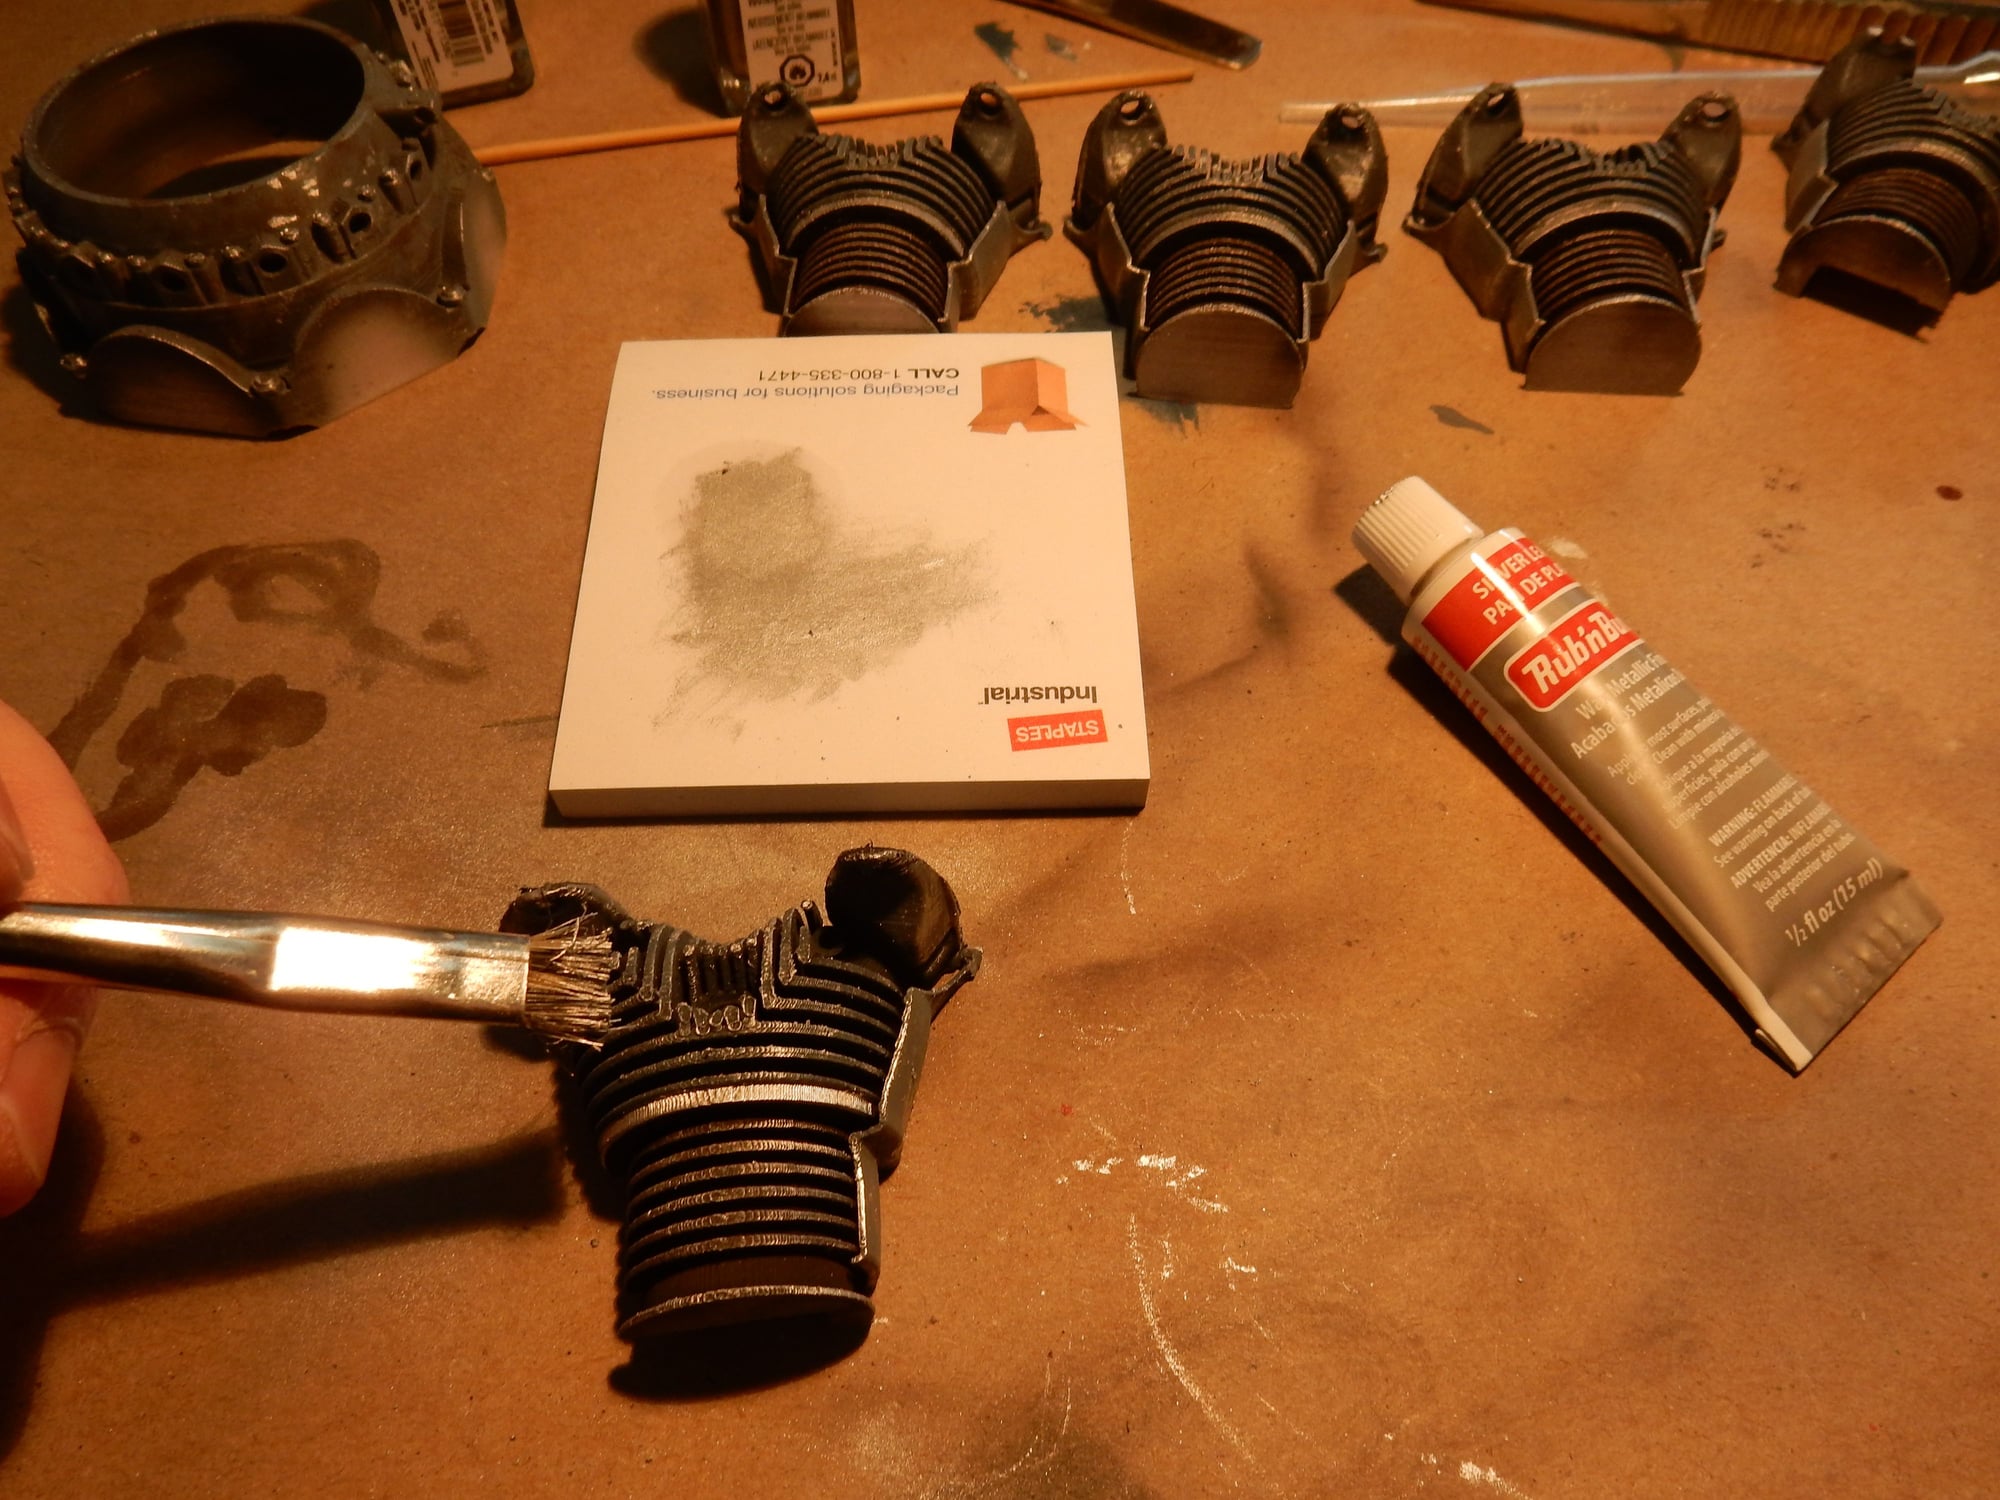
Edges of cooling fins dry-brushed with Rub & Buff silver for a more metallic look.
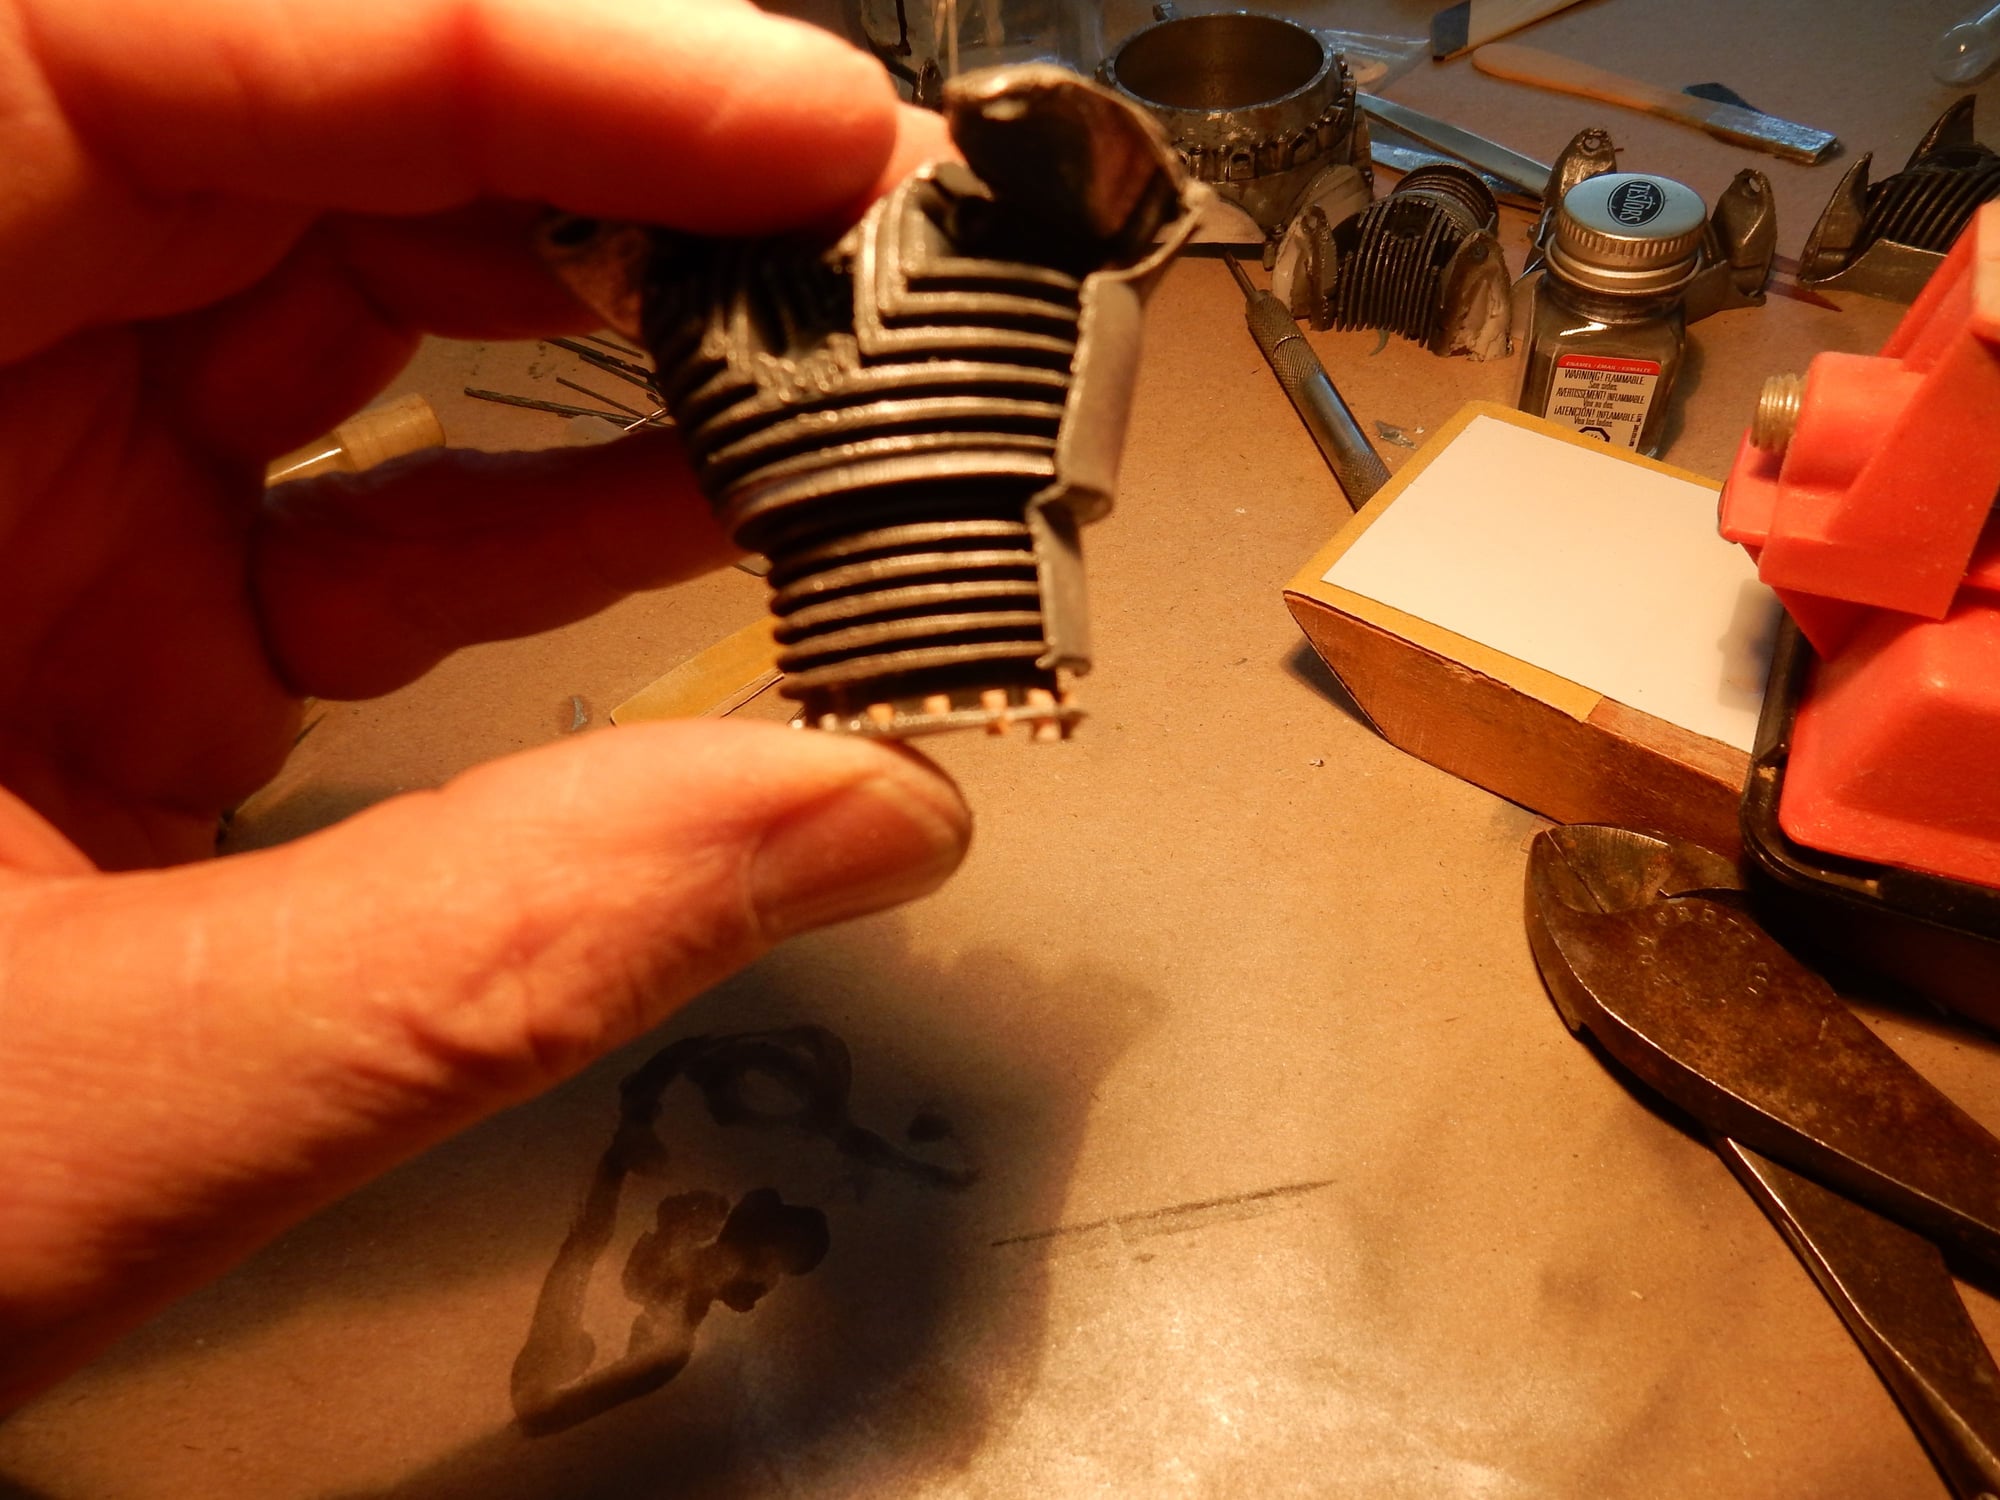
Semi-finished. Notice lowest ( narrow ) base of cylinders sport more of a burnt tan color than blue-gray uppers. Base flange already have toothpick "bolts" drilled & glued in place.
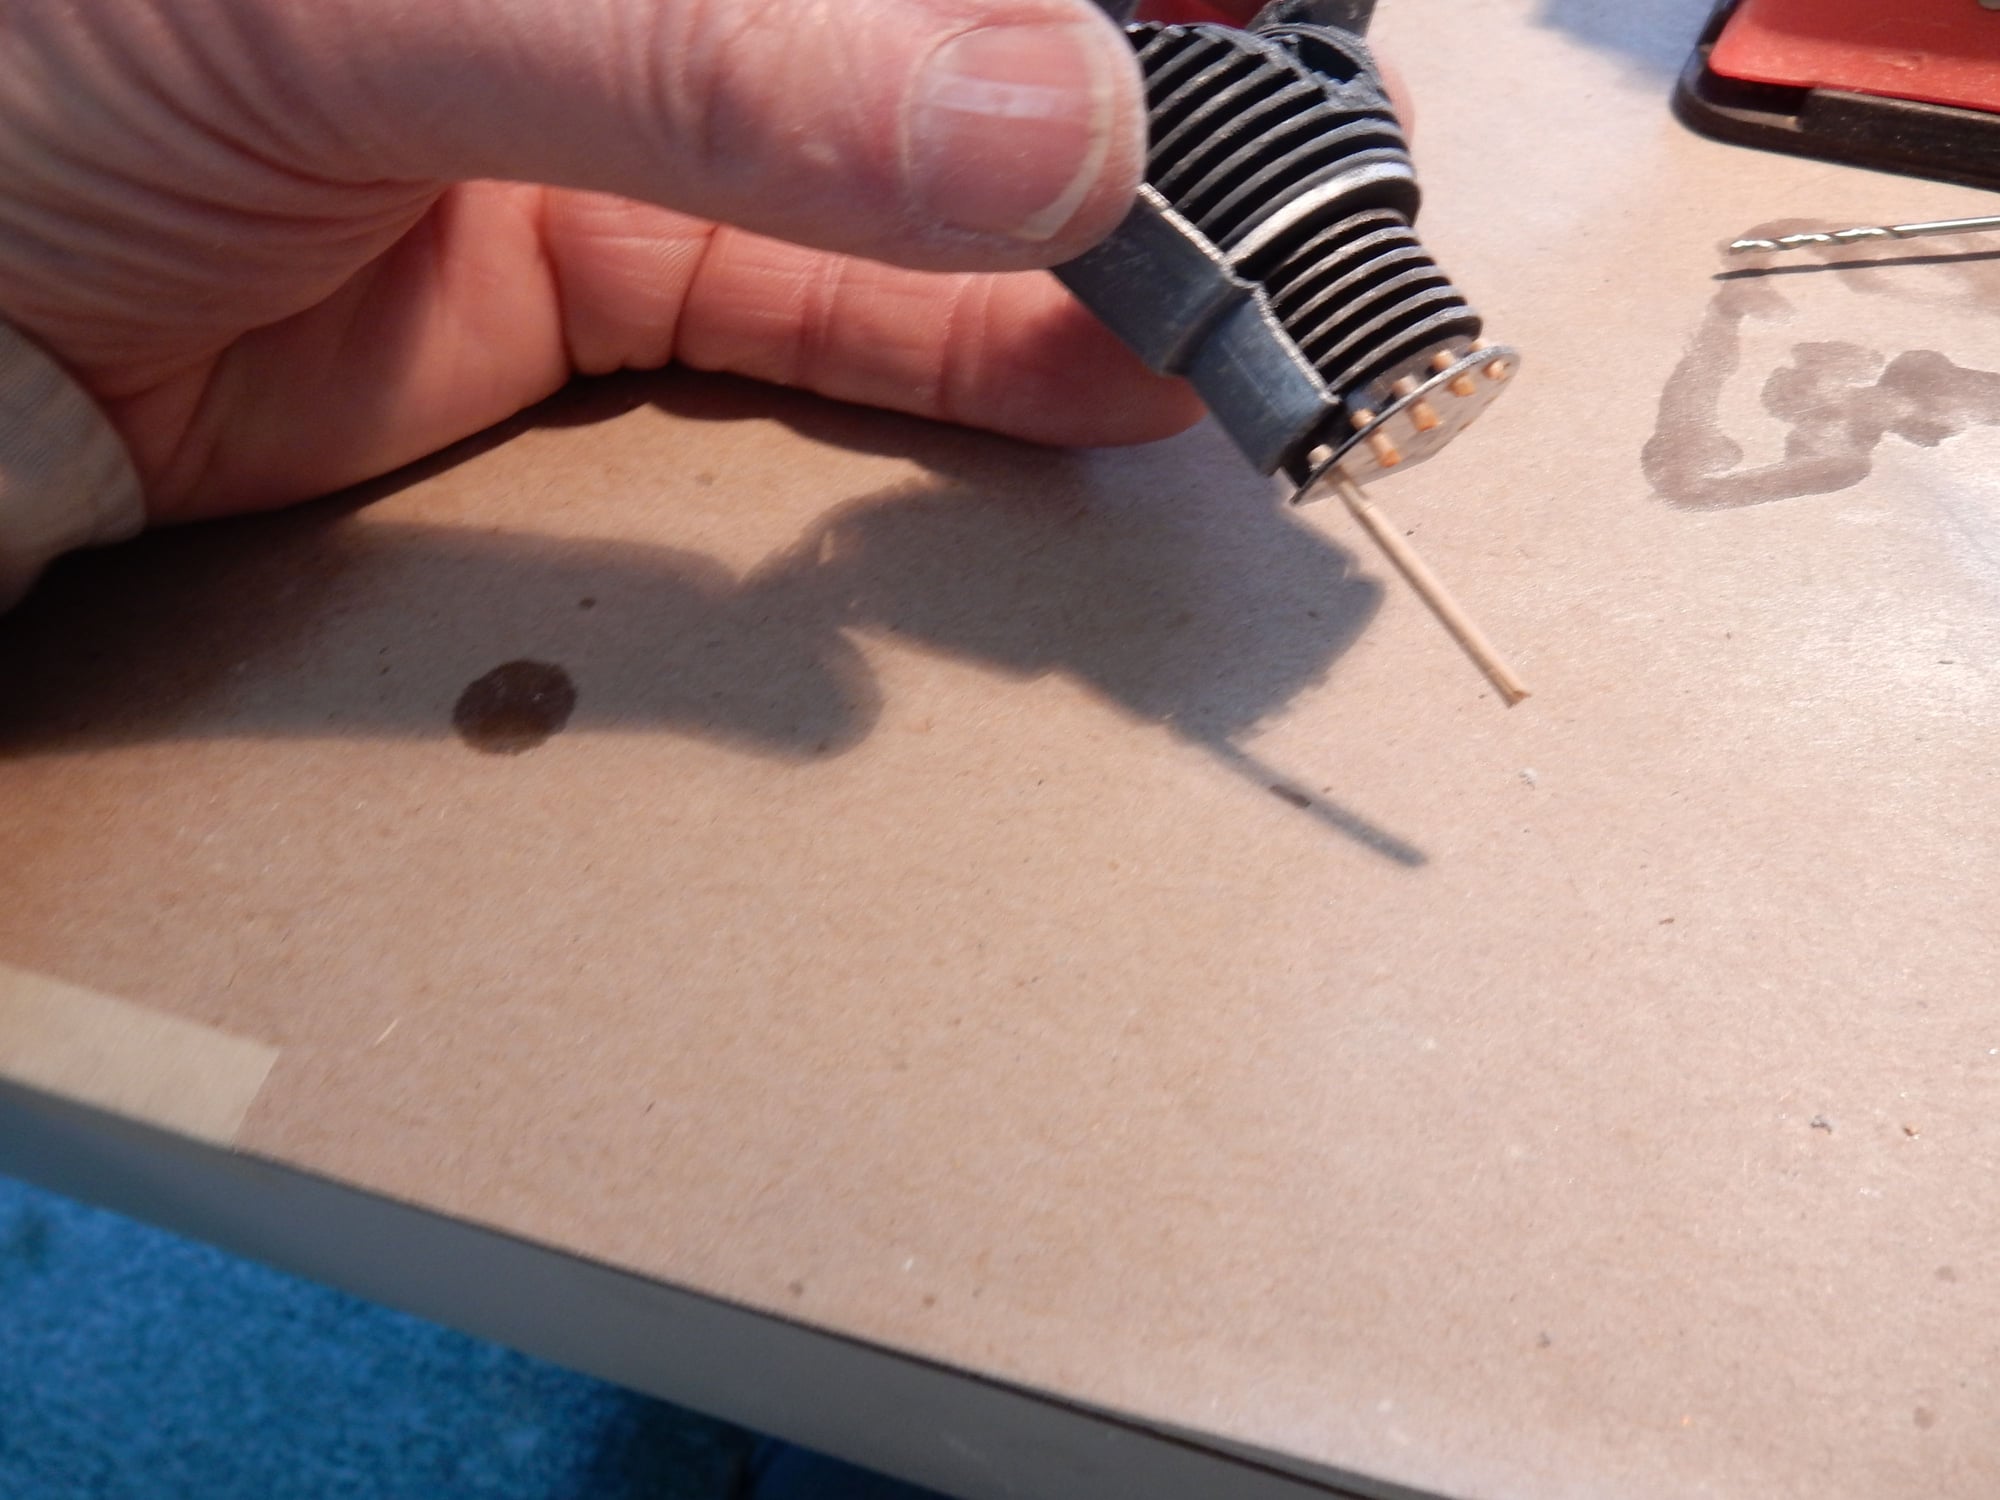
This is how it was done, hand-sanded to fit, hand-drilled with 3 successive sized drill bits, glued in from bottom, snipped & sanded......... all 61 of them.
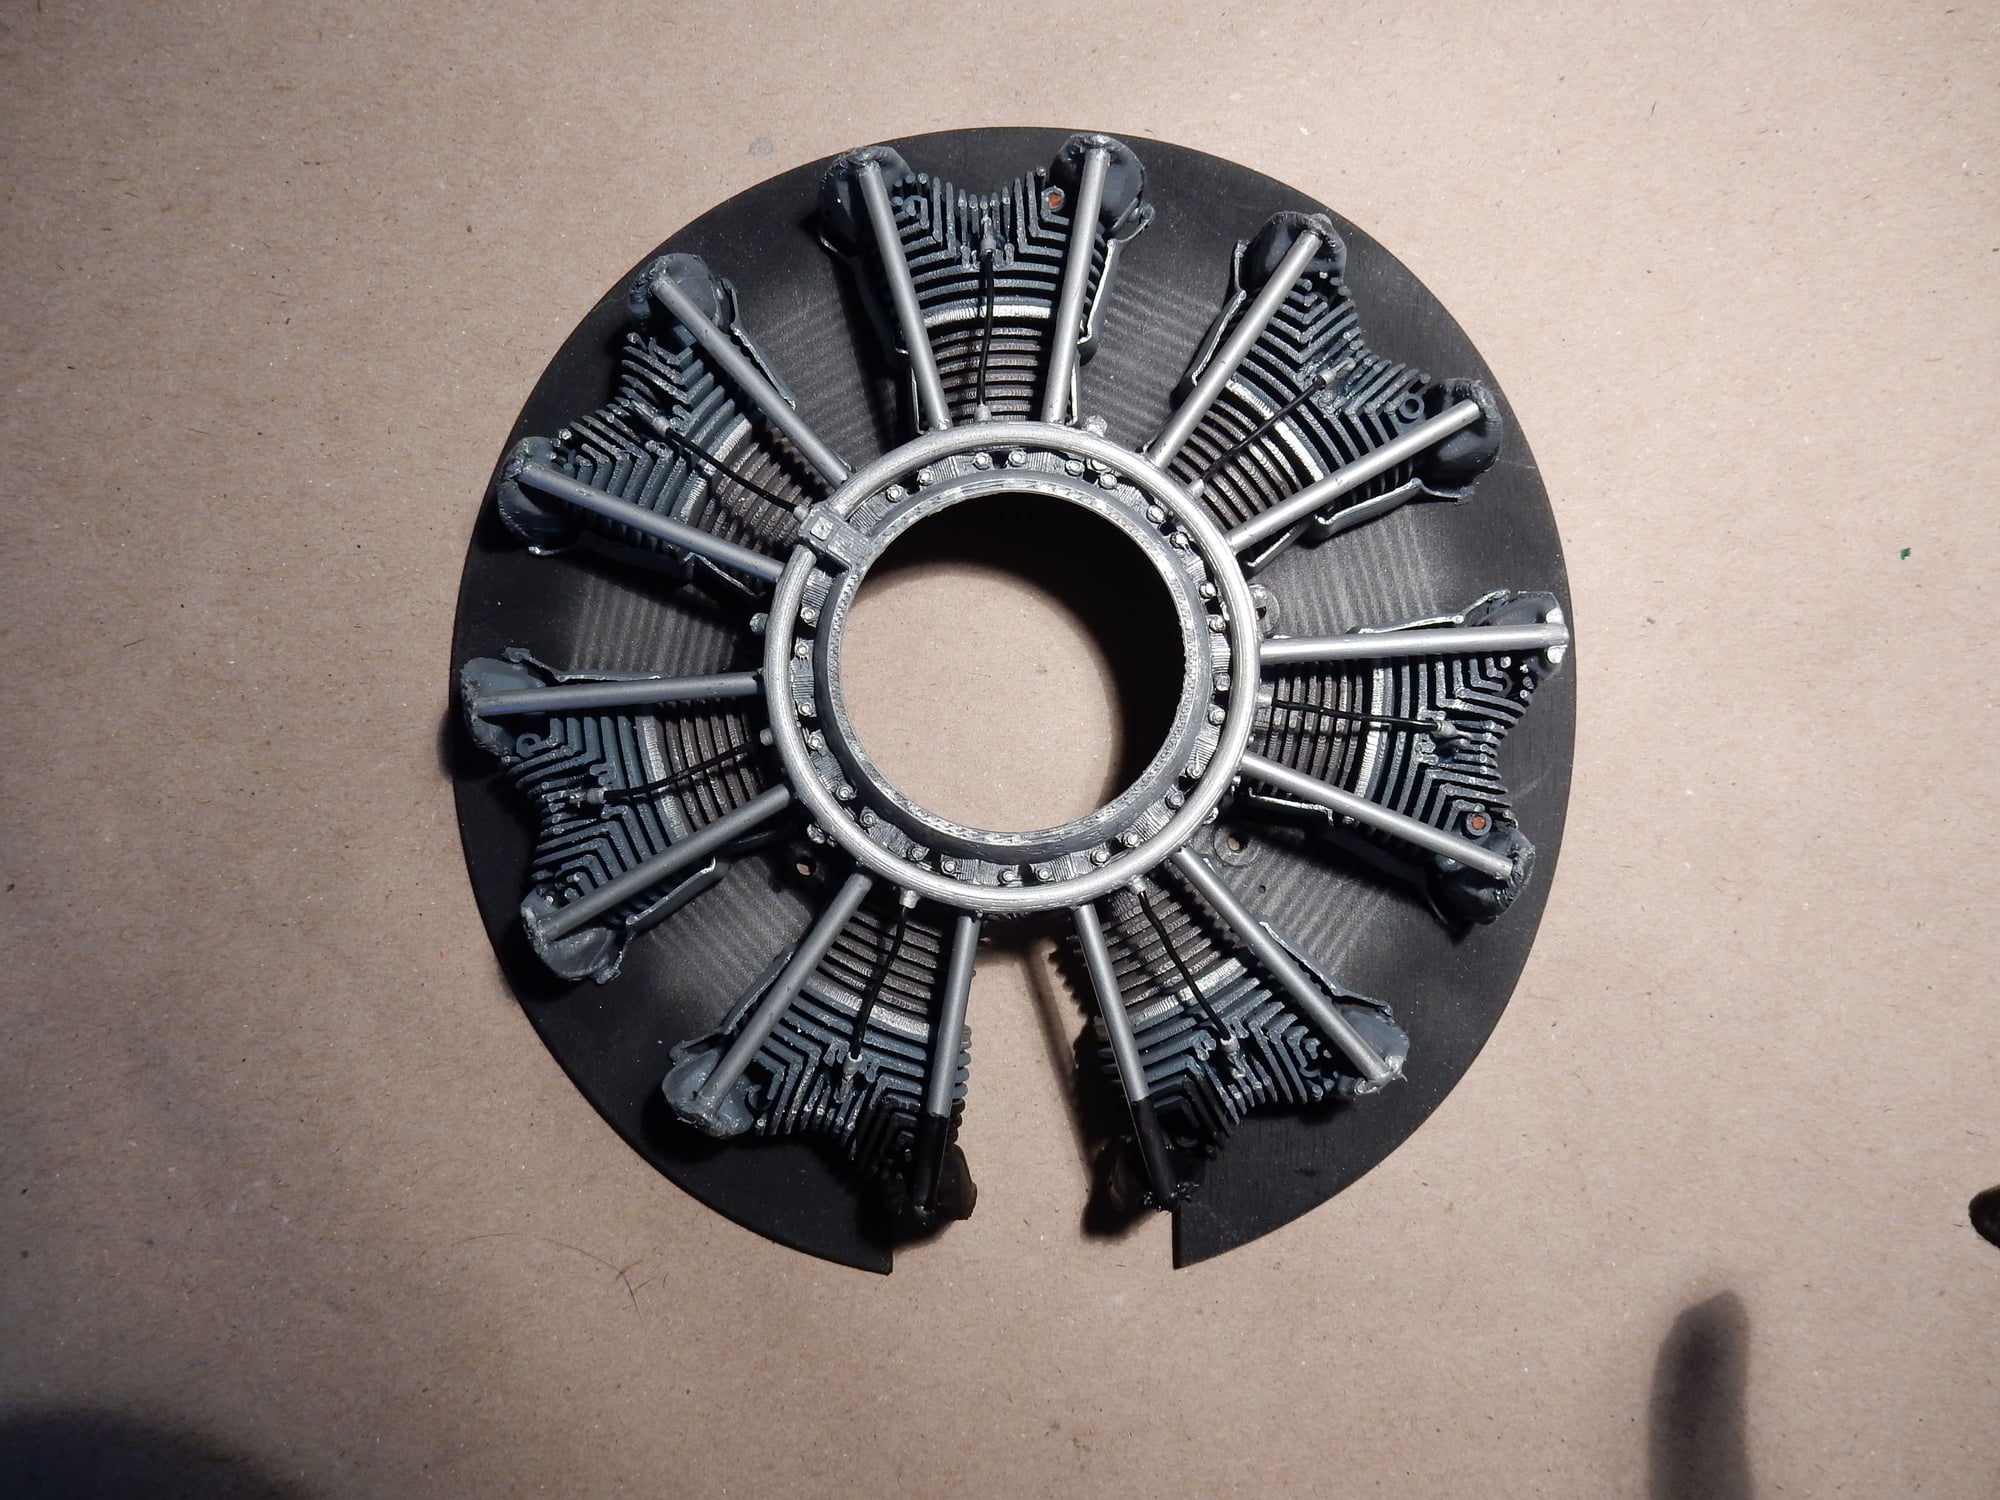
Cylinders getting cemented in place on crankcase core, which has already been painted & weathered to look genuine.
Acetate template to give the illusion of a back row of cylinders ( as opposed to just flat black which just looks like a single row).

Temporarily fitted inside the cowl. Next photo update will show the process of wiring and pushrod tubing.
Cylinders getting first color treatment of airbrushed flat black.
Air-cooling baffles sprayed flat gray.
Edges of cooling fins dry-brushed with Rub & Buff silver for a more metallic look.
Semi-finished. Notice lowest ( narrow ) base of cylinders sport more of a burnt tan color than blue-gray uppers. Base flange already have toothpick "bolts" drilled & glued in place.
This is how it was done, hand-sanded to fit, hand-drilled with 3 successive sized drill bits, glued in from bottom, snipped & sanded......... all 61 of them.
Cylinders getting cemented in place on crankcase core, which has already been painted & weathered to look genuine.
Acetate template to give the illusion of a back row of cylinders ( as opposed to just flat black which just looks like a single row).
Temporarily fitted inside the cowl. Next photo update will show the process of wiring and pushrod tubing.
03-21-2020, 03:57 PM
#293
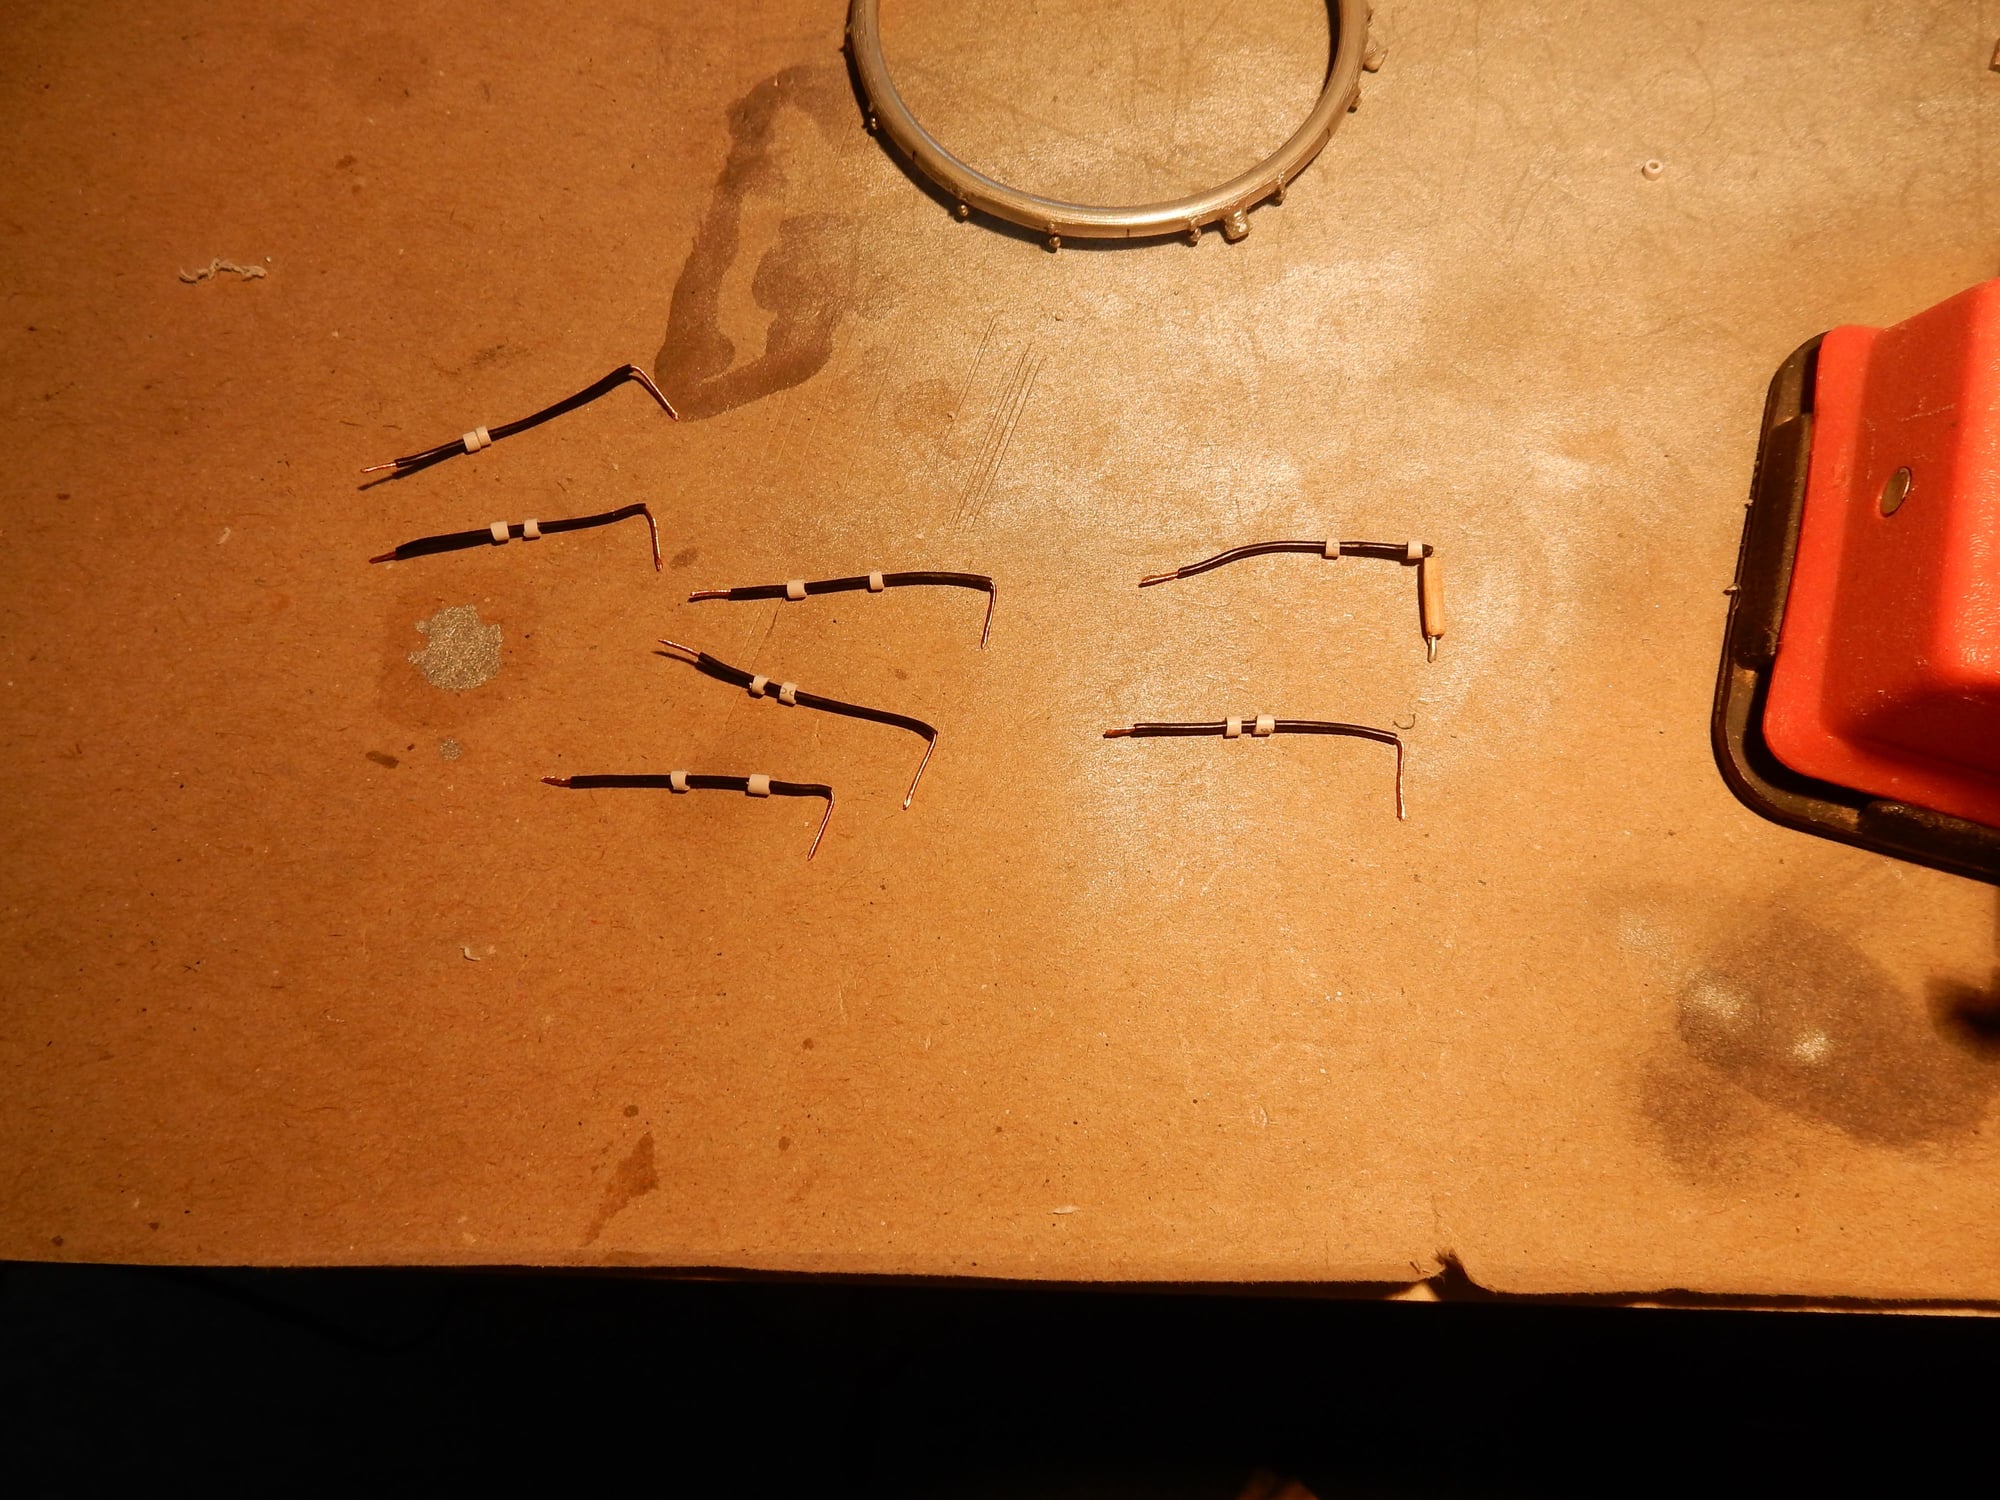
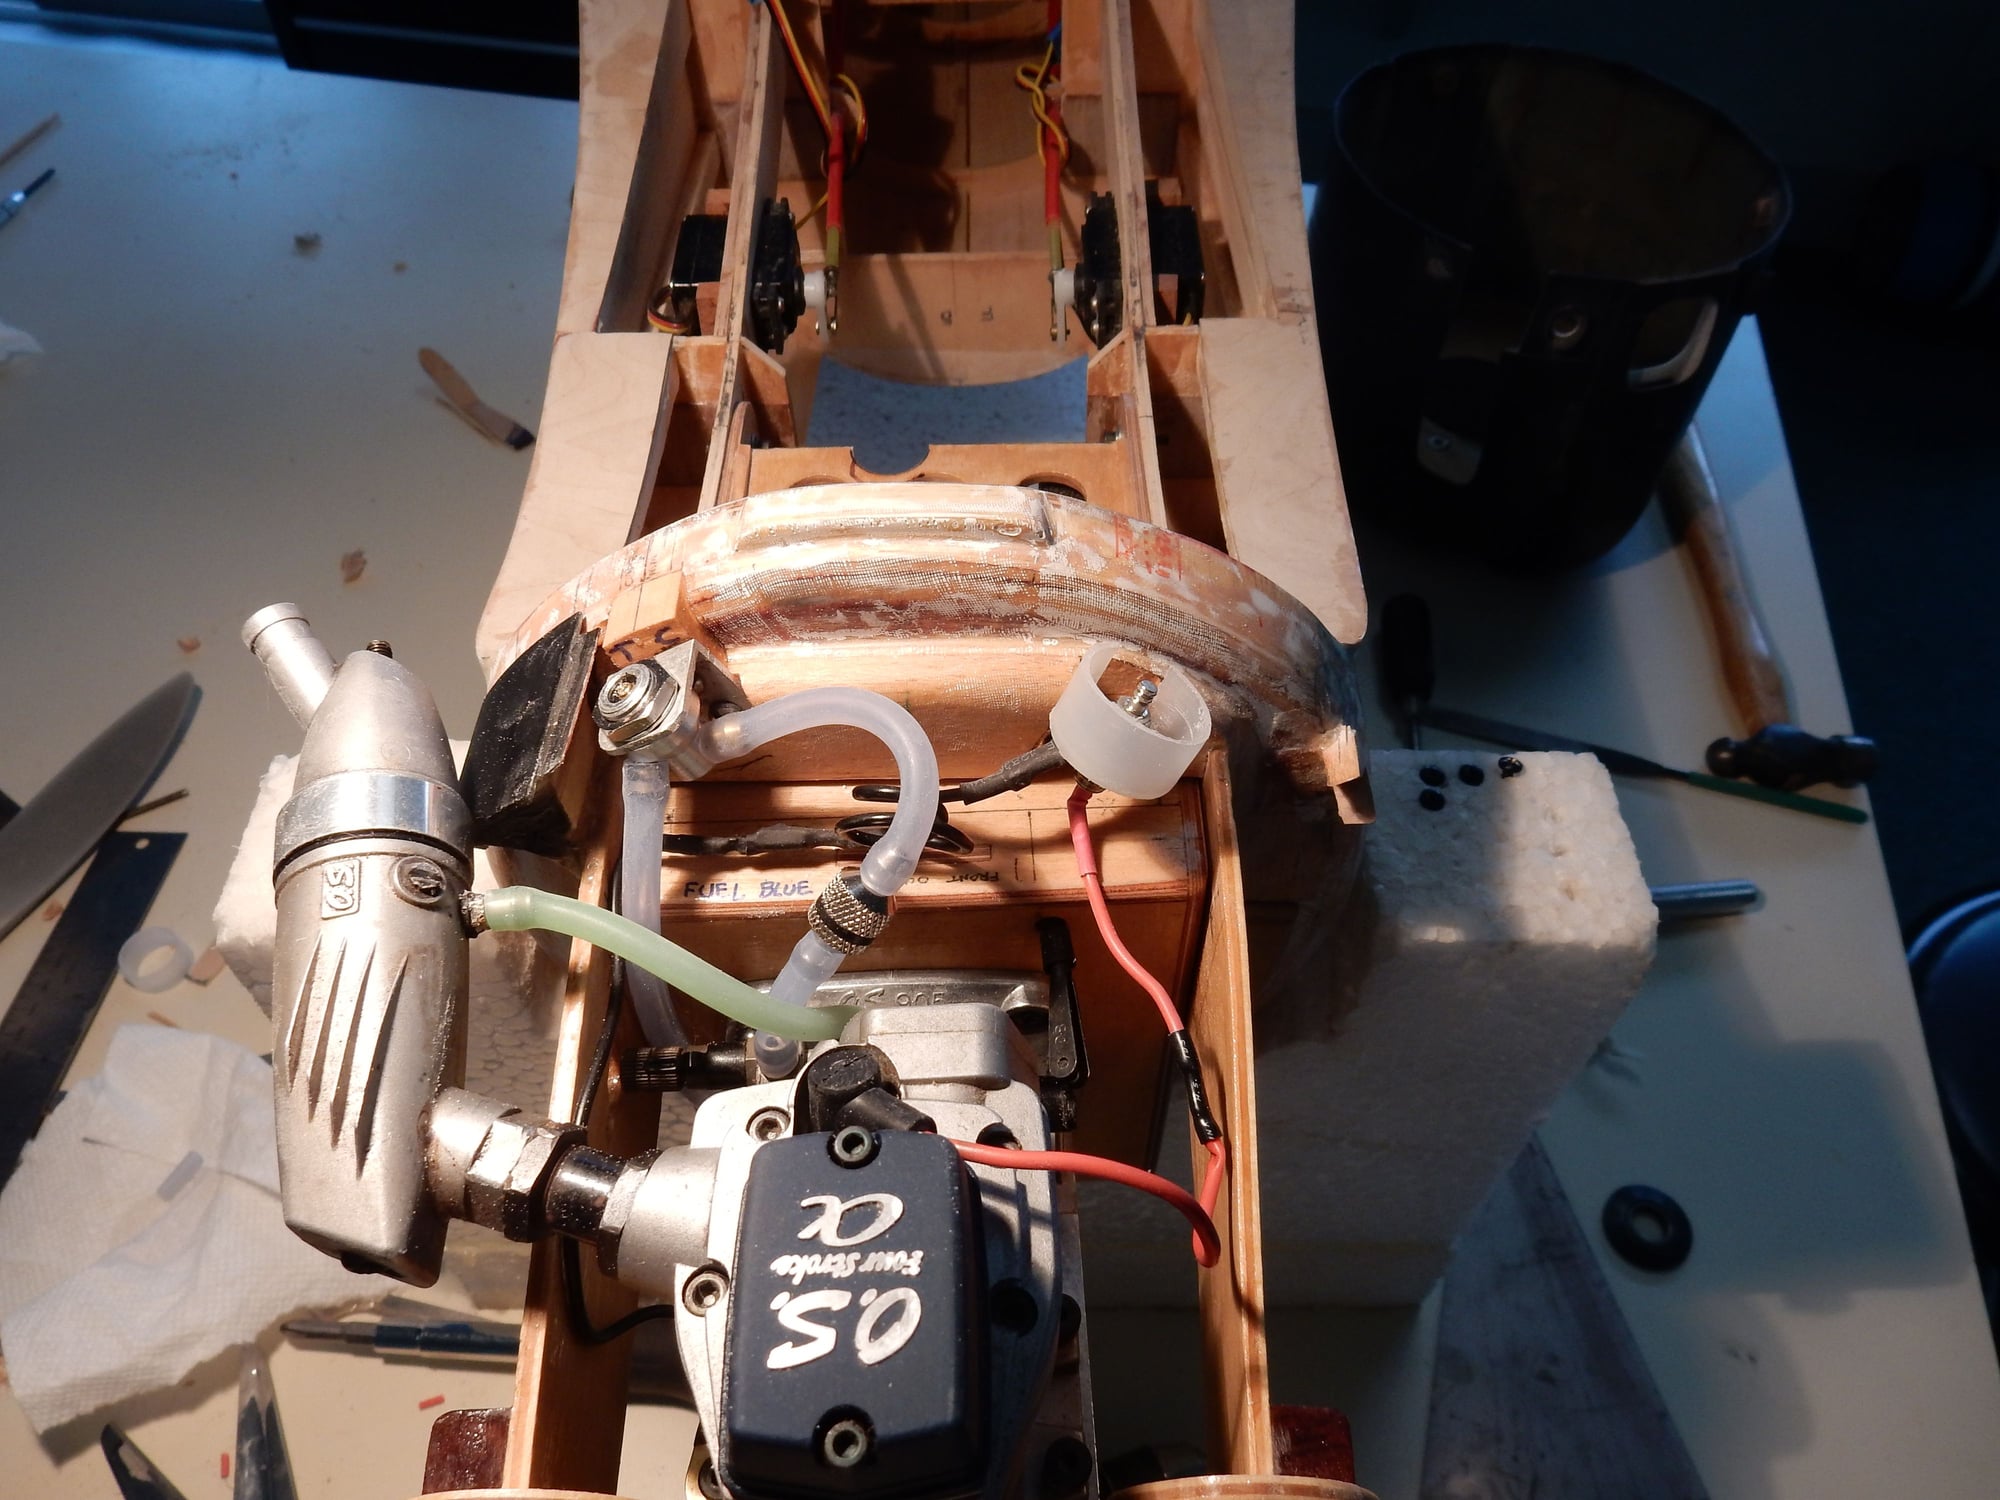
Prepping the ignition wires, white pieces of tubing already slid onto the wire casings, copper wire ends ready for silver solder.
Wires glued in place w/ white tubing pieces painted silver.
Finished assembly in place after receiving two airbrushed sprayings of flat clear to fuel-proof the whole works. Ends of lower pushrods painted flat black to disapear behing carb screen.
The following users liked this post:
chistech (04-02-2020)
03-29-2020, 12:24 PM
#295
Thank you cat5752. I'm currently in the process of engineering the remote glow and remote fuel filler, hiding them in the faux-scale exhaust stacks. After that, cockpit
detailing and canopy installation. Will be posting more photos soon. G.
detailing and canopy installation. Will be posting more photos soon. G.
04-08-2020, 08:02 AM
#296
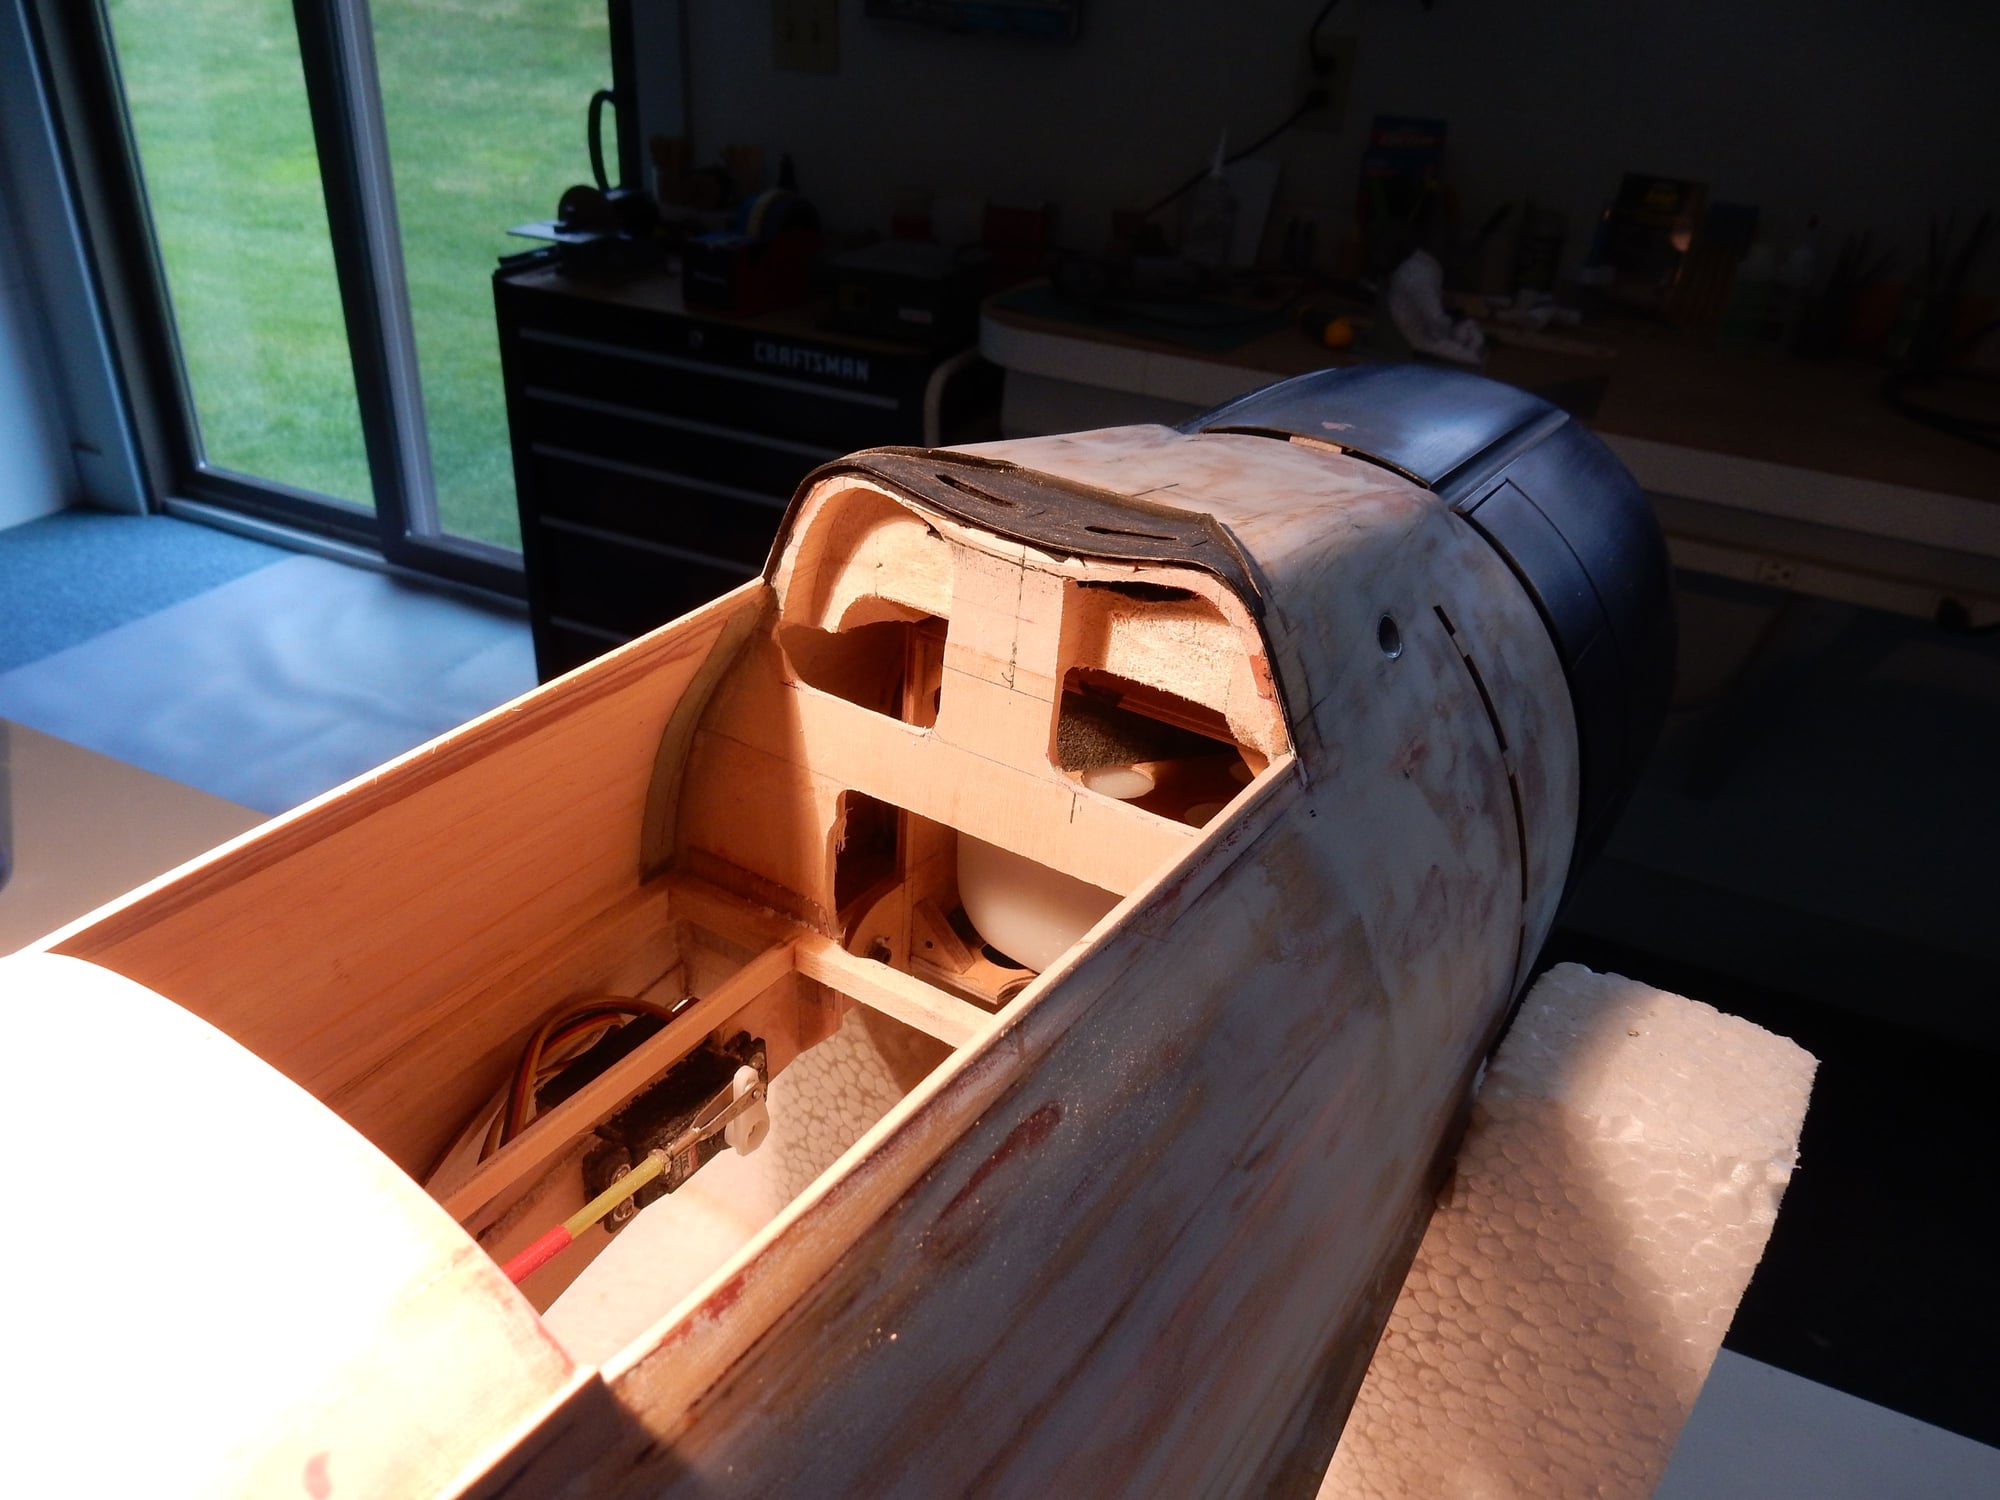
Remote fueler assembly on left w/ remote glow plug ( with fuel spray shield ) on right. Both points are centered in faux exhaust stacks for concealment.
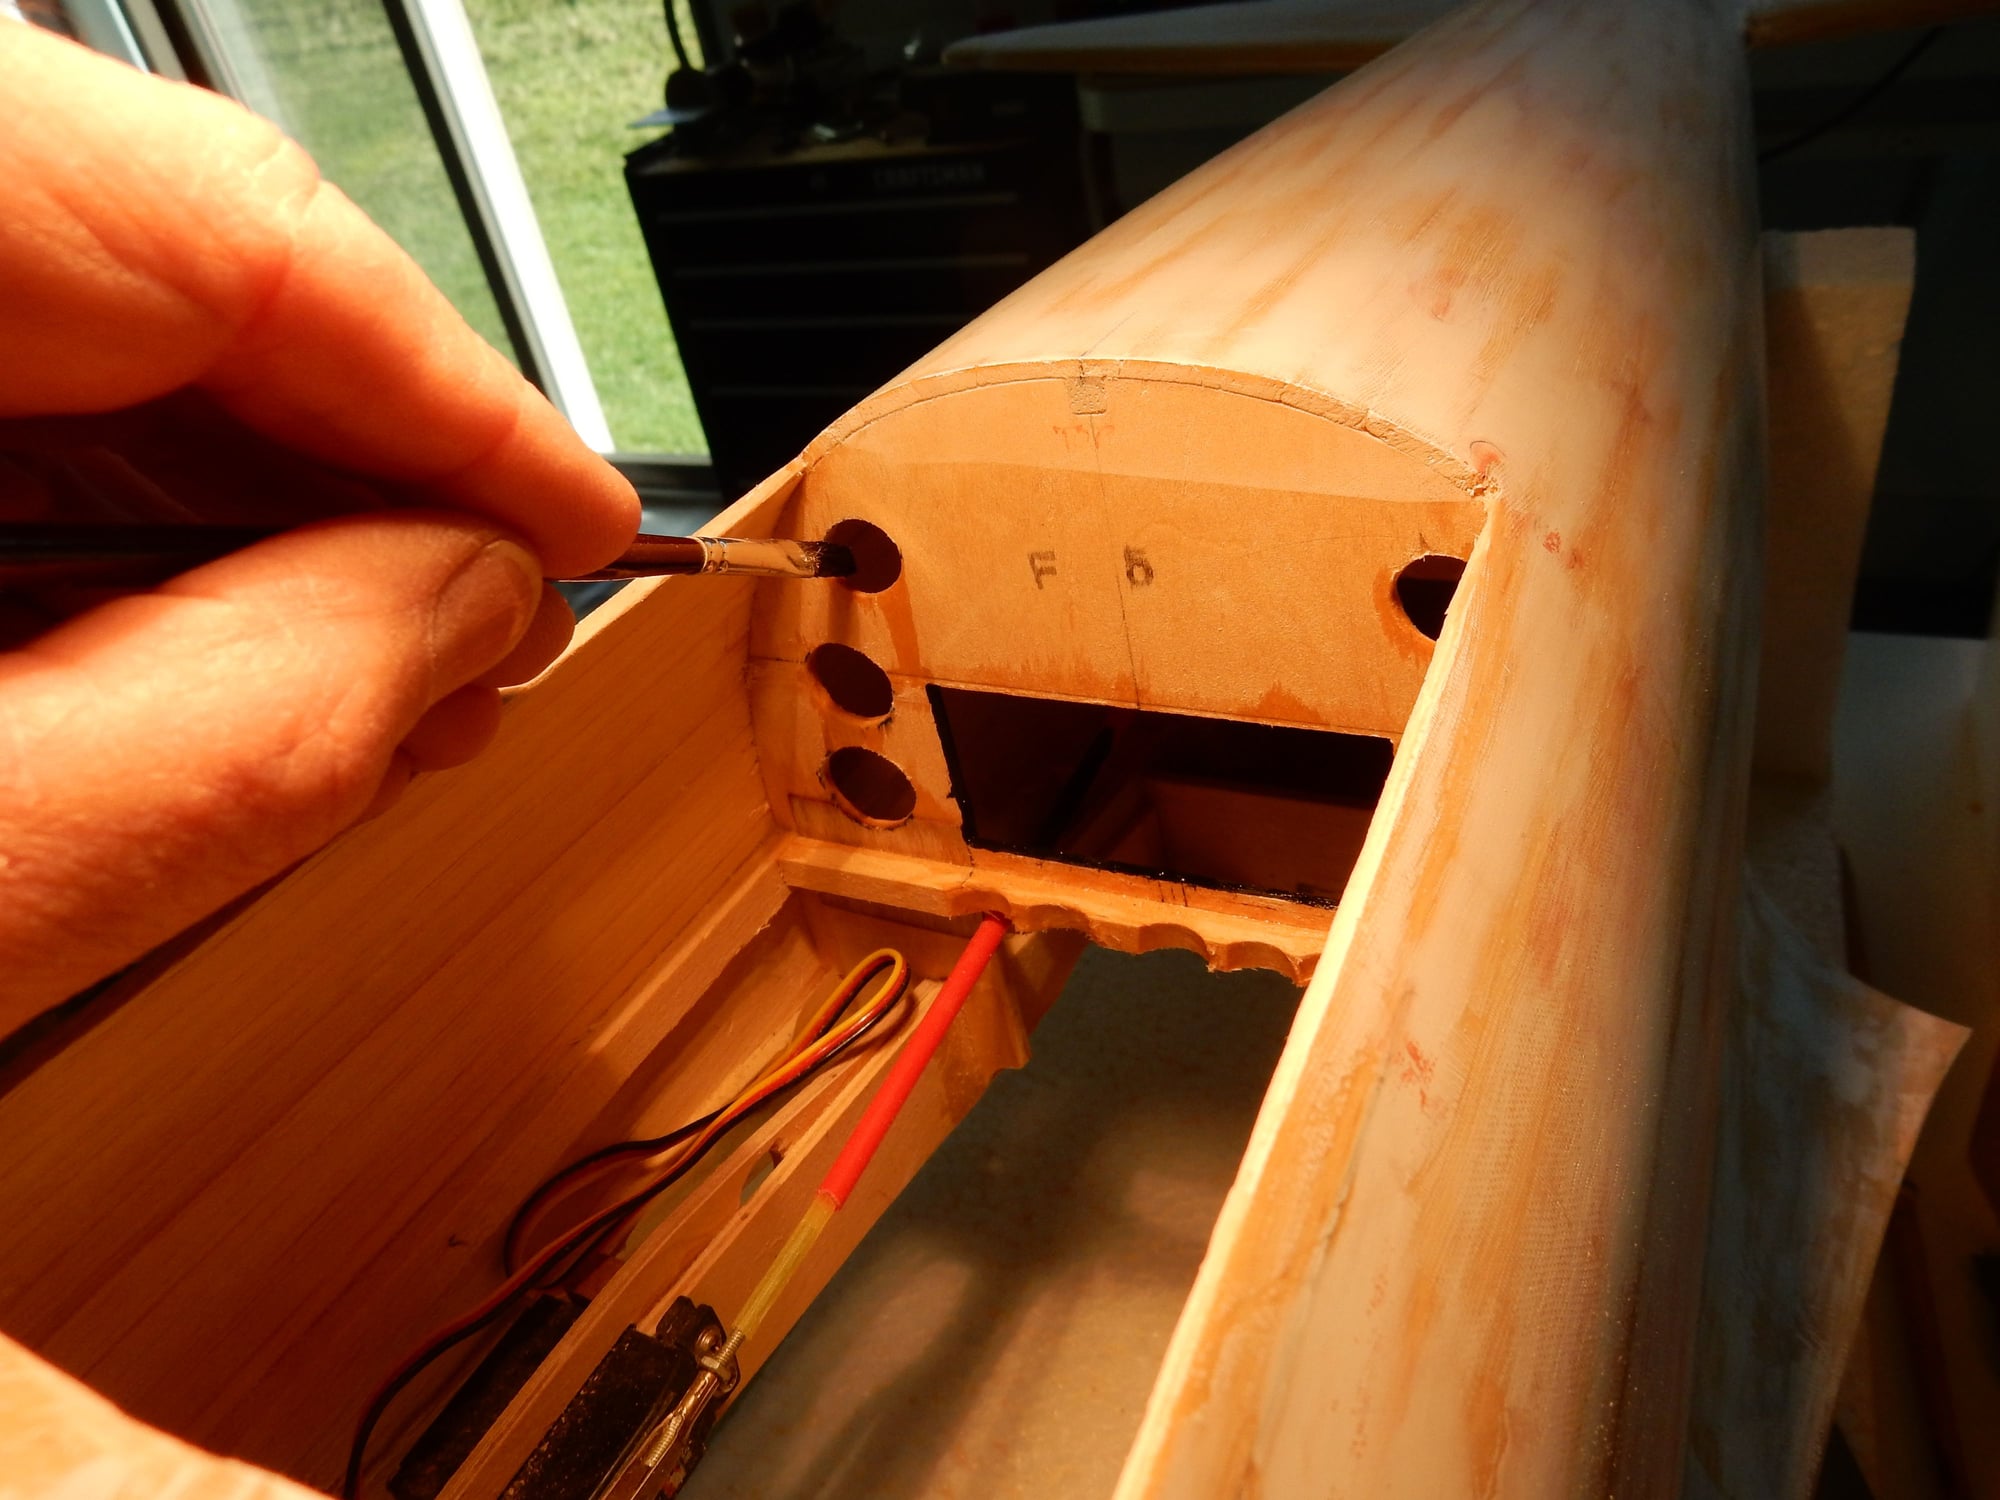
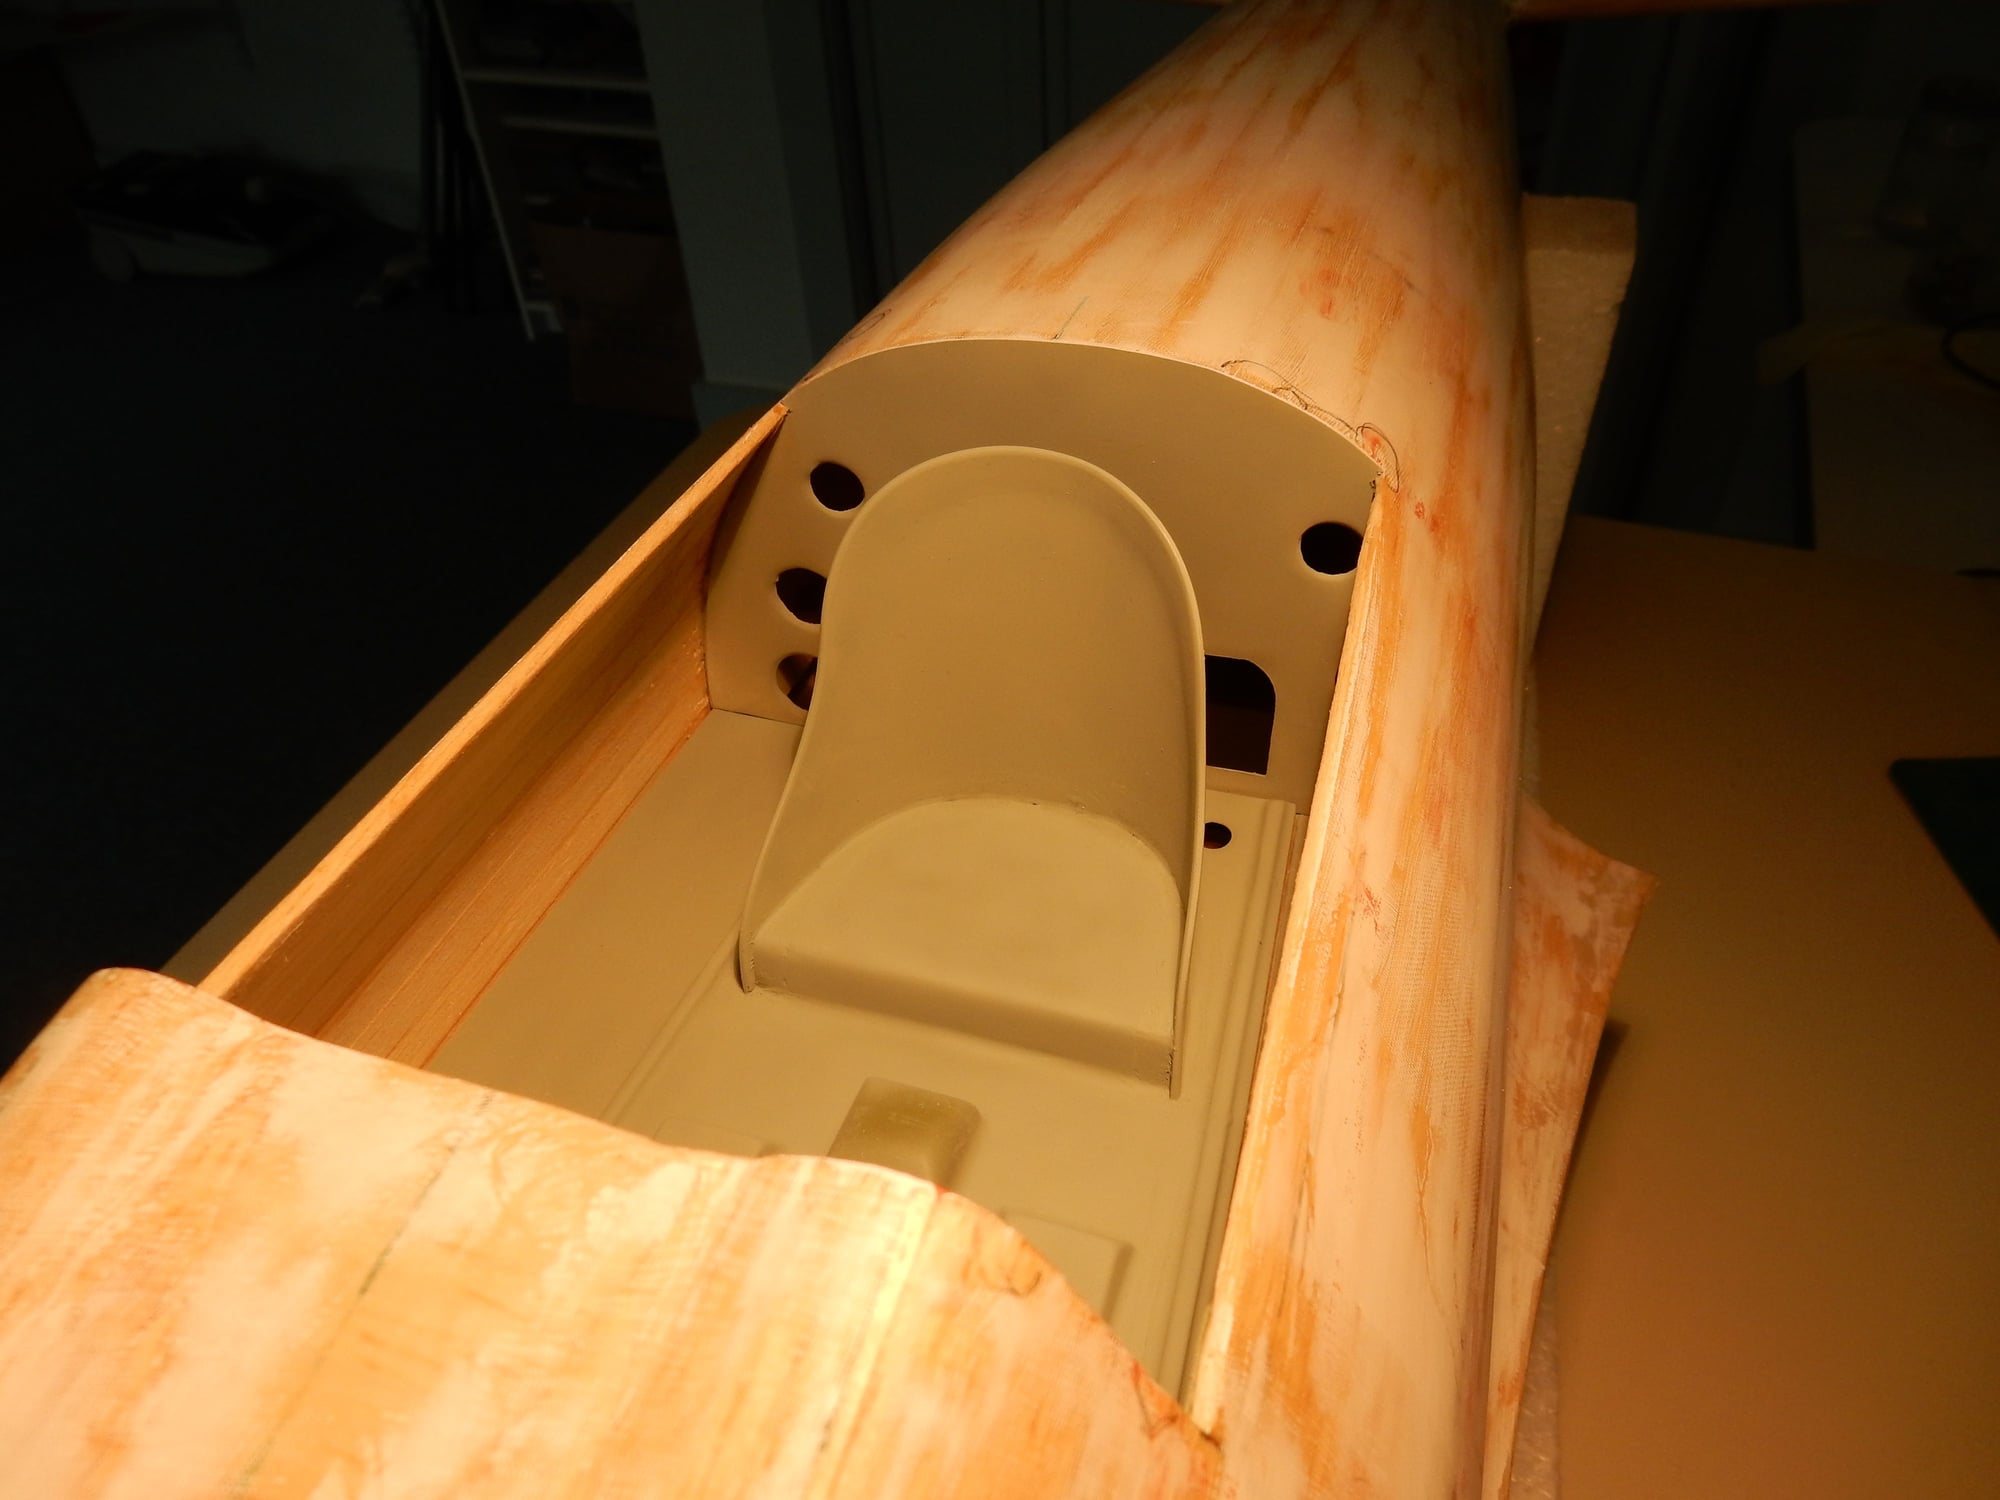
With lightening holes drilled out on cockpit aft bulkhead, inside edges painted flat black to conceal edge thickness of plywood.
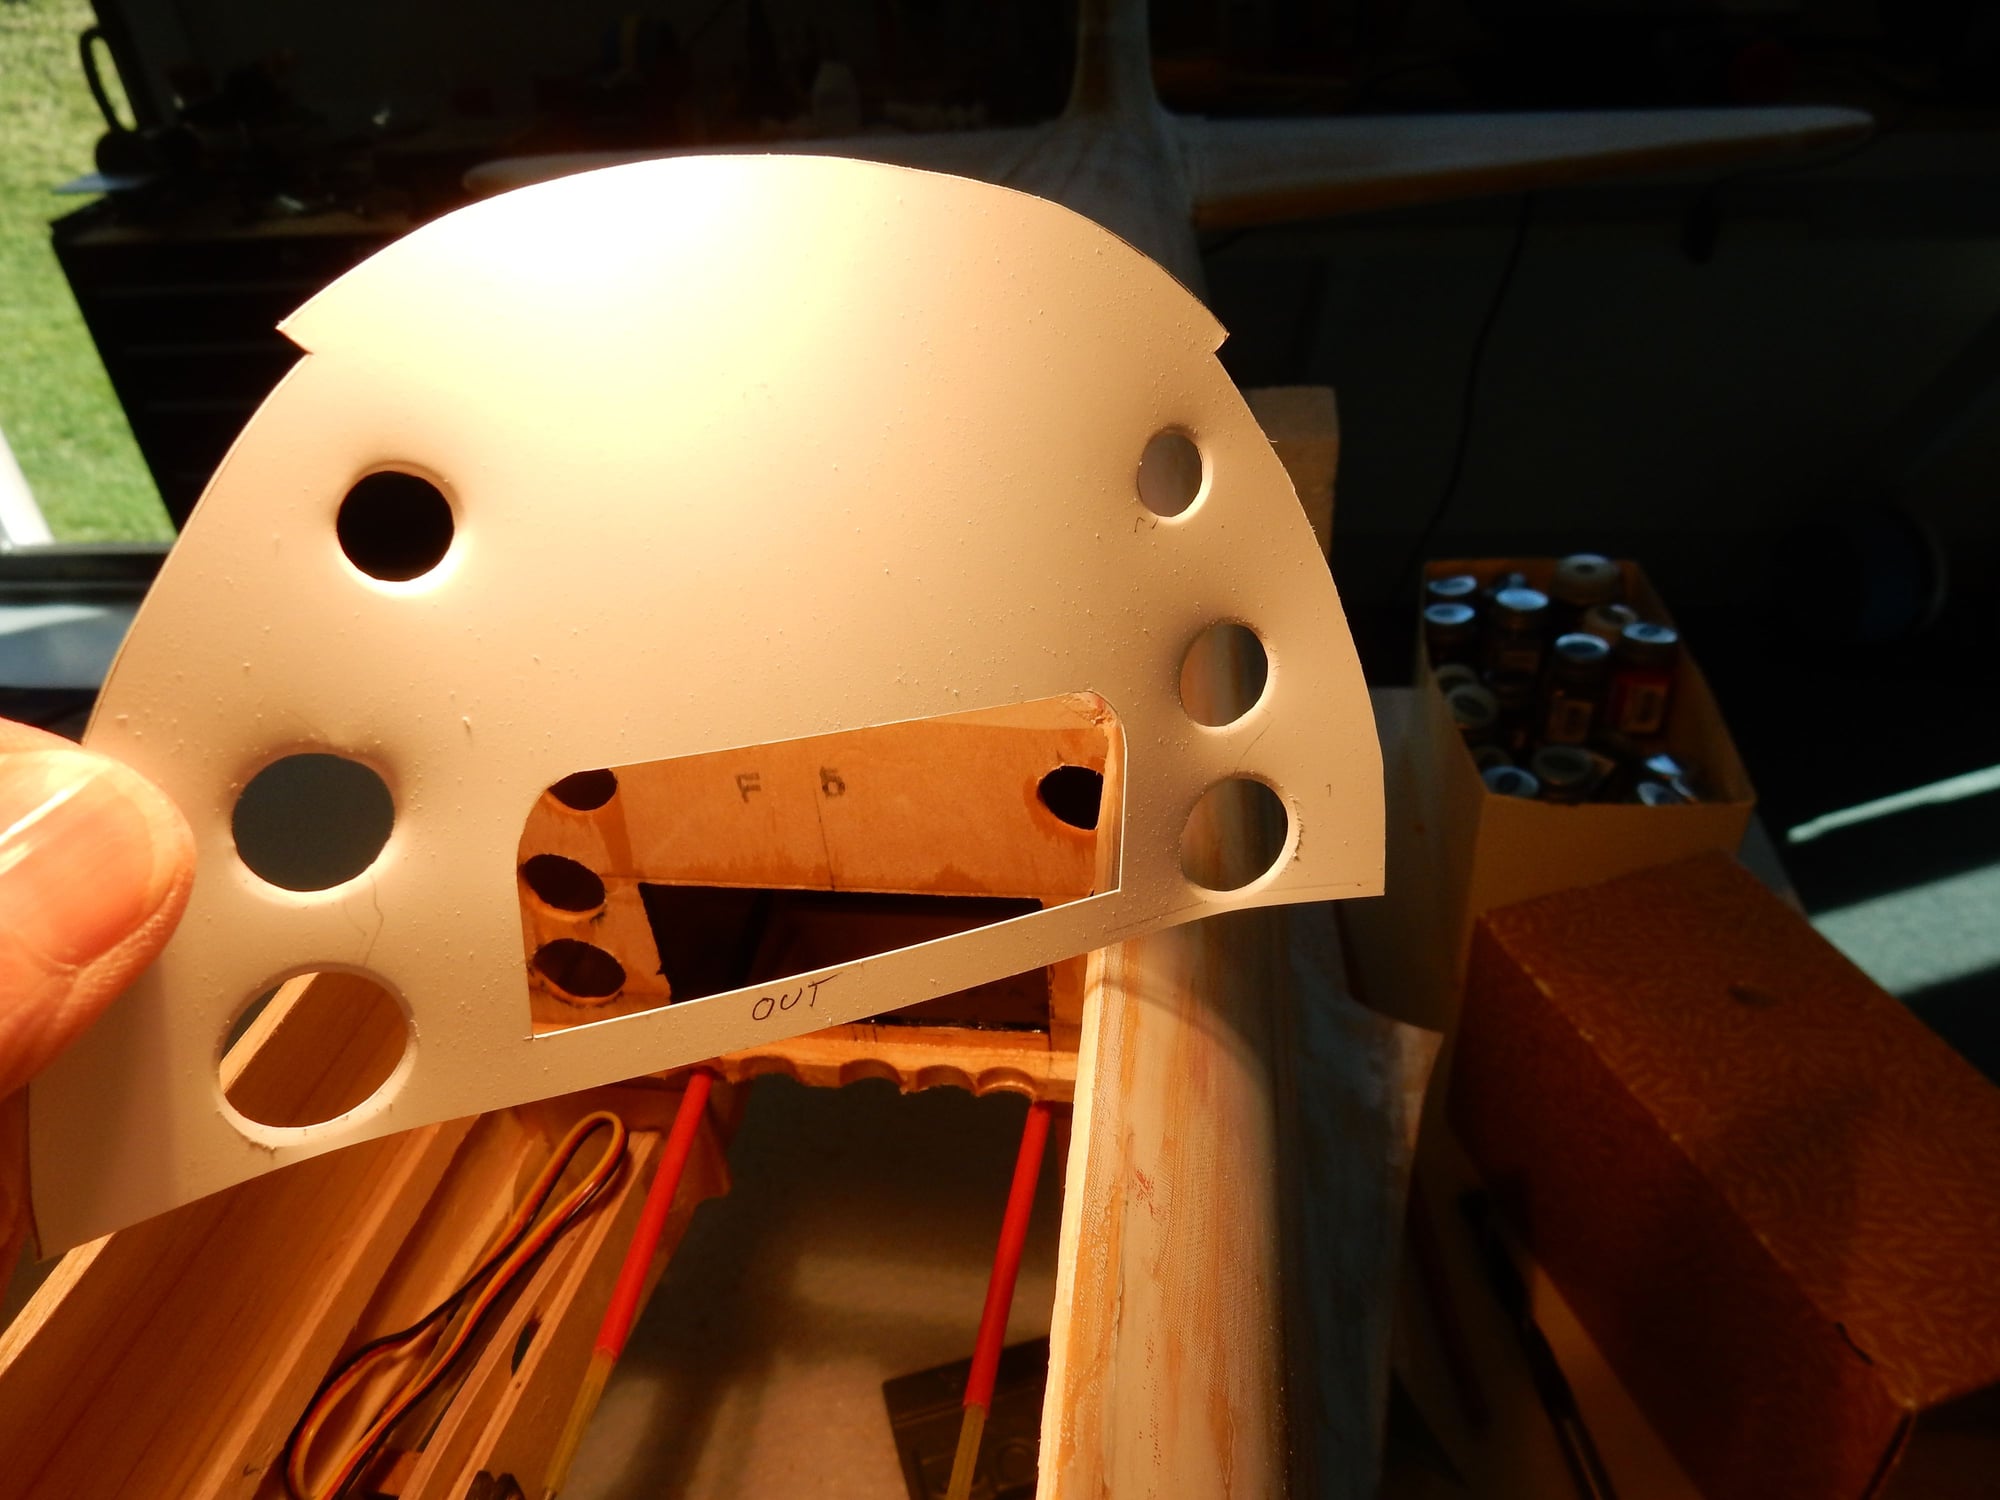
Thin sheet plastic verneer w/ lightening holes pre-cut and embossed w/ tapered dowel to mimic the punched aluminium of an actual bulkhead.
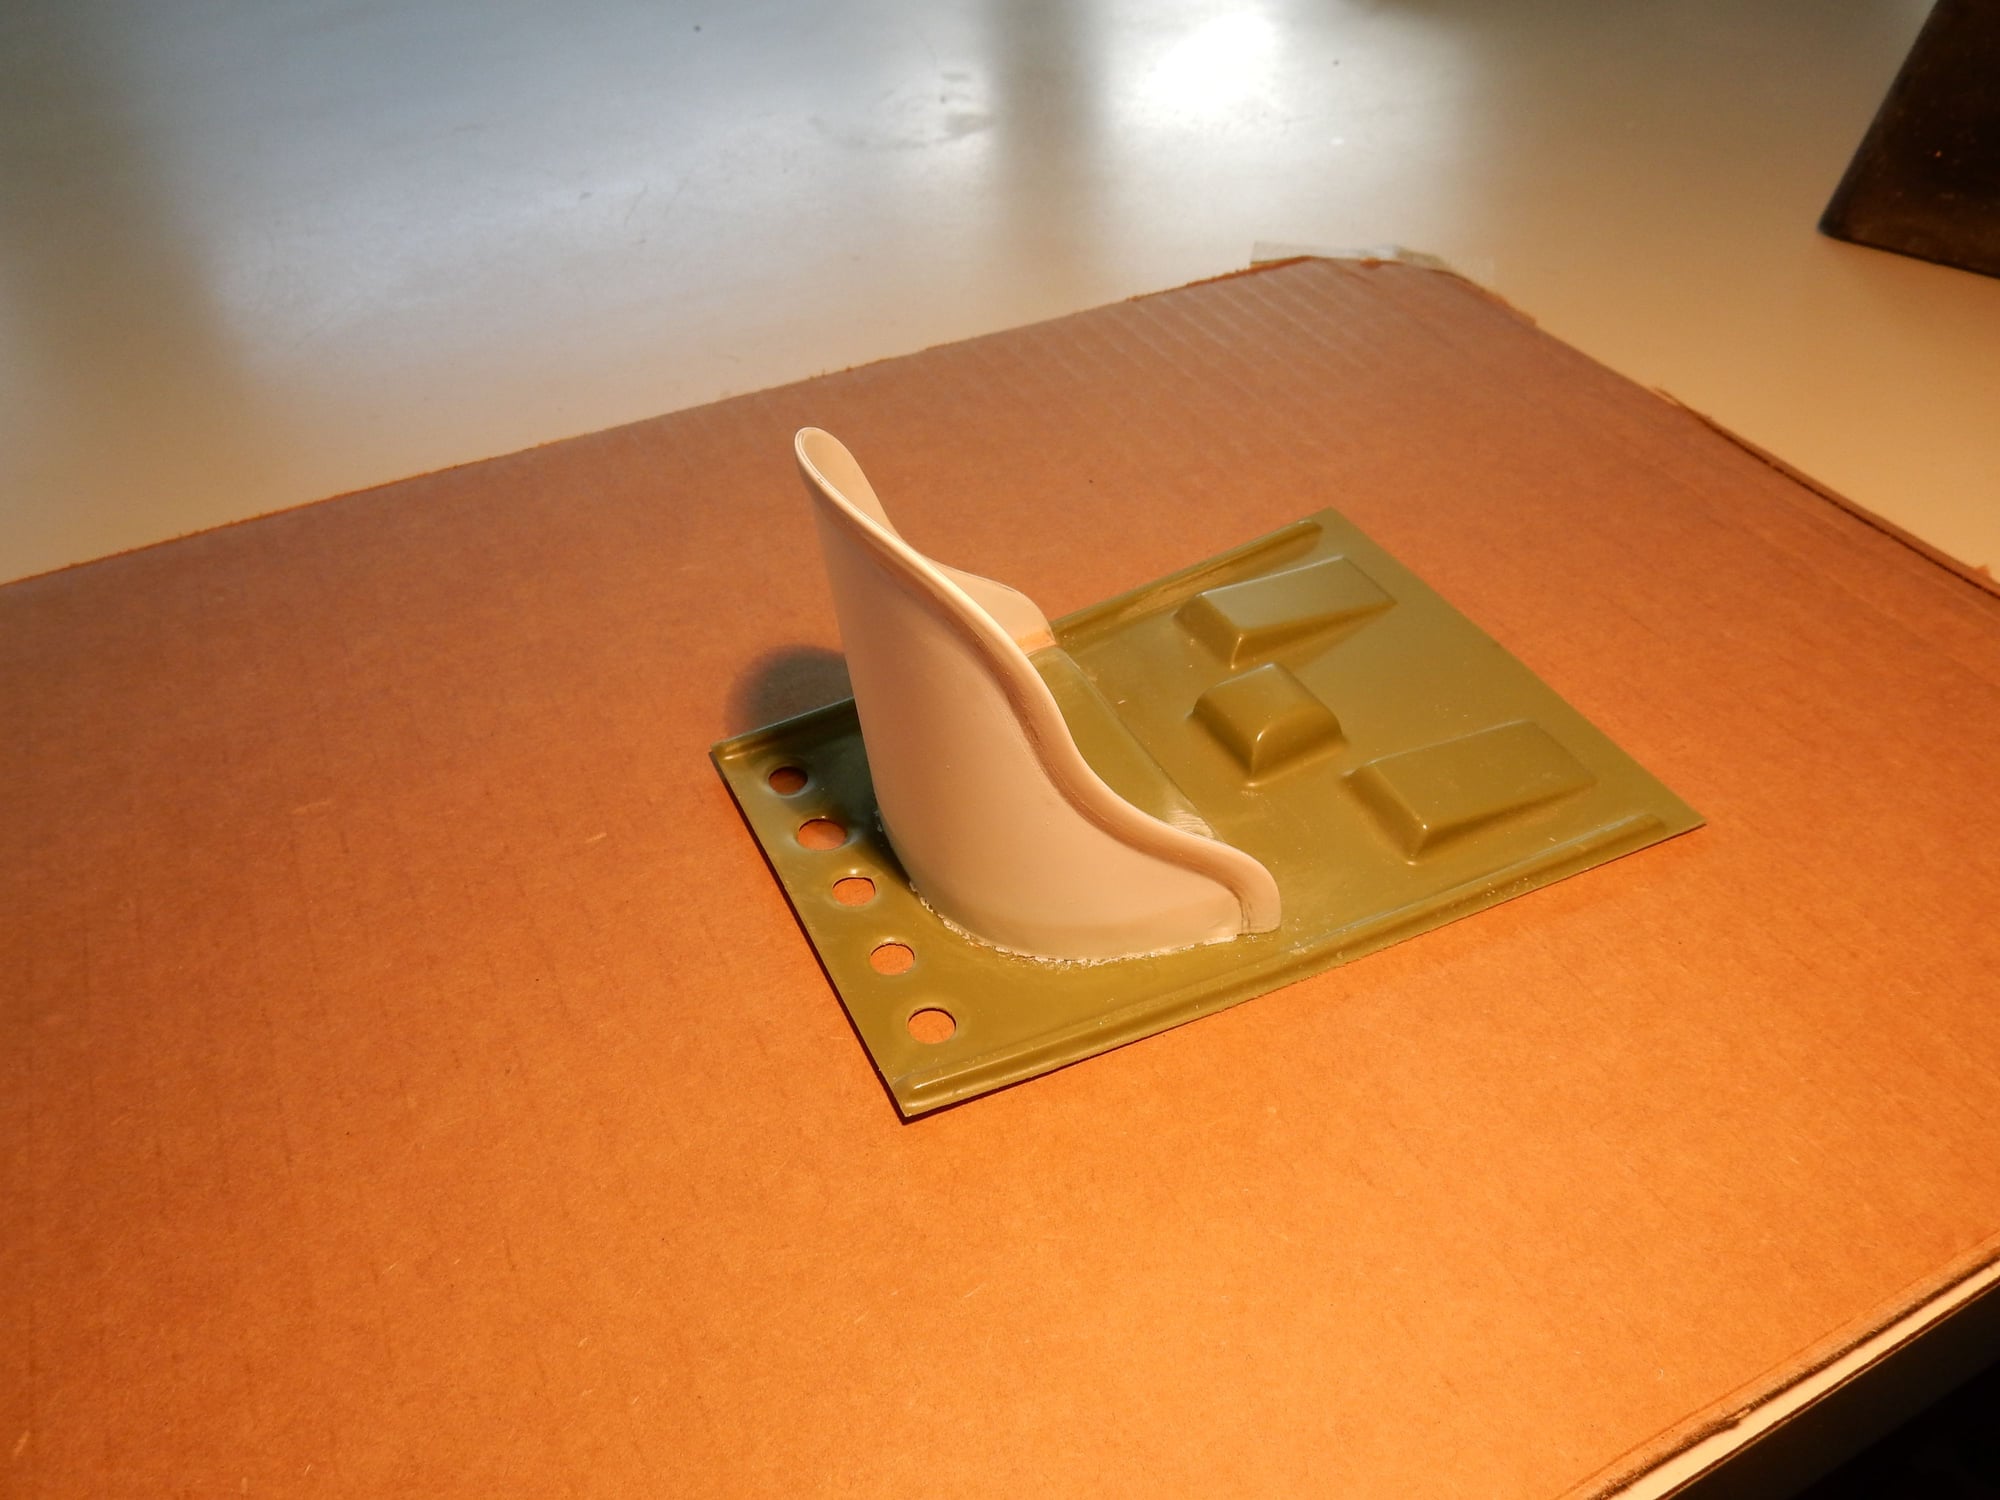
Pilot seat back glued in place on cockpit floor. Several laminations of styrene already glued to top edge, sanded & bevelled to resemble a thicker edge, as opposed to being paper thin.
04-23-2020, 02:19 PM
#297
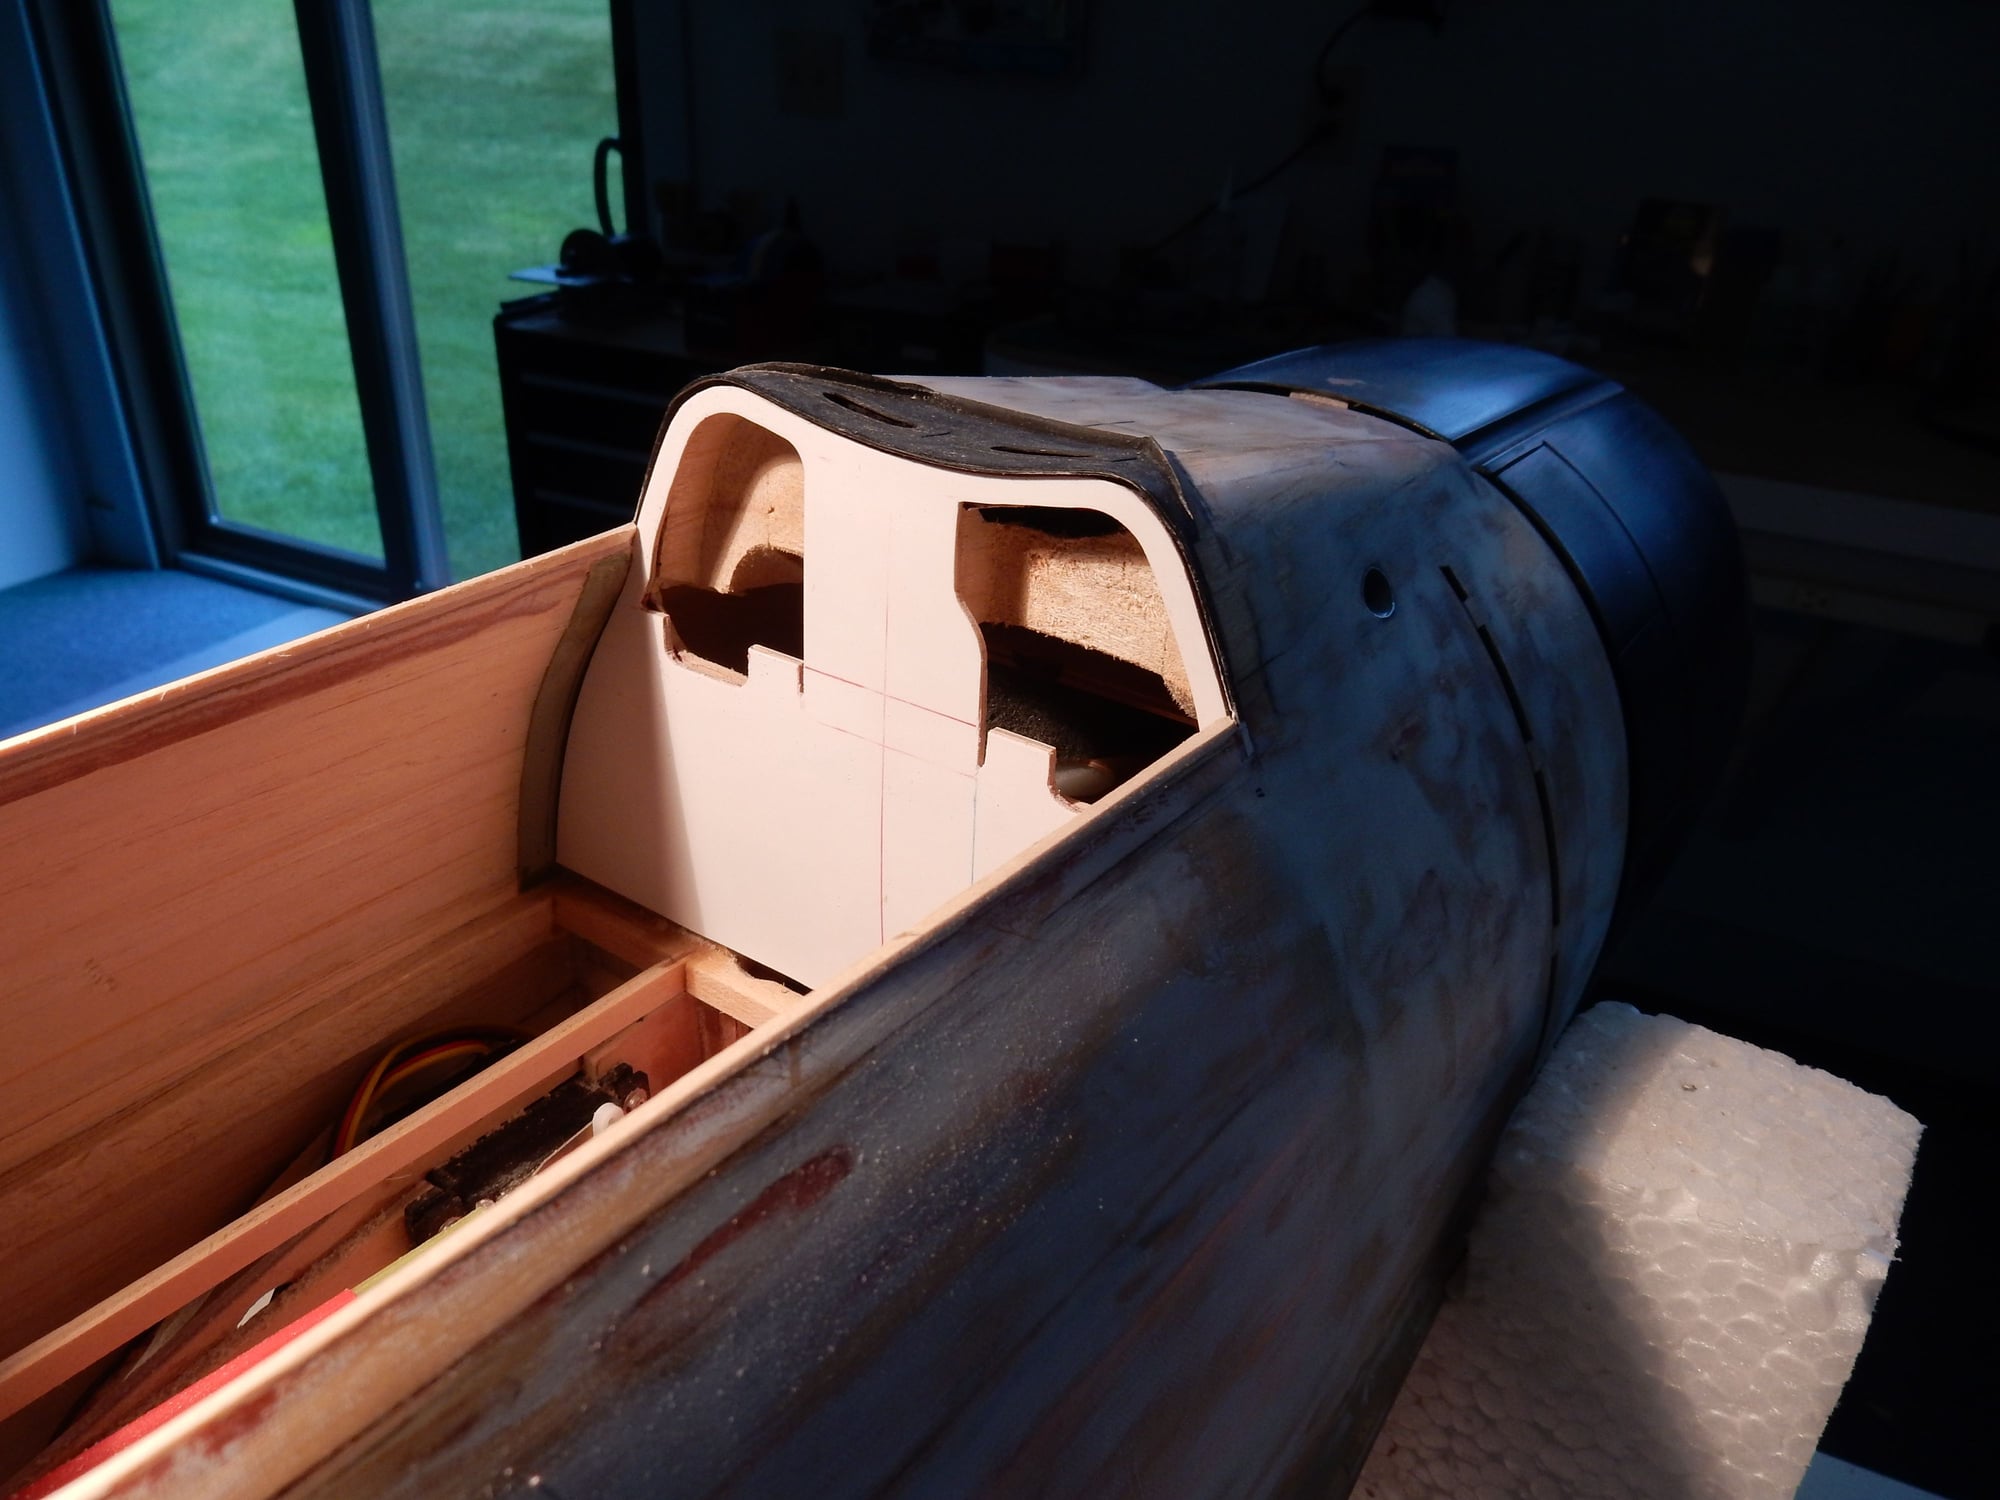
Temporary fitting on pilot's seat & floor. Note that the interior color of Japanese Navy planes are different than their Army counterparts.
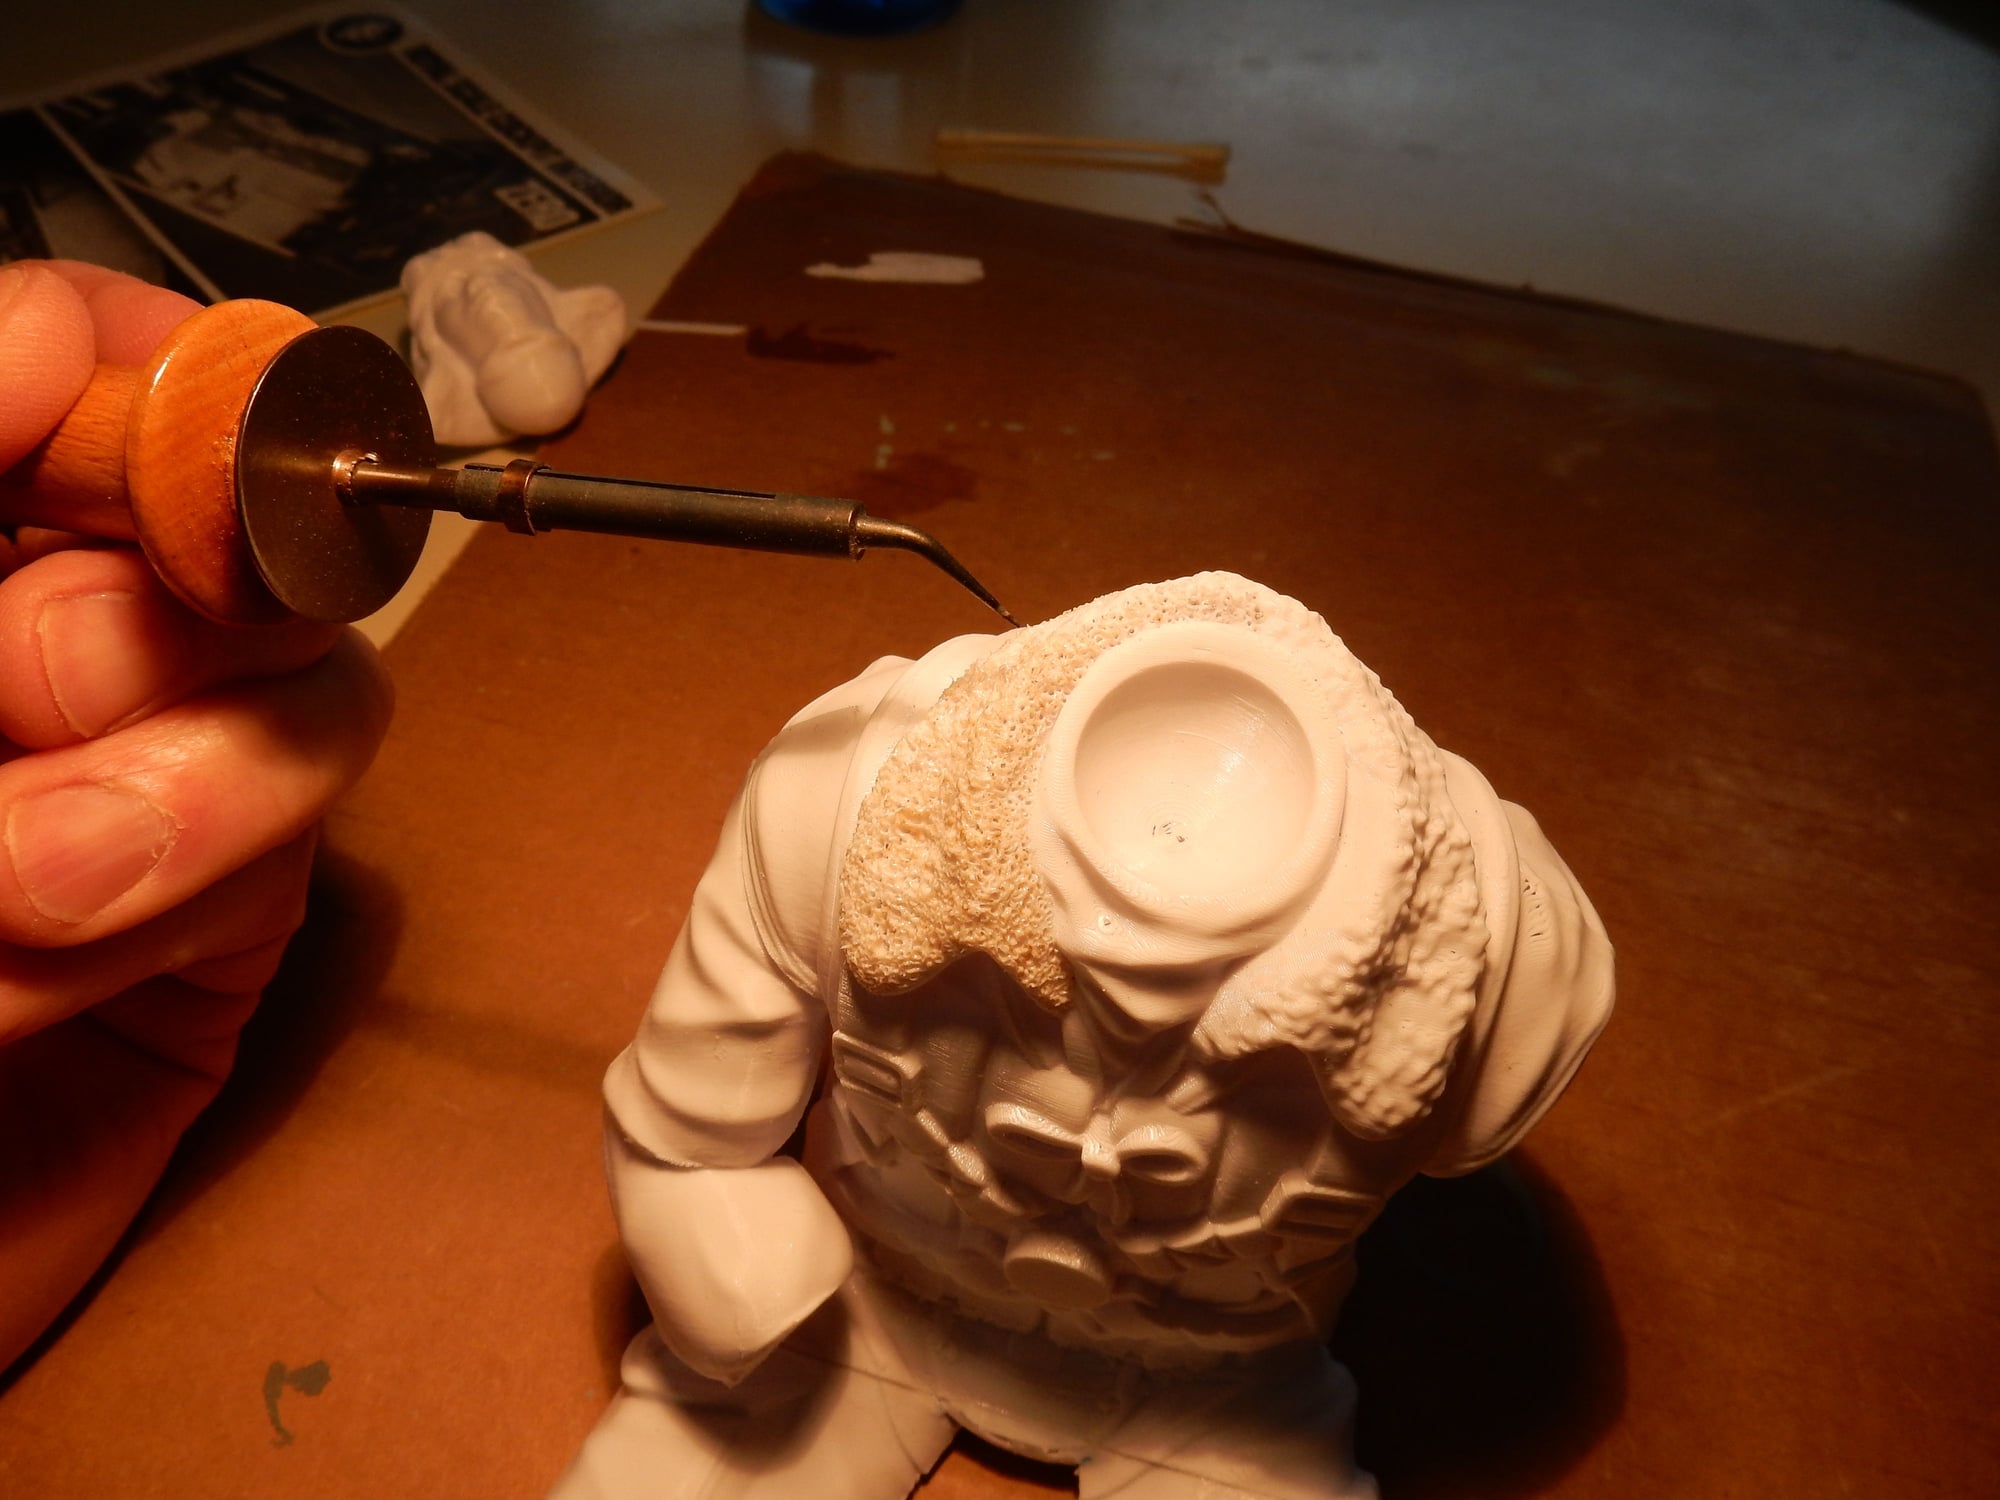
A little enhancement on the 3-D printed pilot. Fur lining on the collar ( & flight helmet ) looked more like tapioca, so I used a stencil burner to texture up the plastic. When airbrushed & dry-brushed, it will resemble lamb's wool.

Foredeck under windscreen. More thin sheet styrene w/ hand-hold laminate, ready to be glued down over cavities dug in on the foredeck.
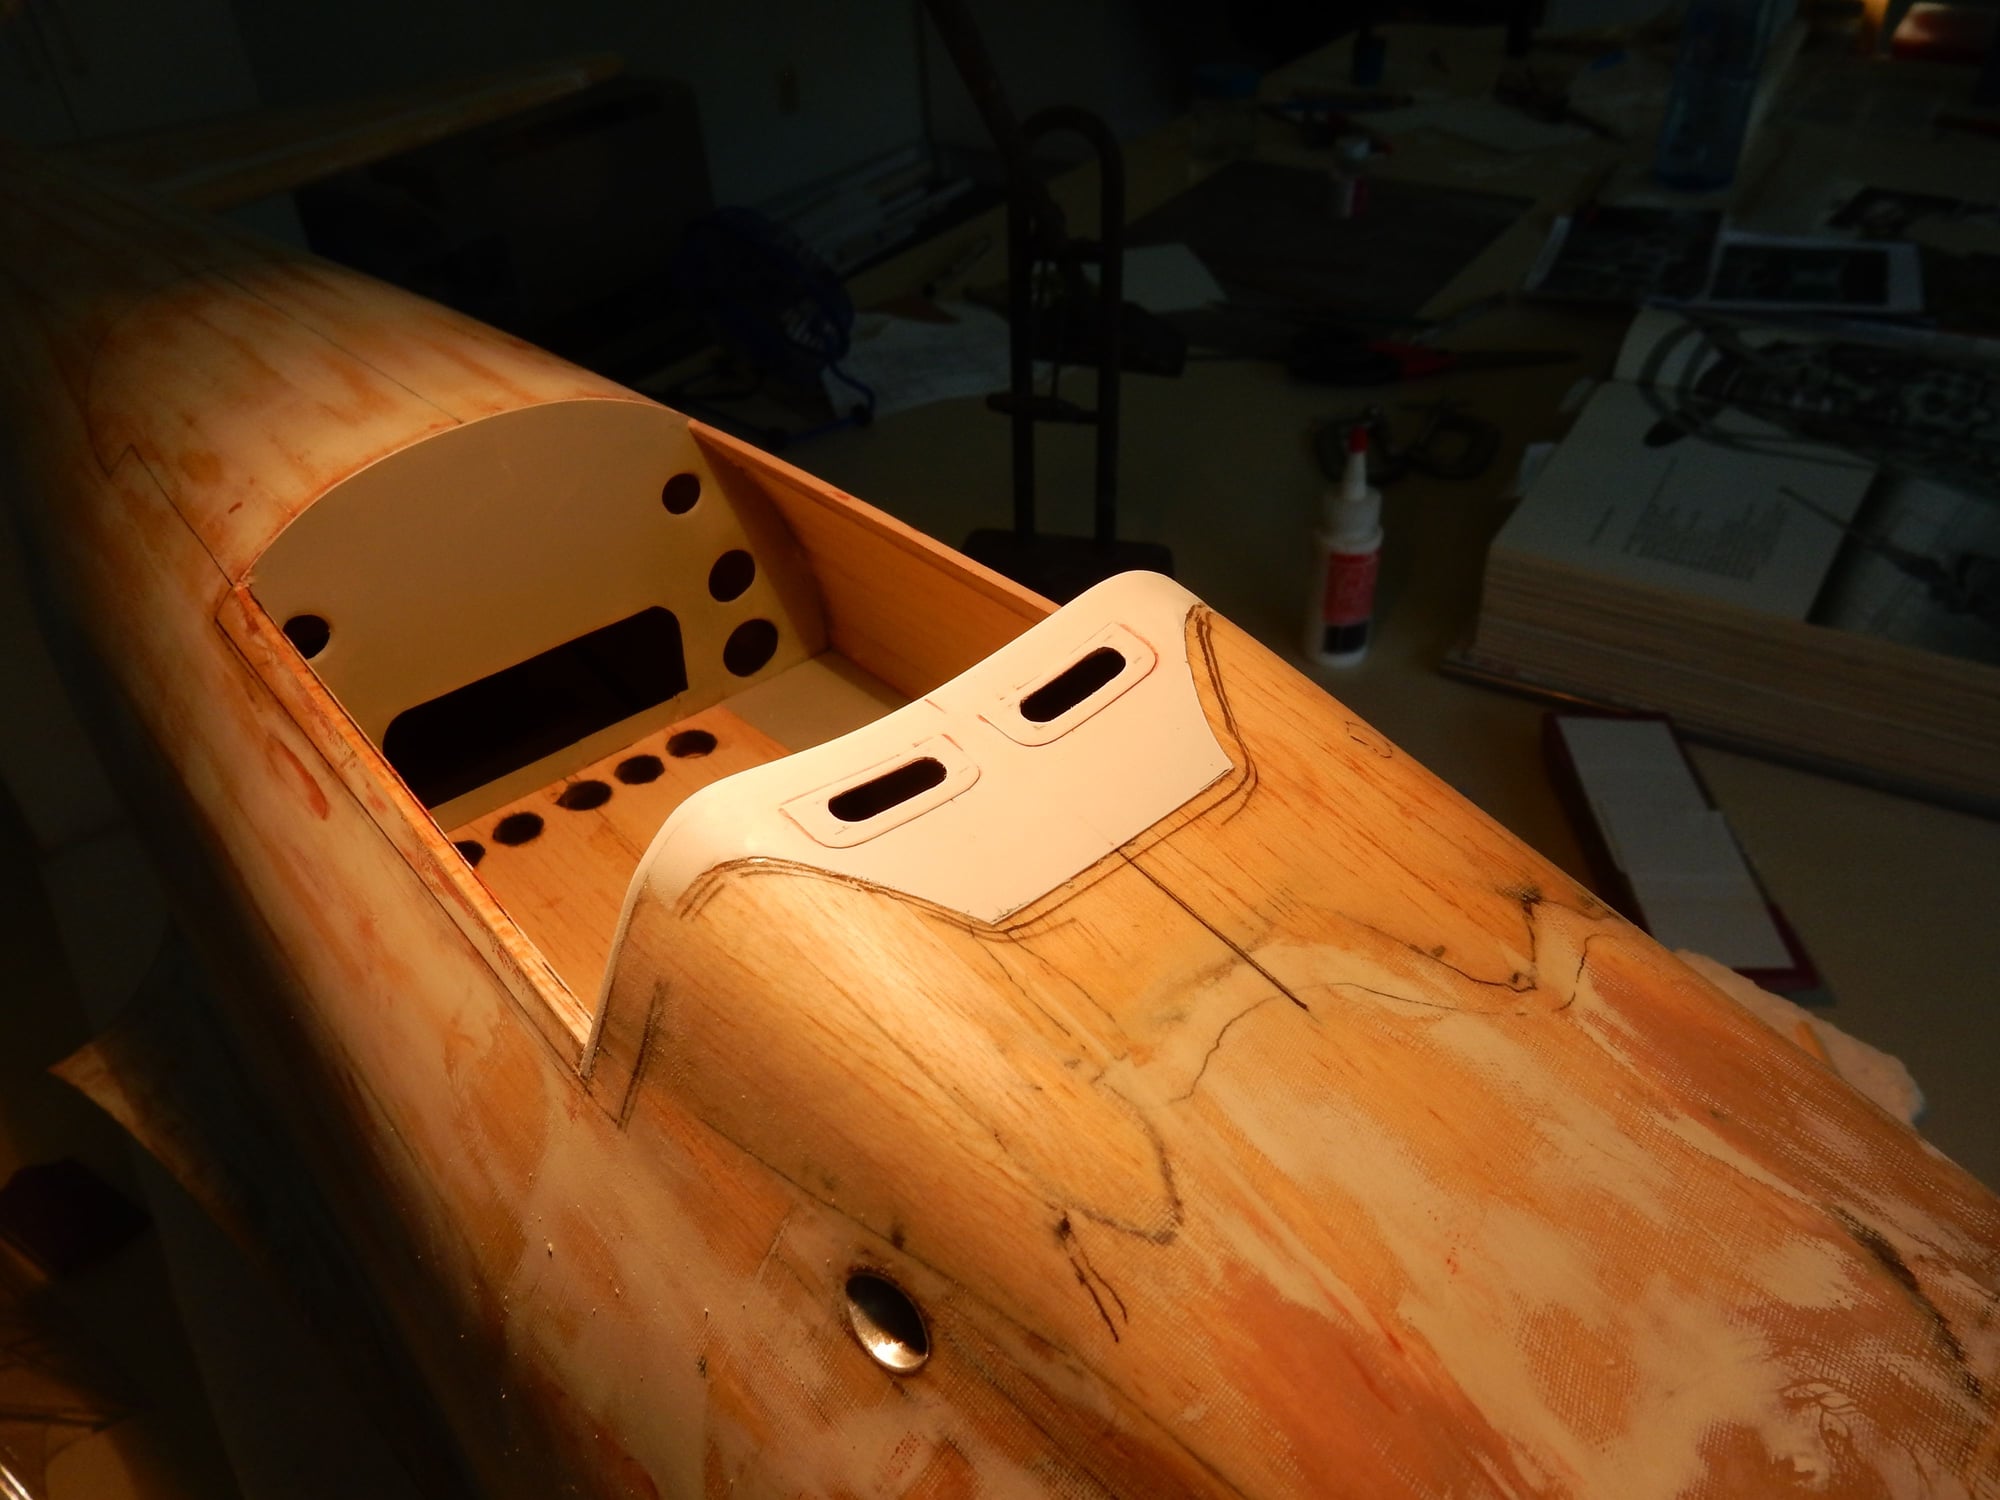
Cemented in place, ready for House Bondo "gasket" to provide more gluing surface for the canopy.
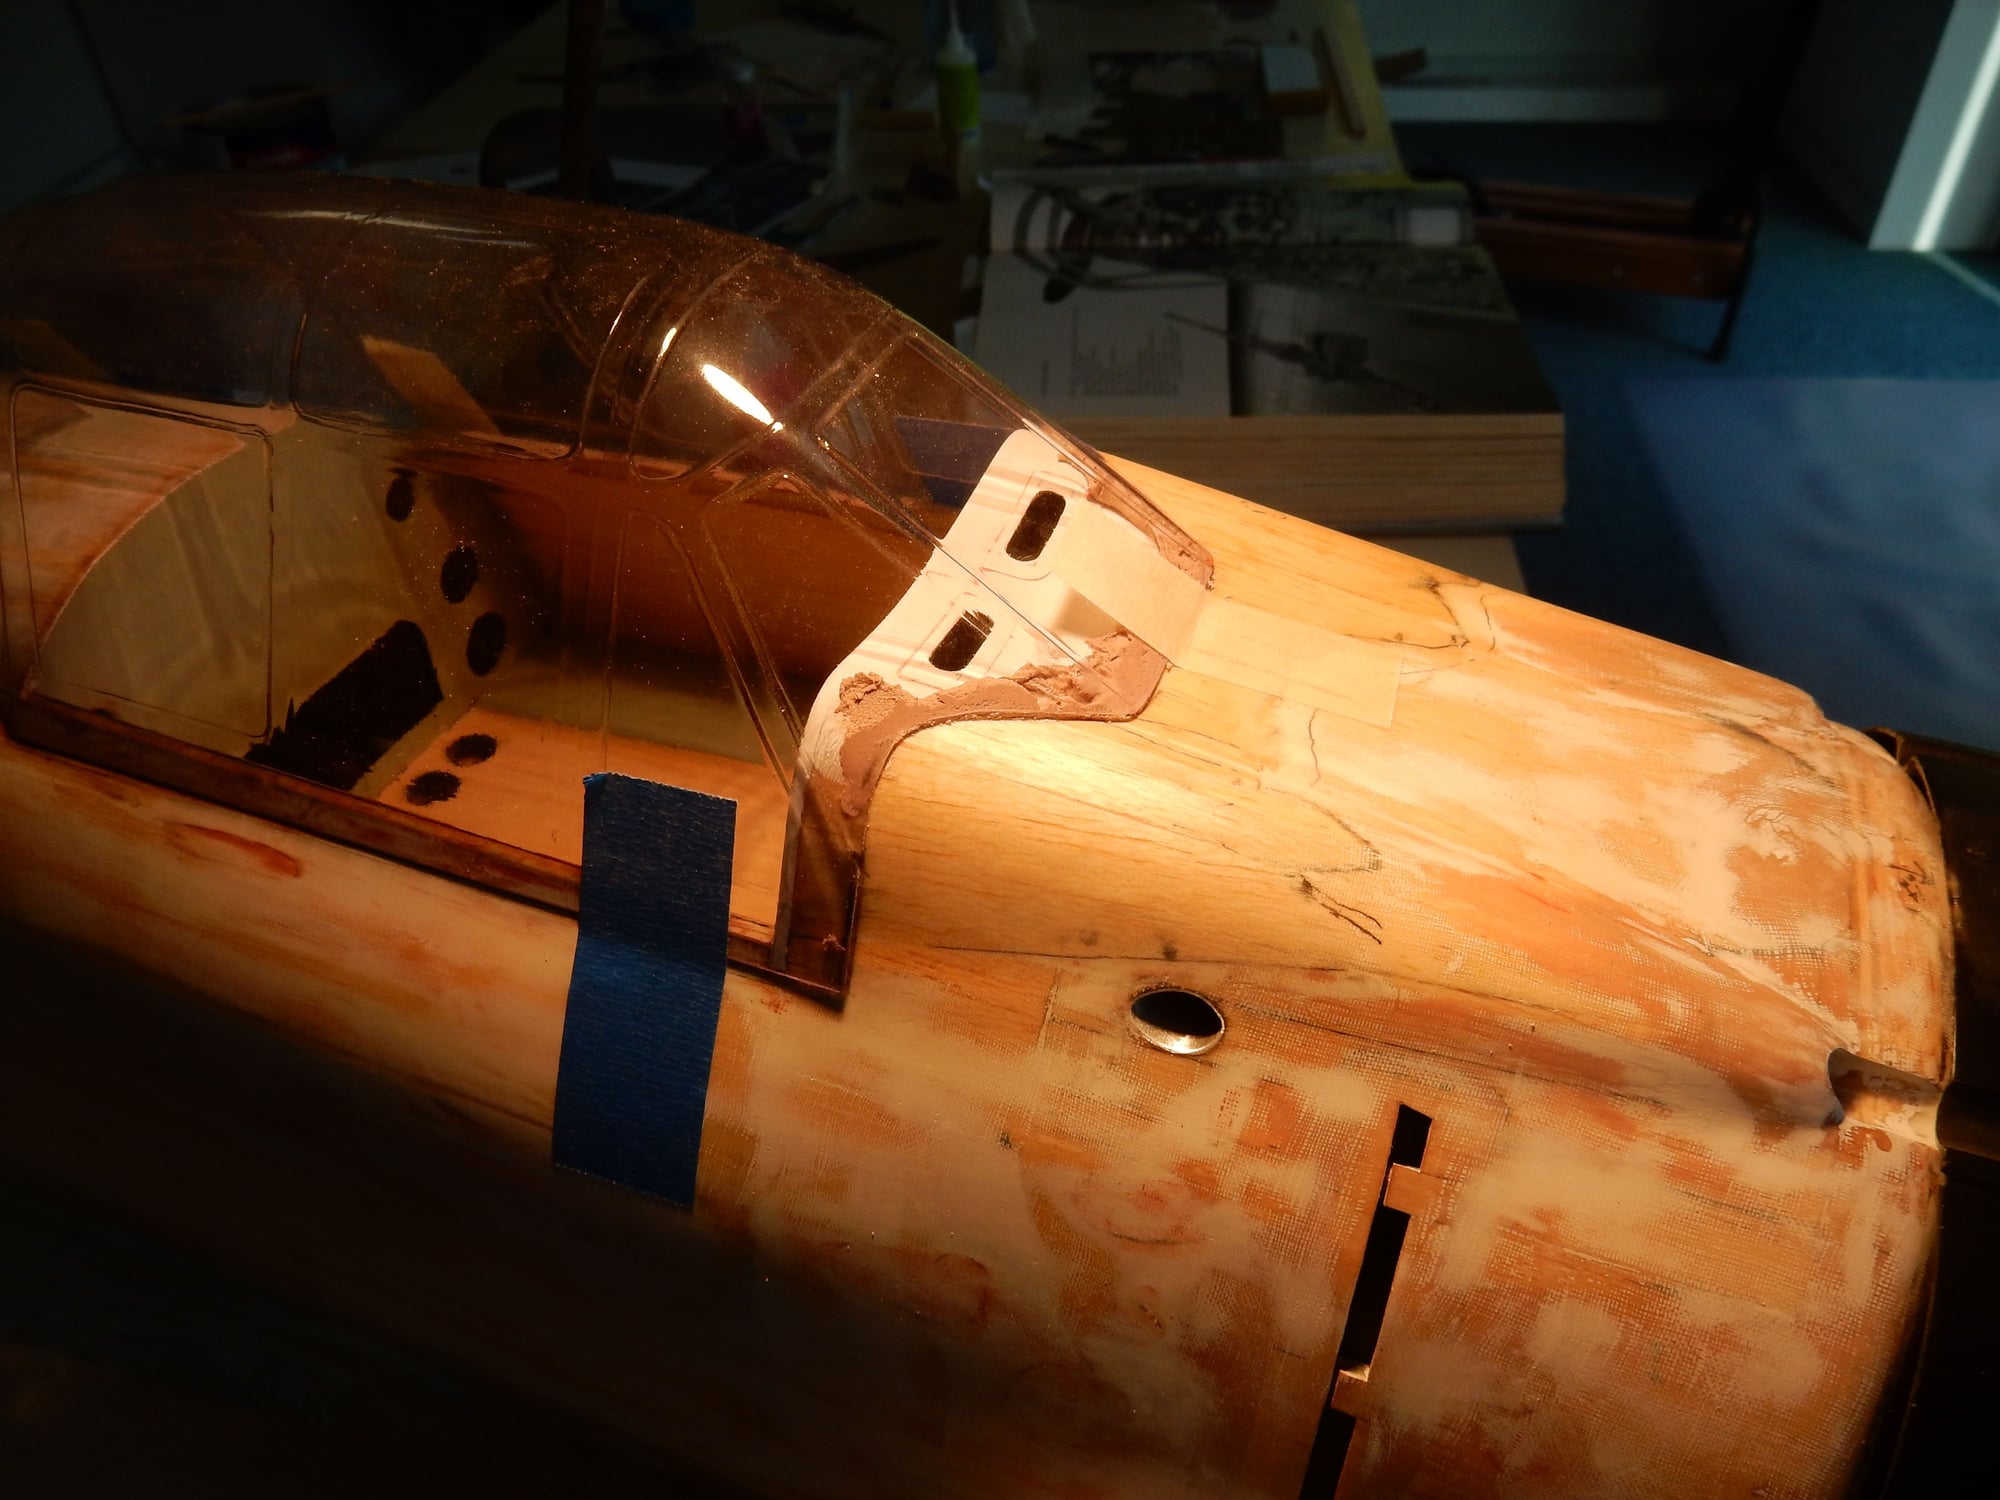
Gasket in place under the canopy which was pre- Vaselined along the edges and taped in place to make an accurate mold.
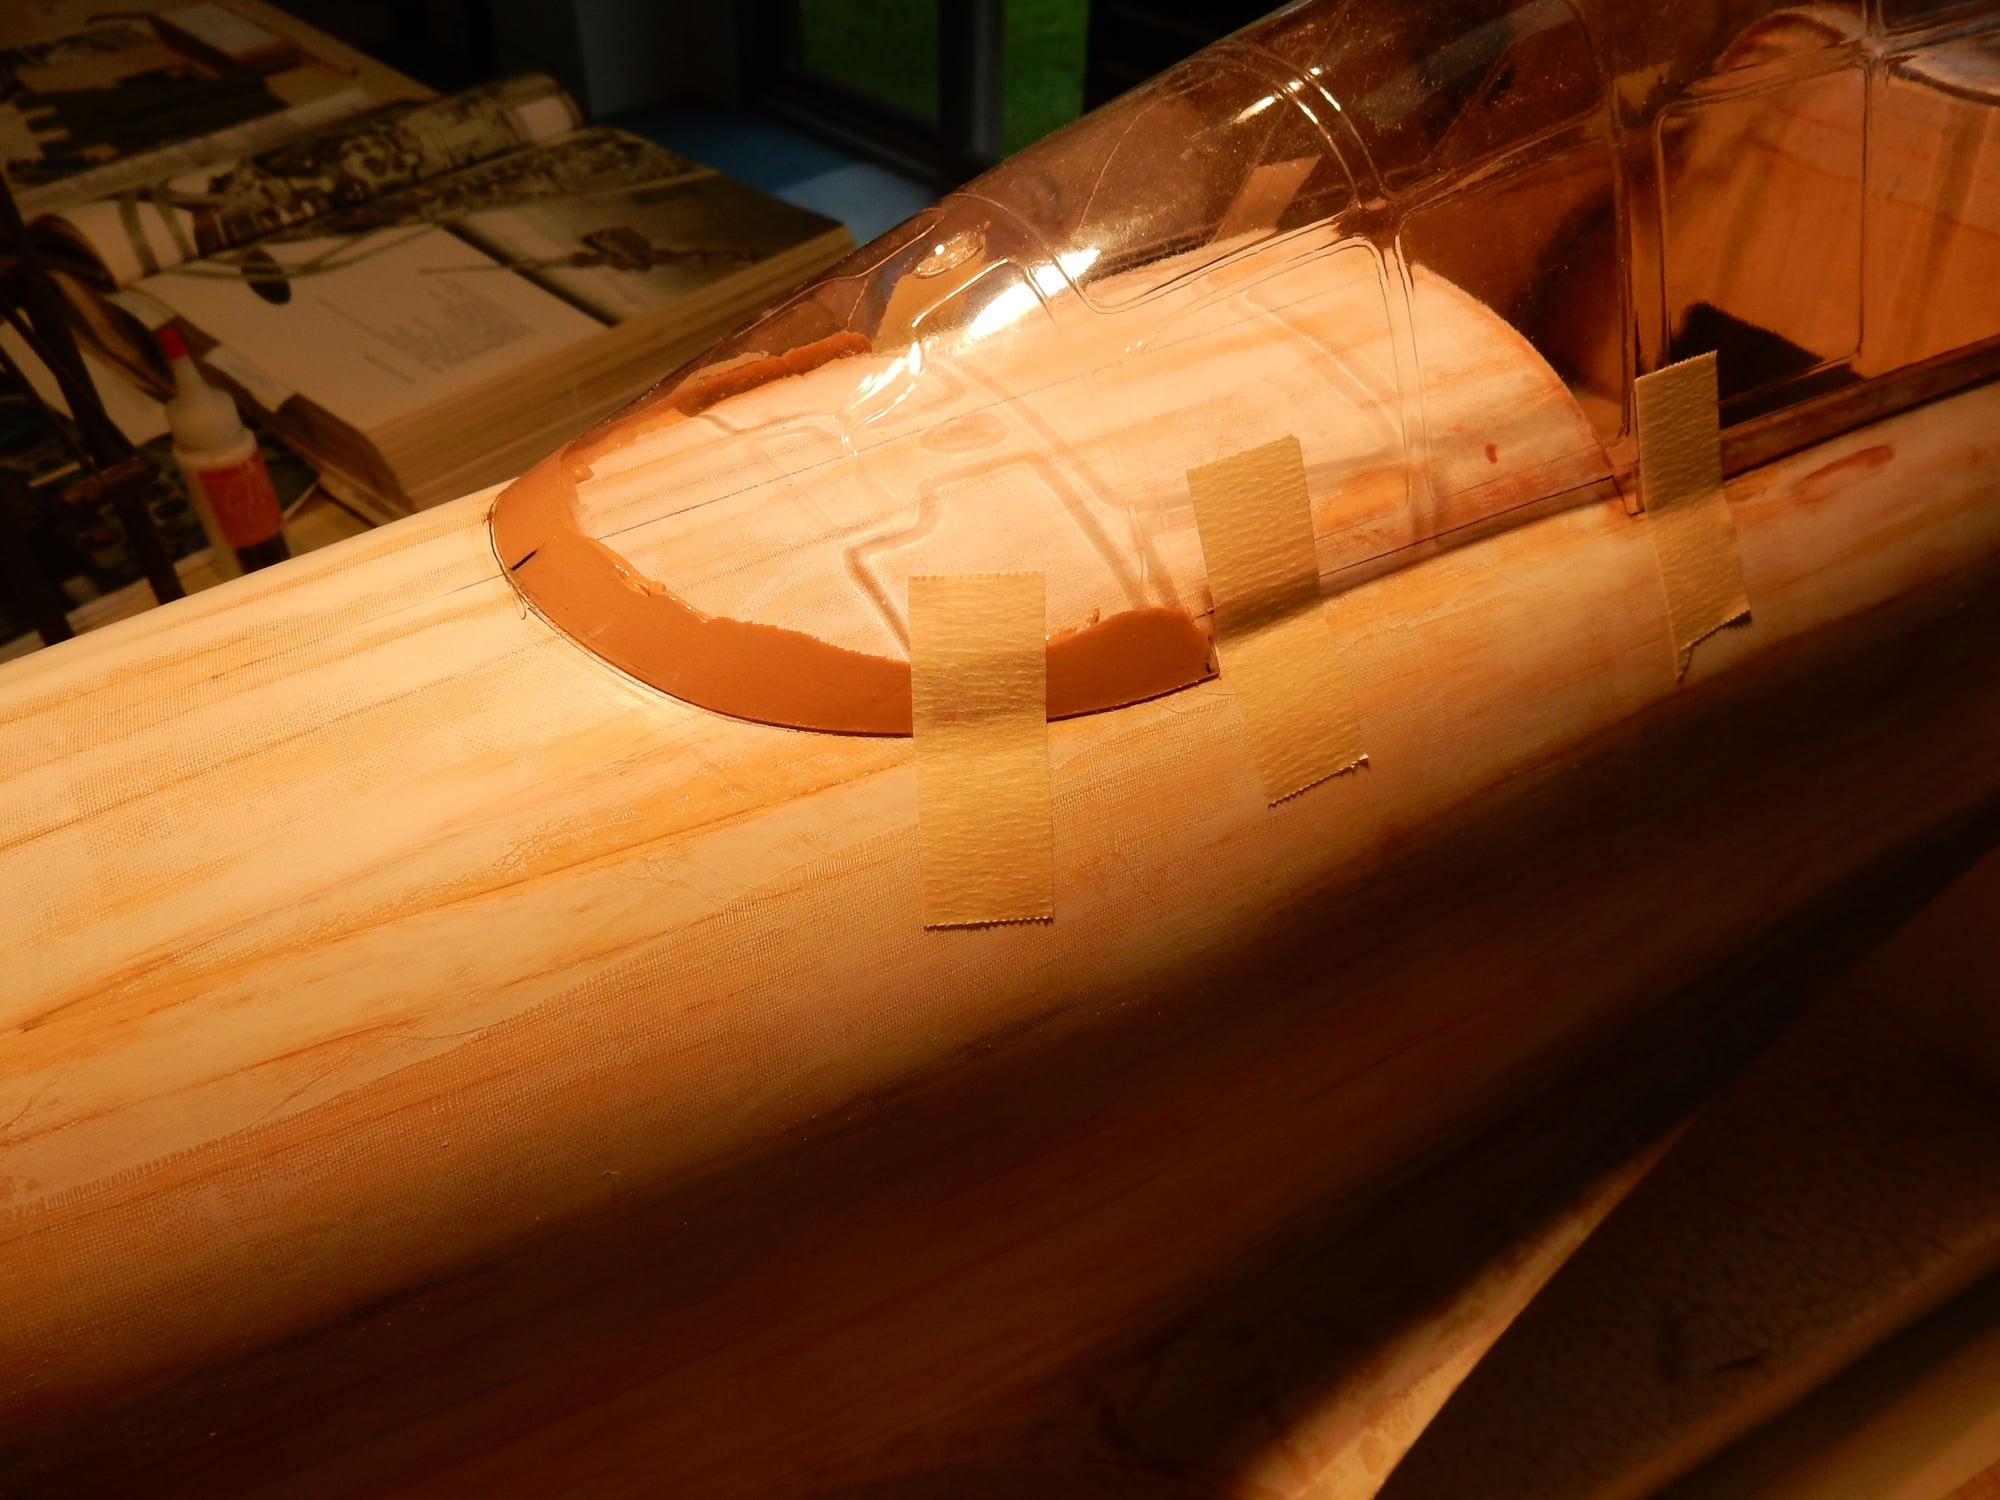
Same thing for the aft portion of the canopy. Note where the gasket ends to allow for the sliding part of the canopy to move aft when opened.
Foredeck airbrushed flat black. Less "naked" balsa showing and more paint taking over. More photos in the works.
The following users liked this post:
Joe. (04-26-2020)
05-06-2020, 08:28 AM
#298
........more updates on progress...��..
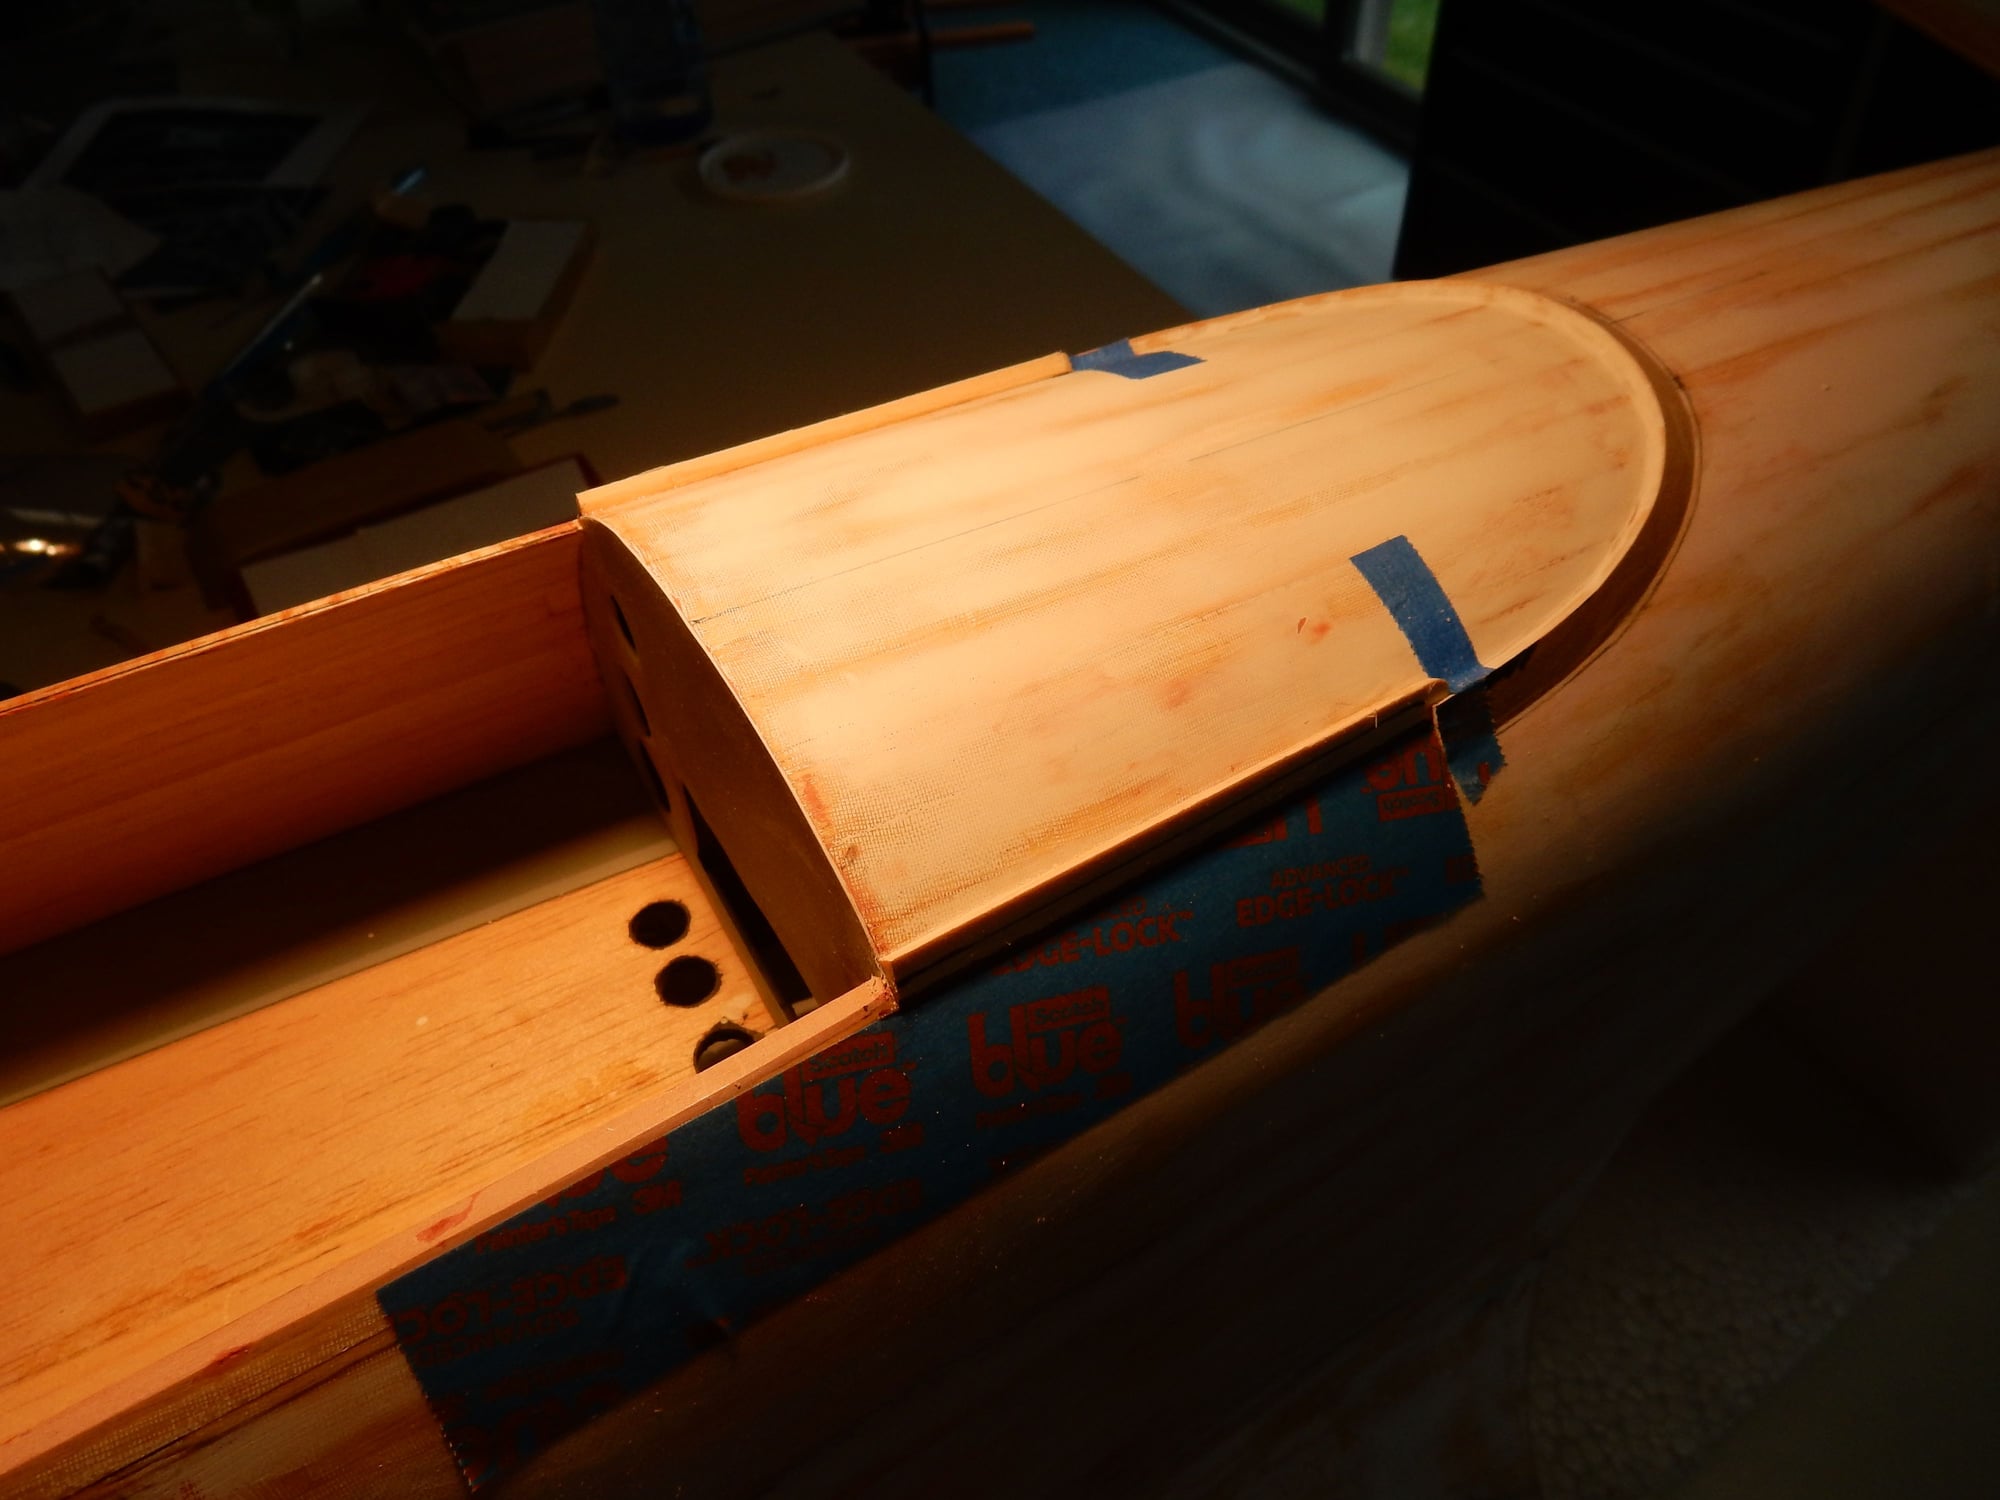
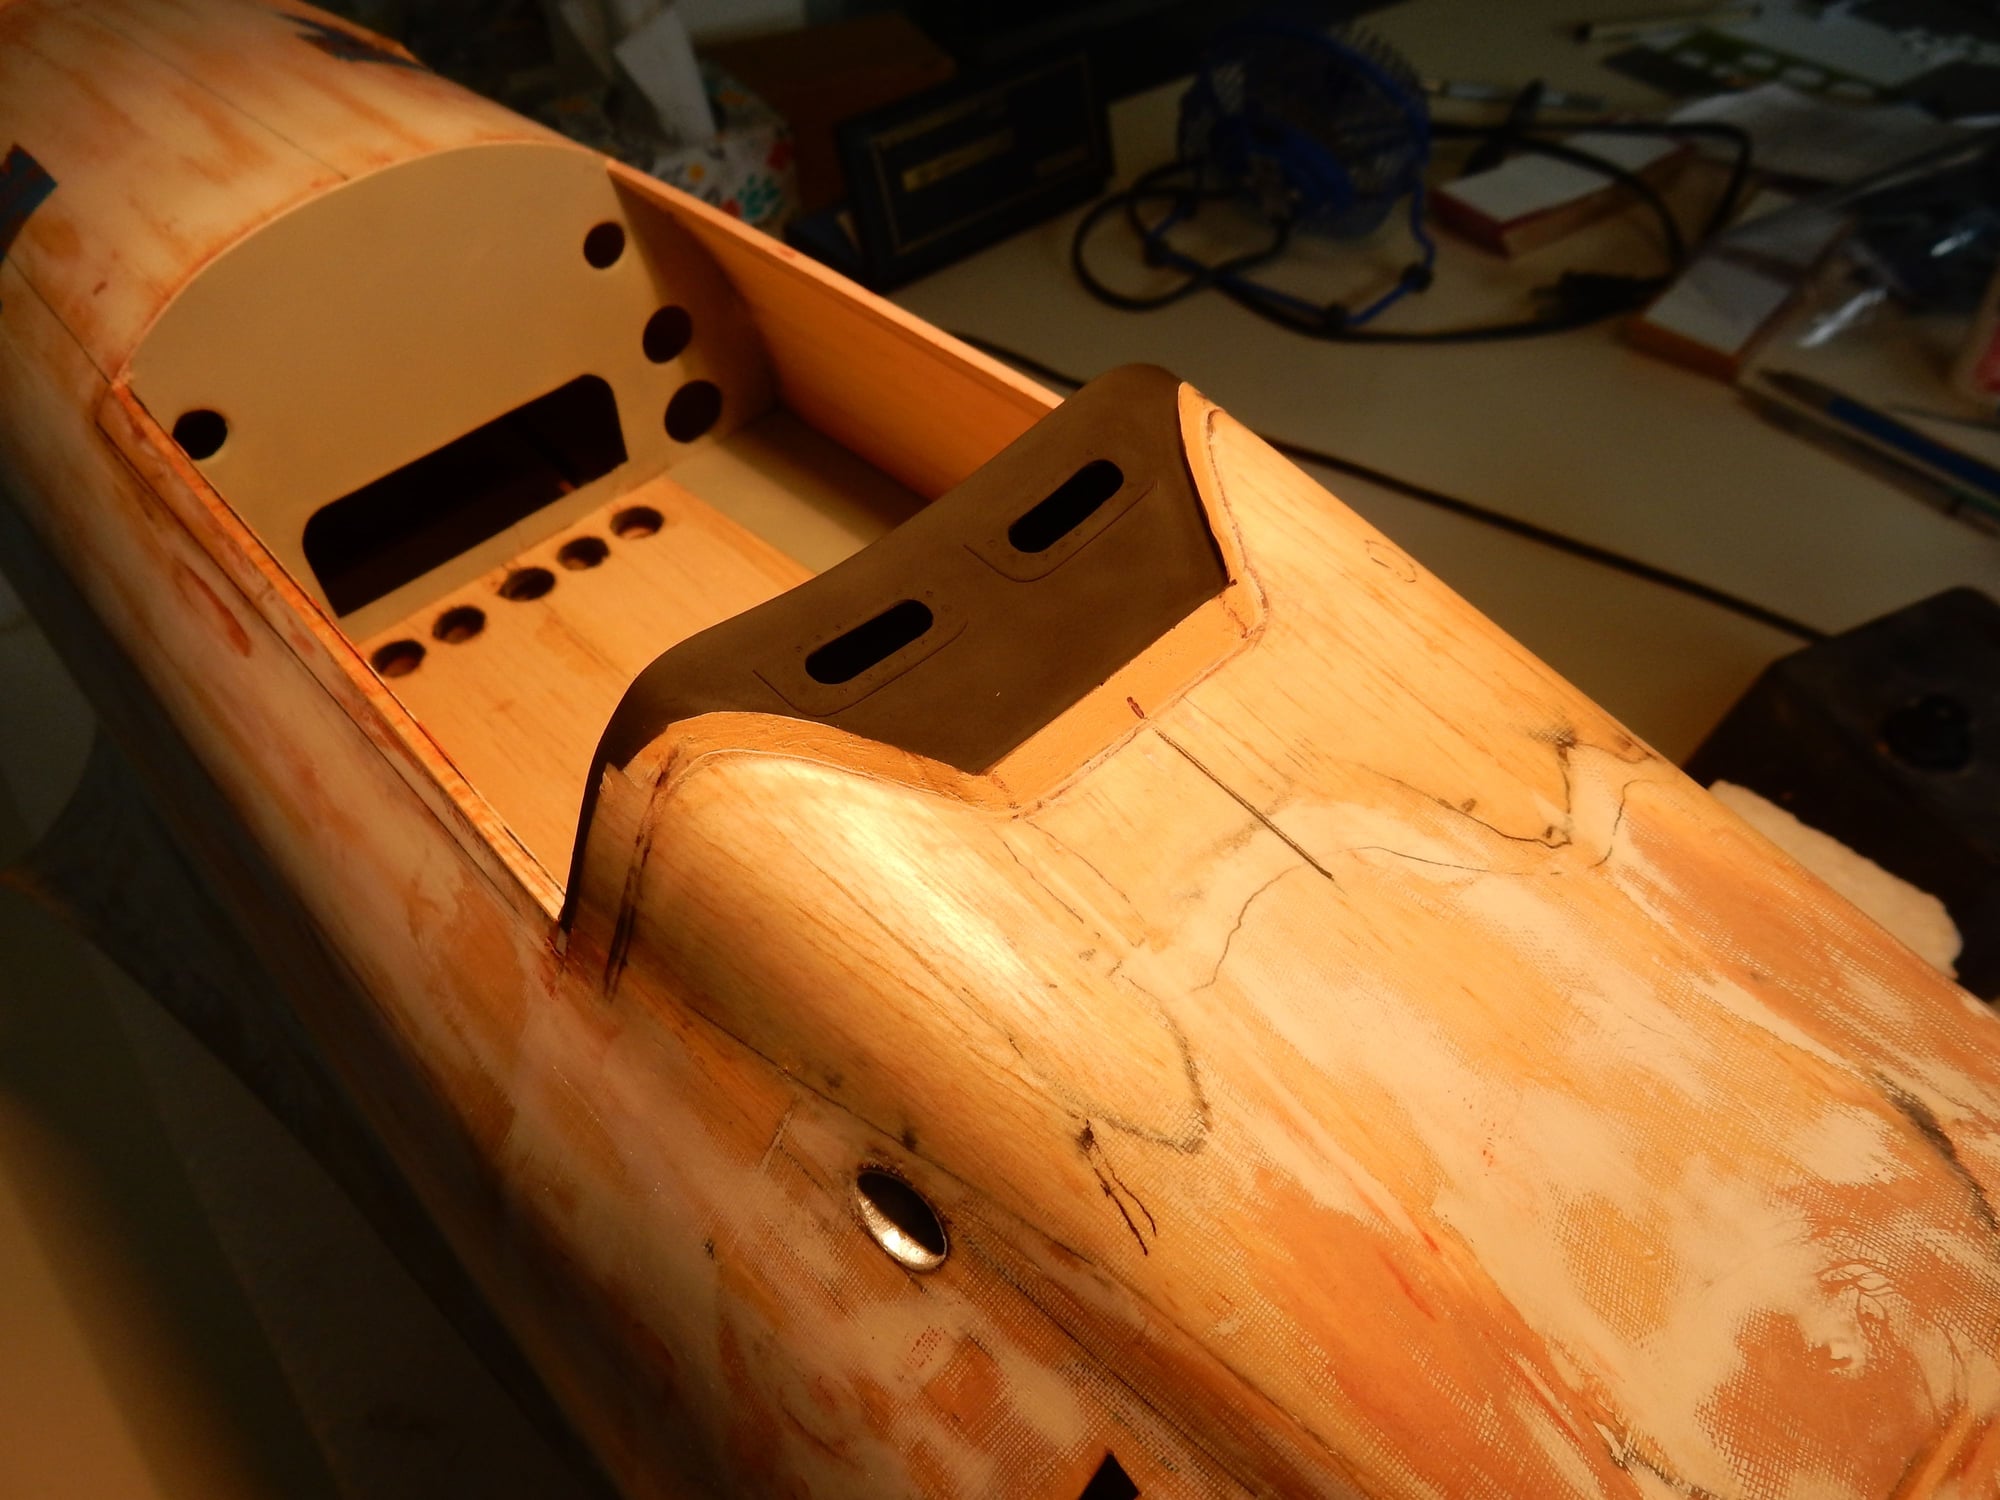
Side support rails molded from bondo in place, excess sanded away and canopy ready.
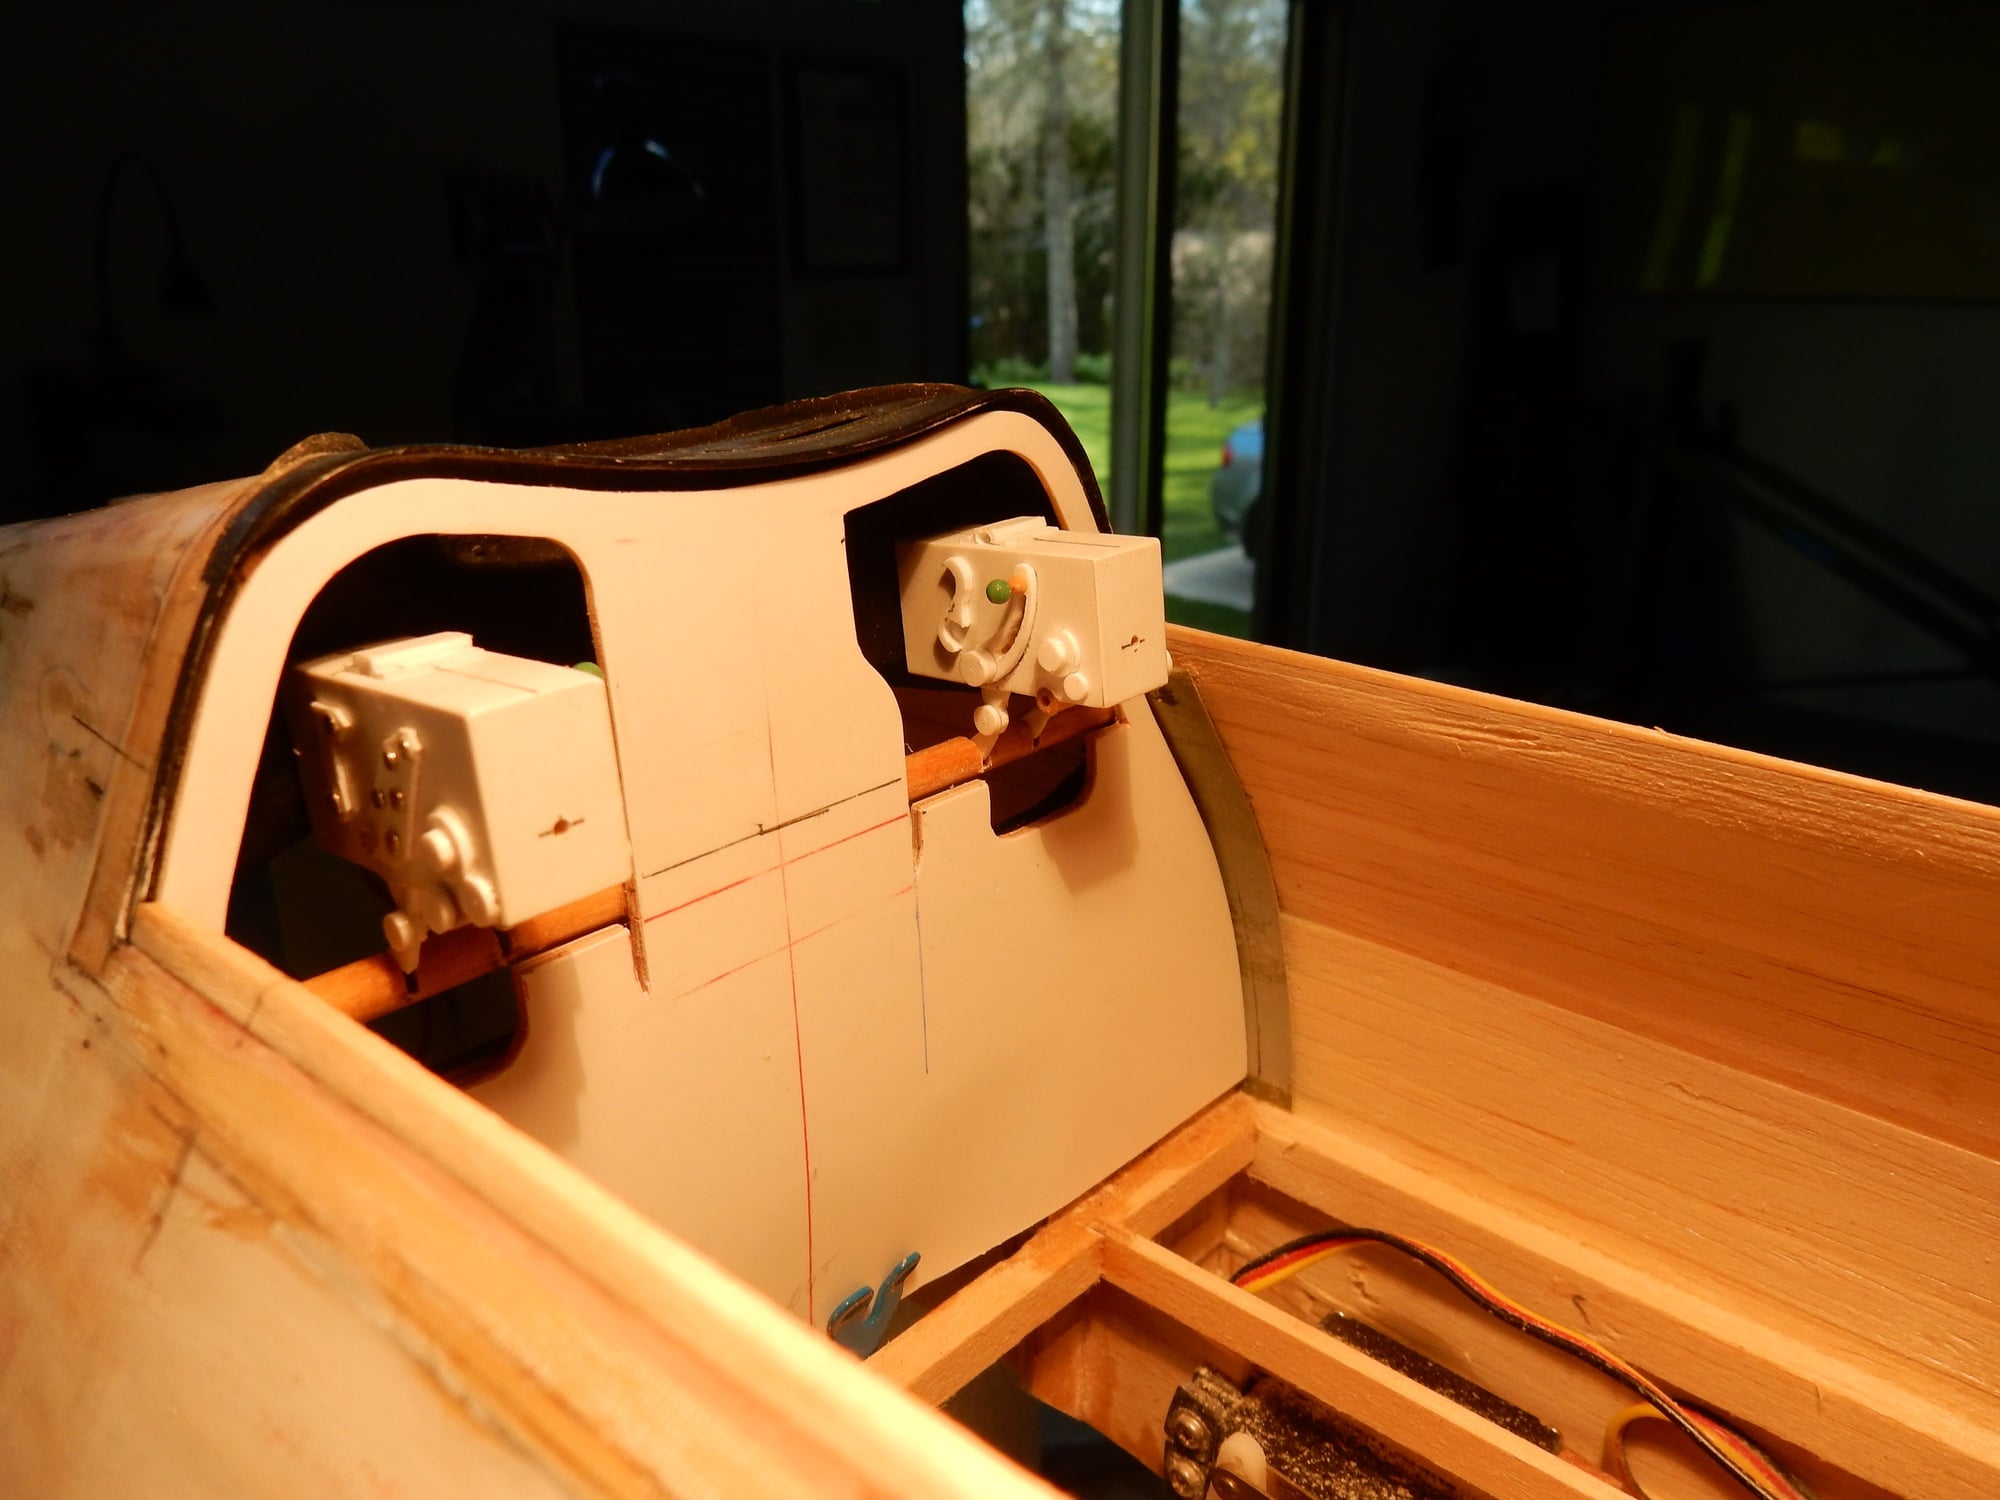
Foredeck ground and sanded out to make a "shadow box" for the twin .30 cal. gun breeches. Will be painted flat black to add depth.
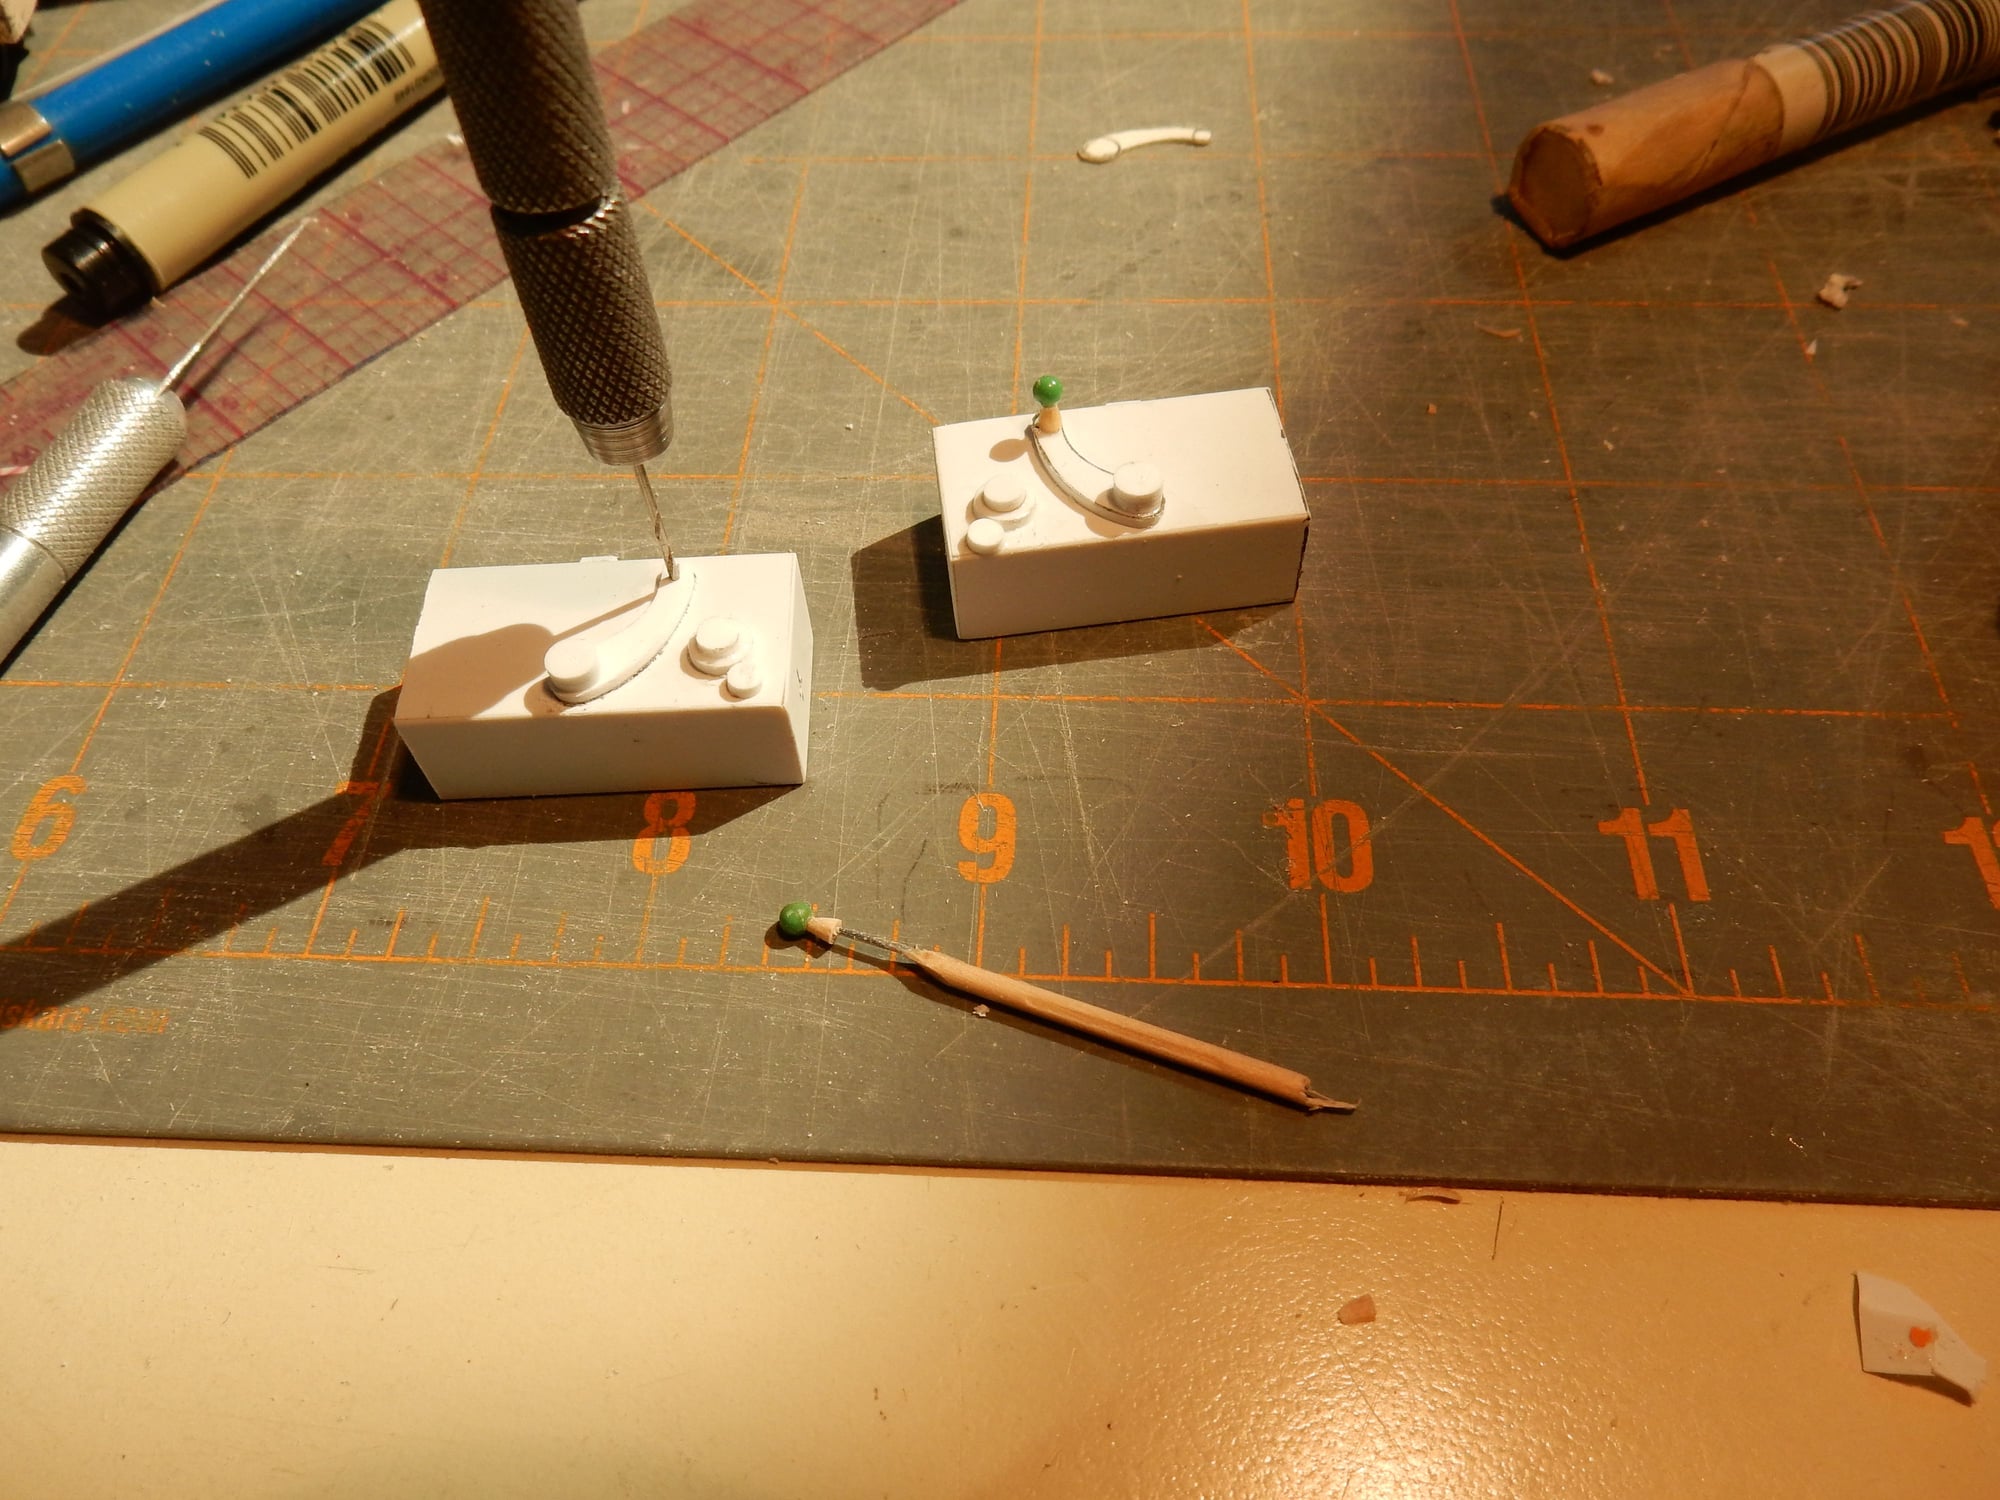
Styrene-clad instrument panel backing temp. in place. When completed w/ instruments, etc., will be painted Jap Navy int. green.
Styrene-clad balsa breeches w/ detailed "bits" added. Here, a series of holes are drilled in a row to simulate bolt travel slots. A #11 blade opened up the channel afterwards.
Channel opened for a convincing look. Bolts were made by drilling a small dowel and inserting a dressmakers pin into it, then taper-sanded and cut to length w/ excess pin shaft used to help glue it in place.
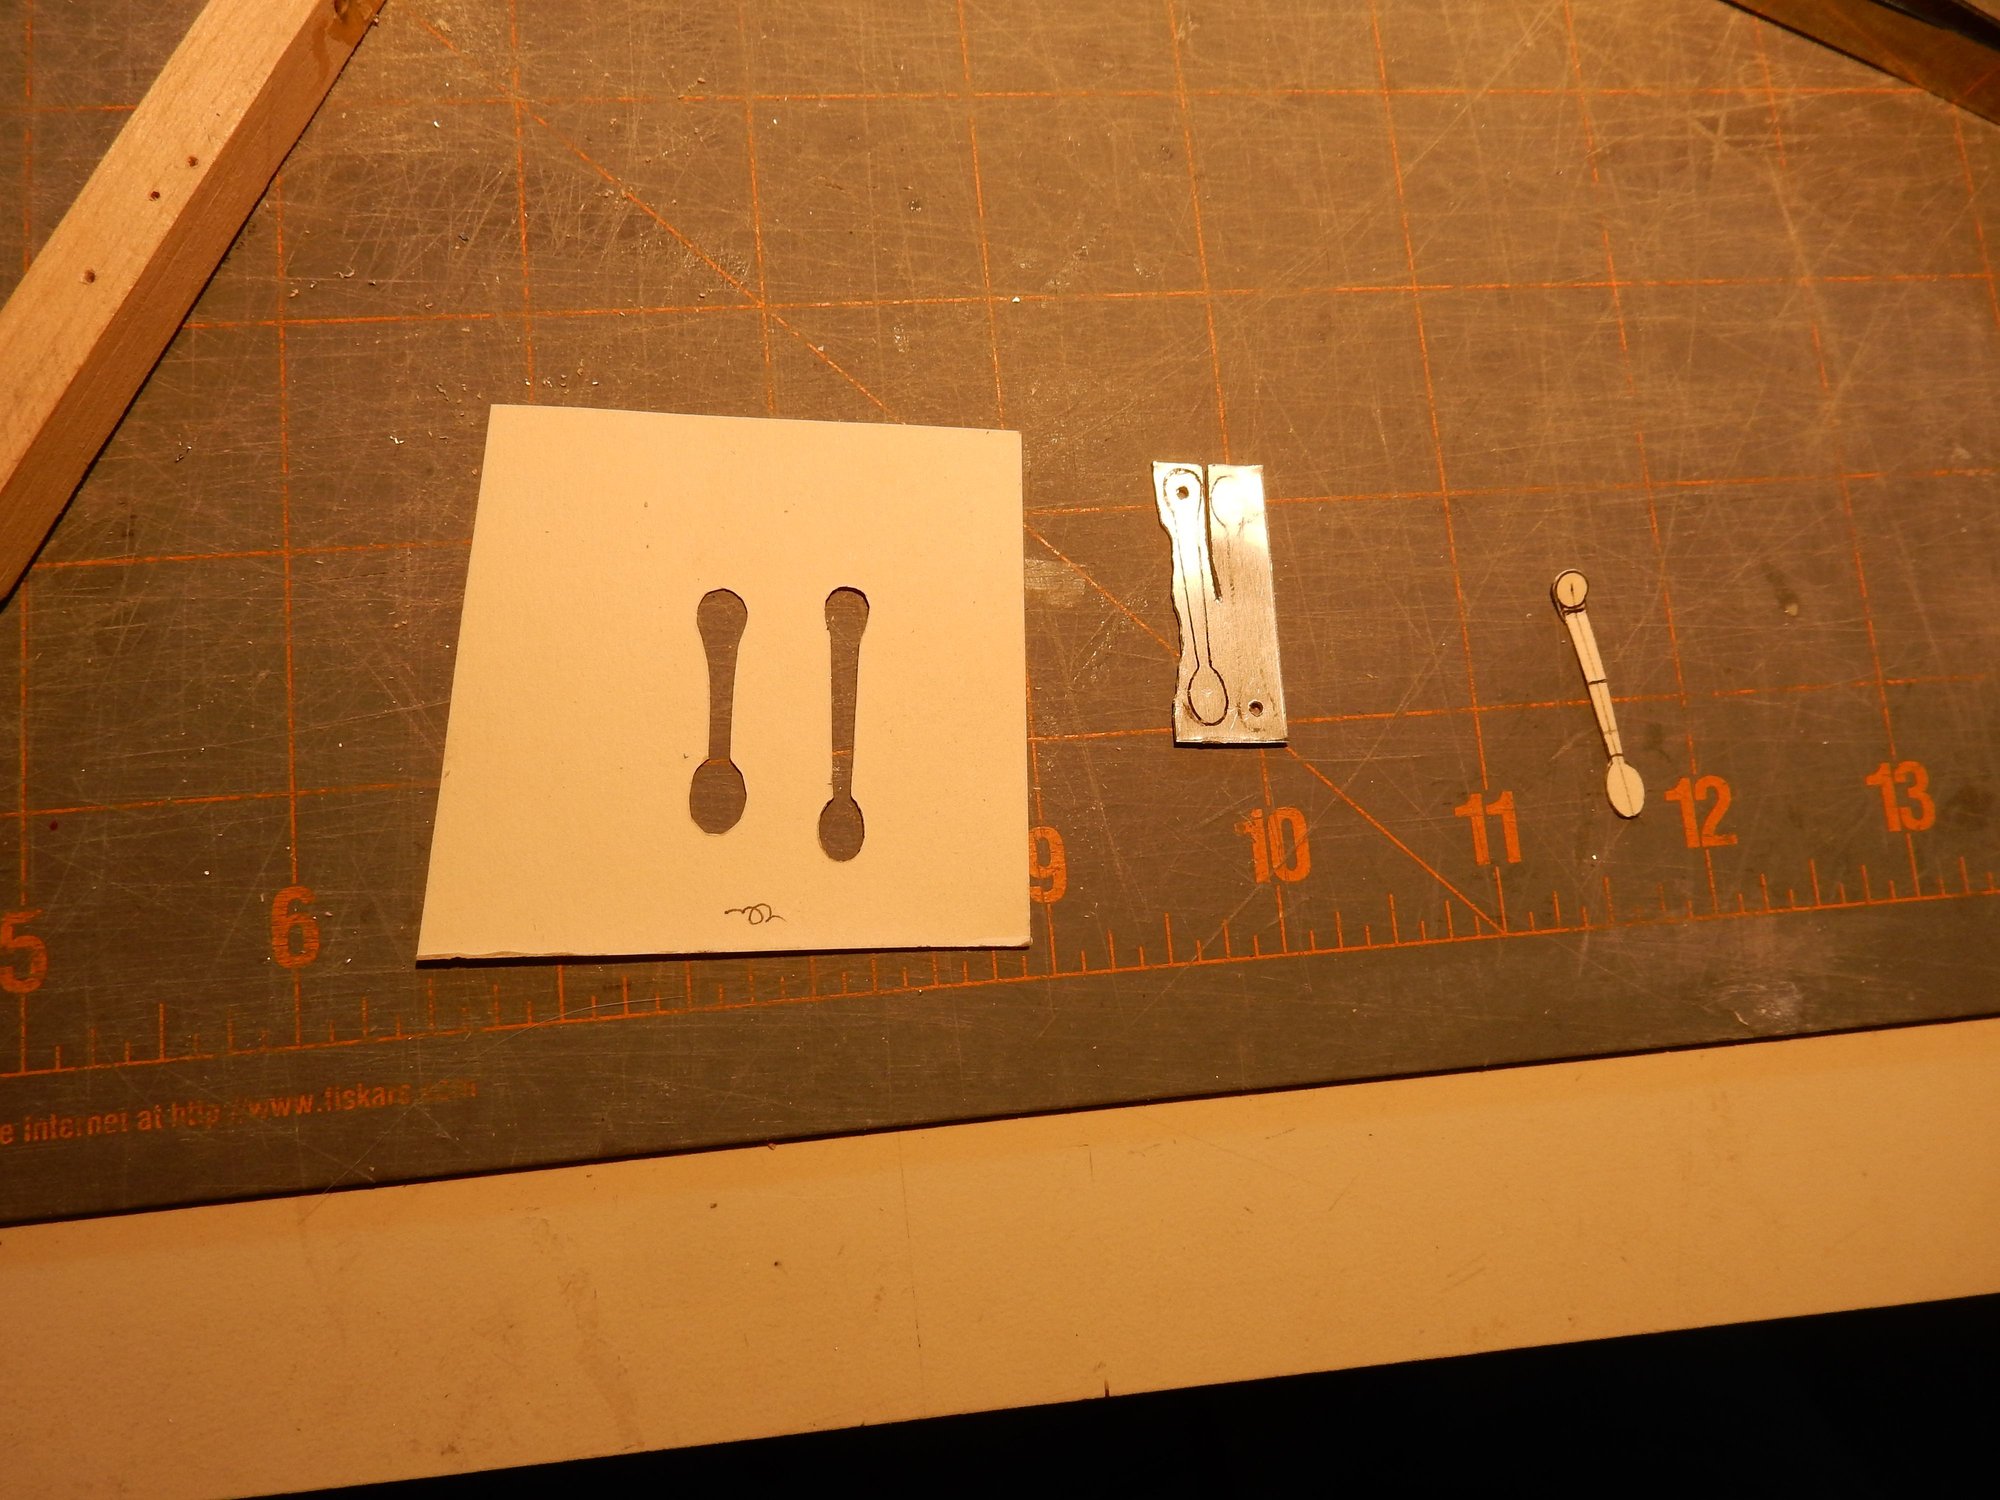
Cocking handle outline (right side on folder stock) cut out and ready to be glued to aluminum sandwich.

Template glued in place, excess outline to be ground and filed away. Hole drilled in bottom of handles already glued together.
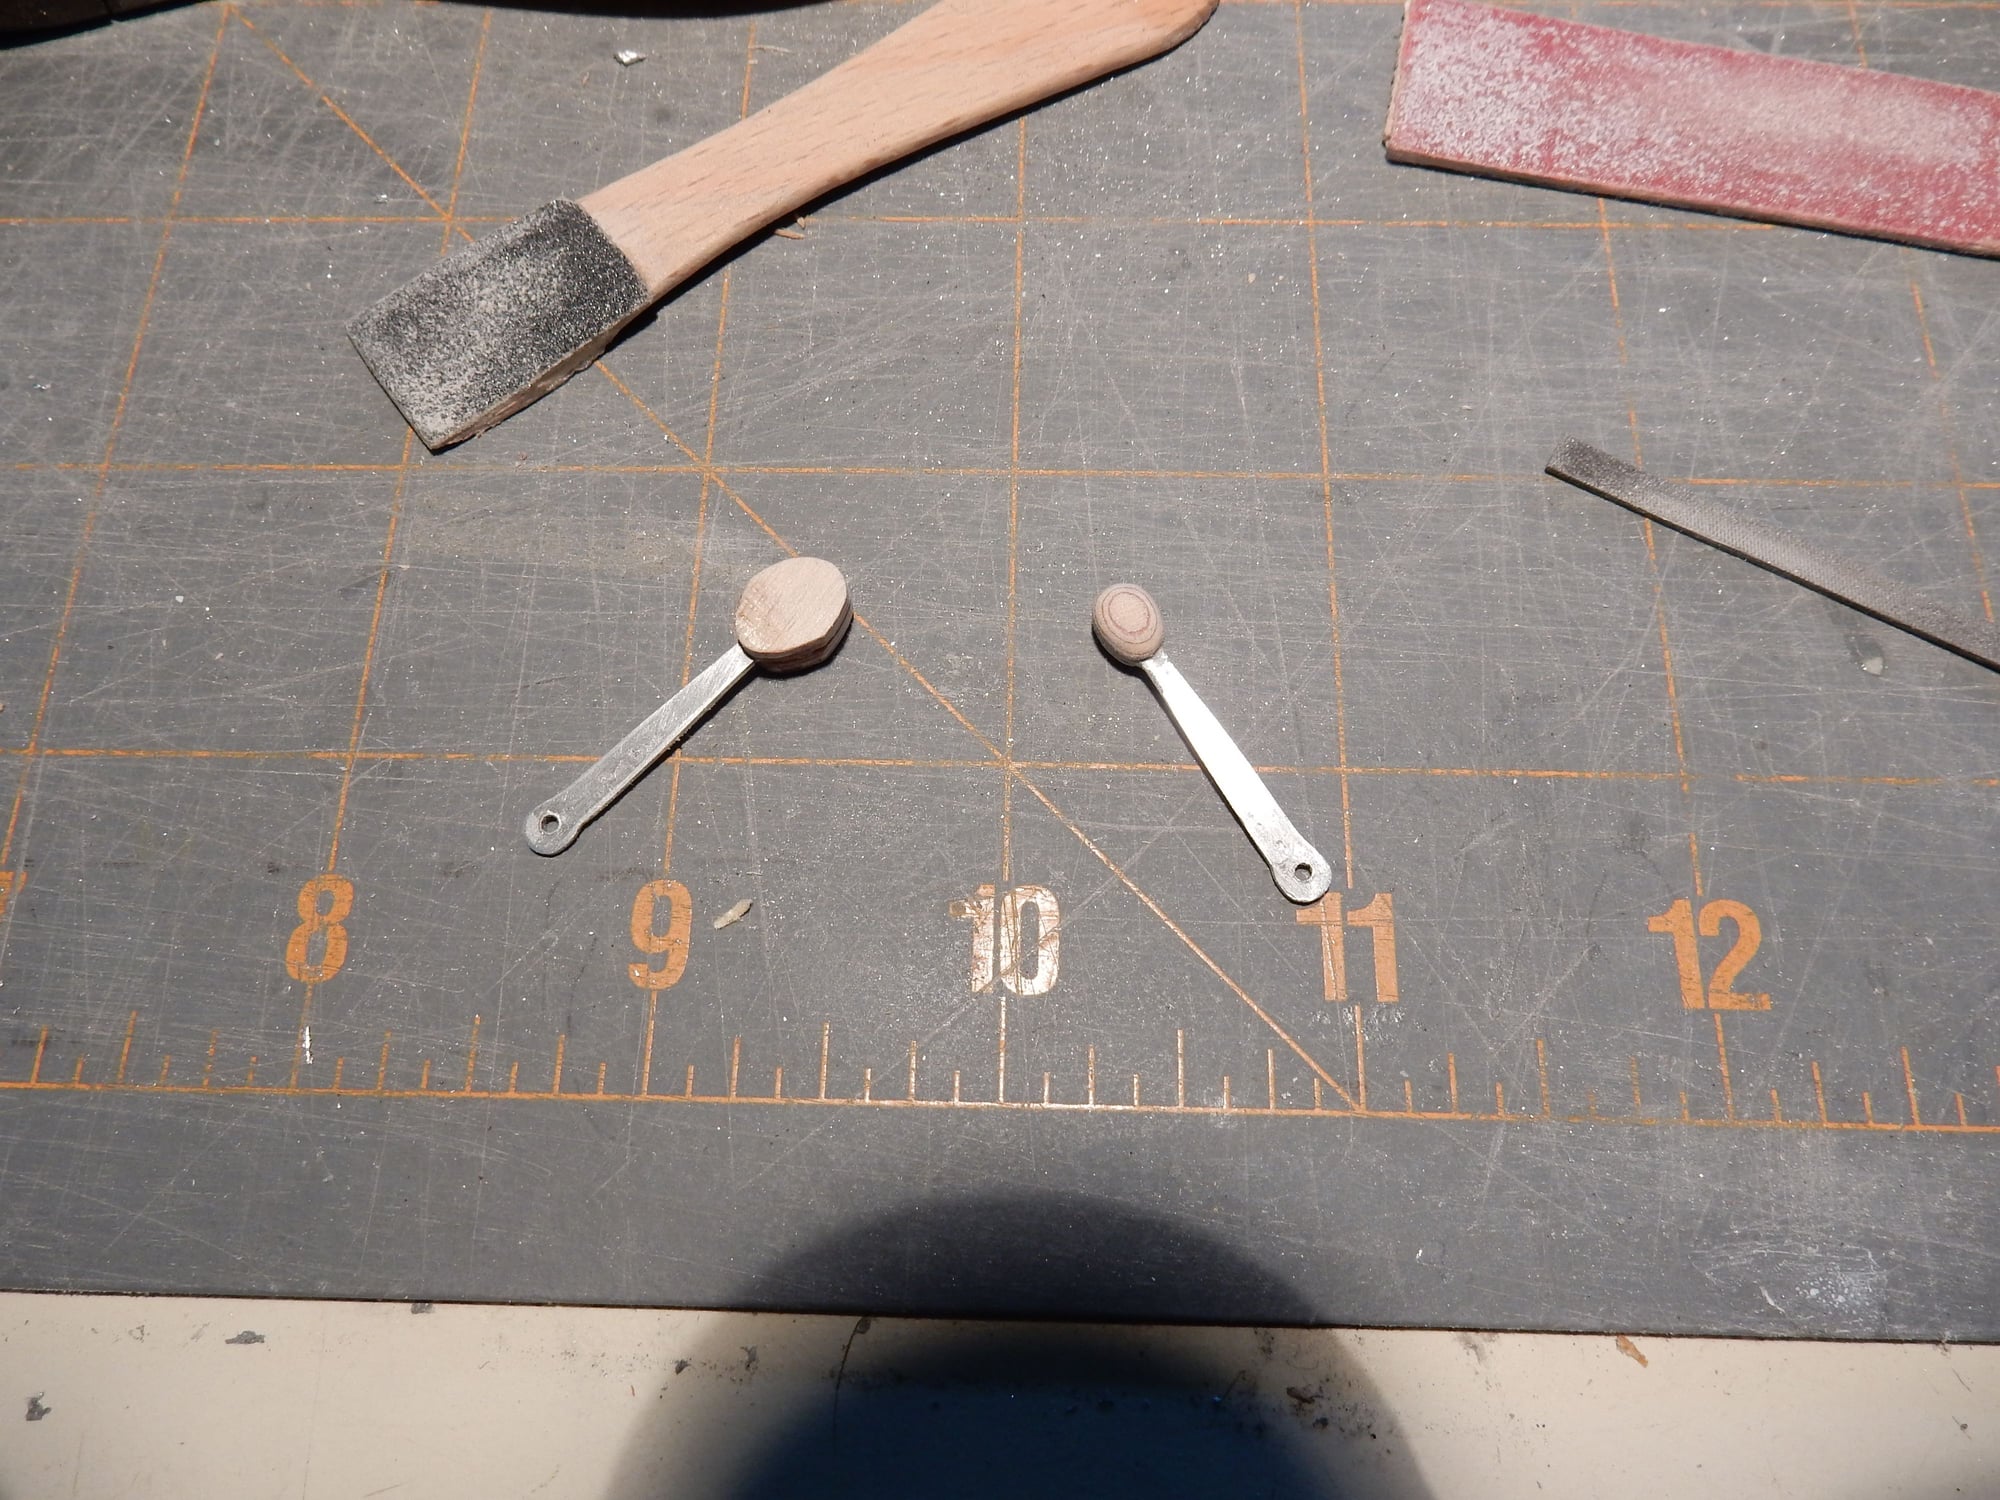
Shaping done, pieces separated and ply handle knobs glued in place on handle on left. Finished shaping & sanding complete on handle on right.
Side support rails molded from bondo in place, excess sanded away and canopy ready.
Foredeck ground and sanded out to make a "shadow box" for the twin .30 cal. gun breeches. Will be painted flat black to add depth.
Styrene-clad instrument panel backing temp. in place. When completed w/ instruments, etc., will be painted Jap Navy int. green.
Styrene-clad balsa breeches w/ detailed "bits" added. Here, a series of holes are drilled in a row to simulate bolt travel slots. A #11 blade opened up the channel afterwards.
Channel opened for a convincing look. Bolts were made by drilling a small dowel and inserting a dressmakers pin into it, then taper-sanded and cut to length w/ excess pin shaft used to help glue it in place.
Cocking handle outline (right side on folder stock) cut out and ready to be glued to aluminum sandwich.
Template glued in place, excess outline to be ground and filed away. Hole drilled in bottom of handles already glued together.
Shaping done, pieces separated and ply handle knobs glued in place on handle on left. Finished shaping & sanding complete on handle on right.
The following users liked this post:
Joe. (05-06-2020)
05-10-2020, 09:57 AM
#299
Very nice work, Gerry. Good use of the styrene, too. I always found that stuff versatile and easy to work with. That's going to be a great looking cockpit. Here's hoping to see it at the pond this season.
Joe
Joe
05-14-2020, 03:54 PM
#300
�. more progress...
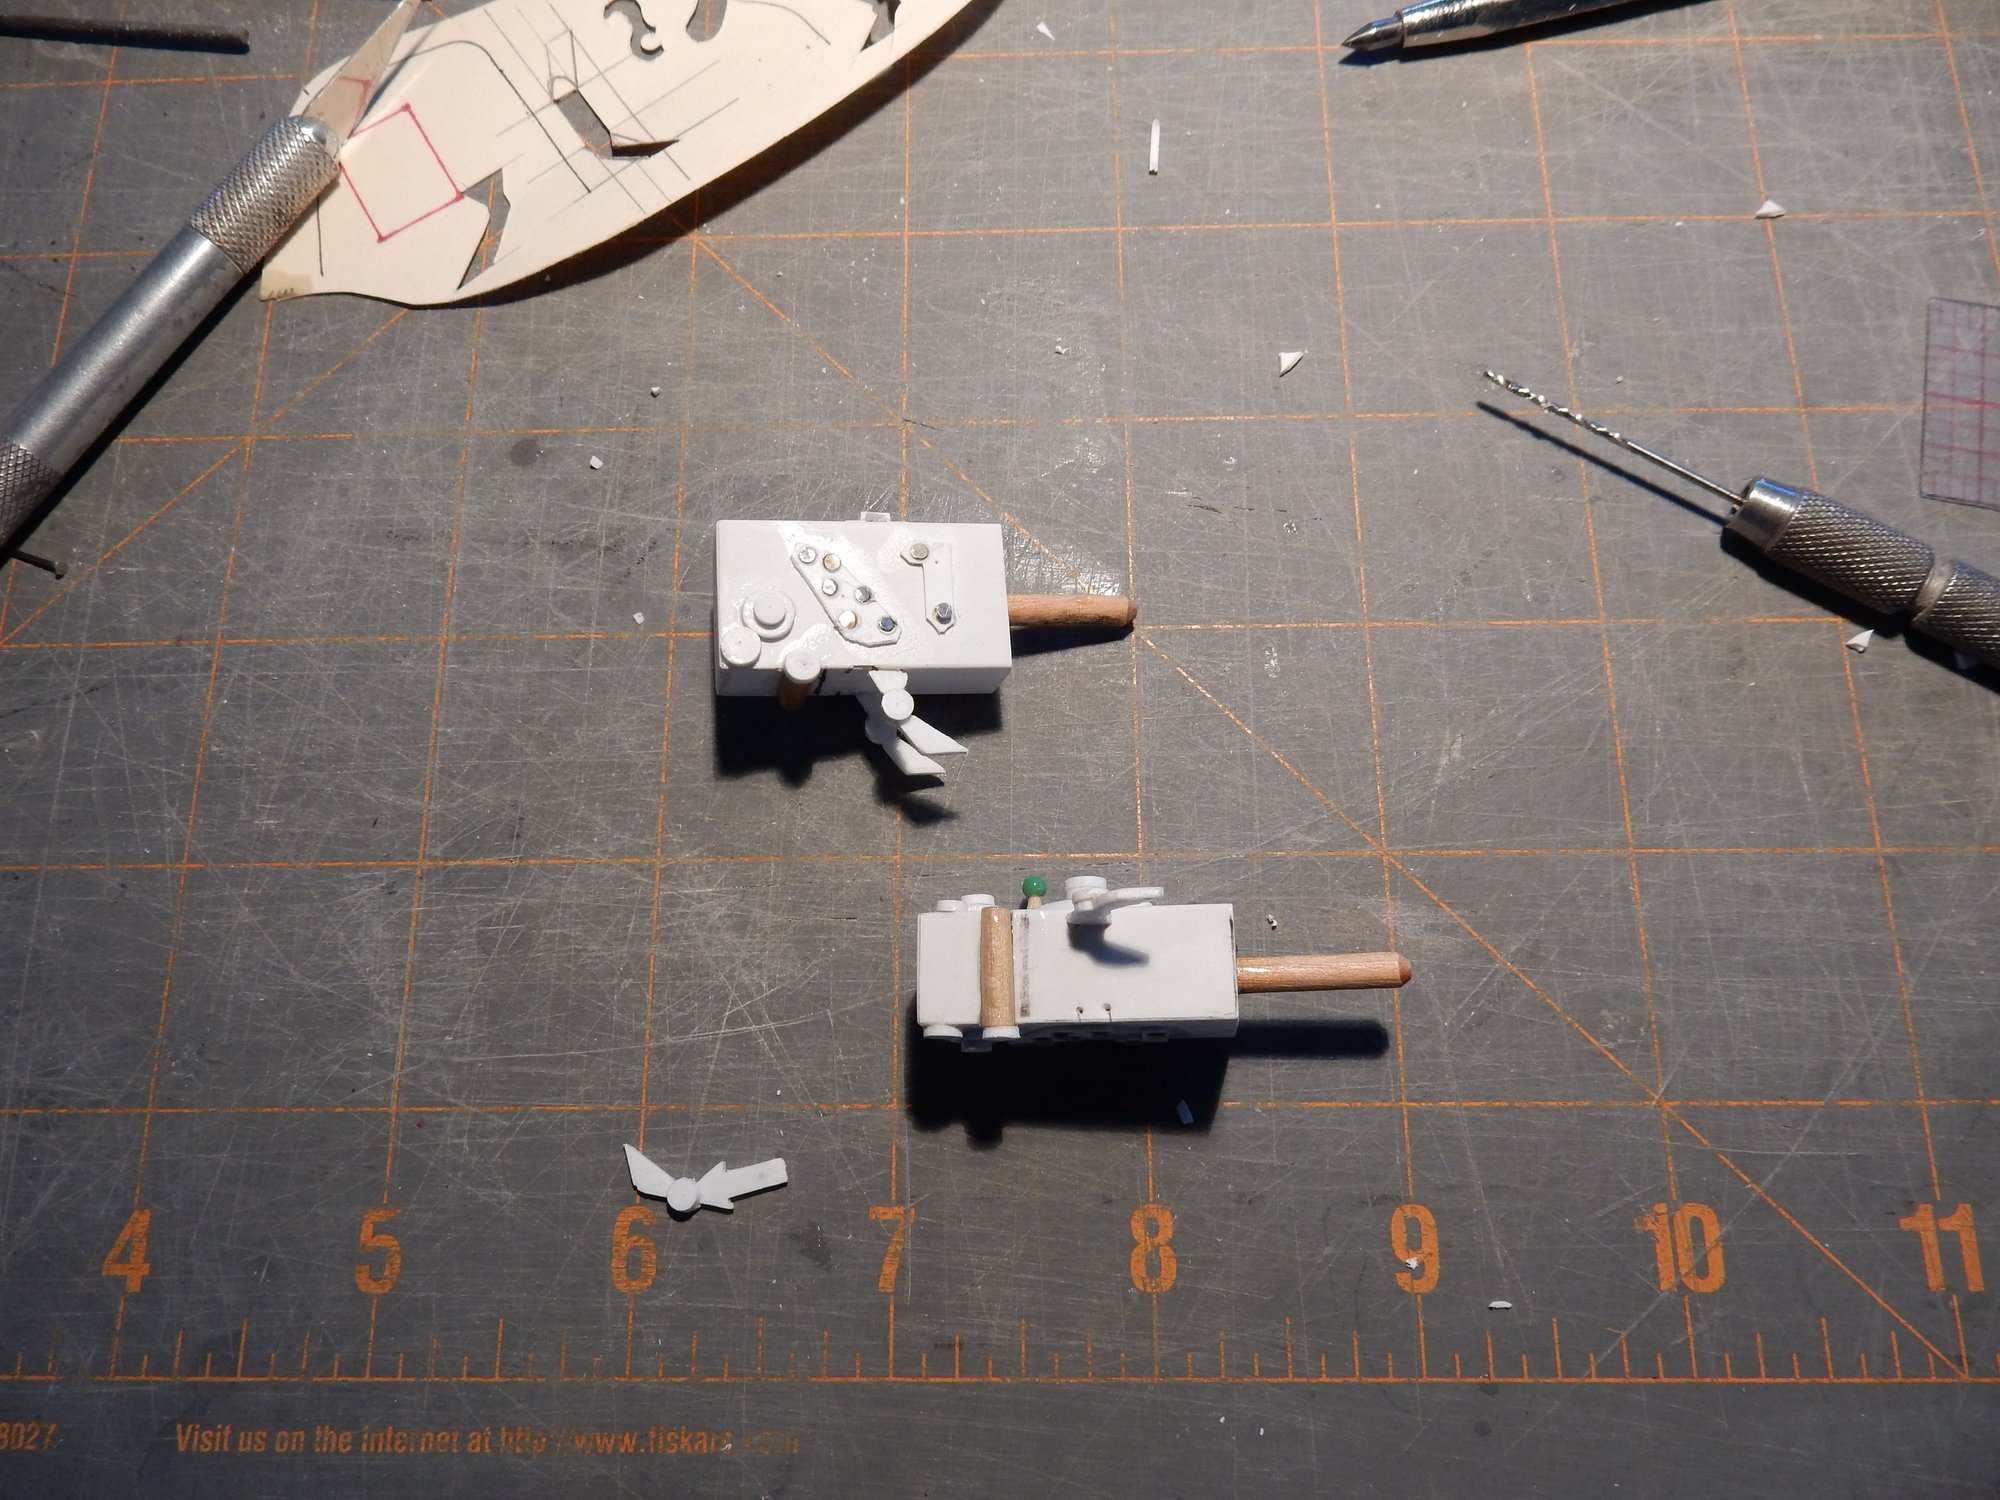
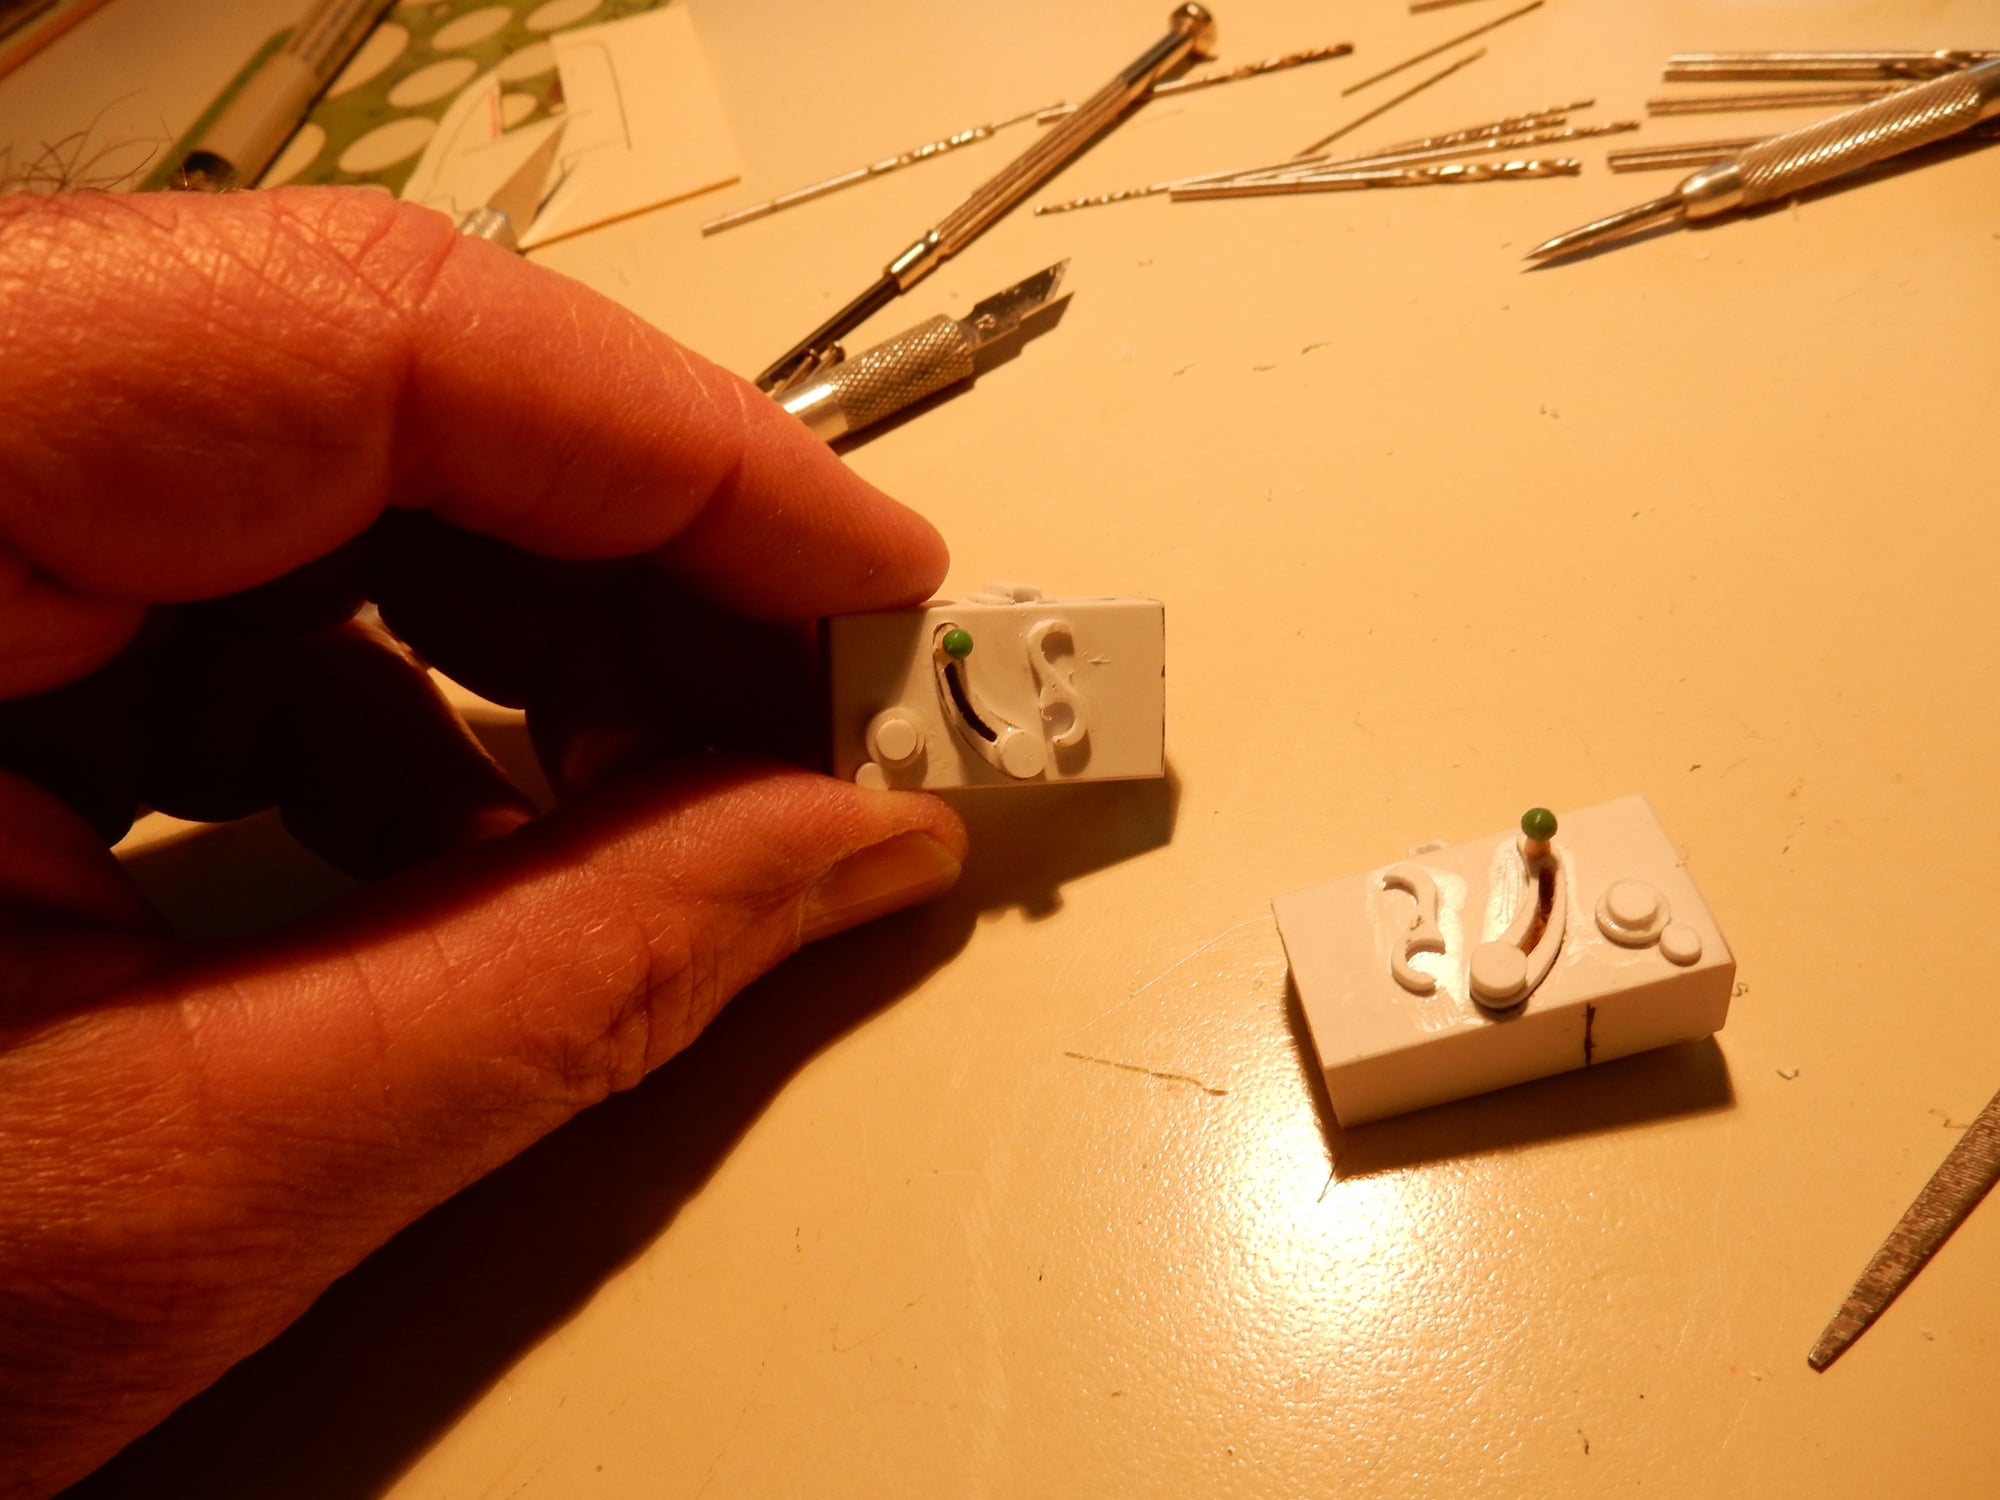
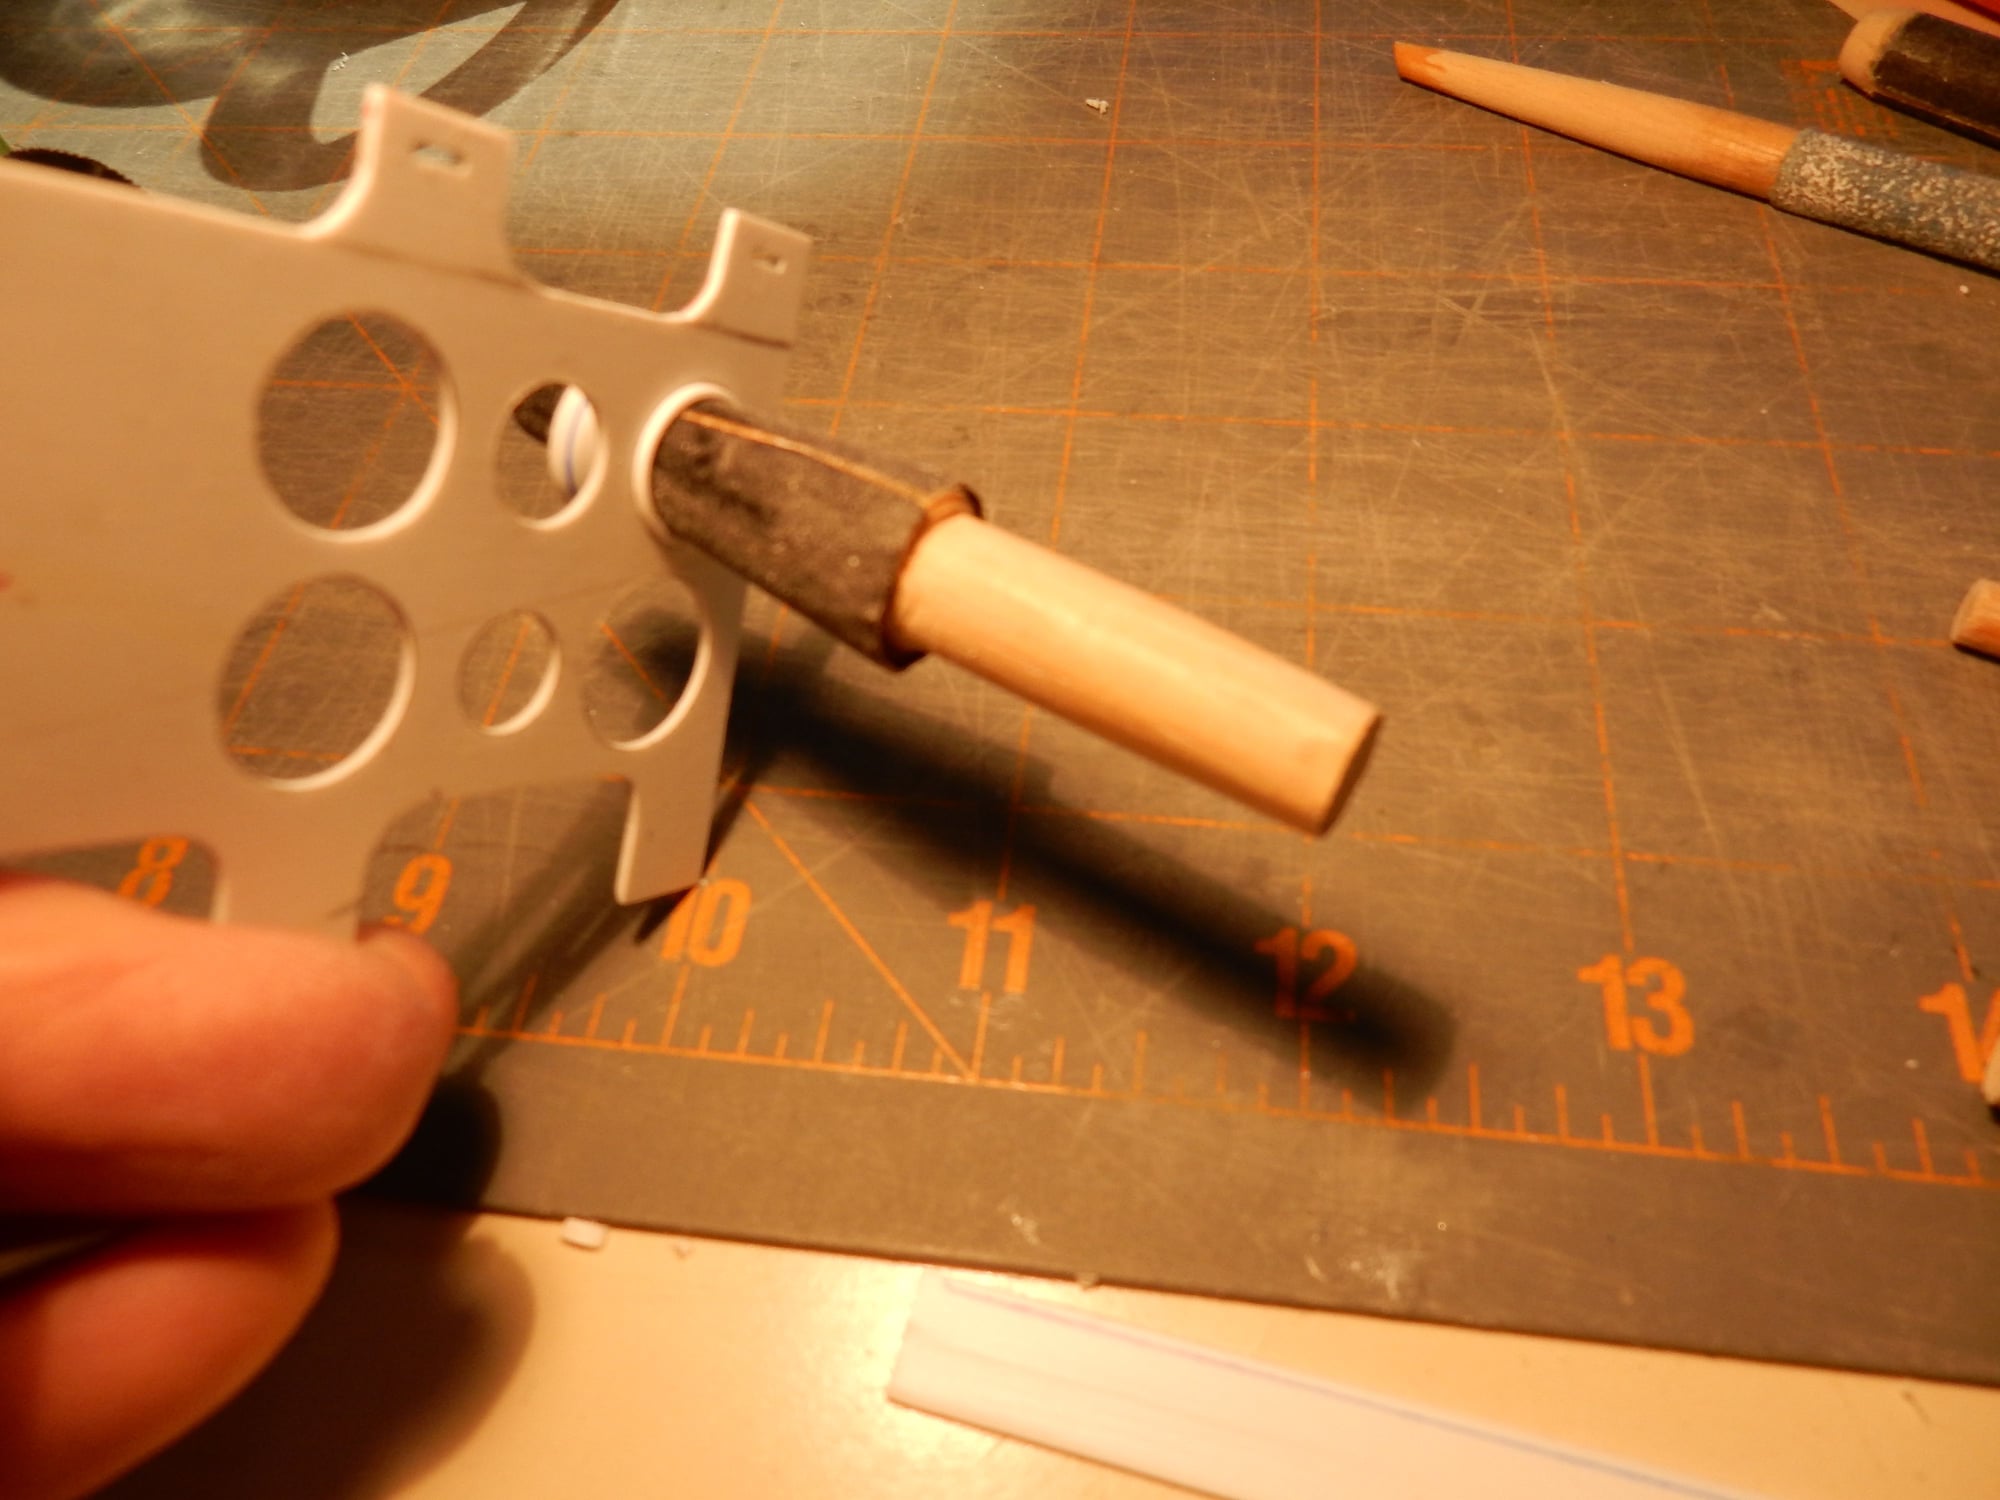
.30 Cal. machine gun breeches. Long dowel is for mounting into foredeck block. Smaller inset dowel underneath is drilled out to accept cocking lever. Small styrene supports are gun mounts to mounting tube behind panel.
Gun breeches temporarily shown in place on notched mounting tube.
Bezels were made by fitting various lengths of laminated styrene strips, pre-shaped w/ half-round exposed edge. Tapered dowel w/ sandpaper helps push everything in place once correct cut & fit is reached. This took more time than I care to admit.
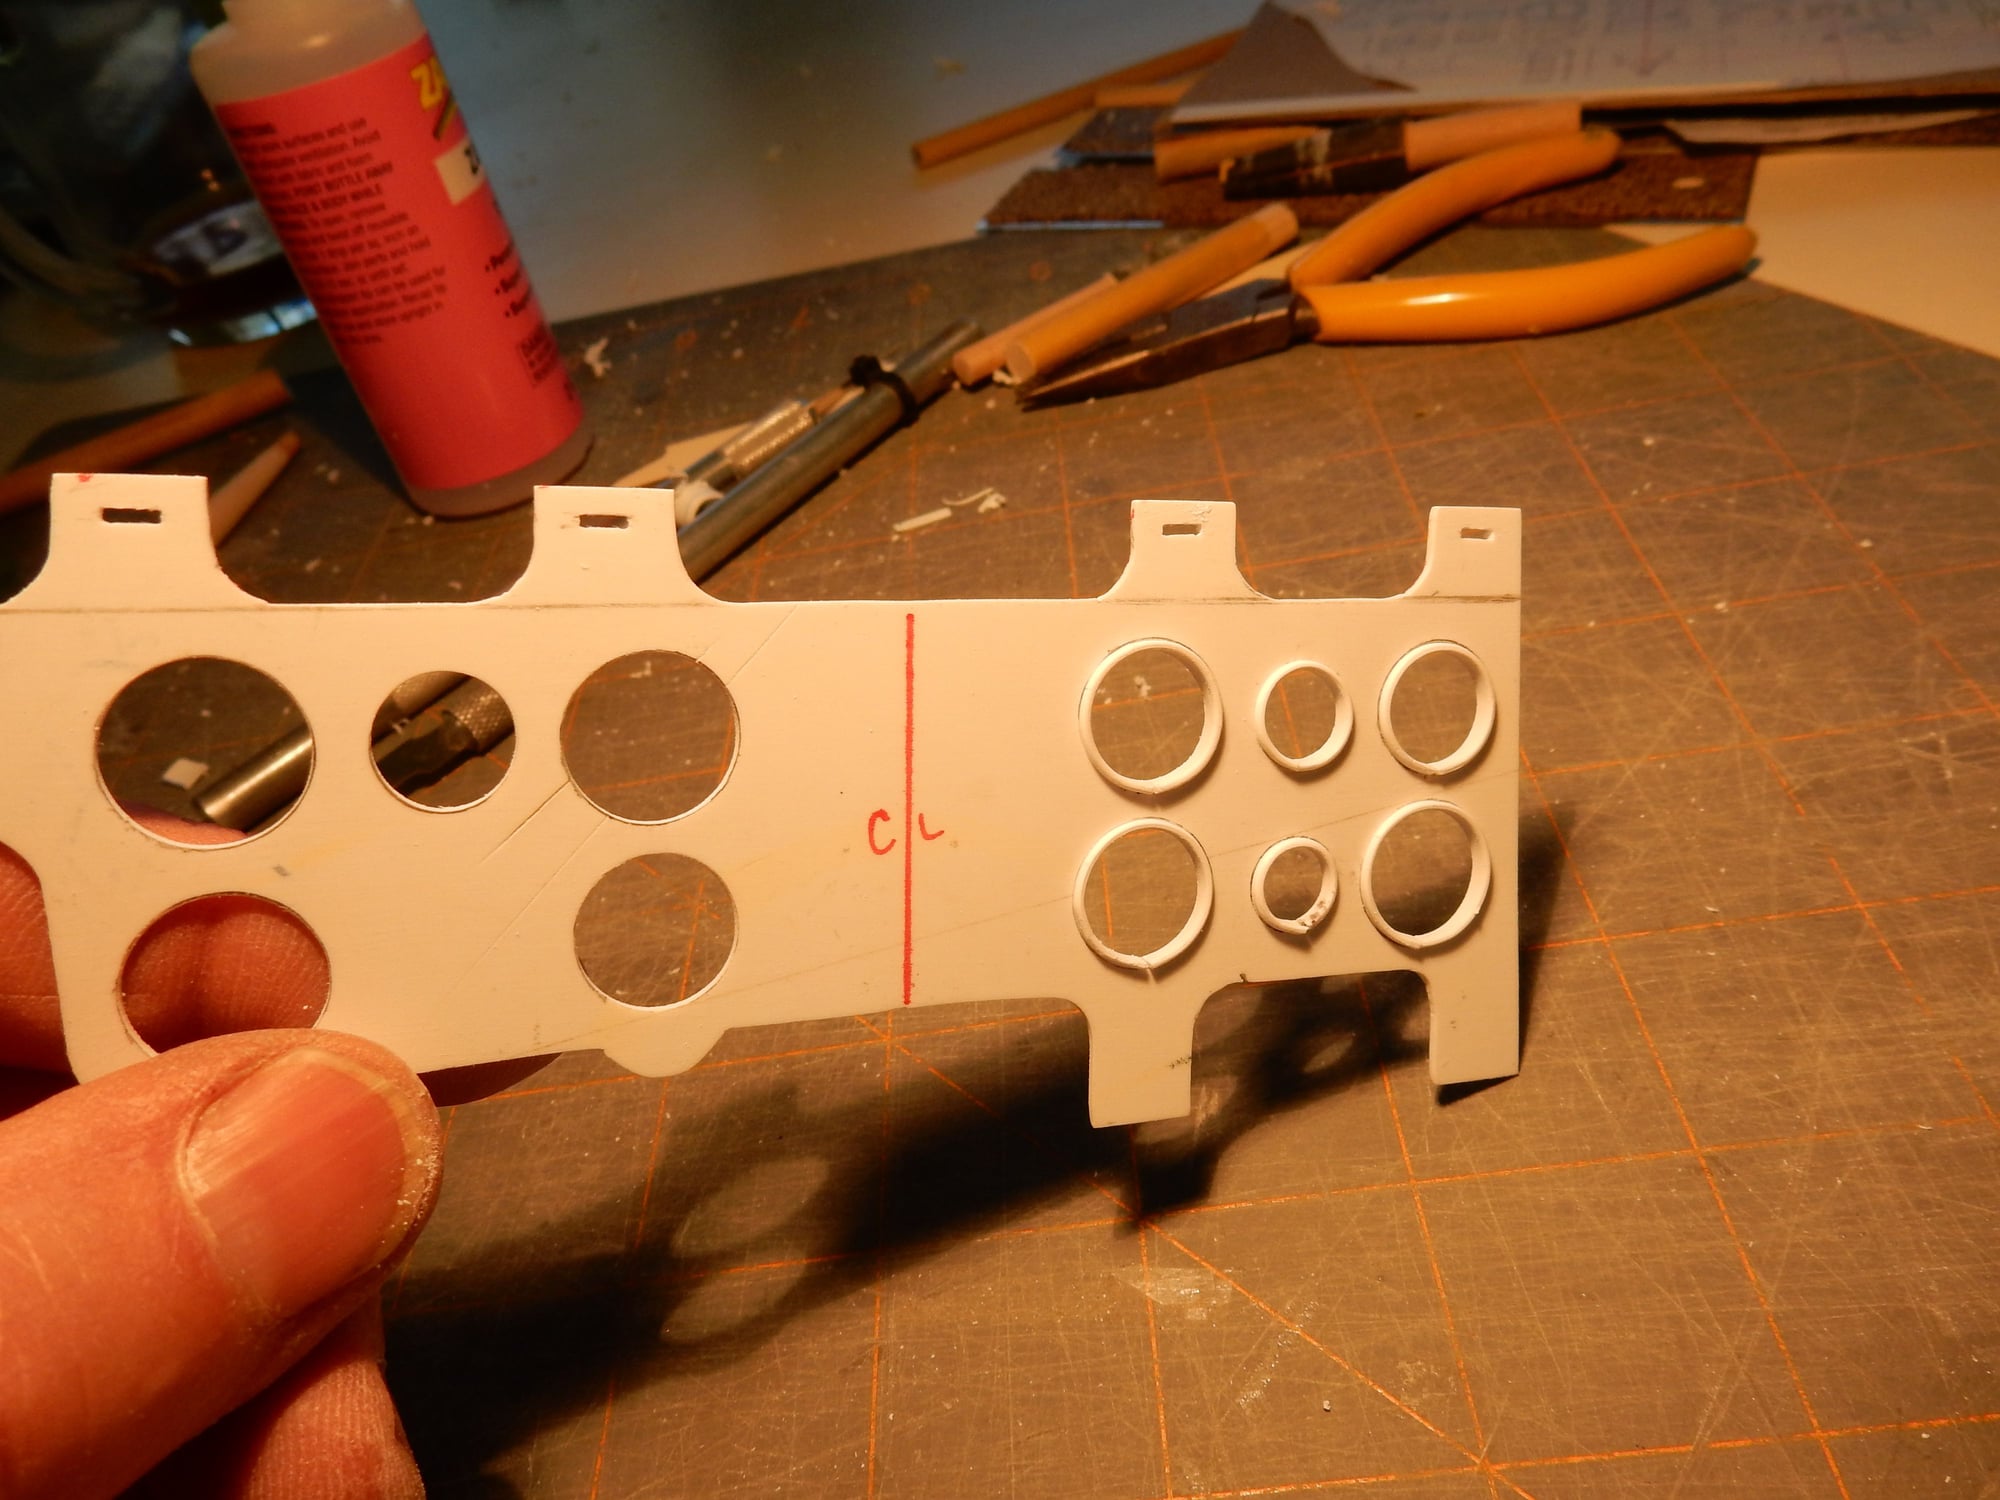
Panel bezel fitting half finished but looking much better with than without.
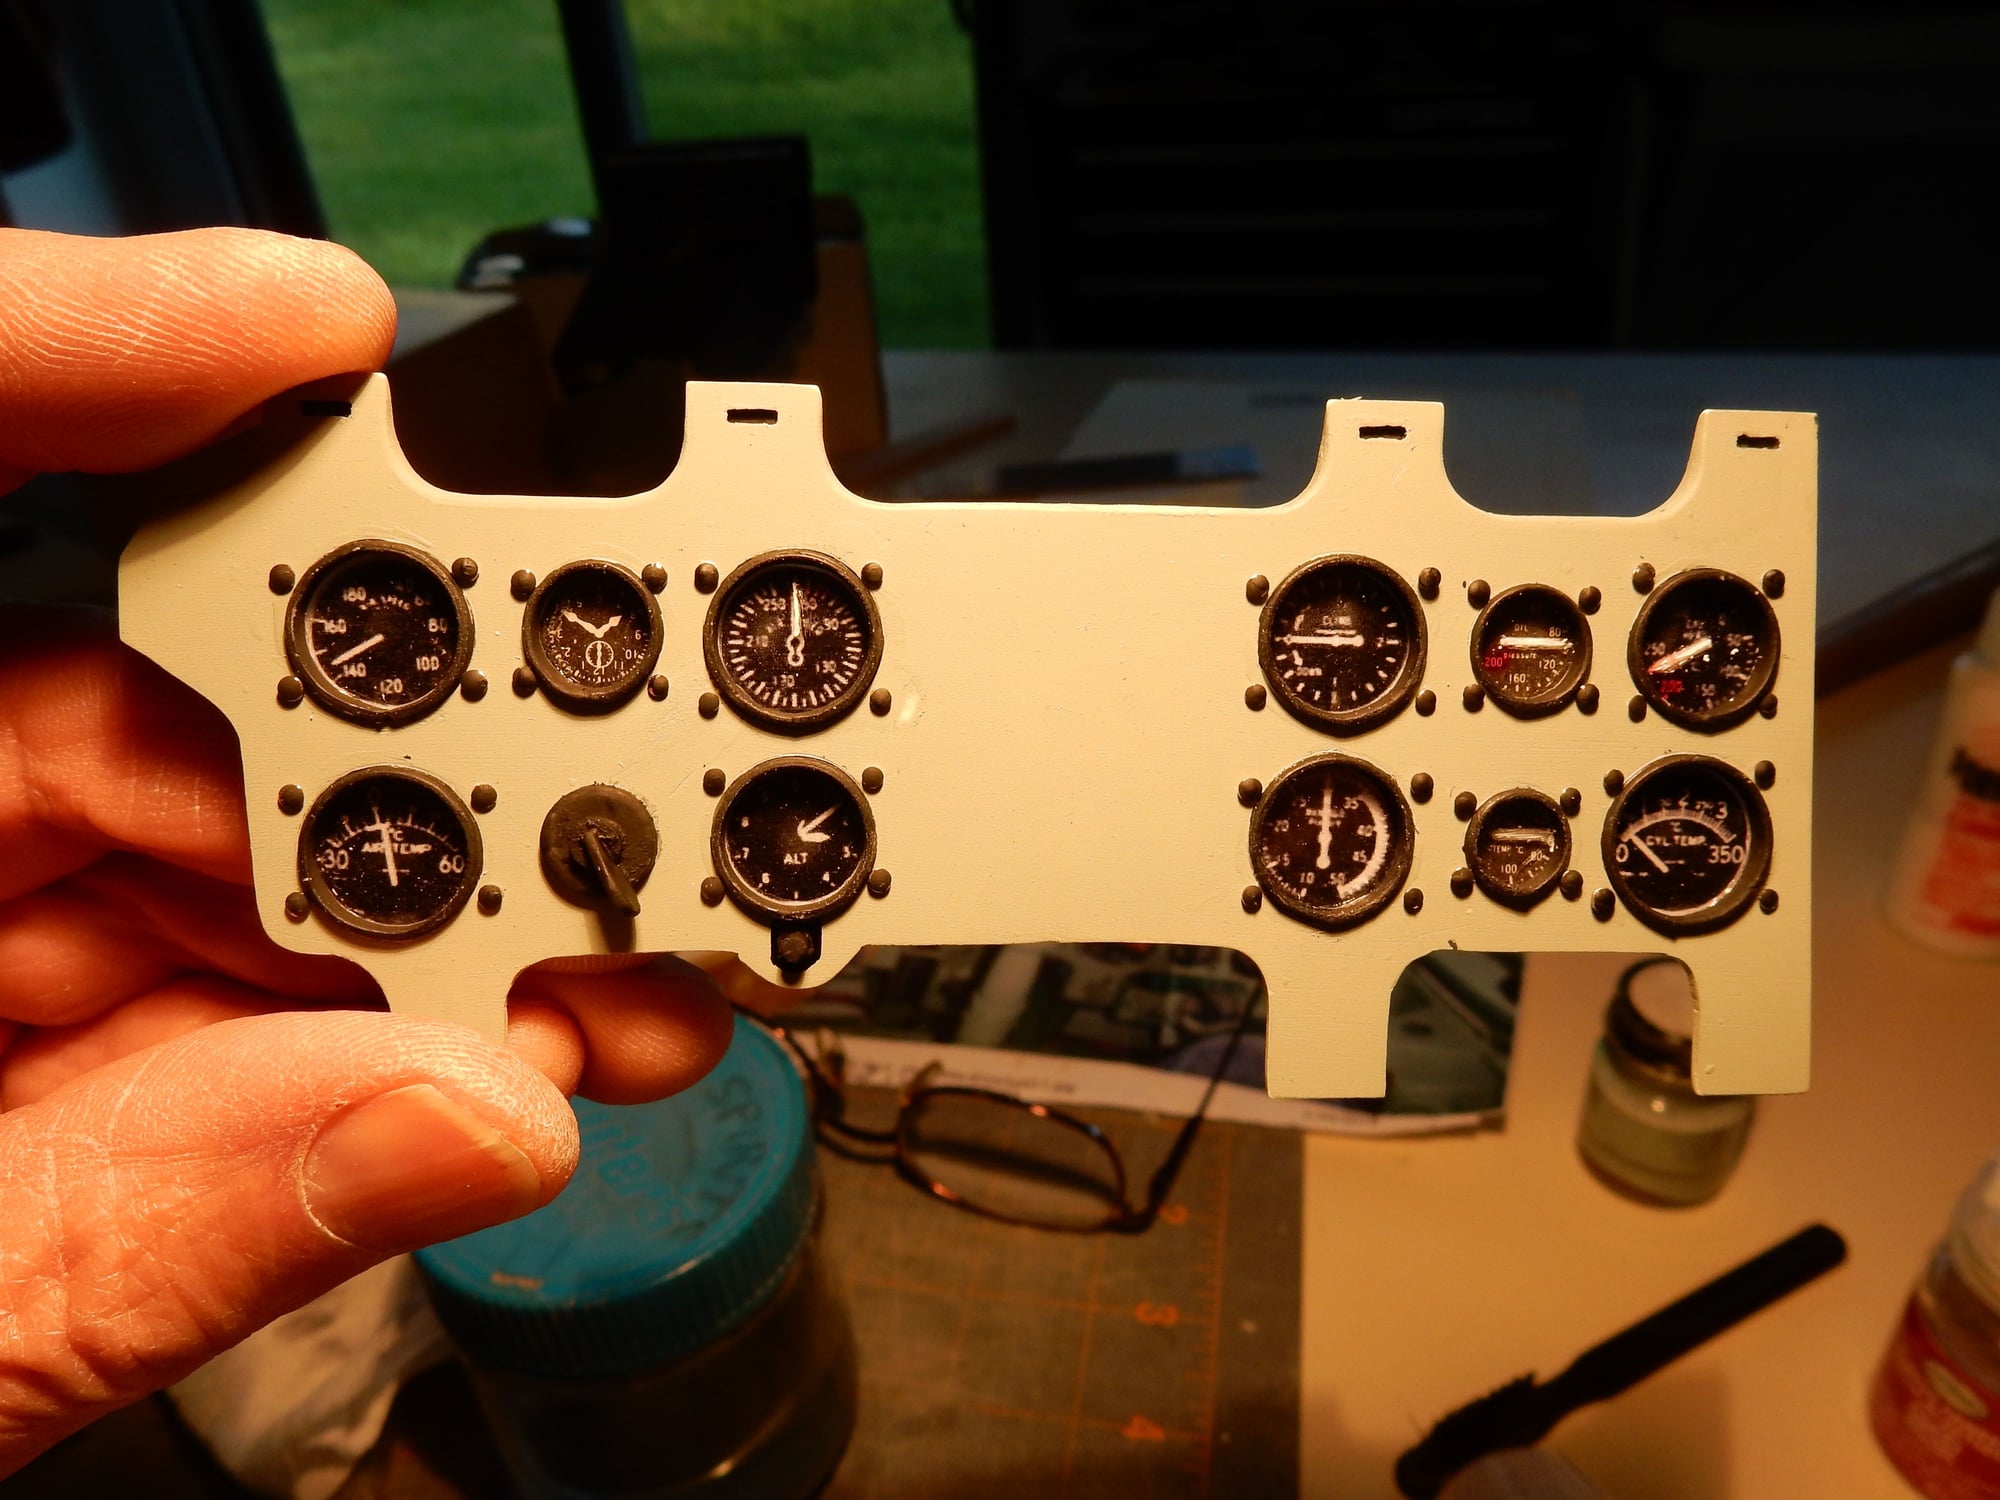
Clear lexan-faced instruments in place w/ straight pins as fasteners. Note styrene magneto switch, second from left on lower row. Small placards to be added soon.
.30 Cal. machine gun breeches. Long dowel is for mounting into foredeck block. Smaller inset dowel underneath is drilled out to accept cocking lever. Small styrene supports are gun mounts to mounting tube behind panel.
Gun breeches temporarily shown in place on notched mounting tube.
Bezels were made by fitting various lengths of laminated styrene strips, pre-shaped w/ half-round exposed edge. Tapered dowel w/ sandpaper helps push everything in place once correct cut & fit is reached. This took more time than I care to admit.
Panel bezel fitting half finished but looking much better with than without.
Clear lexan-faced instruments in place w/ straight pins as fasteners. Note styrene magneto switch, second from left on lower row. Small placards to be added soon.