


Super Sporster 40 sort of
 02-26-2020, 04:47 PM
#26

Thread Starter

Now would you please stop reading my mind . I just bought one today, not that particular one.
Last time I was flying I broke 1/4 20 nylon bolt with my Ryobi drill.
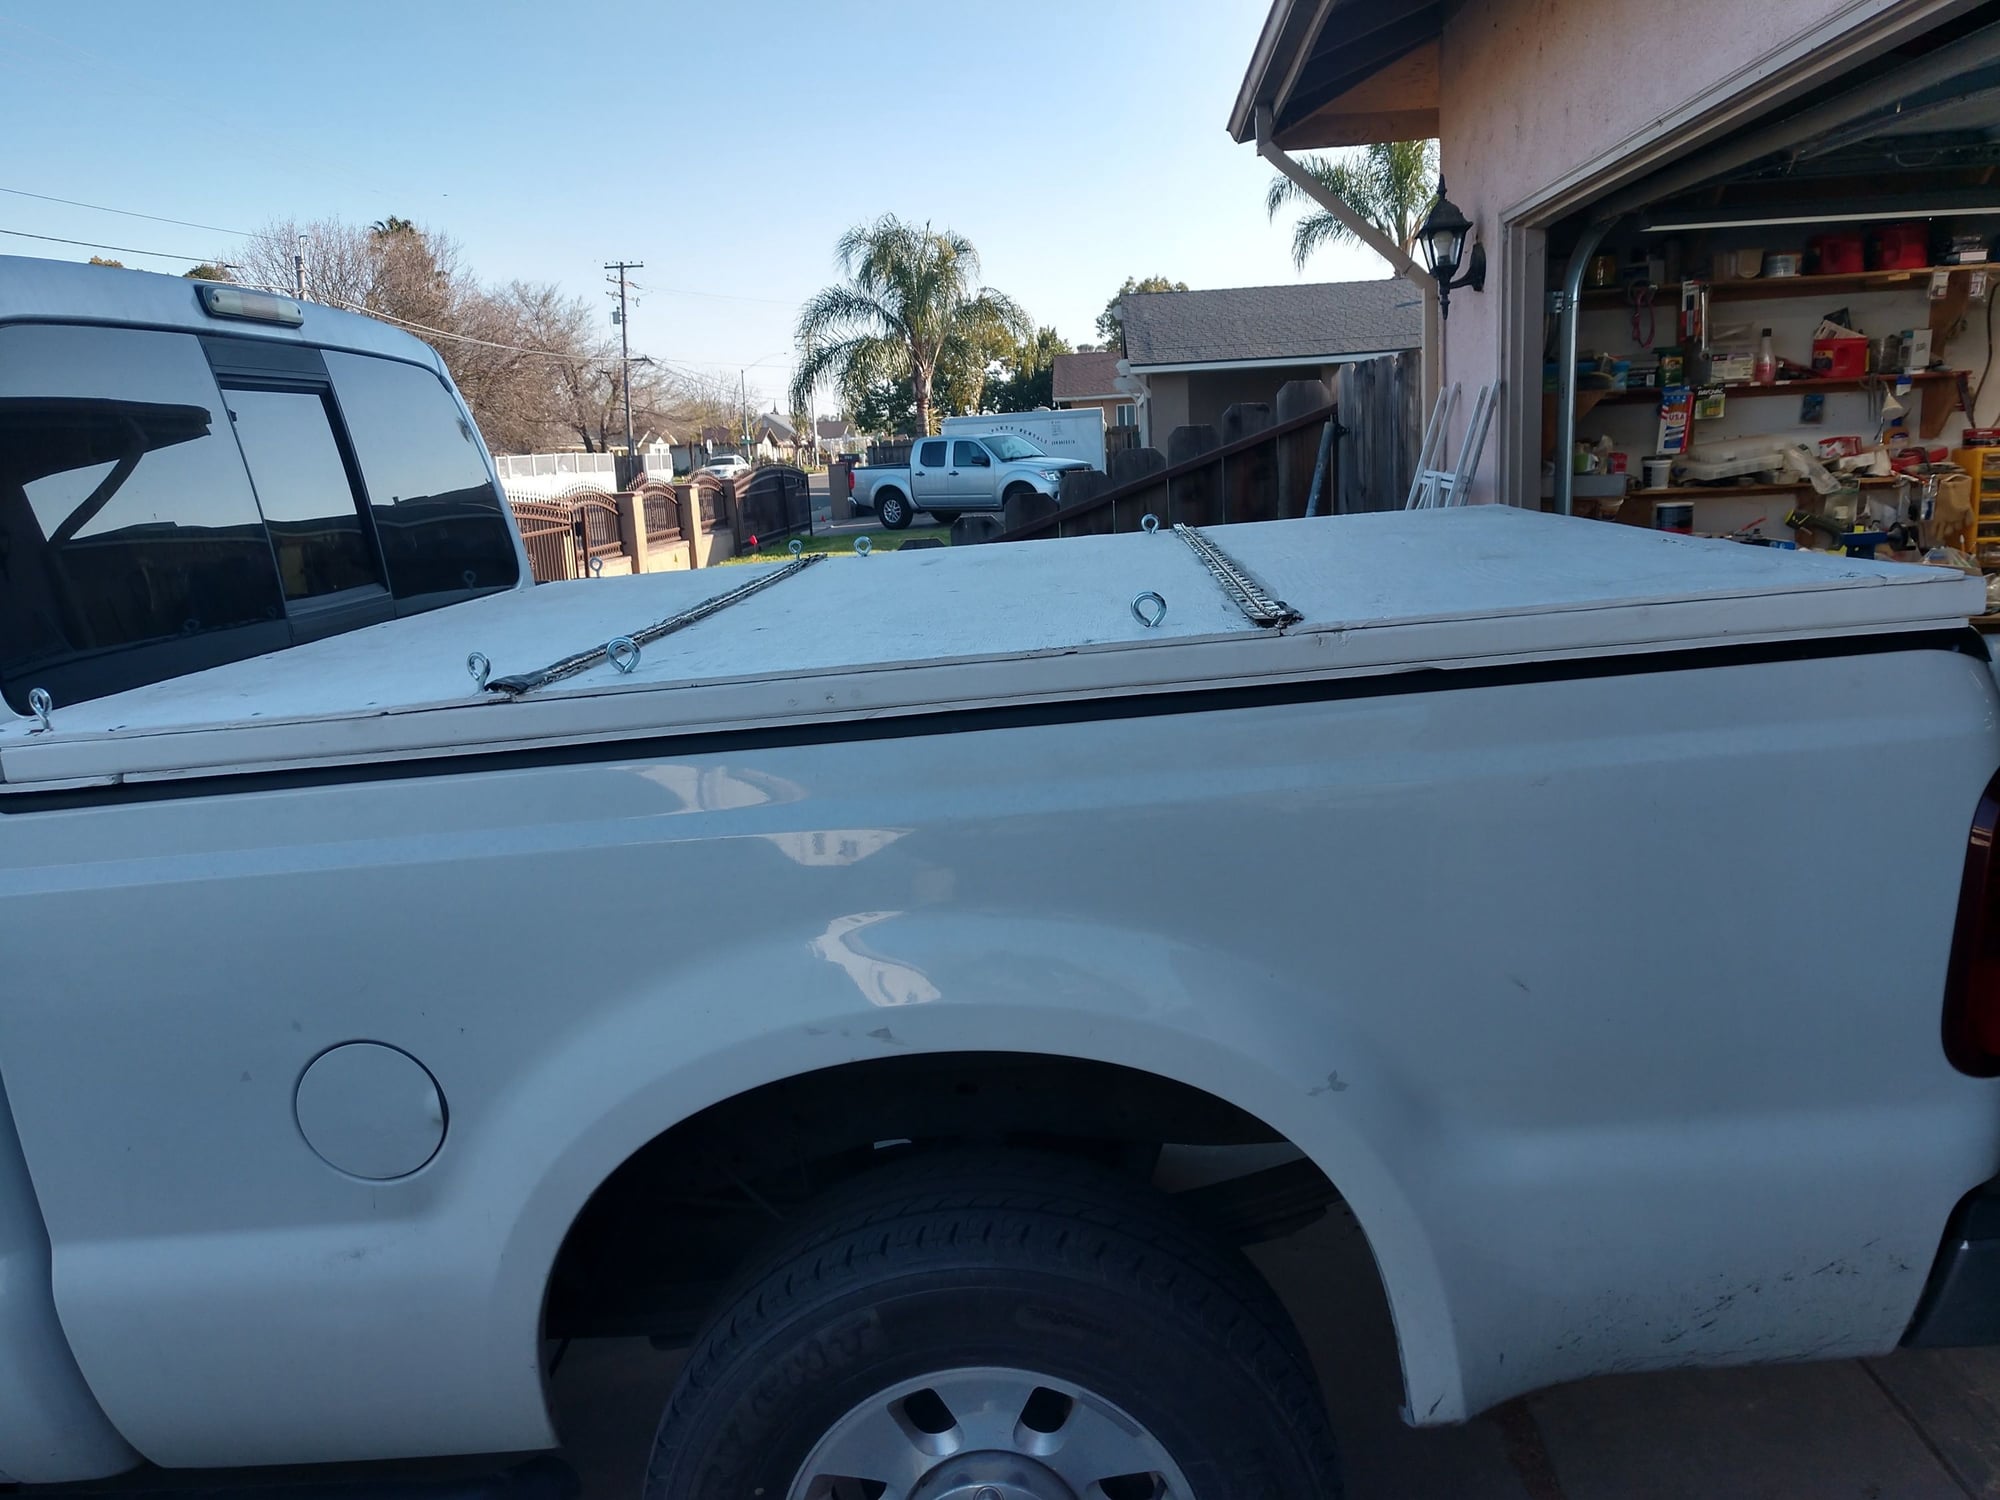
I'm going to leave the this screw driver in the truck I think. I made a poor mans bed cover from 3/8" ply and 2x3 framing. I made it with 2 strip hinges so it folds up 2 times to expose the bed. I use some 1.5" T25 stainless screws to keep people out of it. So have the elec screw driver will be darn handy. I have 4 eye bolts screwed into the frame to strap things to the top of the bed cover. Works a charm. Only cost me about $50.
Under the hinges I place a bicycle inner tup cut in half and split to make a water seal. It actually works pretty good.
No It may not be pretty, But it lets me safely carry my planes or other things.
My truck is a Ford F250 super duty diesel. The bed box is the same as other fords but the out bed outer line is larger and curved slightly. The truck is slightly wider than the other fords. So I bed topper or a shell cost a lot more.
I am going to build my own shell for it later. I bought a beat to holy heck smaller shell to savage the windows. So I good for windows, $50.
I am going to frame the shell up with Poplar and sheet it with 1/4" Baltic birch. Then I will fiber glass it, prime it and then take it to an auto body shop for a cheap paint job.
I may buy a welder and build an internal steel frame that I can then a rack to thru the shell. Obviously there will have to hard points for the bolts to pass thru.
Only got maybe a half hour of time on the bird today.
Ken

This is all got done today
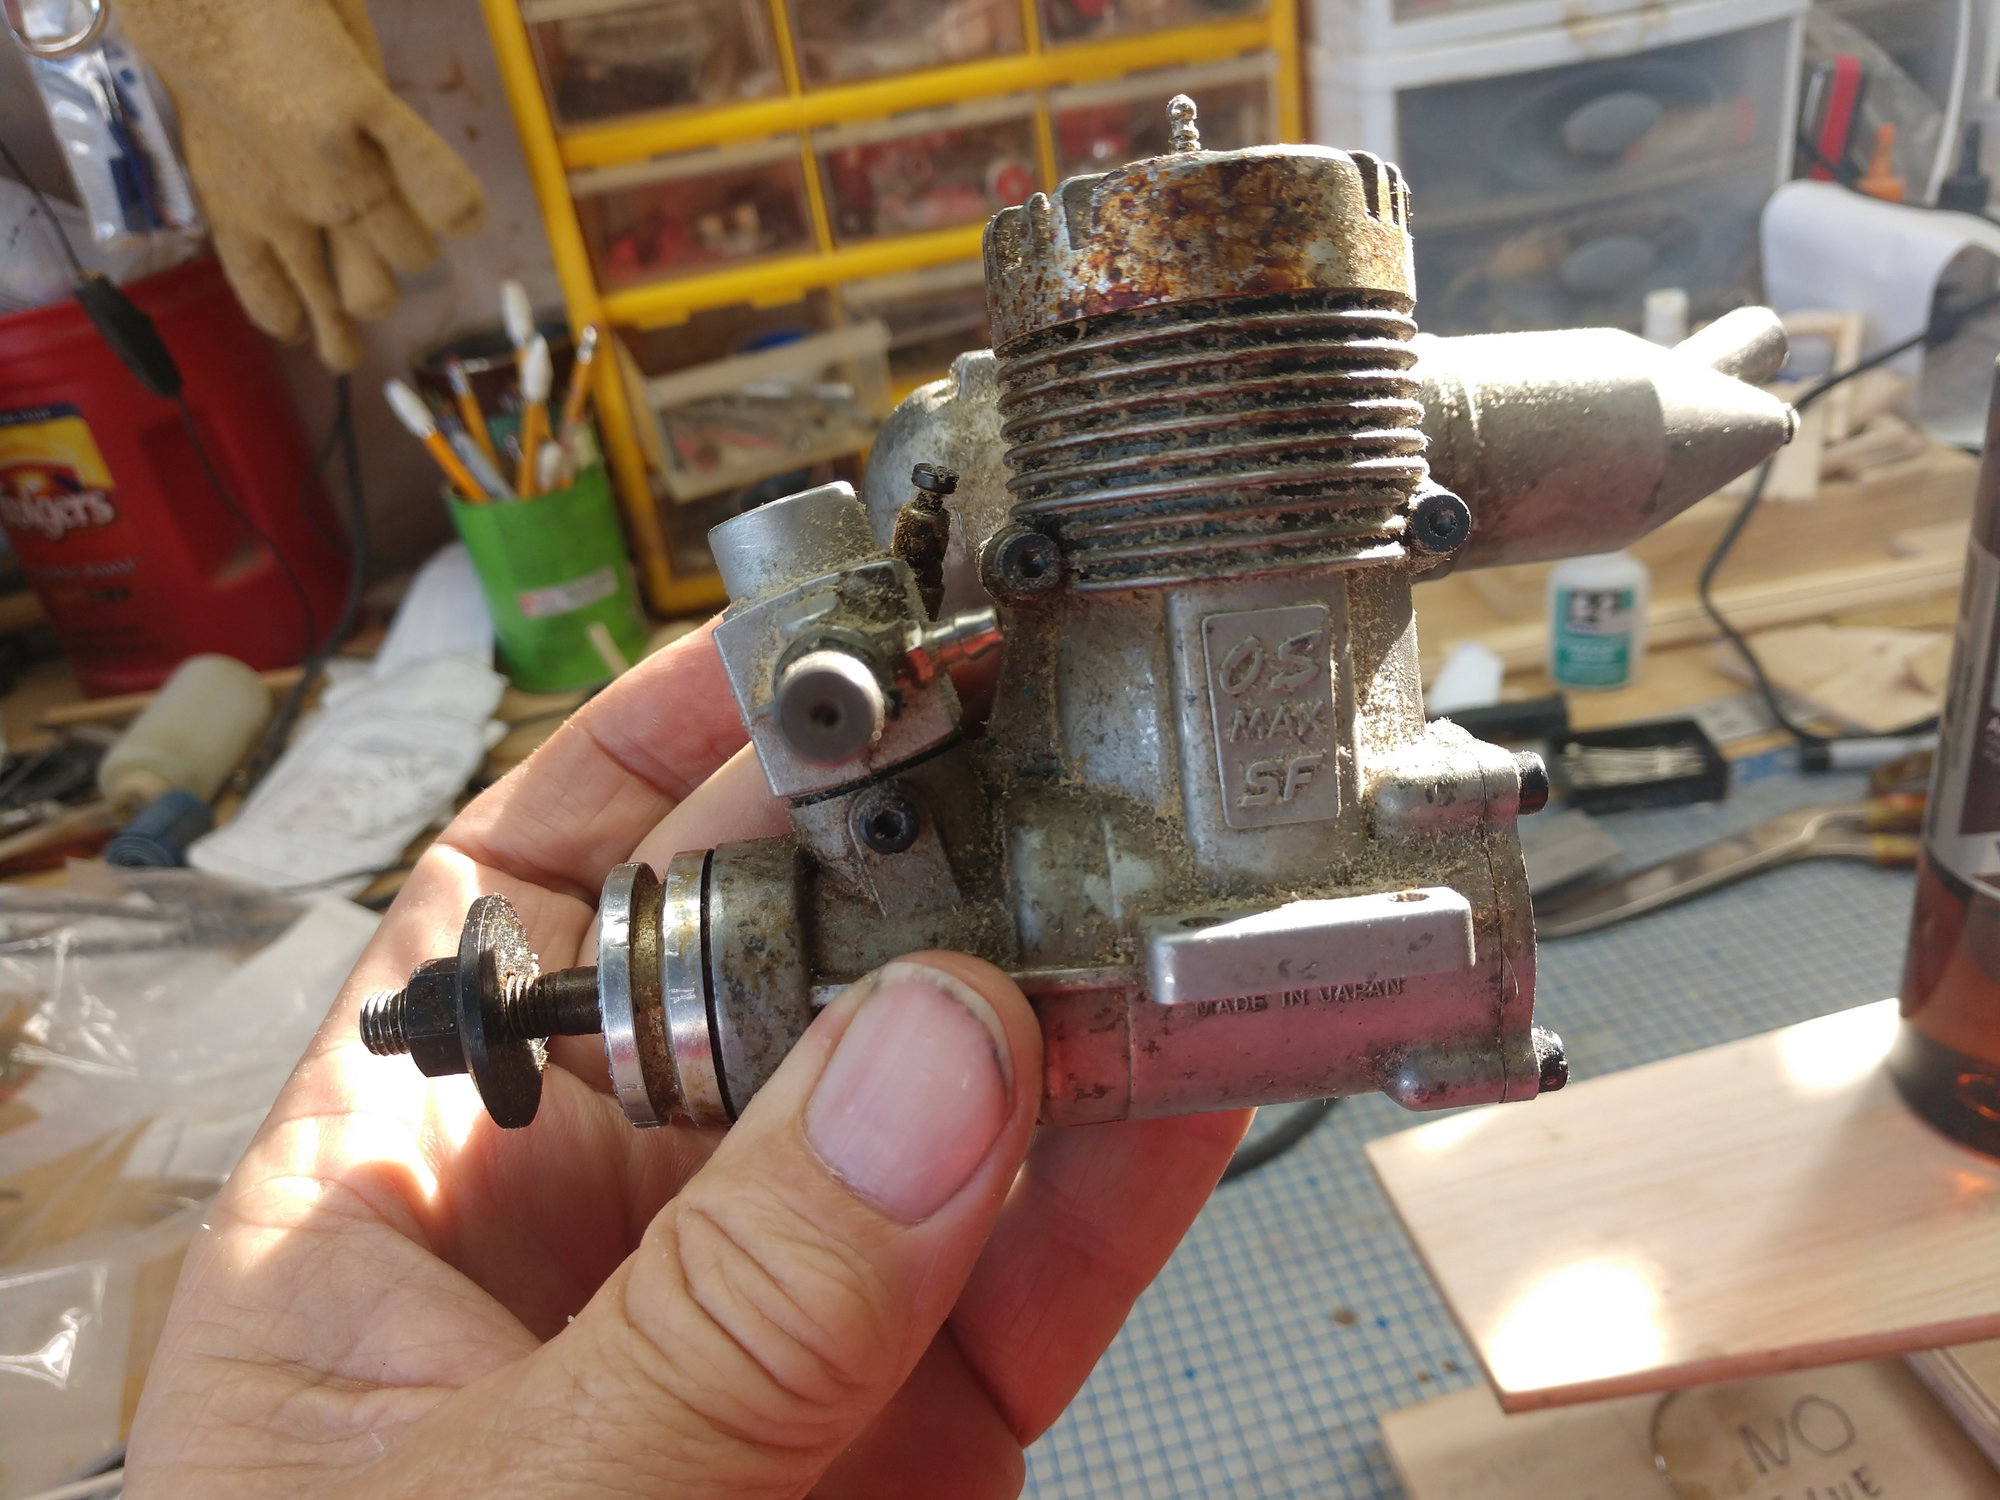
Looks nasty but has good compression Will bench test it later
. I just bought one today, not that particular one.Last time I was flying I broke 1/4 20 nylon bolt with my Ryobi drill.
I'm going to leave the this screw driver in the truck I think. I made a poor mans bed cover from 3/8" ply and 2x3 framing. I made it with 2 strip hinges so it folds up 2 times to expose the bed. I use some 1.5" T25 stainless screws to keep people out of it. So have the elec screw driver will be darn handy. I have 4 eye bolts screwed into the frame to strap things to the top of the bed cover. Works a charm. Only cost me about $50.
Under the hinges I place a bicycle inner tup cut in half and split to make a water seal. It actually works pretty good.
No It may not be pretty, But it lets me safely carry my planes or other things.
My truck is a Ford F250 super duty diesel. The bed box is the same as other fords but the out bed outer line is larger and curved slightly. The truck is slightly wider than the other fords. So I bed topper or a shell cost a lot more.
I am going to build my own shell for it later. I bought a beat to holy heck smaller shell to savage the windows. So I good for windows, $50.
I am going to frame the shell up with Poplar and sheet it with 1/4" Baltic birch. Then I will fiber glass it, prime it and then take it to an auto body shop for a cheap paint job.
I may buy a welder and build an internal steel frame that I can then a rack to thru the shell. Obviously there will have to hard points for the bolts to pass thru.
Only got maybe a half hour of time on the bird today.
Ken
This is all got done today
Looks nasty but has good compression Will bench test it later

 02-27-2020, 05:00 PM
#30
Thread Starter
Lit ply doublers for stab loads
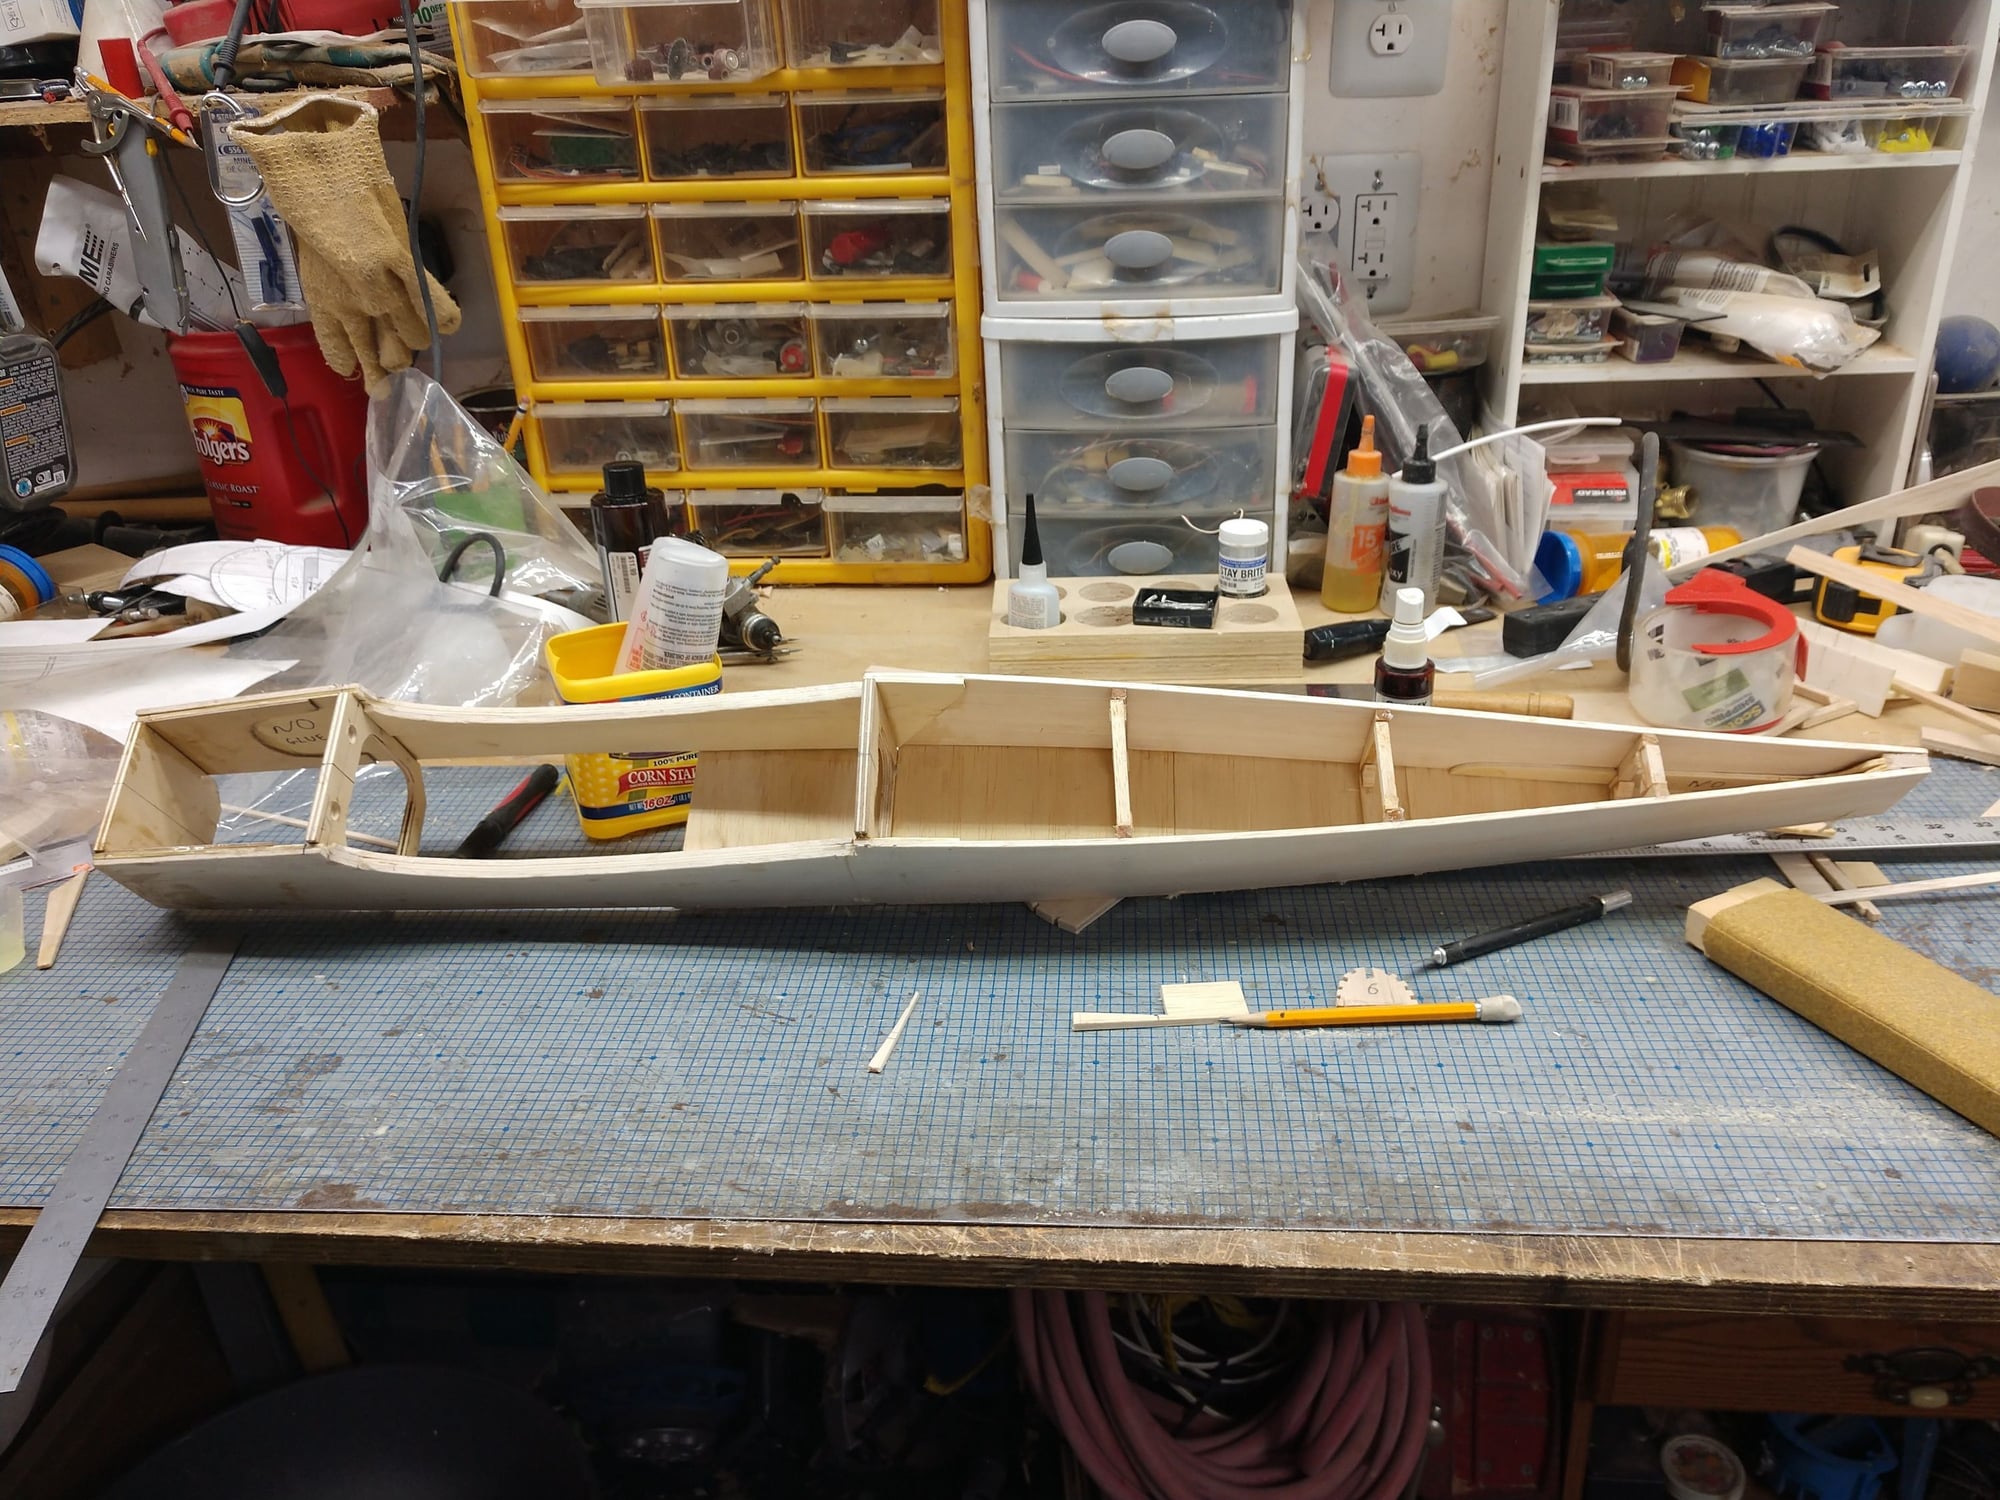
Did not get to go flying so I spent a couple or so hours on the S.S
Installed the two lite ply doublers at the back top end of the fuse to carry the stab loads. Then the rest of the internal formers and the fire wall. Then I sheeted the top aft end of the fuse.
It is a very strong and stiff structure.
Ken
02-27-2020, 05:34 PM
#31
Thread Starter
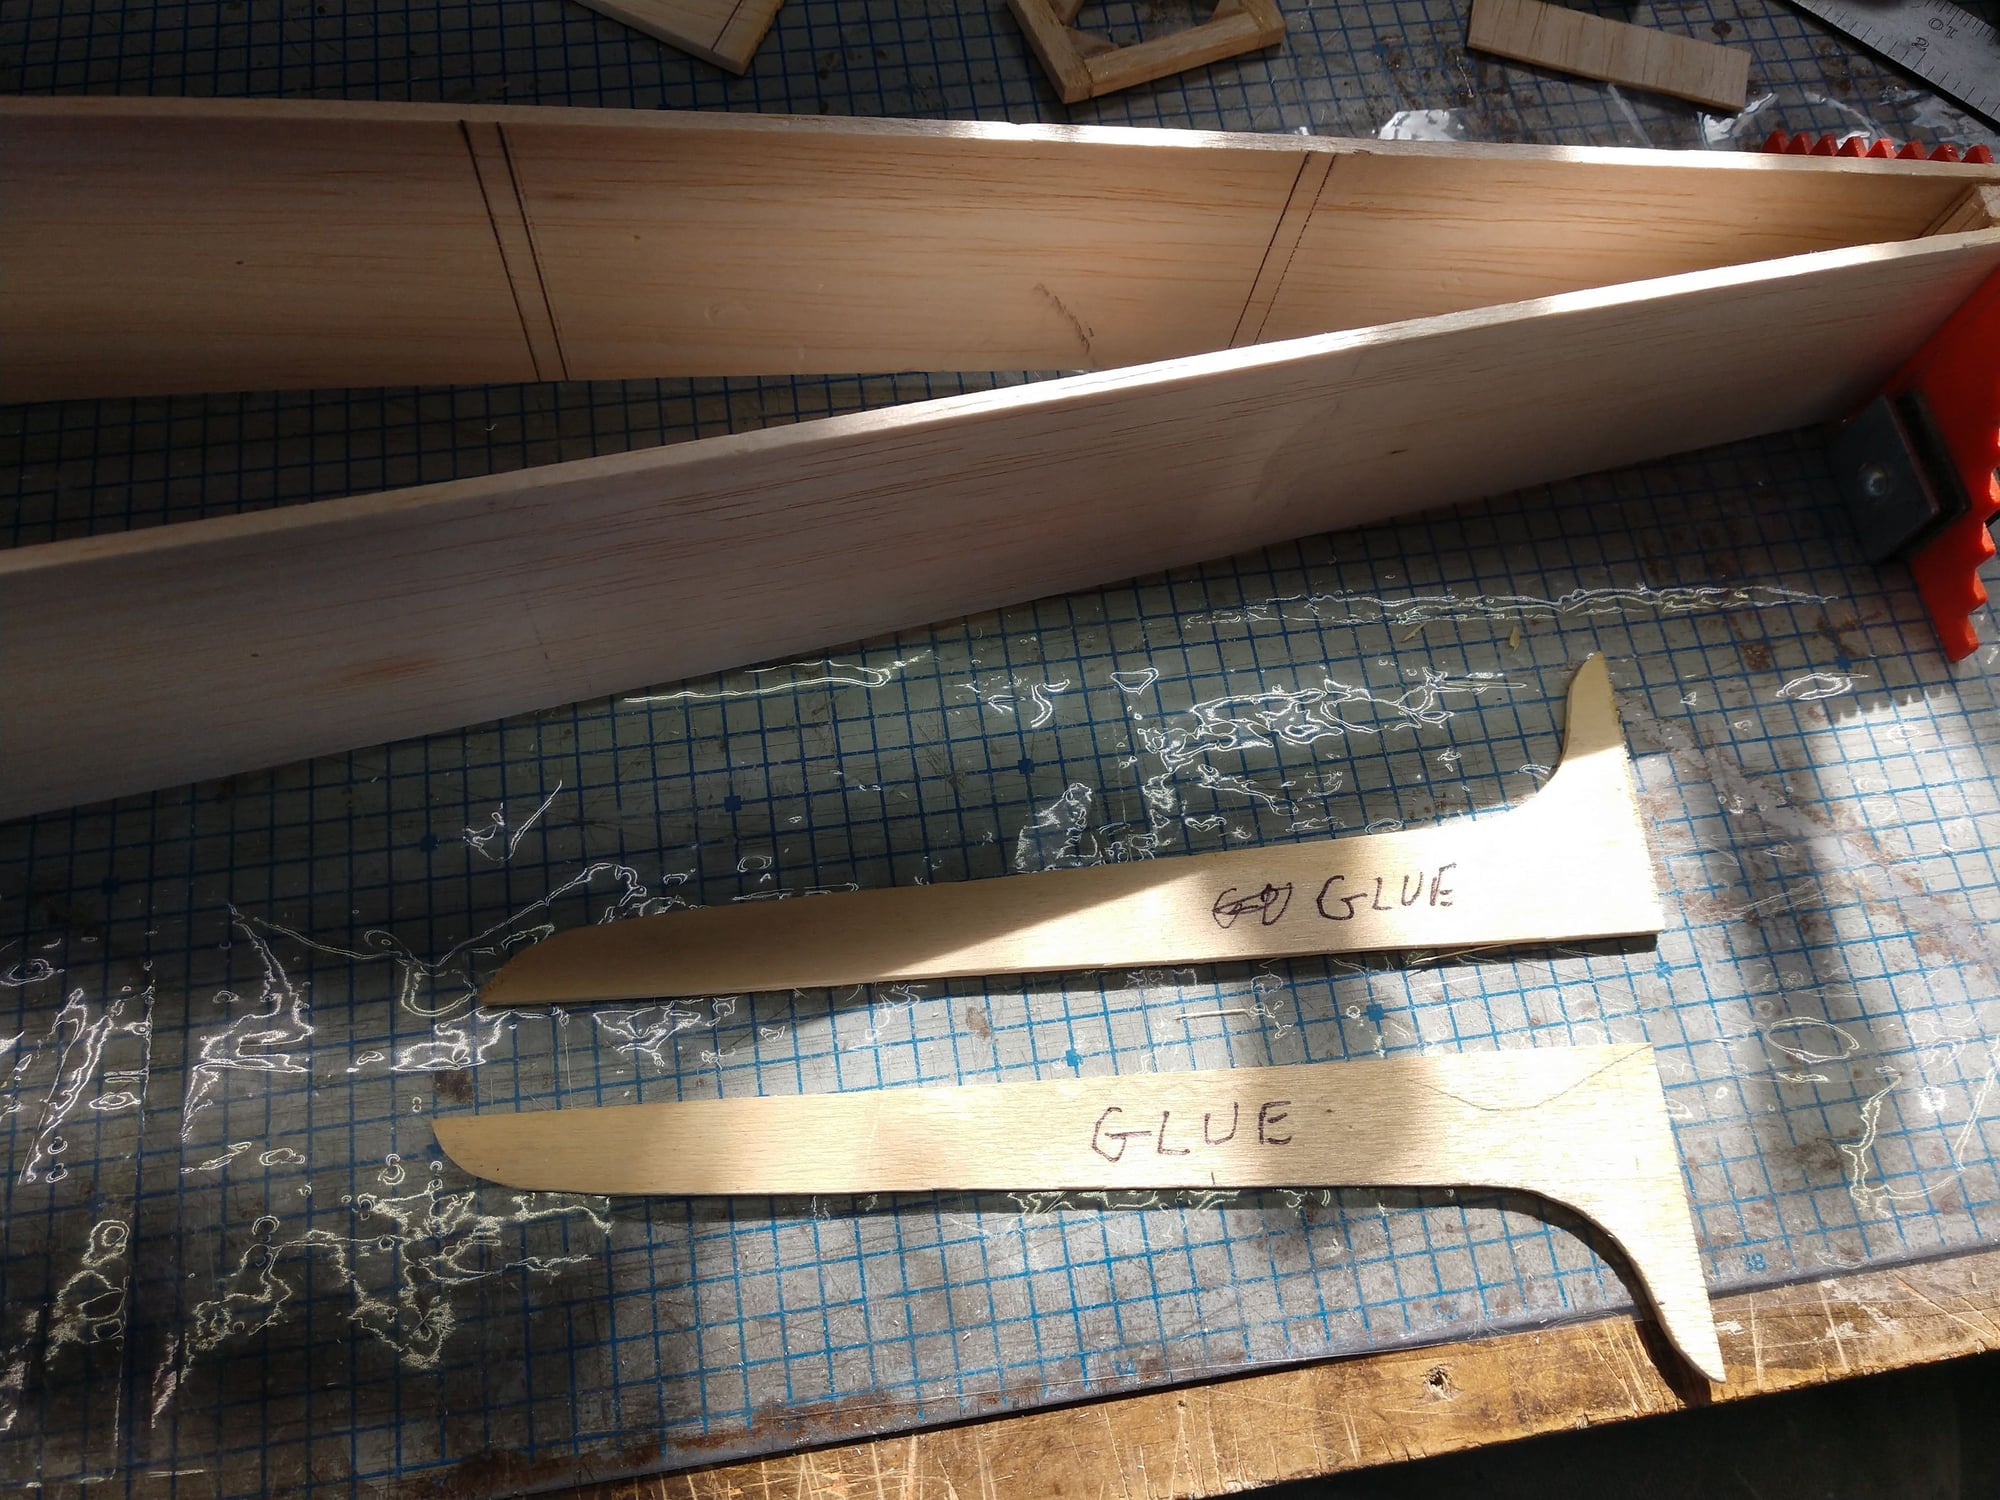
This is how the front of the wing will attach. Two fiber glass arrow shafts pieces will be anchored in the wing. The 2 little round 1/4" ply pieces are not yet epoxied to allow me to center up the wing. I may make 2 new ones that have more surface area before I glue them in.
Then two 1/4 20 nylon bolts thru the trailing edge will secure the wing.
Ken


Then two 1/4 20 nylon bolts thru the trailing edge will secure the wing.
Ken
02-28-2020, 08:50 AM
#34

Testing hands-off straight and level flight at low speed (57mph). Testing the roll function.
Last edited by Lee Taylor; 02-28-2020 at 09:13 AM.
02-28-2020, 01:00 PM
#36
Thread Starter
Hi Lee, Thanks for the input. That was pretty good analyzes. First time I'v seen some do it via YouTube. Much easier than simple text would have been to convey your thoughts.
I noticed last night in the pics that something (actually several somethings) looked off. So I went out this morning to do a more in depth look at things.
One fuse side has a different curve to it. Danged if I know why it did that, never had this type of construction do that so severely. I can't live with it, that's for sure. I think I can get away with adding another sheet of 1/8" balsa, and then sand it to match, maybe 2 at the high point of the curve.
The biggest concern was the fire wall. I was thinking it might have a been a warped piece of ply. I made bothe the fire wall and F1 from some scrap 1/4".
So what i did to check was a ruler to check flatness. That came out OK.
Then jigged the fuse up on one of the inch lines on my steel building board. I made sure to get the fire wall, F1, and the very back centered on the line. I had use the scrap 3/4" ply that I was using as a push block on my little dremel saw. Hmm, then thought well better see if the push block is true. It ain't. Took some digging but I found a piece of OSB the checked true when I laid it on the cast iron bed of my big table saw. That piece of OSB I recognized and know it is really old, So I checked some more. Well pleasant surprise, it was dead on flat no matter how I checked it. Good to go.
I jigged the fuse and the OSB At a perfect right angle and started checking expecting to see a off true fire wall. I wasn't see that though. Nah, can't be right. Check some more and still true. Well I guess I can be persuaded to live with that .
.
I will have to be much more careful with camera angles.
Interesting that the S.S sim corkscrews in rolls. Hopefully mine will do a little better, but if not no big deal.
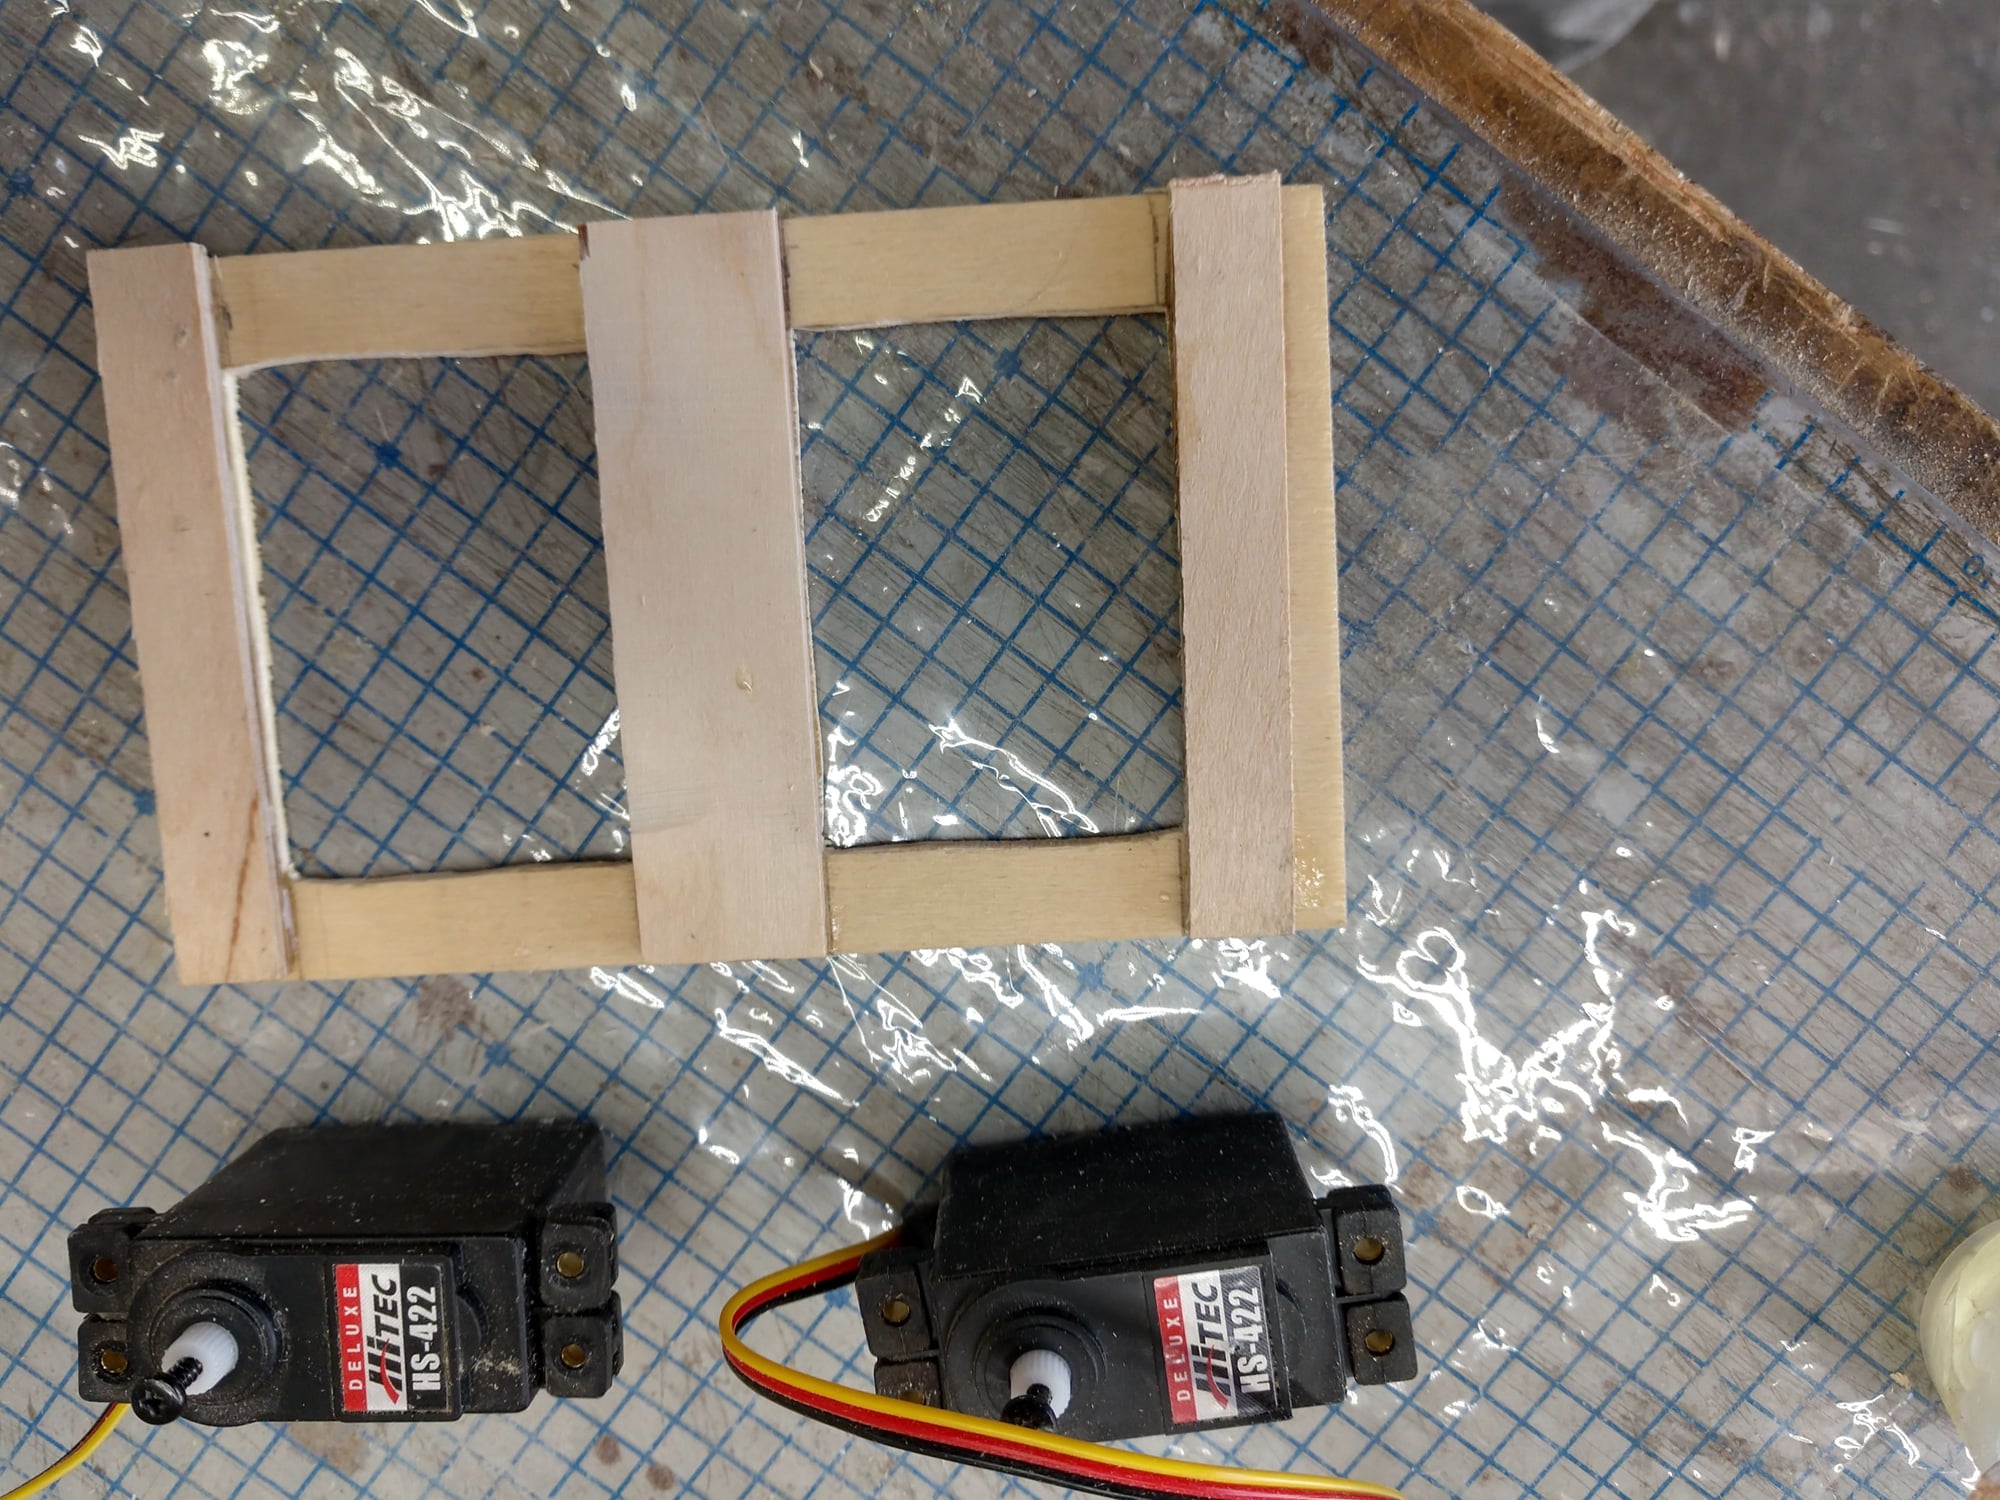
Making a servo tray The right hand aircraft ply doubler looks crooked. I fixed that after I saw it in the pic
I noticed last night in the pics that something (actually several somethings) looked off. So I went out this morning to do a more in depth look at things.
One fuse side has a different curve to it. Danged if I know why it did that, never had this type of construction do that so severely. I can't live with it, that's for sure. I think I can get away with adding another sheet of 1/8" balsa, and then sand it to match, maybe 2 at the high point of the curve.
The biggest concern was the fire wall. I was thinking it might have a been a warped piece of ply. I made bothe the fire wall and F1 from some scrap 1/4".
So what i did to check was a ruler to check flatness. That came out OK.
Then jigged the fuse up on one of the inch lines on my steel building board. I made sure to get the fire wall, F1, and the very back centered on the line. I had use the scrap 3/4" ply that I was using as a push block on my little dremel saw. Hmm, then thought well better see if the push block is true. It ain't. Took some digging but I found a piece of OSB the checked true when I laid it on the cast iron bed of my big table saw. That piece of OSB I recognized and know it is really old, So I checked some more. Well pleasant surprise, it was dead on flat no matter how I checked it. Good to go.
I jigged the fuse and the OSB At a perfect right angle and started checking expecting to see a off true fire wall. I wasn't see that though. Nah, can't be right. Check some more and still true. Well I guess I can be persuaded to live with that
.I will have to be much more careful with camera angles.
Interesting that the S.S sim corkscrews in rolls. Hopefully mine will do a little better, but if not no big deal.
Making a servo tray The right hand aircraft ply doubler looks crooked. I fixed that after I saw it in the pic
02-28-2020, 01:49 PM
#37
It seems to me IF the wing surfaces, the main wing, the horizontal stab, and the vertical stab are in proper relationship to each other then the fuse can just hang in there. The engine shaft center-line angle was important way back in the control line days. (SO it draws my attention)
I like the videos for conveying my thoughts. Much simpler than text.
One of the reasons the corkscrew got my attention is because some of the other sim models I have been flying do not corkscrew as much. I am tempted to say all planes corkscrew in a roll it just is a matter of degree. The one thing I noticed about the SS is the speed. (117mph straight and level, have not measured a dive yet) Again, the other models I have been sim flying are larger and I fly them slower
02-28-2020, 02:30 PM
#38
GREAT NEWS! My concern over the SS sim not rolling well, is incorrect. When I first saw the slow cork screw I addressed it by increasing the aileron deflection. At least I thought I was increasing the aileron deflection. I actually increased the rudder deflection which did nothing to address the concern. I have since tested it and it rolls just fine.
Last edited by Lee Taylor; 02-28-2020 at 03:00 PM.
02-28-2020, 03:35 PM
#39
Thread Starter
You are a step or more than a few ahead of me with the vid to express your thoughts. I have often struggled to clearly get an idea across on build threads.
Good to know that the S.S does roll nicely. Even my little Kadet Jr seems to roll reasonably well. just an observation from flying it. It has the dihedral reduce by half and strip ailerons added.
Oh on the wing to saddle gap. I will fix that. Likely with epoxy and micro balloons. Will make a thick past and with scotch tape on the wing mating surface just mush em together. When using a thick mix of epoxy and micro balloons I like to apply some normal epoxy and then the paste. That gives good adhesion. The paste will be applied to the wing saddles. Should give a perfect mate. Iv'e done that before. Once the paste has set real good then I carve off the squish out to get a true flat surface on the side of it.
Back in the 60's 70's there was a 2 part epoxy paste that did the job of the micro balloons epoxy paste. Brown if I recall correctly. Heavy, could be smoothed out with a wet finger. Can't recall what it was.
Bondo might also be an option, not sure. Iv'e never used it before.
Ken
02-28-2020, 05:08 PM
#40
Bondo without micro balloons is hard as a rock. I use it on my house.
I was thinking the screen recordings would be faster than video but it is not faster. It takes just as long to upload. I like it. I think it is more versatile. Thought I would try "screencast-o-matic" for a year. Gave them 20 for a year. You can use it for free but they limit you to the sound from the computer or your voice, one of the two, not both. I cannot remember which
I was thinking the screen recordings would be faster than video but it is not faster. It takes just as long to upload. I like it. I think it is more versatile. Thought I would try "screencast-o-matic" for a year. Gave them 20 for a year. You can use it for free but they limit you to the sound from the computer or your voice, one of the two, not both. I cannot remember which
Last edited by Lee Taylor; 02-28-2020 at 05:10 PM.
02-28-2020, 06:18 PM
#41
Thread Starter
Here is how I am going to fill the area behind the wings trailing edge. I cut the original off when I removed the ailerons. That was to only way to remove the torque rods. The original ailerons were just flat stock, no taper front to back. Rather ugly.
I have several different aileron stock material. Only one that is as thick as the wings trailing edge is also 1.5" wide. The original was 1" wide. I have some 1" wide stock but it is about half as thick as the wings trailing edge. So it's the 1.5" stock.
I can cut the 1.5" stock to 1" or I can use it. That would make the roll control way to much. So really I have 3 choices.
1 Cut the wide stock down to 1"
2 I can add flaps. So half the span as flaps, the second half as ailerons.
3 I can make barn door ailerons. The inner half fixed and the outer half ailerons.
Half span barn door ailerons 1.5" wide would likely be about the right control authority.
I have modified a couple of airplanes to half span flaps, and half span ailerons. But I made the twice as wide as the original. That gave a rather responsive roll rate, so maybe 1.5 times wider would be perfect.
Adding flaps does have 2 disadvantages. That's is roughly another 3 ounces in servos. No big deal really. The second disadvantage is flaps add $26 to the servo cost. I am out of usable servos right now, so I have to buy servos for this plane. Well maybe 3 disadvantages, two more servos to install. I had already planed to use two servos for ailerons.
I have a plane with all Hitec HS-322HD Standard Heavy Duty Karbonite Gear Servo and I like them.
Ken
03-01-2020, 05:04 PM
#43
Thread Starter
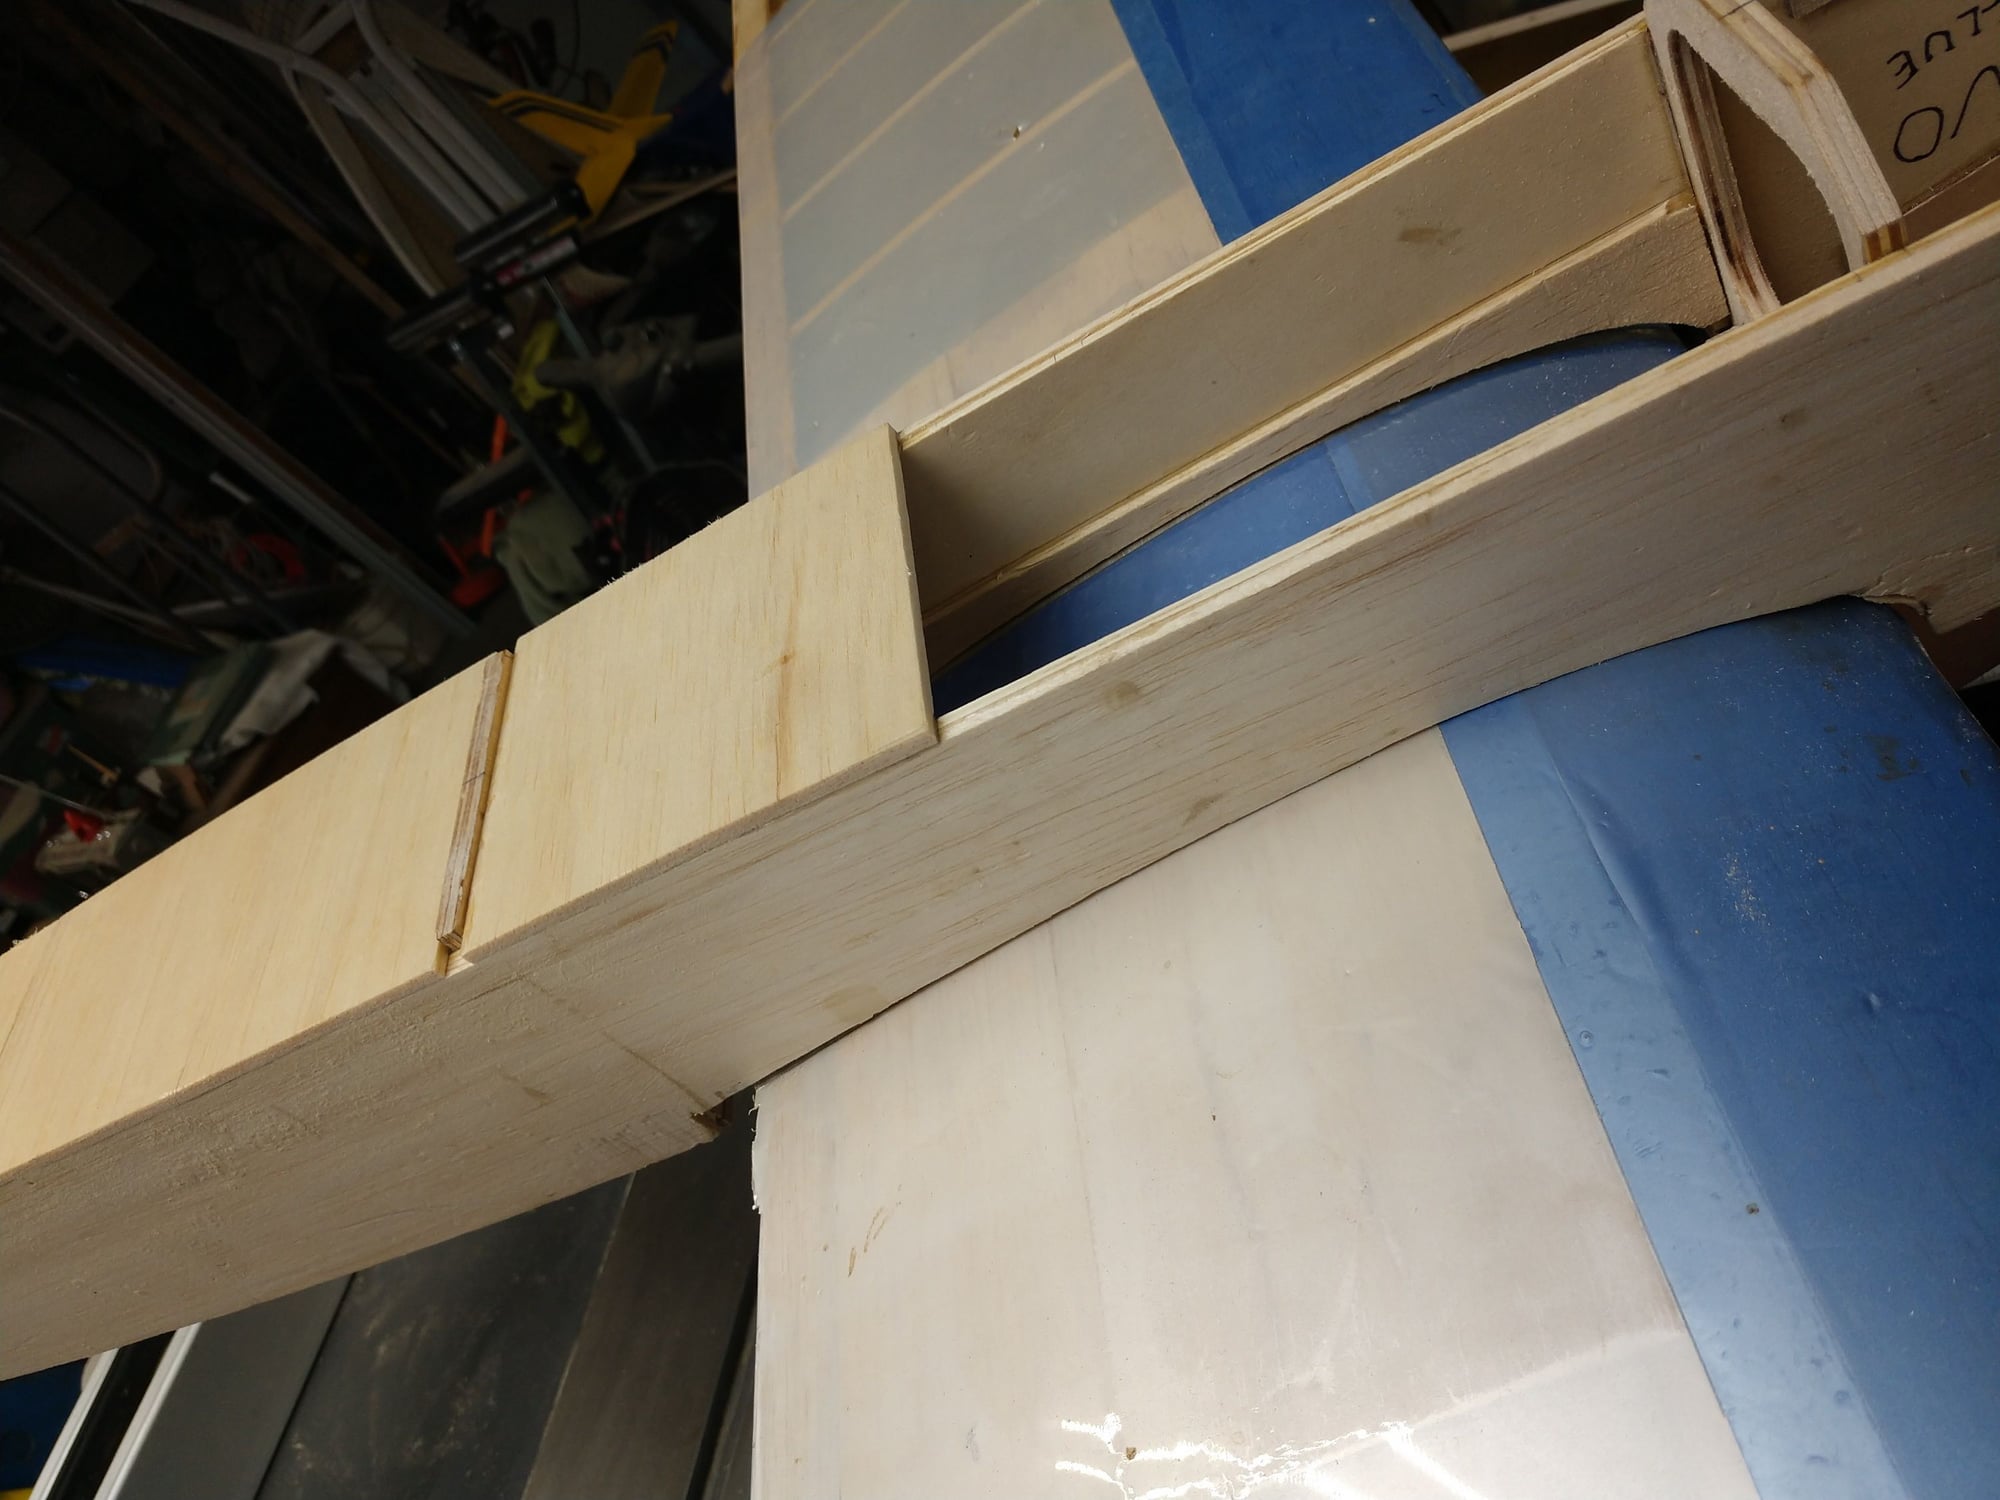
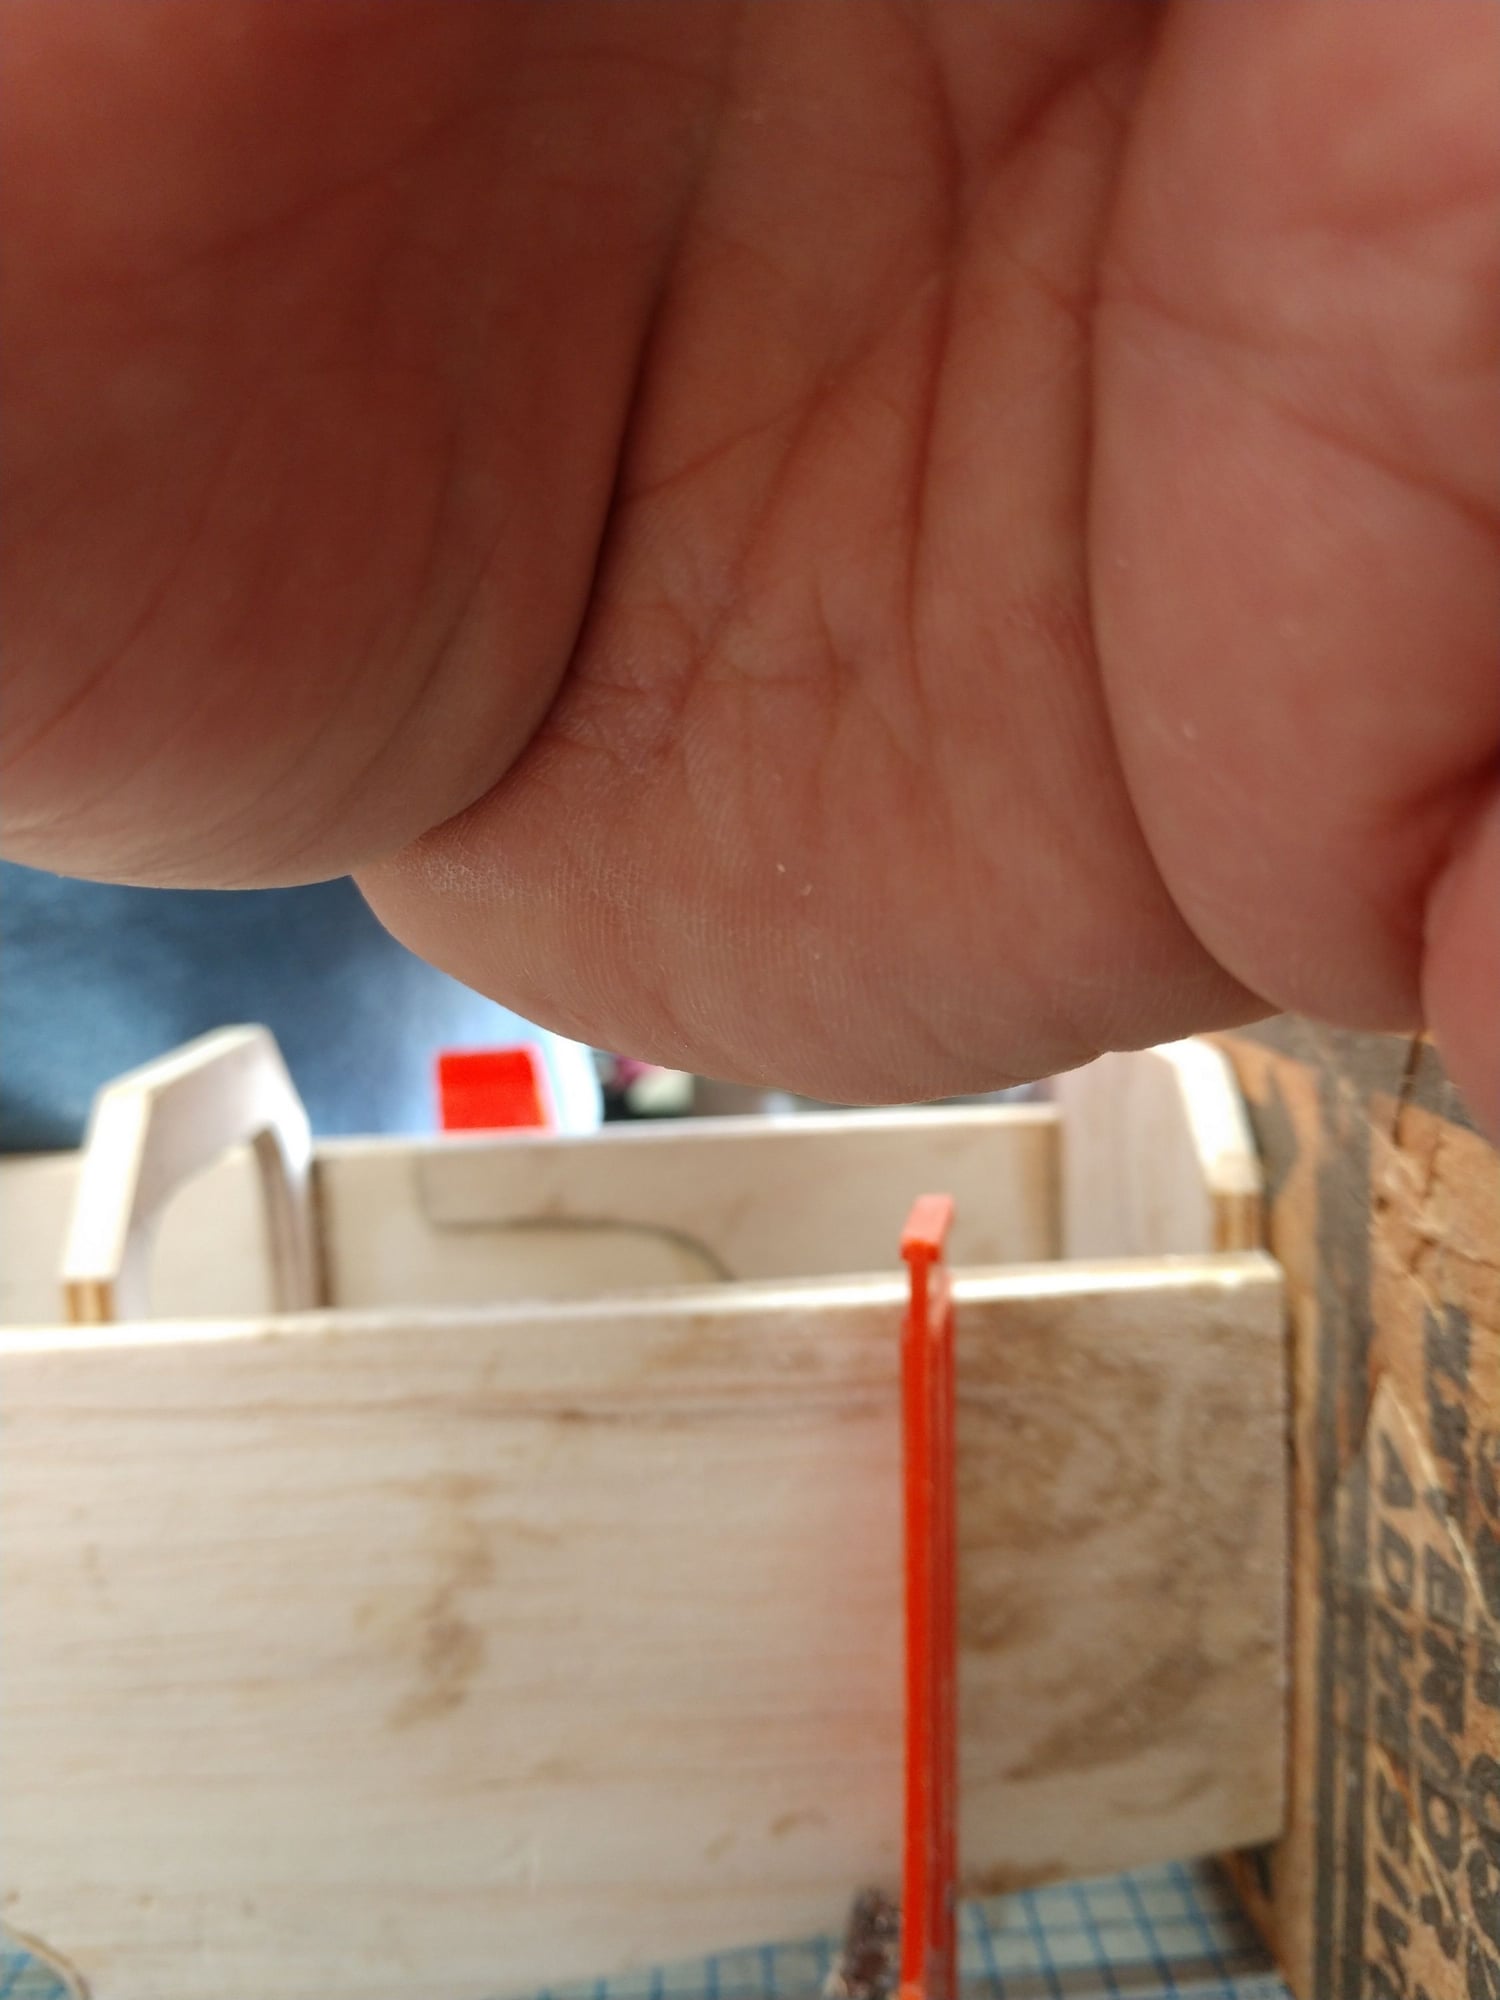
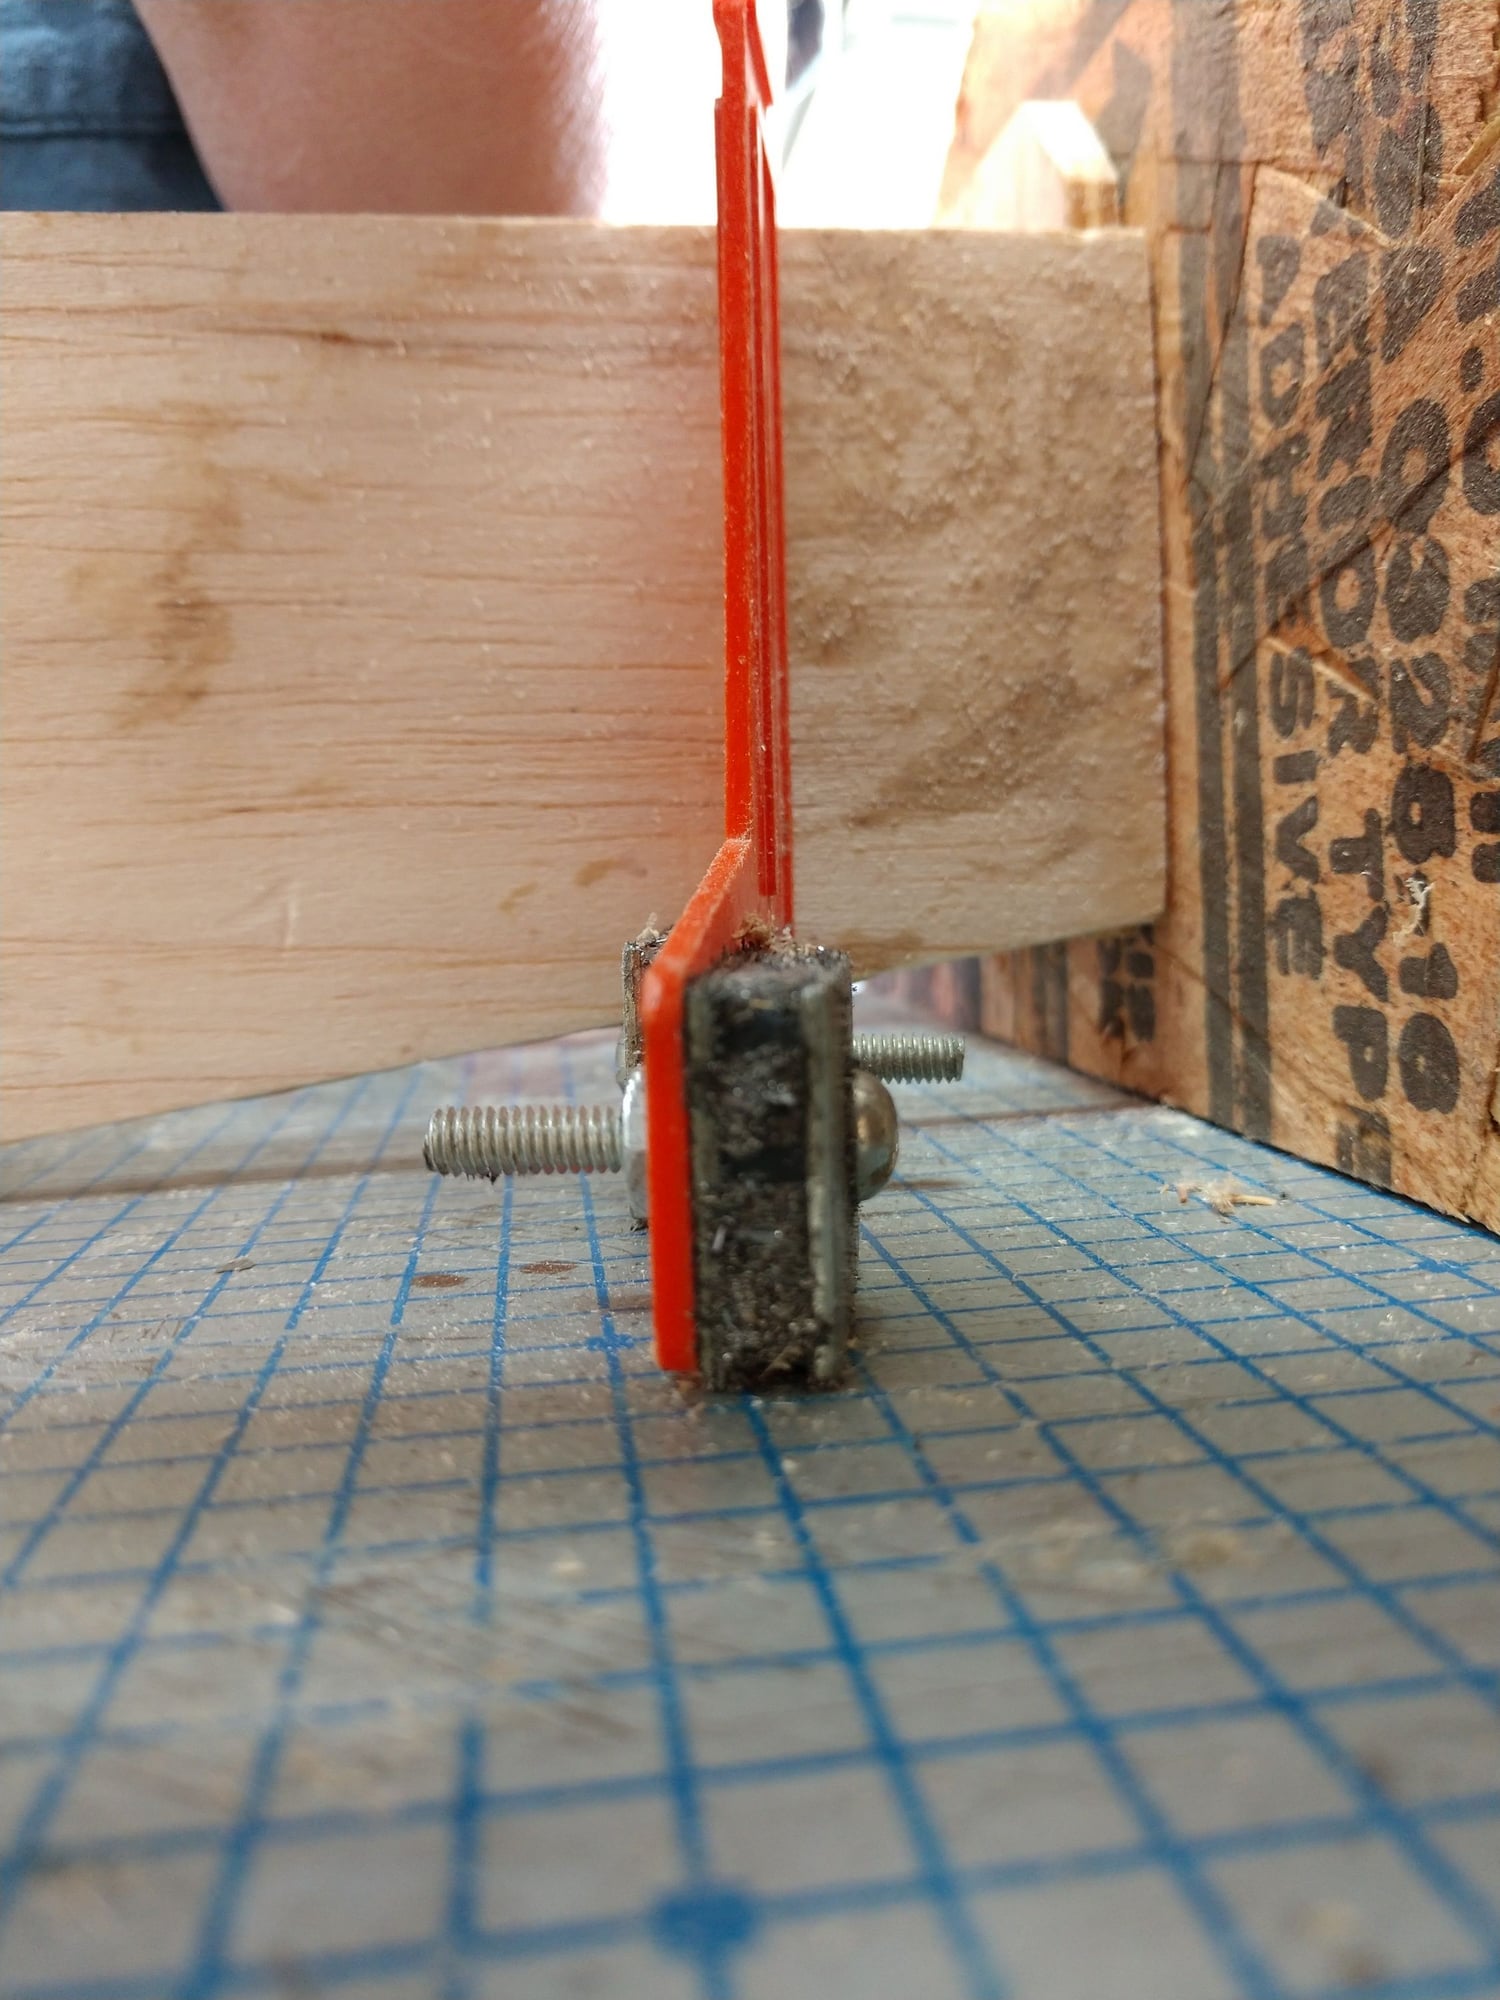
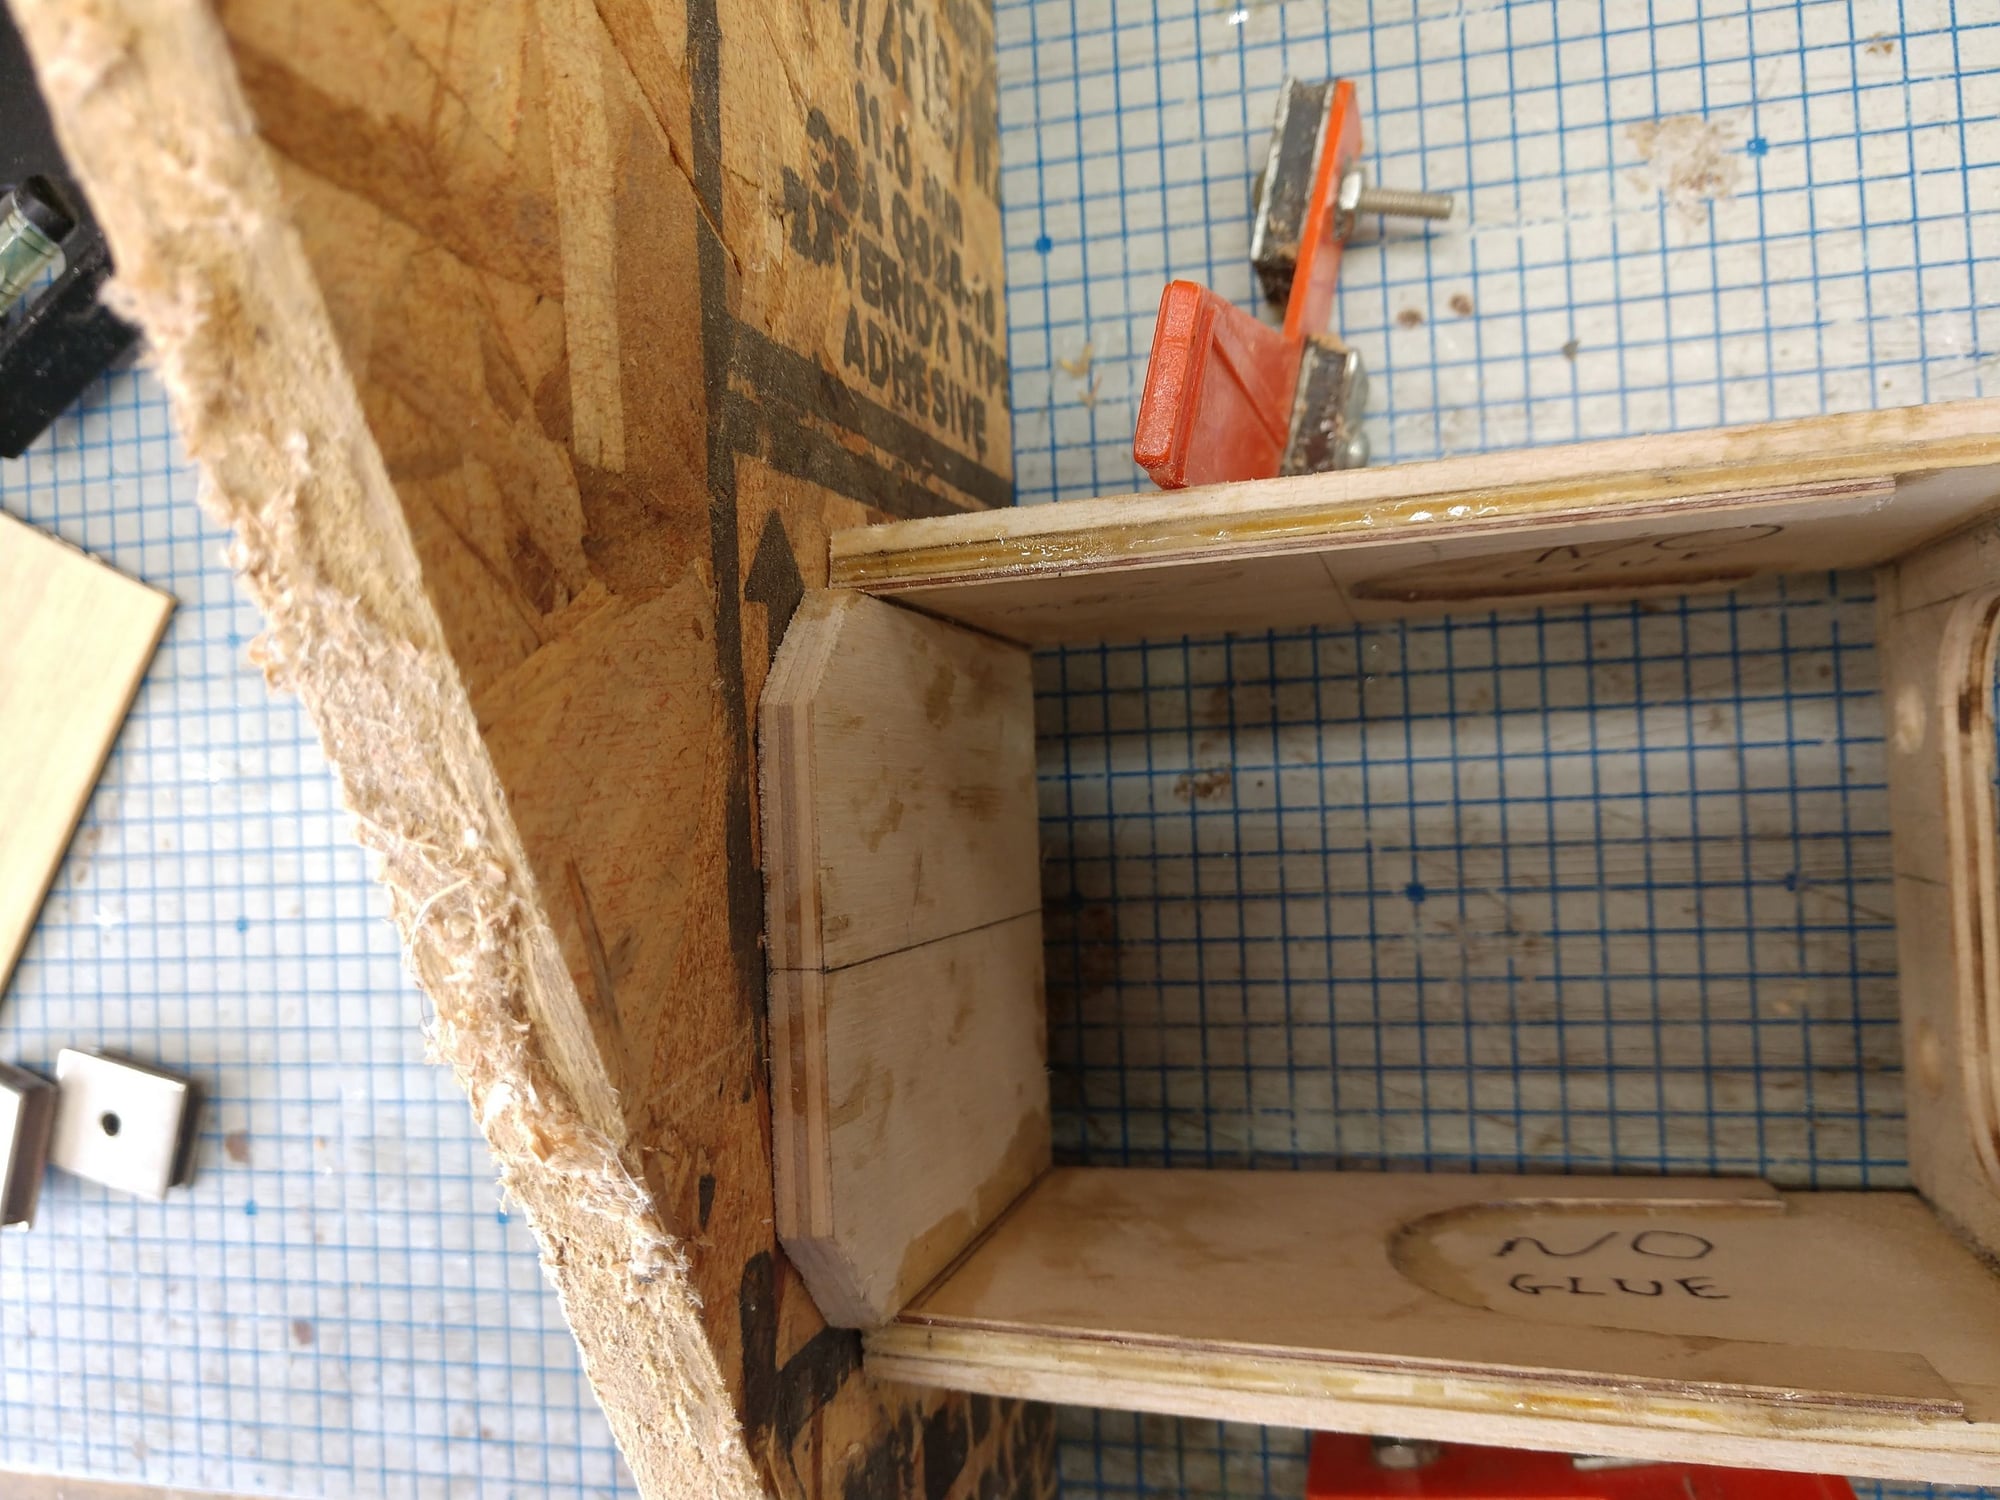
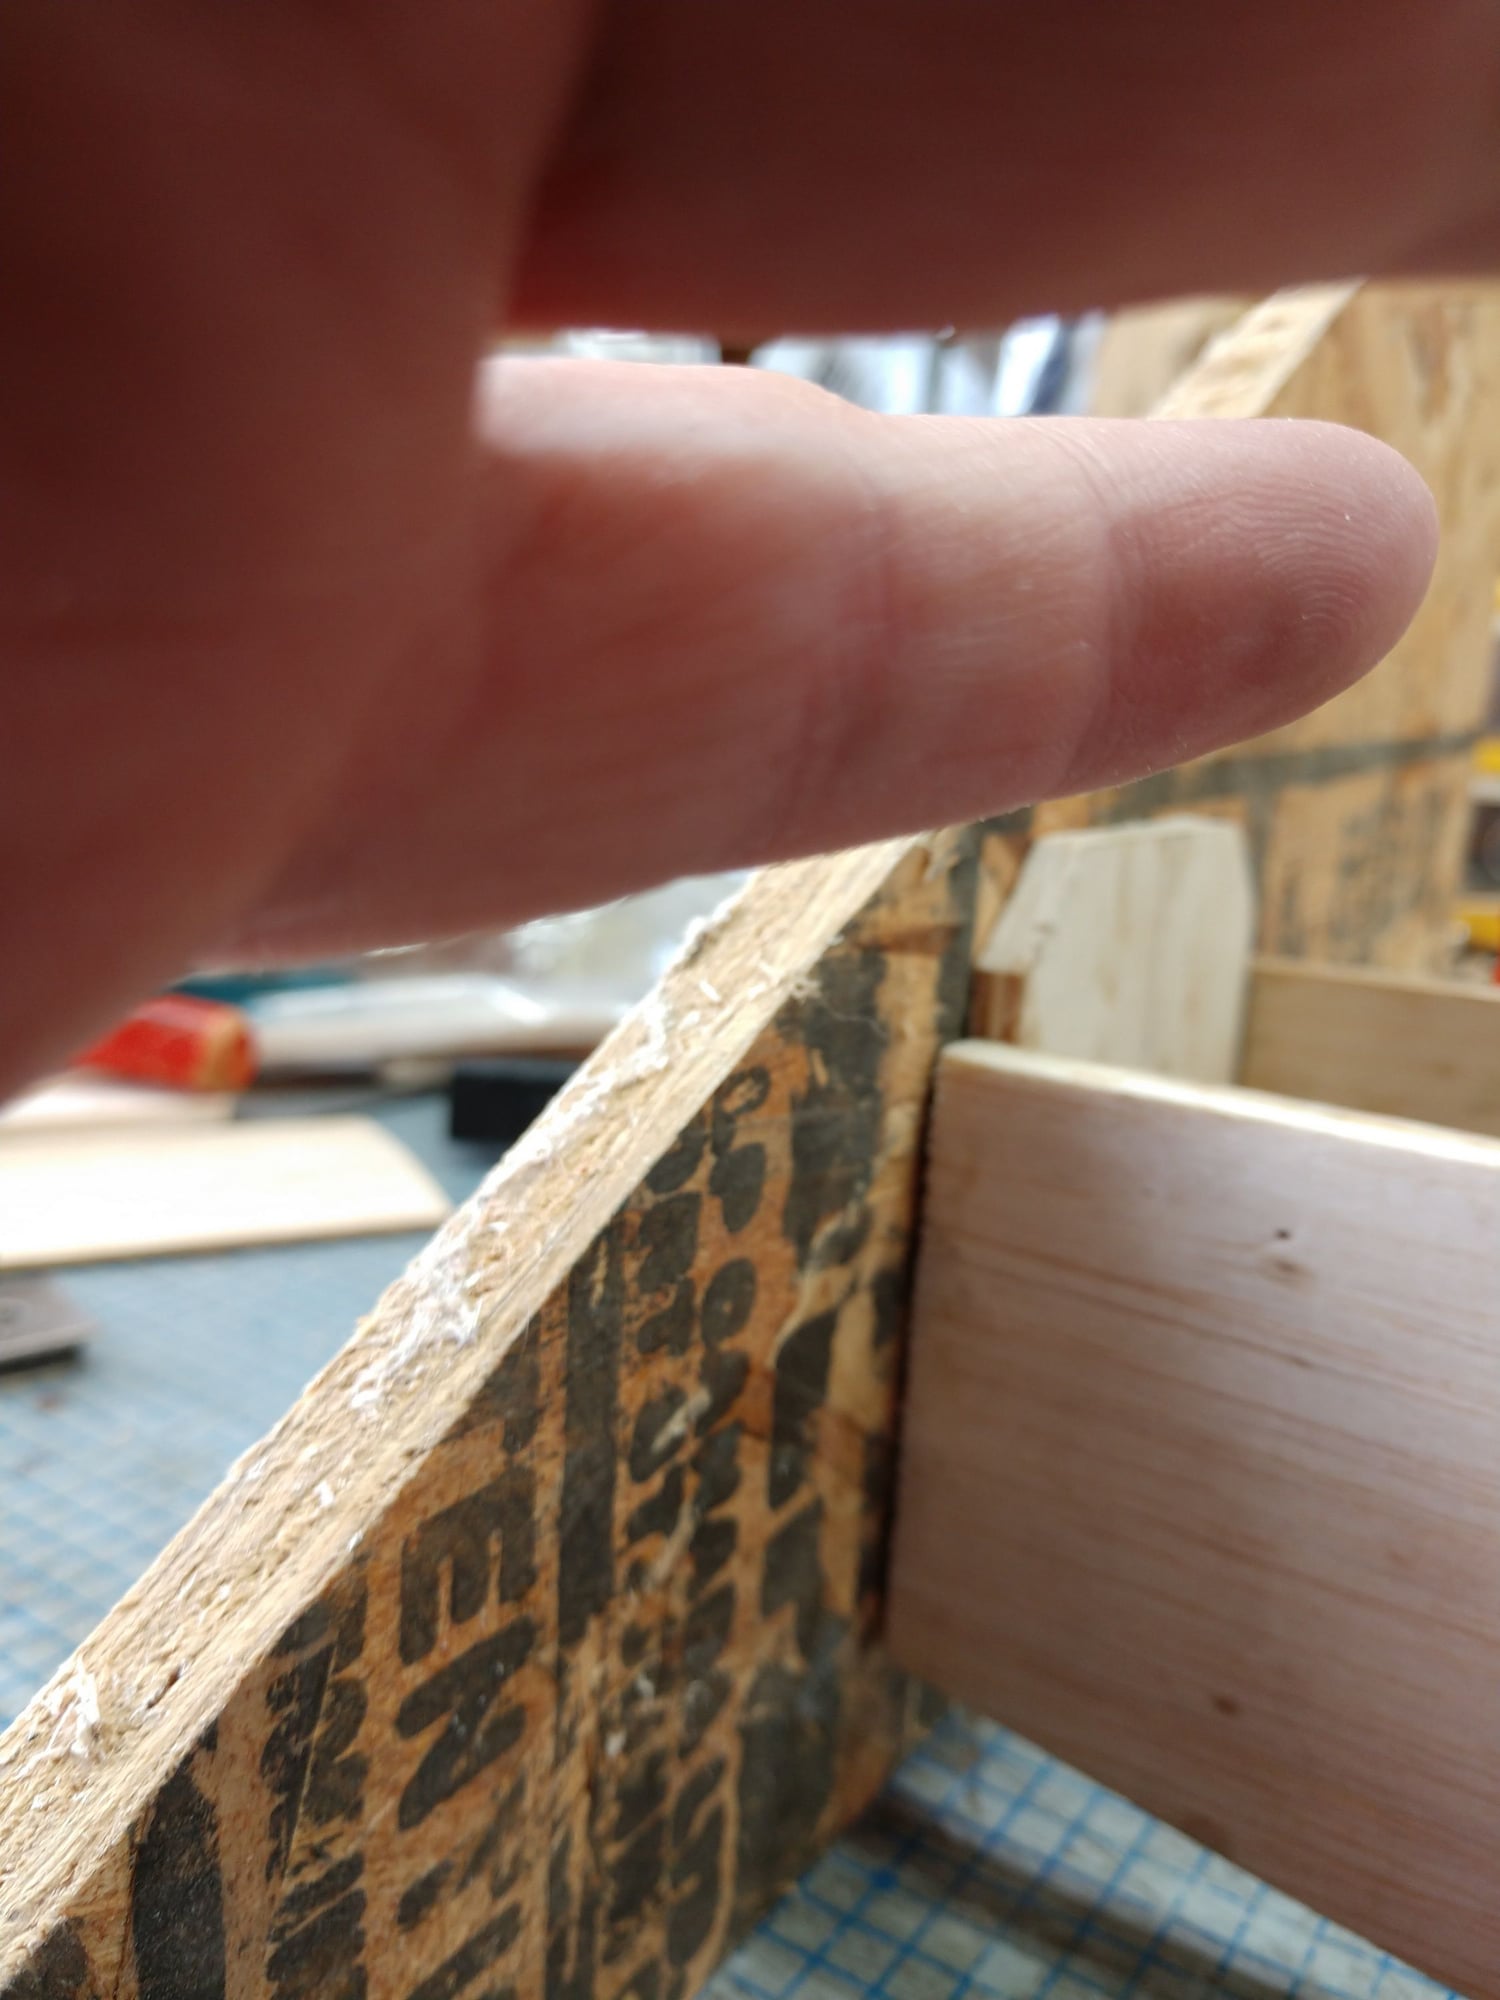
I have a solution for the un matched rear fuse sides. I tacked glued to 1/4" sq bass sticks dead on the center line of the fuse. That gives me a reference 1/8" on either side of the fuse center line, The thickness of the fuse skins, and of the repair sheet of balsa. I will put a series of 1/4" wide strips on the bad side vertically and then sand then down till I can measure the same from my center line stick from the opposite side. That gives me the offset for the new skin. The 1/4" wide strips can only be used for the worst of the mismatch. The new 1/8" skin will be to much at the back and near the wing trailing edge. I will use 1/16" in those areas. Once I have matching curves I can remove some of the original skin.
By hook or crook I am going to fix that mismatch> I can not live with it.
I think I know why it happened. I had a piece of the clear throw away plastic from Monokote down over my magnetic board. The magnets can slip fairly easily with that between them and the board. I also may have tweaked the fuse forcing it to line up on the center line. If I had caught Before gluing the upper sheeting on, I would have just cut the bulkheads and tail stock loose and corrected then. I won't do this again!
Any way letting the tacked on center line sticks dry.
I got the wing stripped and the other wing tip off. I was able to cut and pull most of the covering off. I still don't know what it is. Don't care. It was stuck pretty good to some of the wood and center section fiber glass. So in the end I sanded off what I couldn't pull off.
I have notice that the glass that is on there is very coarse, maybe 8 ounce cloth, and not sanded at all to smooth. It is also not as wide as the fuse I am building. I like the glass to be as wide or a little wider than the wing saddle. Once I fix the holes I will cover with 4 ounce cloth. I have a lot of 4 ounce crows foot weave (also known as satin weave).
The wing control surface servos will be install out board in the wing.
I just may add flaps. If so the will couple to the elevator for some really tight loops, like a control line plane. It's just a matter of Tx programming. Also if I do add flaps, they will also function for landings.
Ken
Last edited by flyingagin; 03-01-2020 at 05:06 PM.
03-02-2020, 03:25 AM
#44
I do not think it will affect the flying or final "looks", because it is so slight. Just leave it out of the equation when doing the alignments. In other words, align the wings, vertical stab, and engine relative to each other. Use the fuse as just something that connects the parts. But then it is your model and you can do as you please with it.
All the "flying" models in my life have certainly not been perfect by any means. Things tend to get a bit rough at the flying field. Not that we want it rough, but flying models tend to get their bumps, bangs, and bruises. I know everyone does not think like me but I keep in mind that my plans are to take this thing to the field and put it through the paces.
When I was a kid I use to build plastic models just for "show". I put them in contests and sometimes won. That was a whole different story than the model built for the field. I secretly think that eventually I am going to crash. It just seems inevitable to me. The severity of the crash is another story. There is no way to speculate on that
03-08-2020, 08:14 PM
#45
Thread Starter
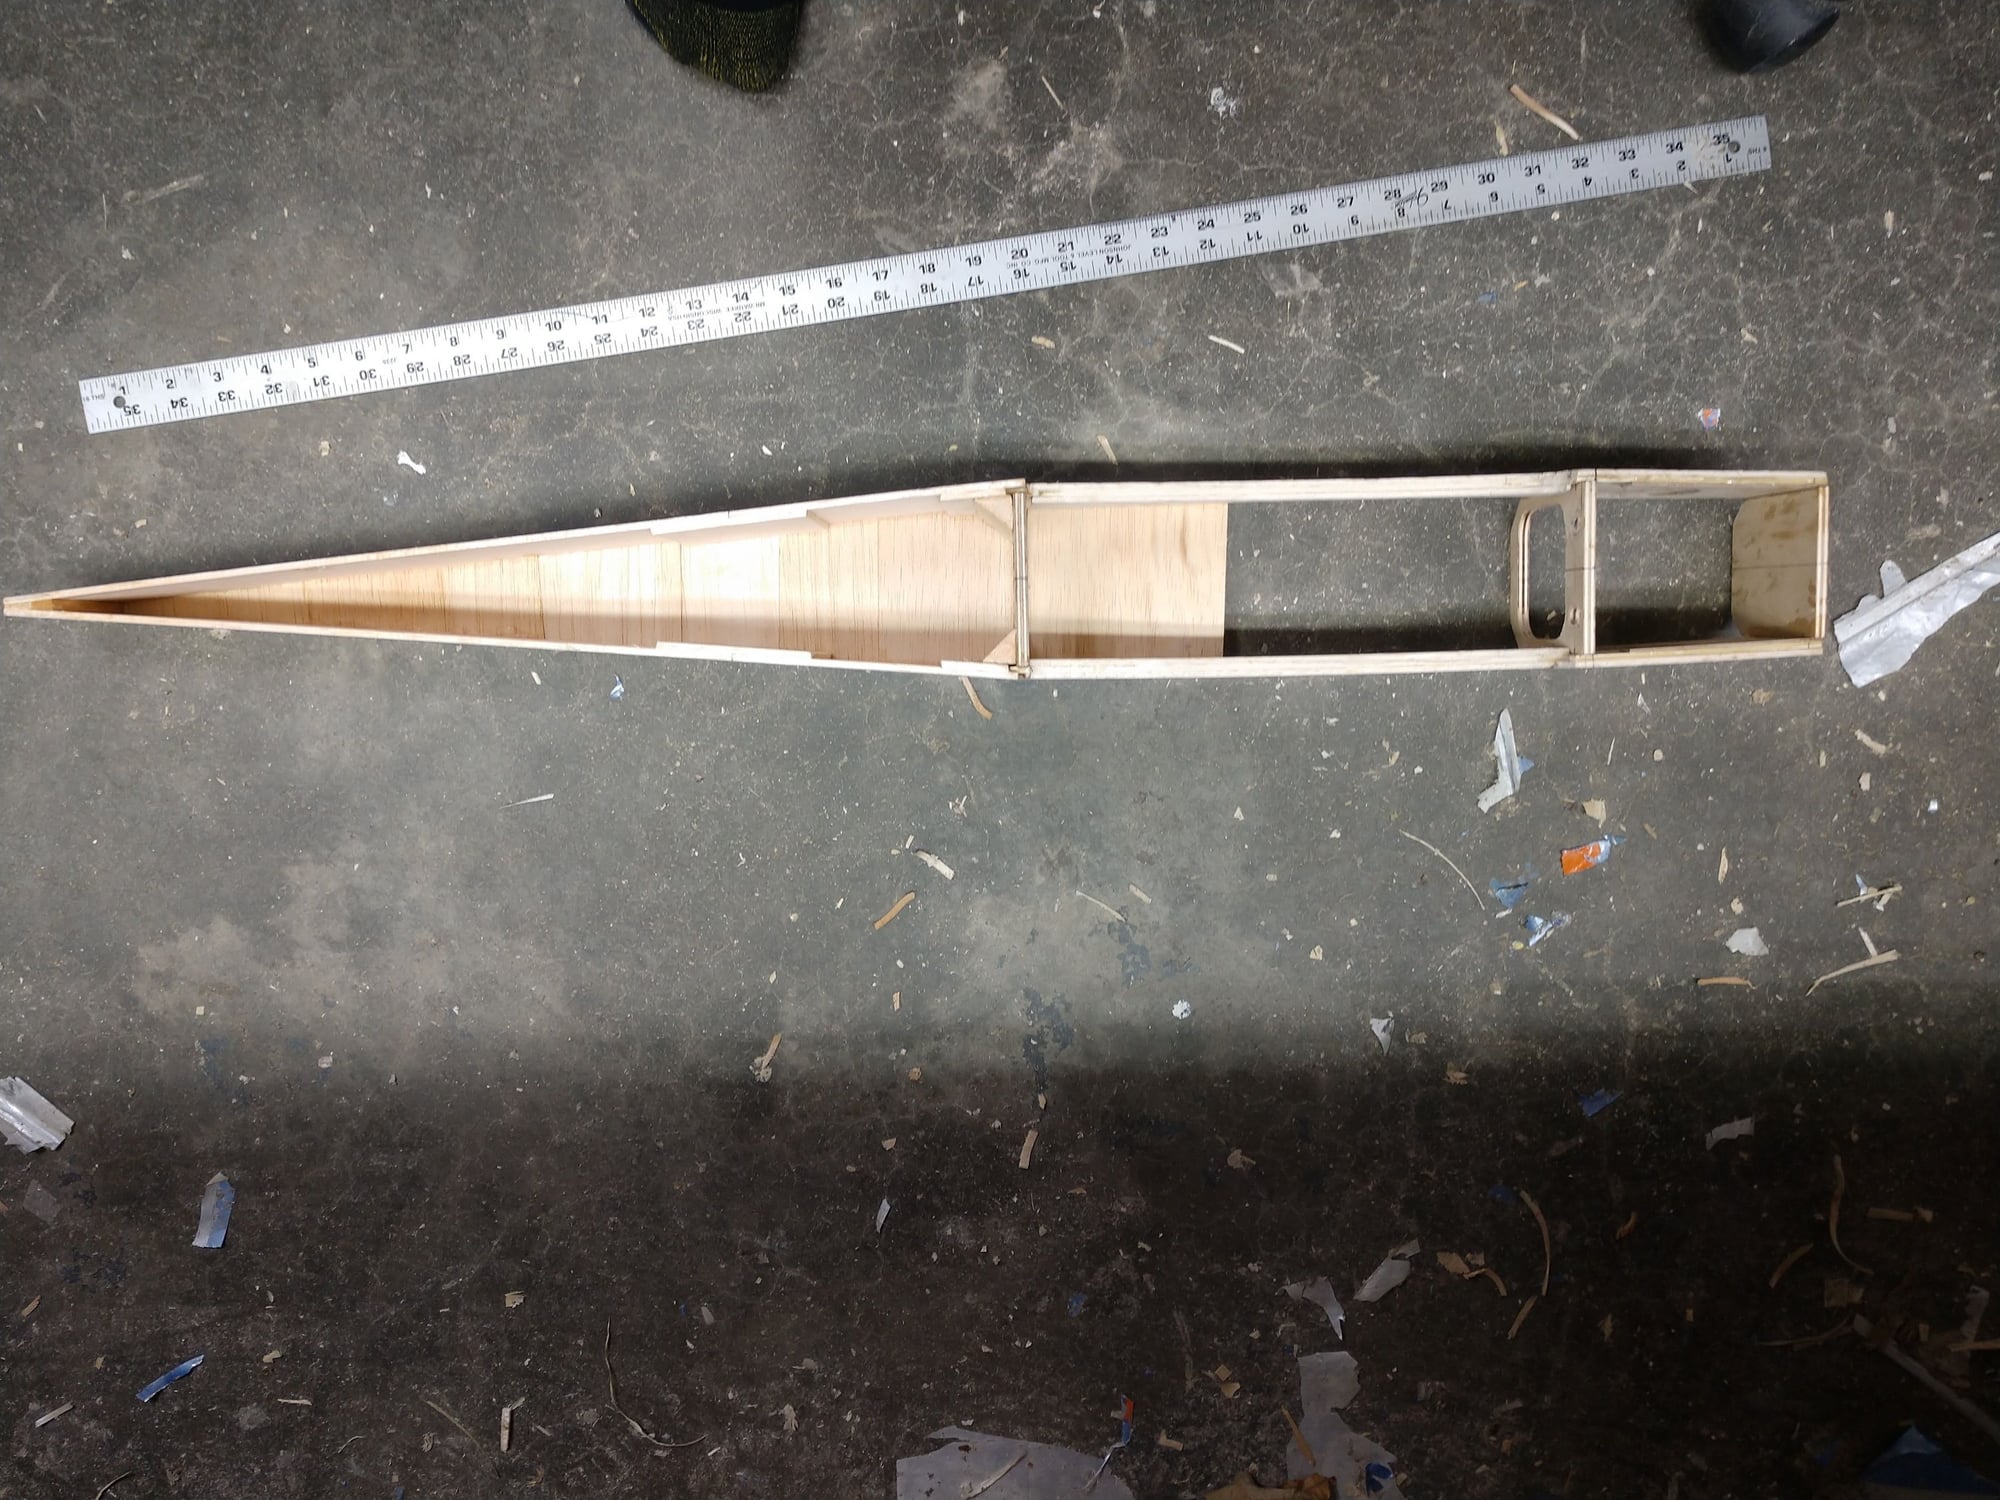

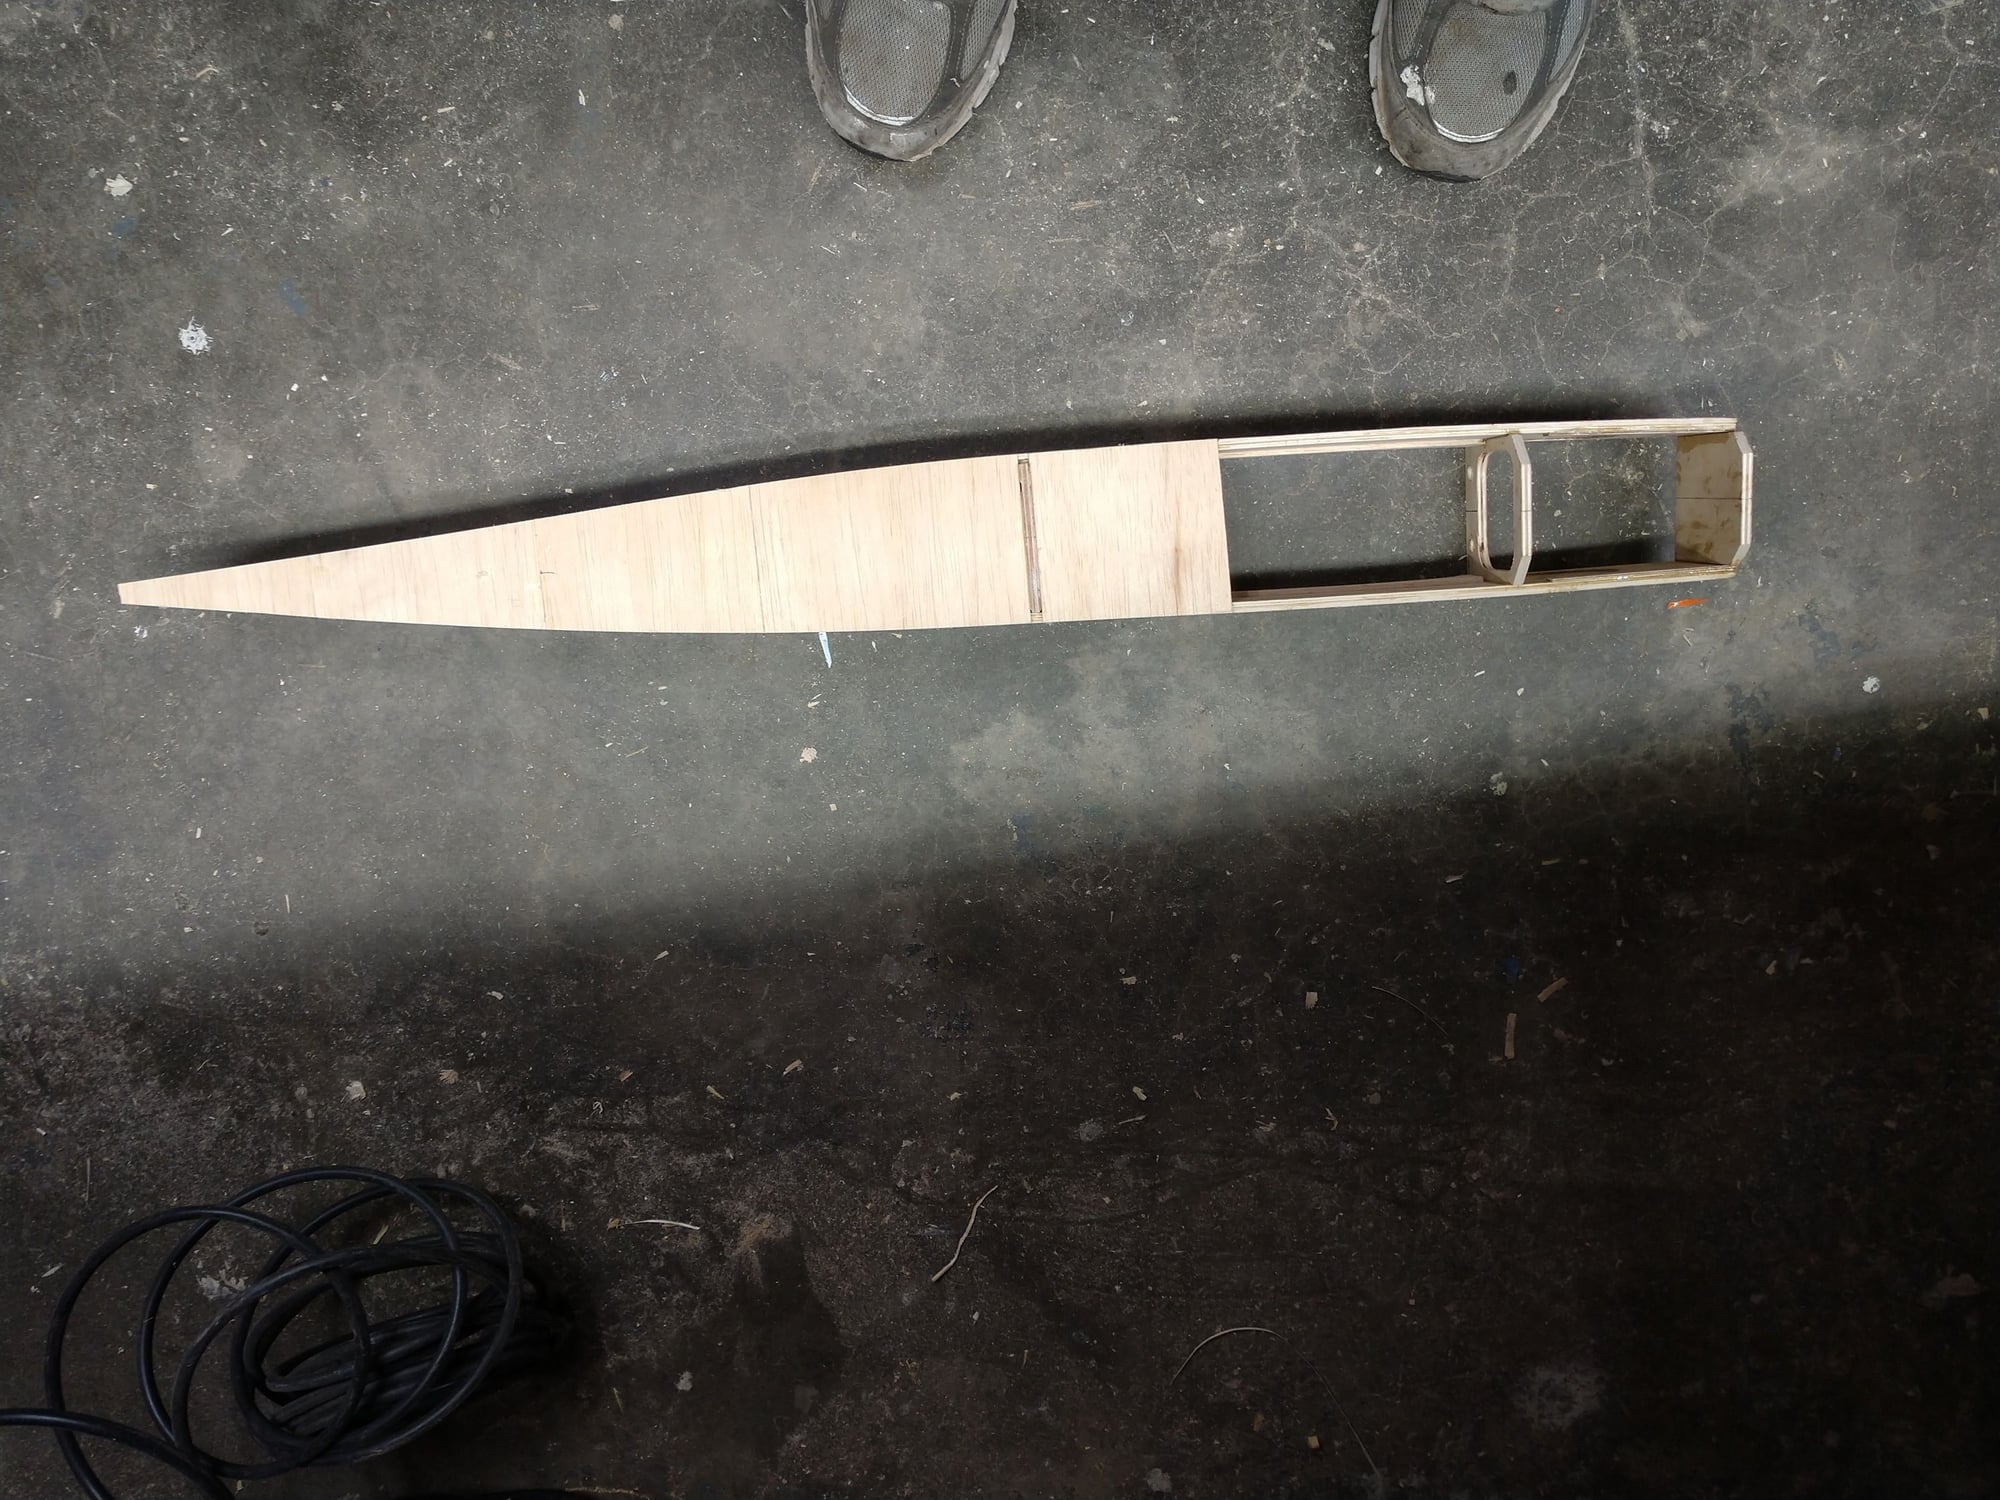
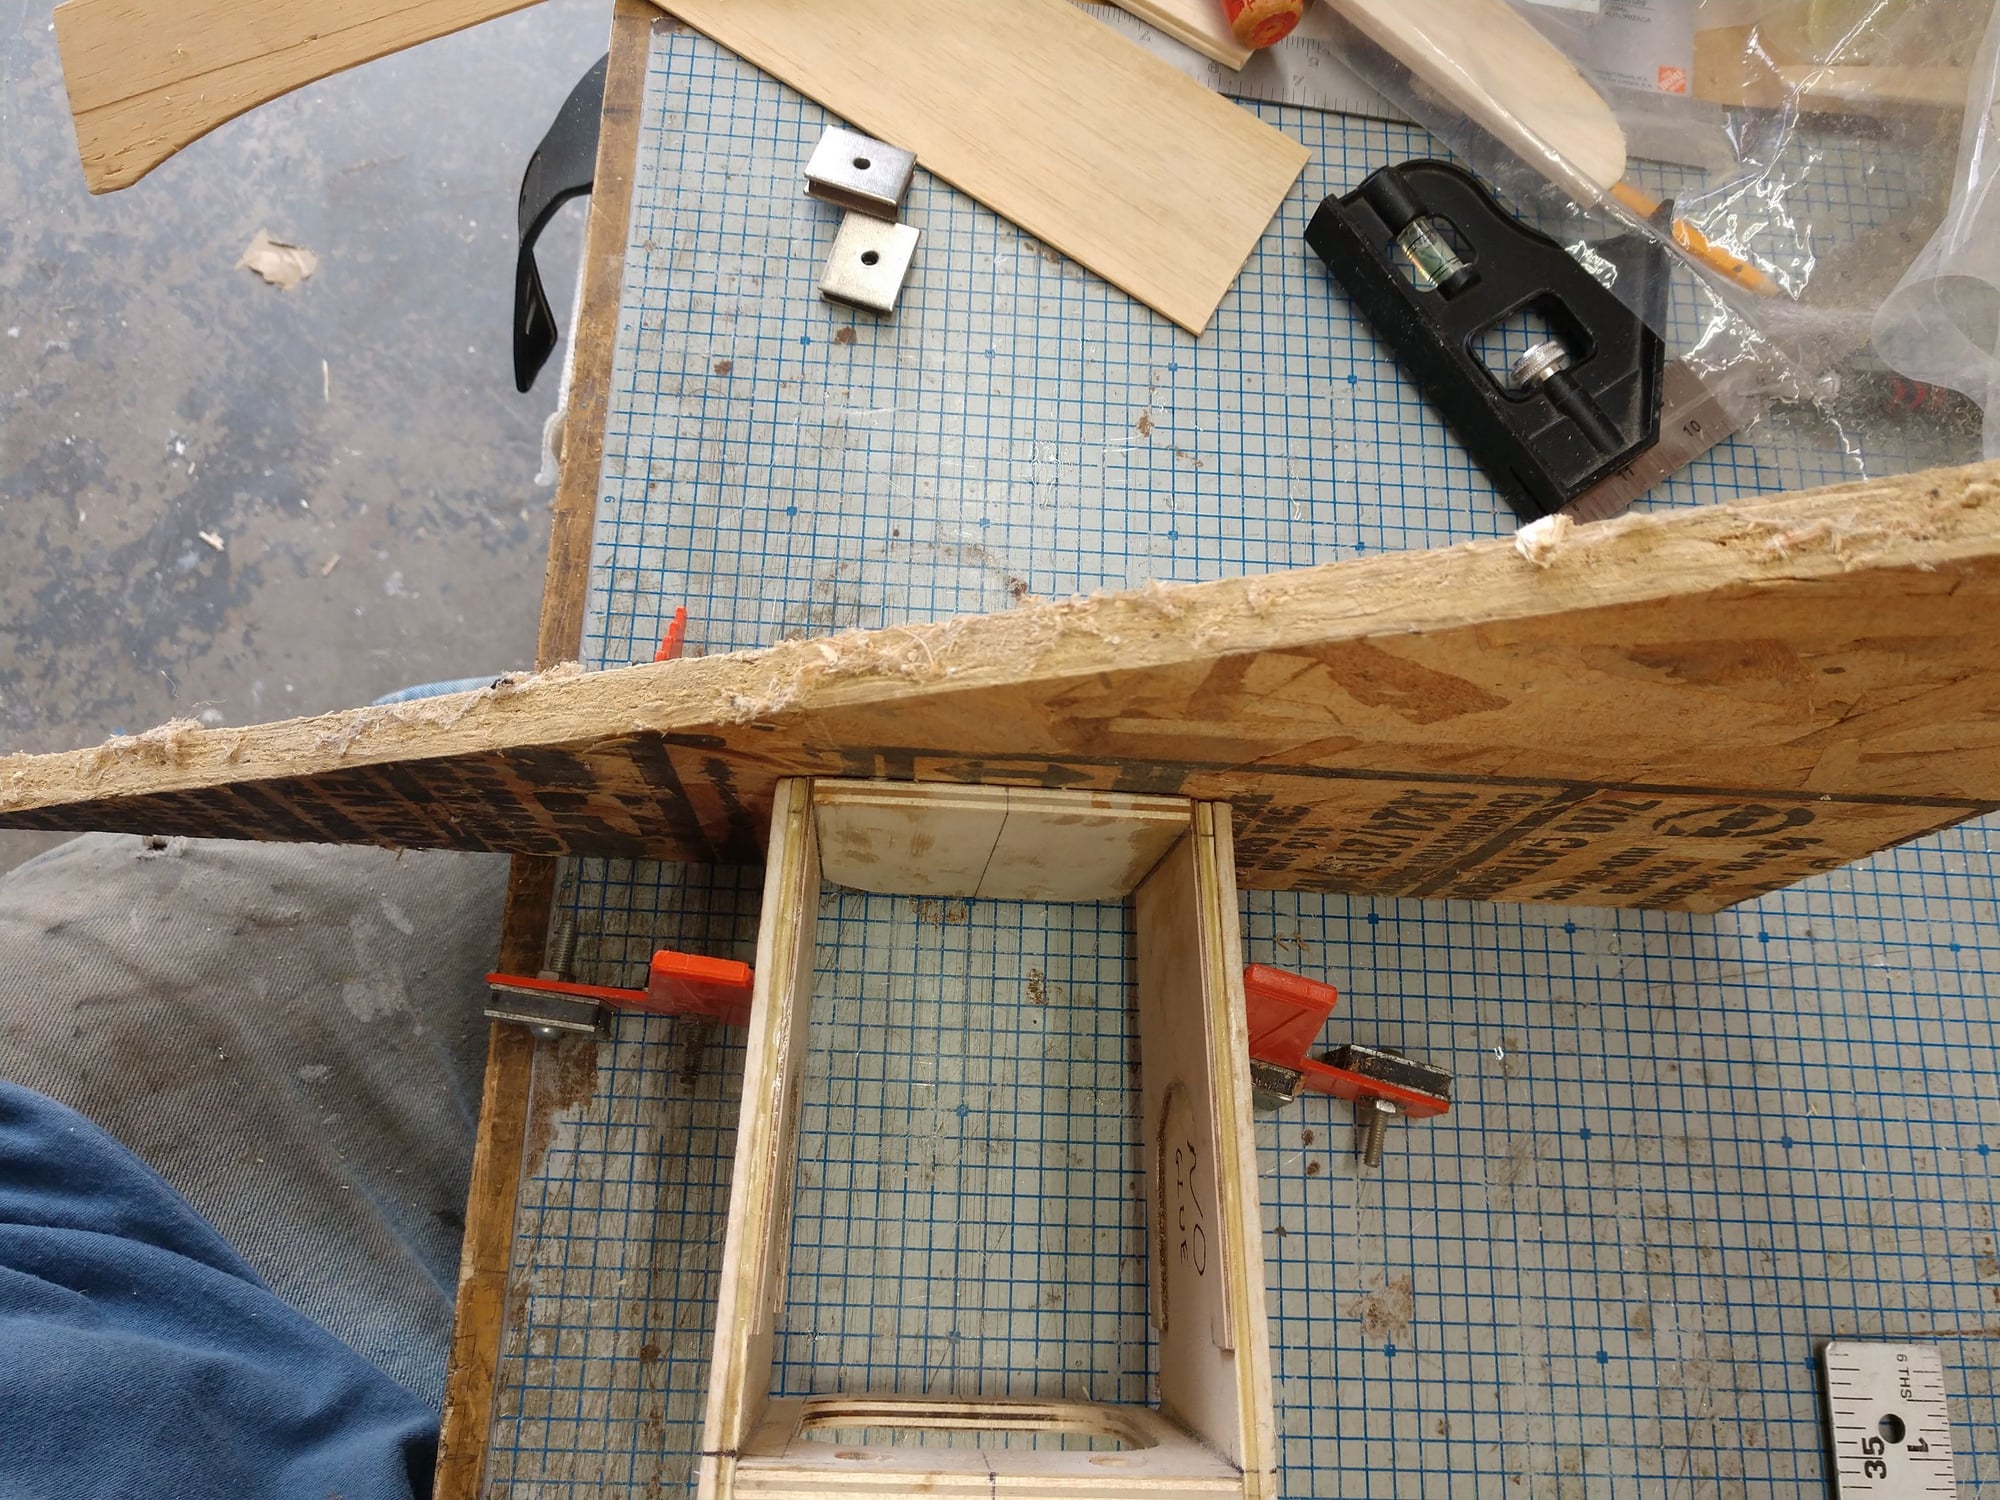
If I had thought about it in time I would have taken a shot from up on a ladder straight down on the jig. I did try to get a straight above as I could for these 2 shots
Took a slight pause, Busy and ran out of material that I had to wait to buy. Also got in a nice day of flying this past Thursday. Was able to take my wife with me. She really likes to go with me when I go flying.
The club flies from an abandoned Navy airfield. So has a 7000 ft runway.
One of the jet pilots pulled off a spectacular save. He was loosing link. Pointed it back at the runway sort of (was at an angle) and came in gear up down wind. Slid several hundred feet, but saved the plane, and did not put any one else at risk in the process. Actually minimal damage to the jet.
But back to the S.S.
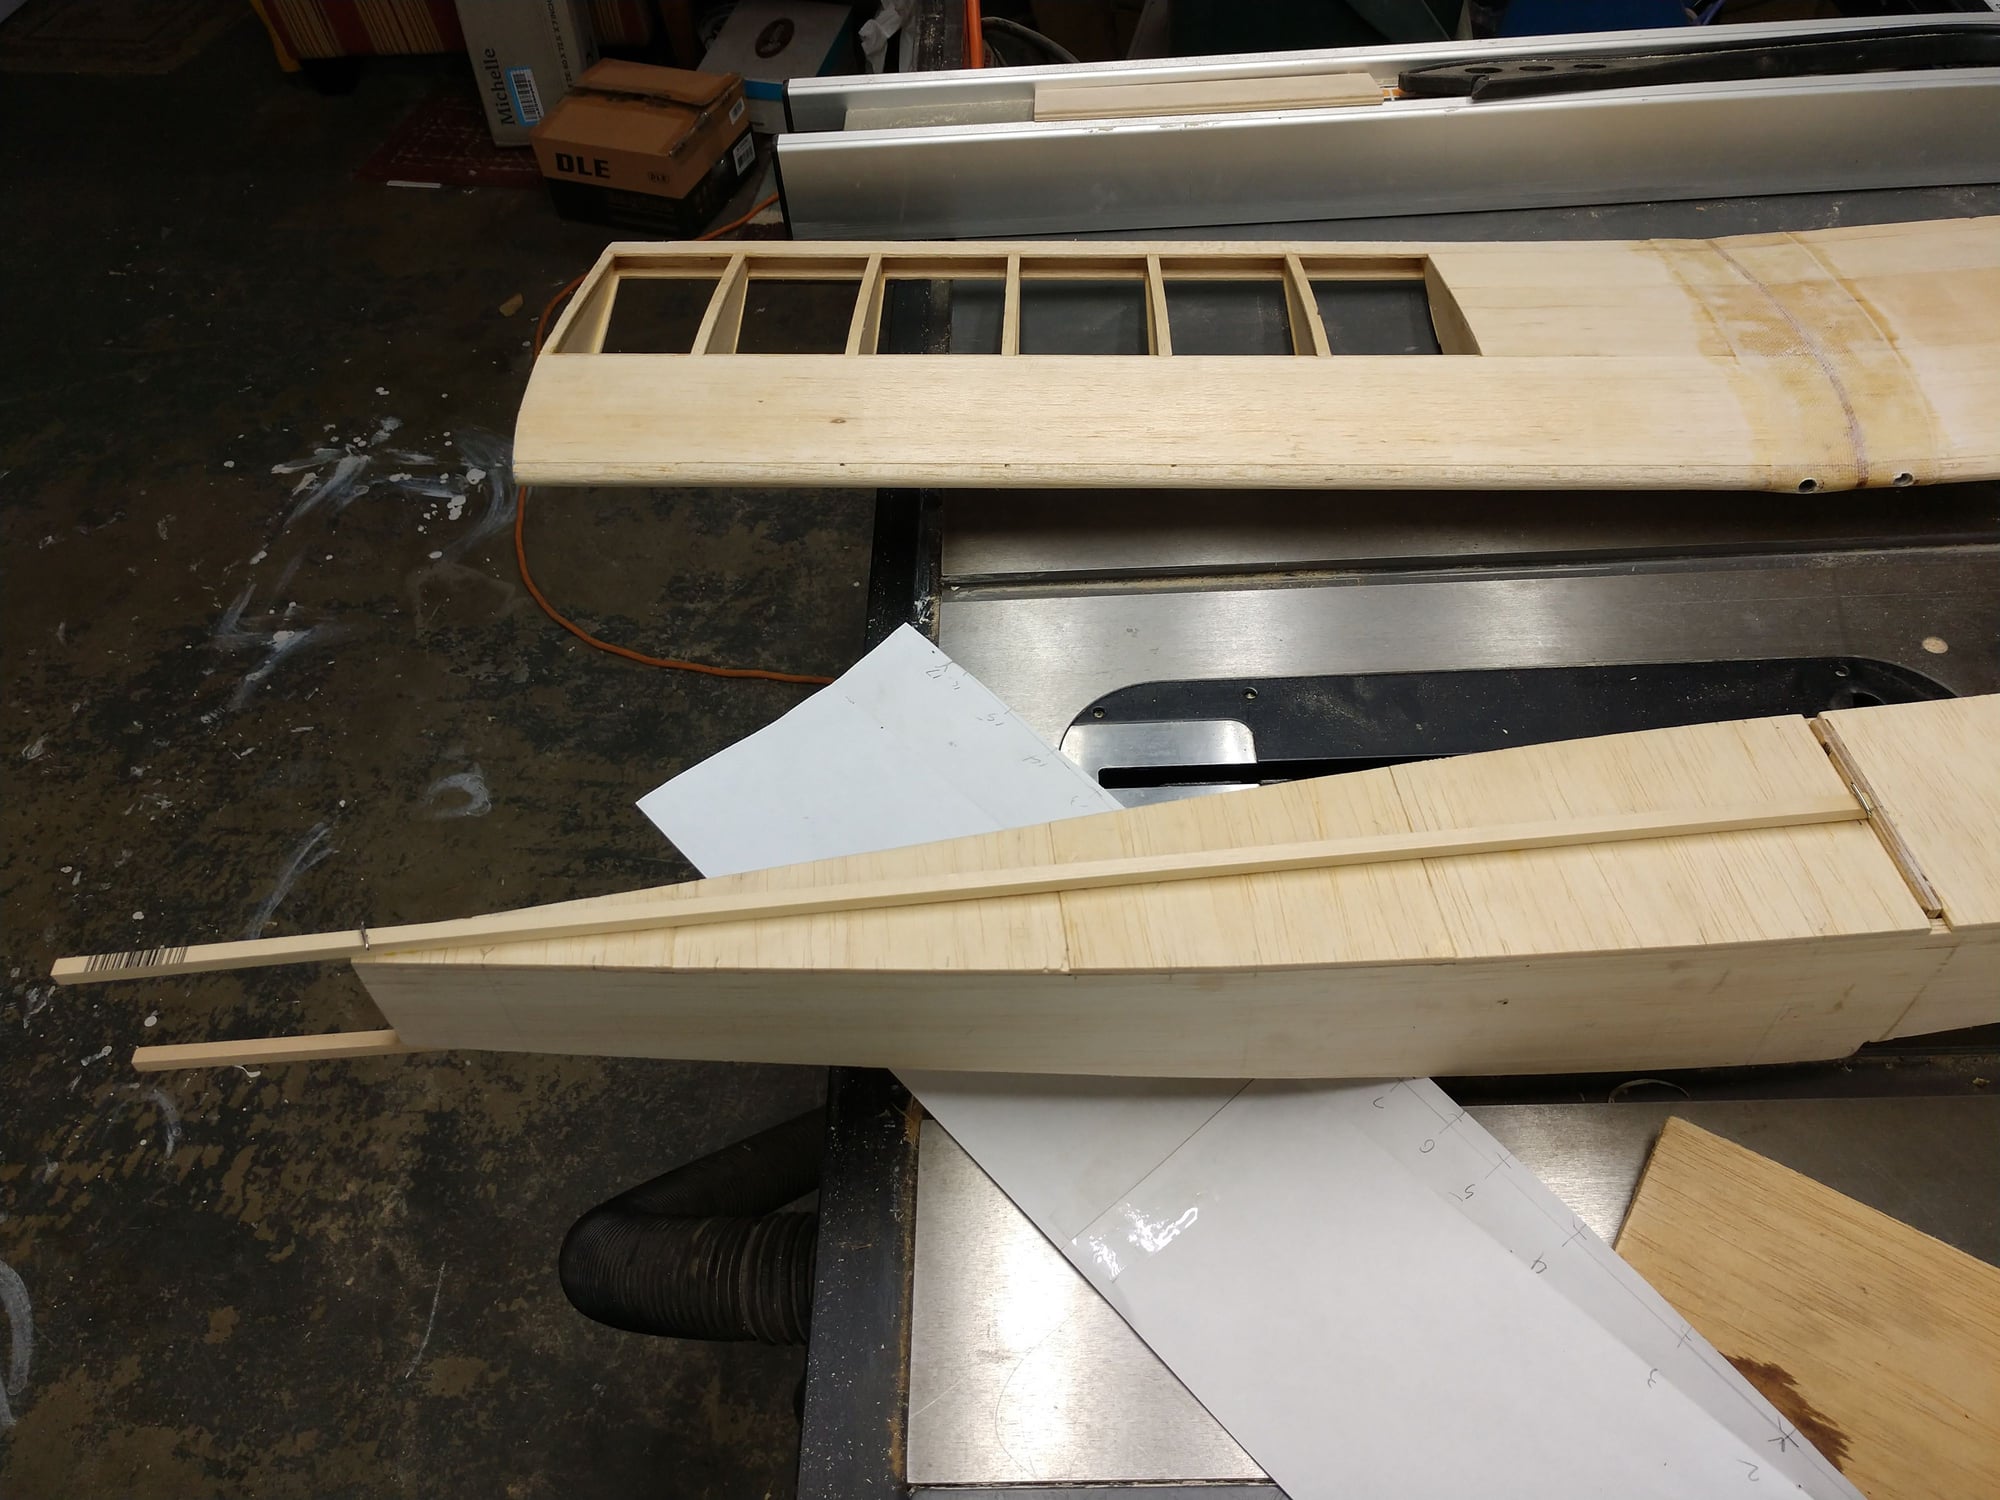
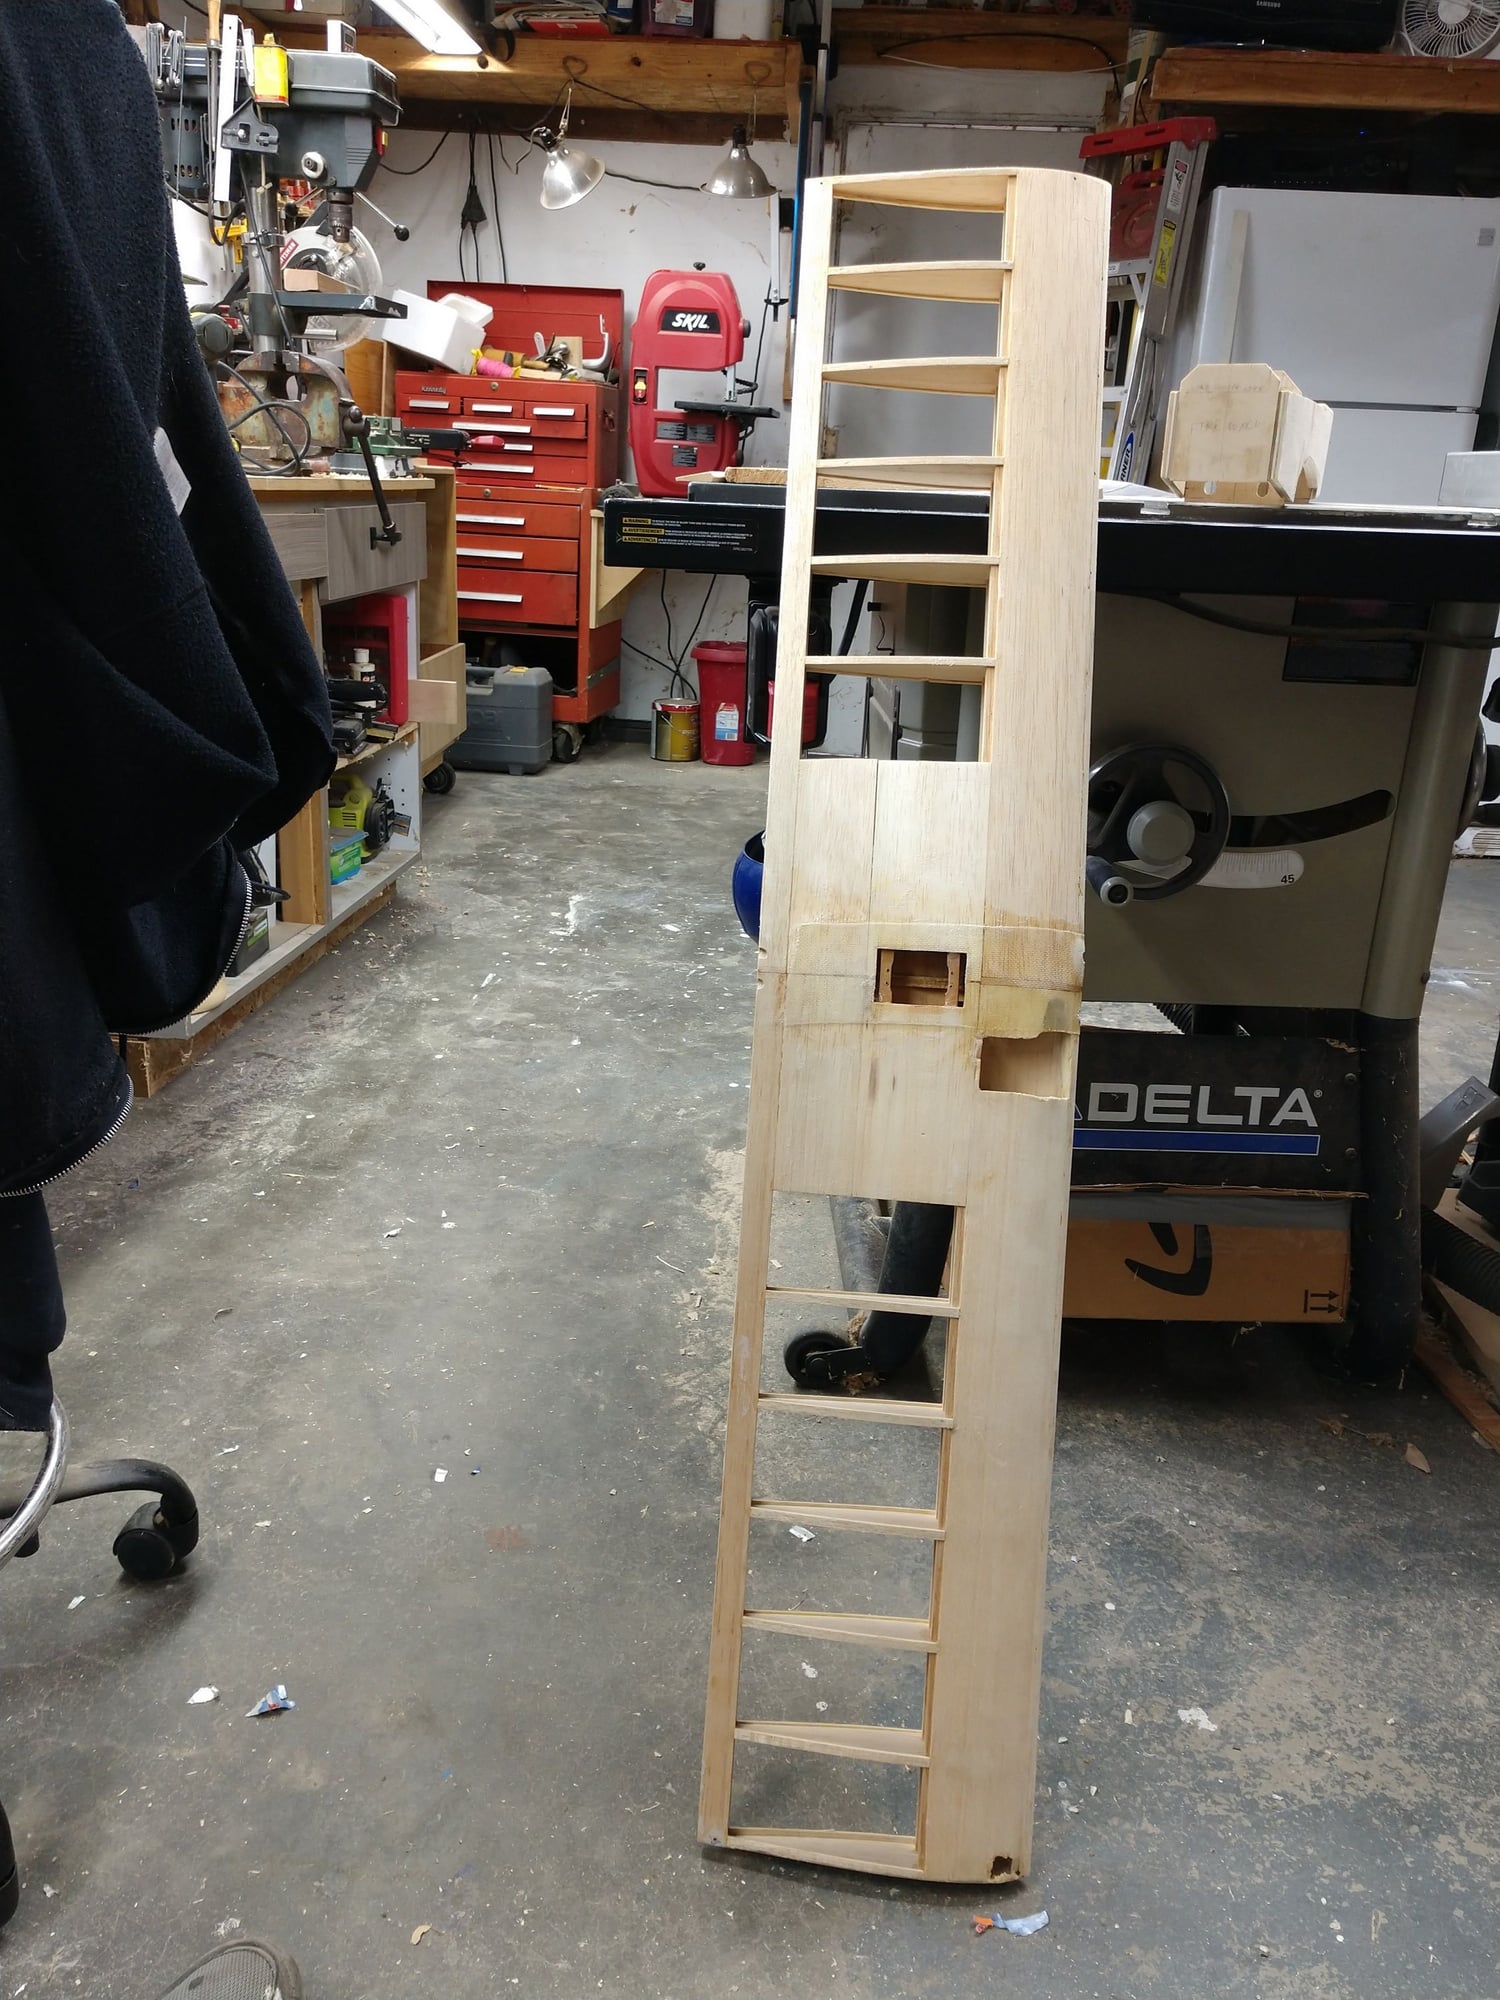
I started to add a second skin to the bowed in side and was going to sand to match as best as I could. But then after looking at it a while I just cut the whole rear end off.
Then after some real careful jigging and double checking and walking away to come back later I added a new rear section.
The picks don't show the jig I did, but all of the center lines are dead on true. Then I placed the rear section on my table saw with the front hanging off and check at multiple points with a level. Used a bubble level. Did not even think to grab my digital. But close enough I'm sure.
I need to add back some internal framing.
Will go a bit further and then work on the Pacific Ace some more. I also need to work on our travel trailer and get it ready for use, including an easy way in and out of the yard.
Ken
03-09-2020, 04:12 AM
#48
I have been working on "other" projects. Its endless. Have not done much modeling lately. It has been on my mind and I may put my hands on it today. My hobby focus lately has been the sim. I watched a video from two of the Realflight technical employees. I noticed they said that the sim models do not "exactly" replicate field conditions. This is something I had suspected.
.
Their "physics engine" causes each plane to fly differently due to its form and shape. Naturally. My suspicion is the air thermals, wind, and sun, make a significant difference. The trim controls are actually unnecessary. I do use the elevator and the throttle but the ailerons and rudder are never needed.
Once you get the control surface deflections set where you like them you are good to go. It also takes a little time to get accustom to the way a particular model performs. This seems to get programed into your brain. I am sure it fades as time passes
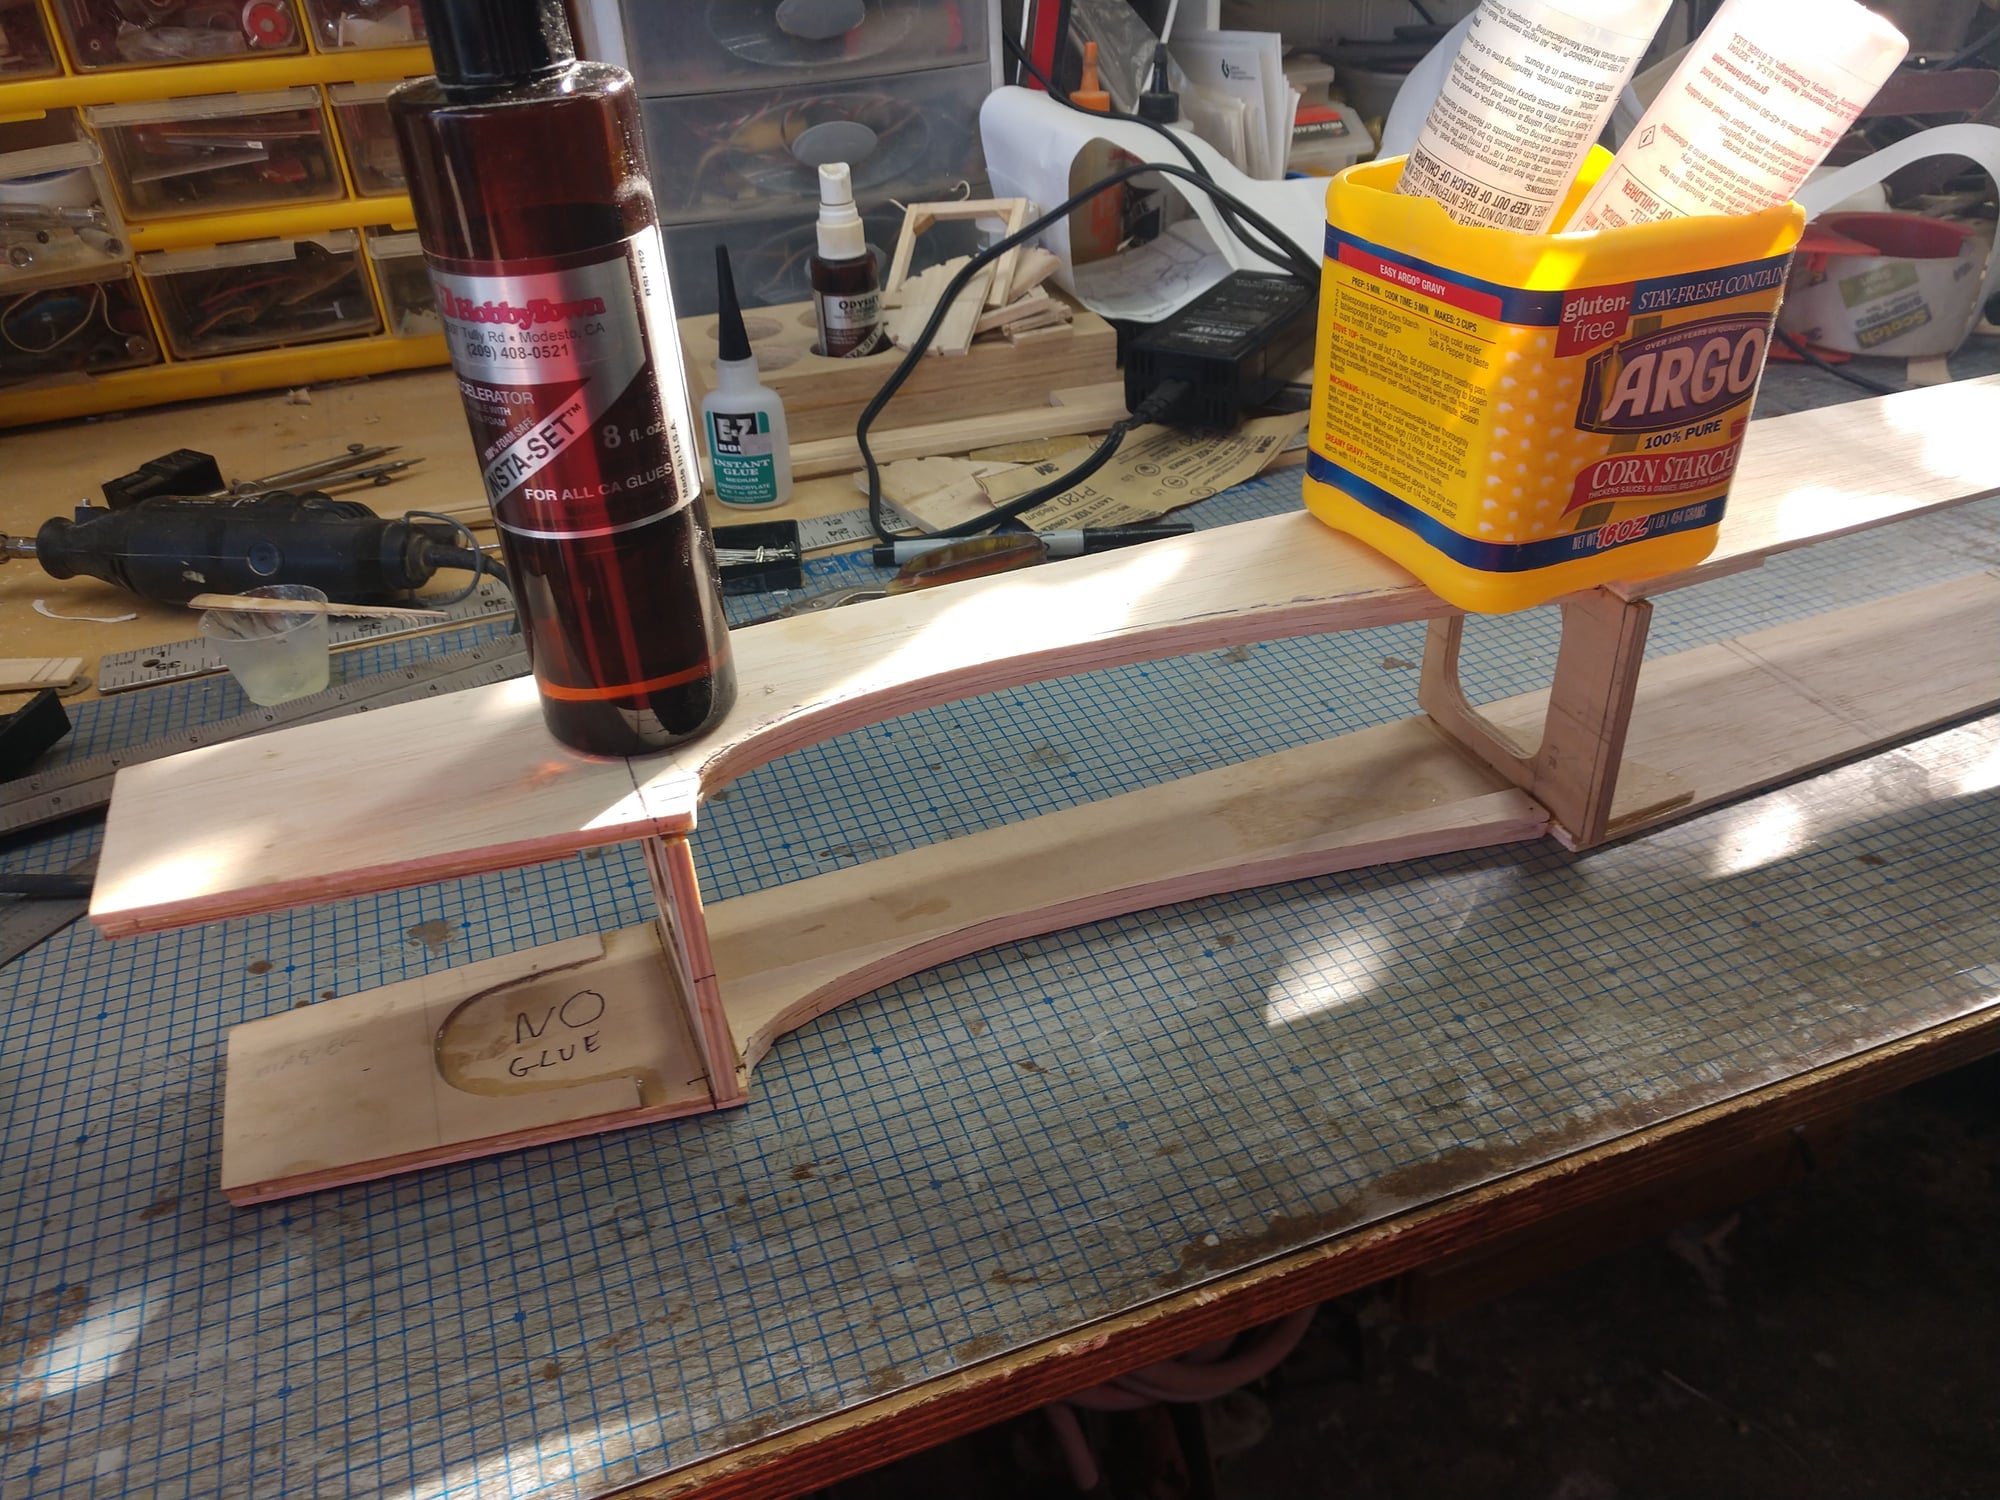
On my modeling agenda: paint field box, finish engine test station, complete sportster tail repair
.
Their "physics engine" causes each plane to fly differently due to its form and shape. Naturally. My suspicion is the air thermals, wind, and sun, make a significant difference. The trim controls are actually unnecessary. I do use the elevator and the throttle but the ailerons and rudder are never needed.
Once you get the control surface deflections set where you like them you are good to go. It also takes a little time to get accustom to the way a particular model performs. This seems to get programed into your brain. I am sure it fades as time passes
On my modeling agenda: paint field box, finish engine test station, complete sportster tail repair
03-09-2020, 08:21 AM
#49
Thread Starter
Thanks Lee
I actually did the work on the fuse while taking breaks from super cleaning the kitchen counters. I am limited on how long I can stand with out it becoming to painful. So work a bit, and then go out to the garage and sit in front of the work bench and do some work there, then back inside for more kitchen work. That got both jobs done.
Right now I am flying my Funny Wing.
I have been able to fly much the last 10 years. So right now I am just rebuilding my ability to fly with out overly risking a crash. It is coming back fairly quickly. But I wan't to get a few flights under my belt with a few touch and goes. Then fly my Kadet Jr. (4 channels, reduce dihedral), a few times, then I should be good to go with the S.S. Skill rebuilding back to the level where I can fly anything comfortably and safely in collection of birds.
Here is the Funny Wing
It was built for a wight carrying contest. Stock .25,prop club furnished fuel. Max of 500 sq".
many of the contest planes struggled in the turns with starting a side ways slide flowing the low wing. Resulting in the walk of shame to retrieve the debris. My enlarged tips with the pronounced polyhedral were meant to avoid that by raising the tip as it slid sideways. I built the wing at the time the contest wight was over 12 lbs. Swept forward wing for more efficiency to avoid the tendency of air to flow towards the tips. The spars have carbon caps.
I moved from that area before I got a chance to test out how well it would work in the contest.
I lost or busted the original fuse that was designed to carry the wight box. So I made another fuse that is big enough for the radio gear, etc, but that is it. No wight box.
It looks funny as heck so the plane is called Funny Wing. Power is now an old Os .20 from around 1970, a baffle piston engine. Old school for sure.
The plane actually flies fairly well. really light, so needs very little power to cruise. The fuse is rather long resulting in large tail moment arms. Improves stability, but also make the controls very effective. Maybe to effective. So triple rates, triple since my radio supports triple by default. On the turn to final, orientation is not the greatest.
Actually my big mistake with the design is the airfoil. Thinner than it should be for the expected wing loading and cruise speed at contest wight. A 18% Clark Y would be provide more lift at the expect contest wight and air speeds. Maybe even going to 20% would have worked. At contest wights the planes usually got off the ground around 30 mph and maybe went around the pattern at about 35 max, unless they went terminal (frequent). Some one had a radar gun and gave us interesting data. One of the club officers was an aerospace engineer as well as the contest director. He gave me insight into the design.
With the control rates trimmed down it is a very easy to fly plane. Very stable, self recovers well. cruises on one third to half throttle, Does not feel right with power much above half.
Ken
03-09-2020, 08:39 AM
#50
I completely understand the household chores and repairs. I have a long list. That is a cool looking model. Trying to knock down the chores a little today so I will not feel so guilty when I "disappear" in my hobby zone.

