


Royal Zero Kit Build into Rufe
 08-07-2018, 04:35 AM
#251

That's looking great! It's sad to hear that it won't be ready by the 18th, but it's always good to see progress. Nice work on the recessed panel lines, that's some clever use of the laser level. I bet they'll give the finish of the plane some nice dimension once weathering is applied.
Also while I don't post here enough to know how to scale the photos, these large ones look nice and are easy to scroll through. I'd say just keep doing what you're doing.
Also while I don't post here enough to know how to scale the photos, these large ones look nice and are easy to scroll through. I'd say just keep doing what you're doing.

 08-04-2019, 09:30 AM
#254
I'm trying to upload more photos.... I'm going to "Go Advanced". Manage Attachments, Browse Device, then I 've selected the photos and entered text about each. Ive found them in My Albums and now I can't post them!!!. Can anyone help me get through this....???? G.
Last edited by southpaw50; 08-04-2019 at 09:32 AM. Reason: misspelling
08-04-2019, 09:40 AM
#256

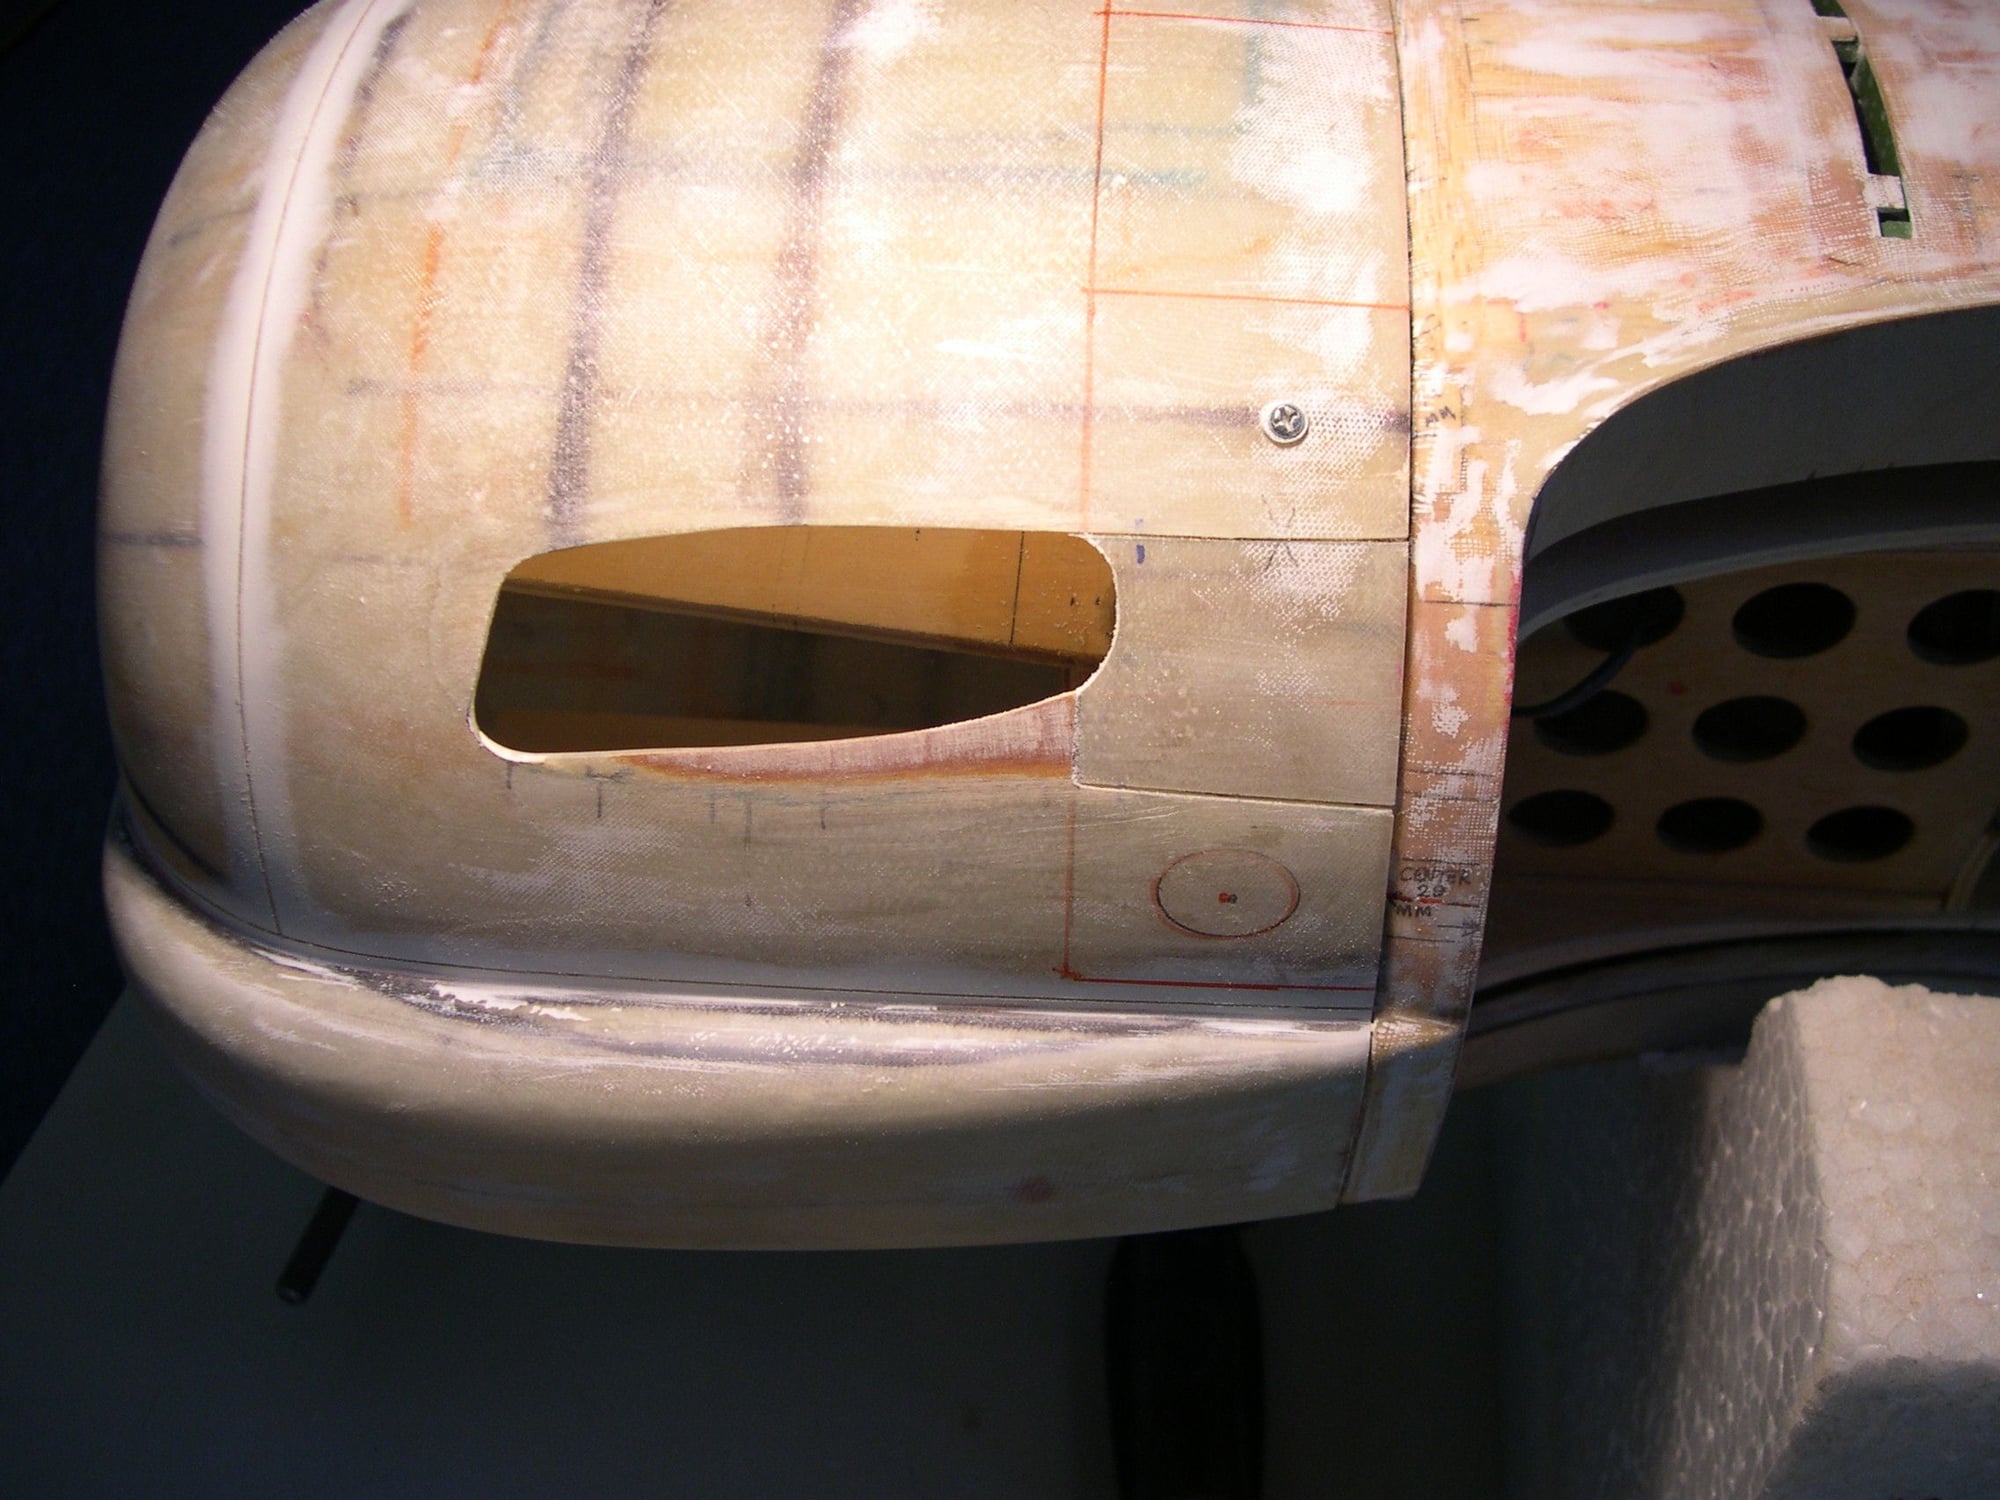
After a lot of measuring, a cut-out was made to the end of the cowl flap to slide the cowl straight in.

The aft piece was saved and I temp-glued a balsa "holder" to facilitate measuring, etc.
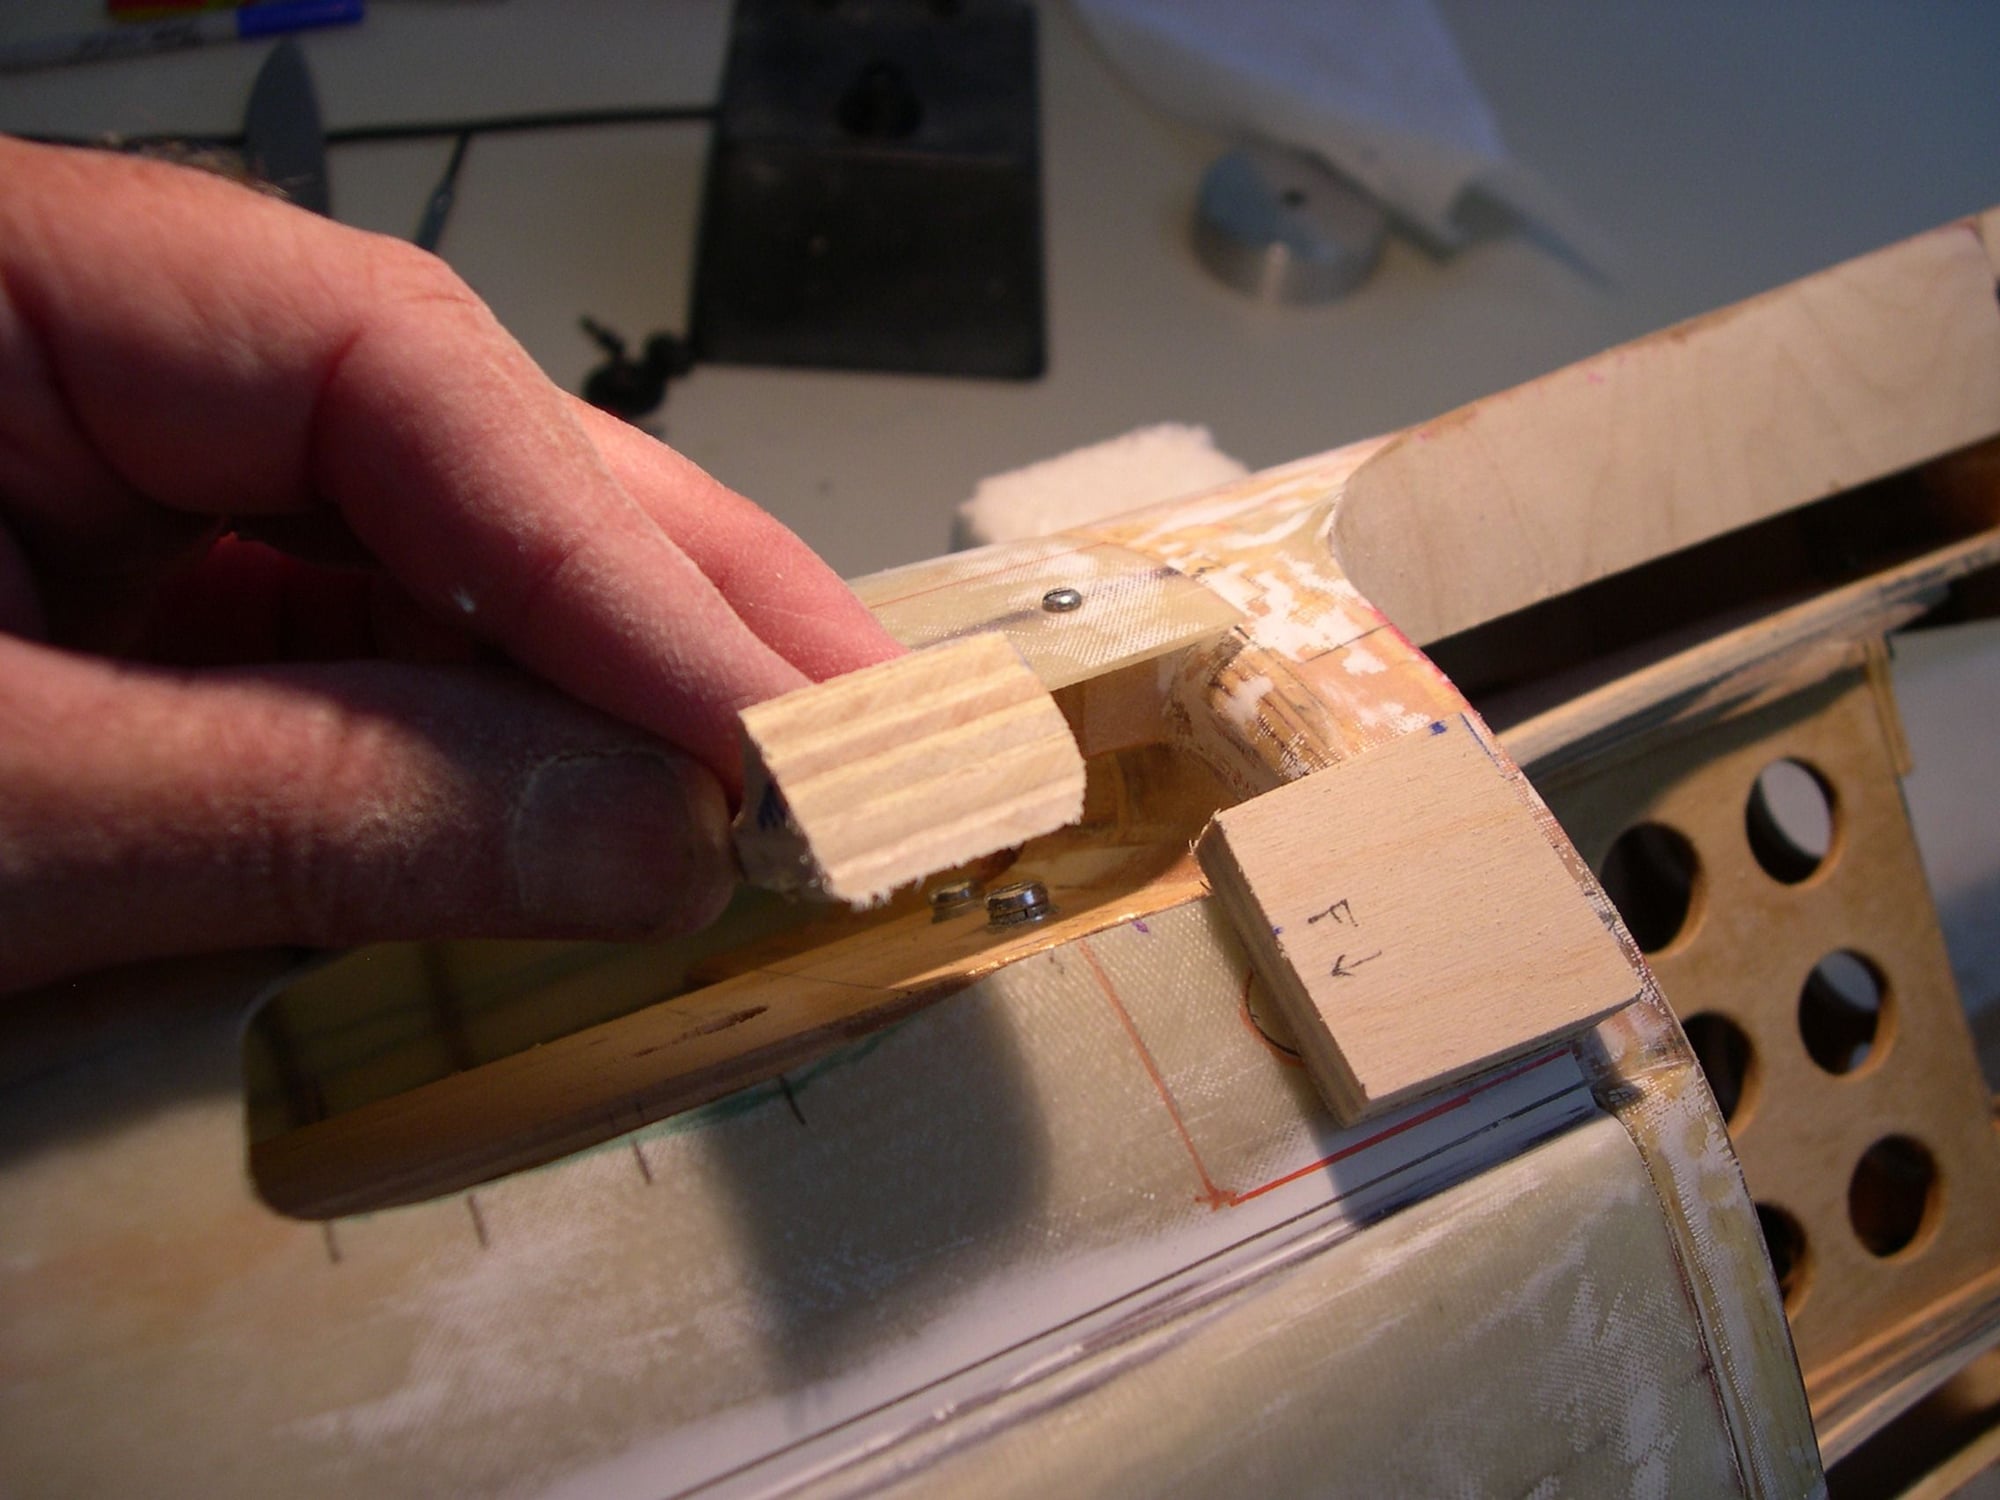
A support piece was crafted to have a glueing the aft fixed piece of the cowl.
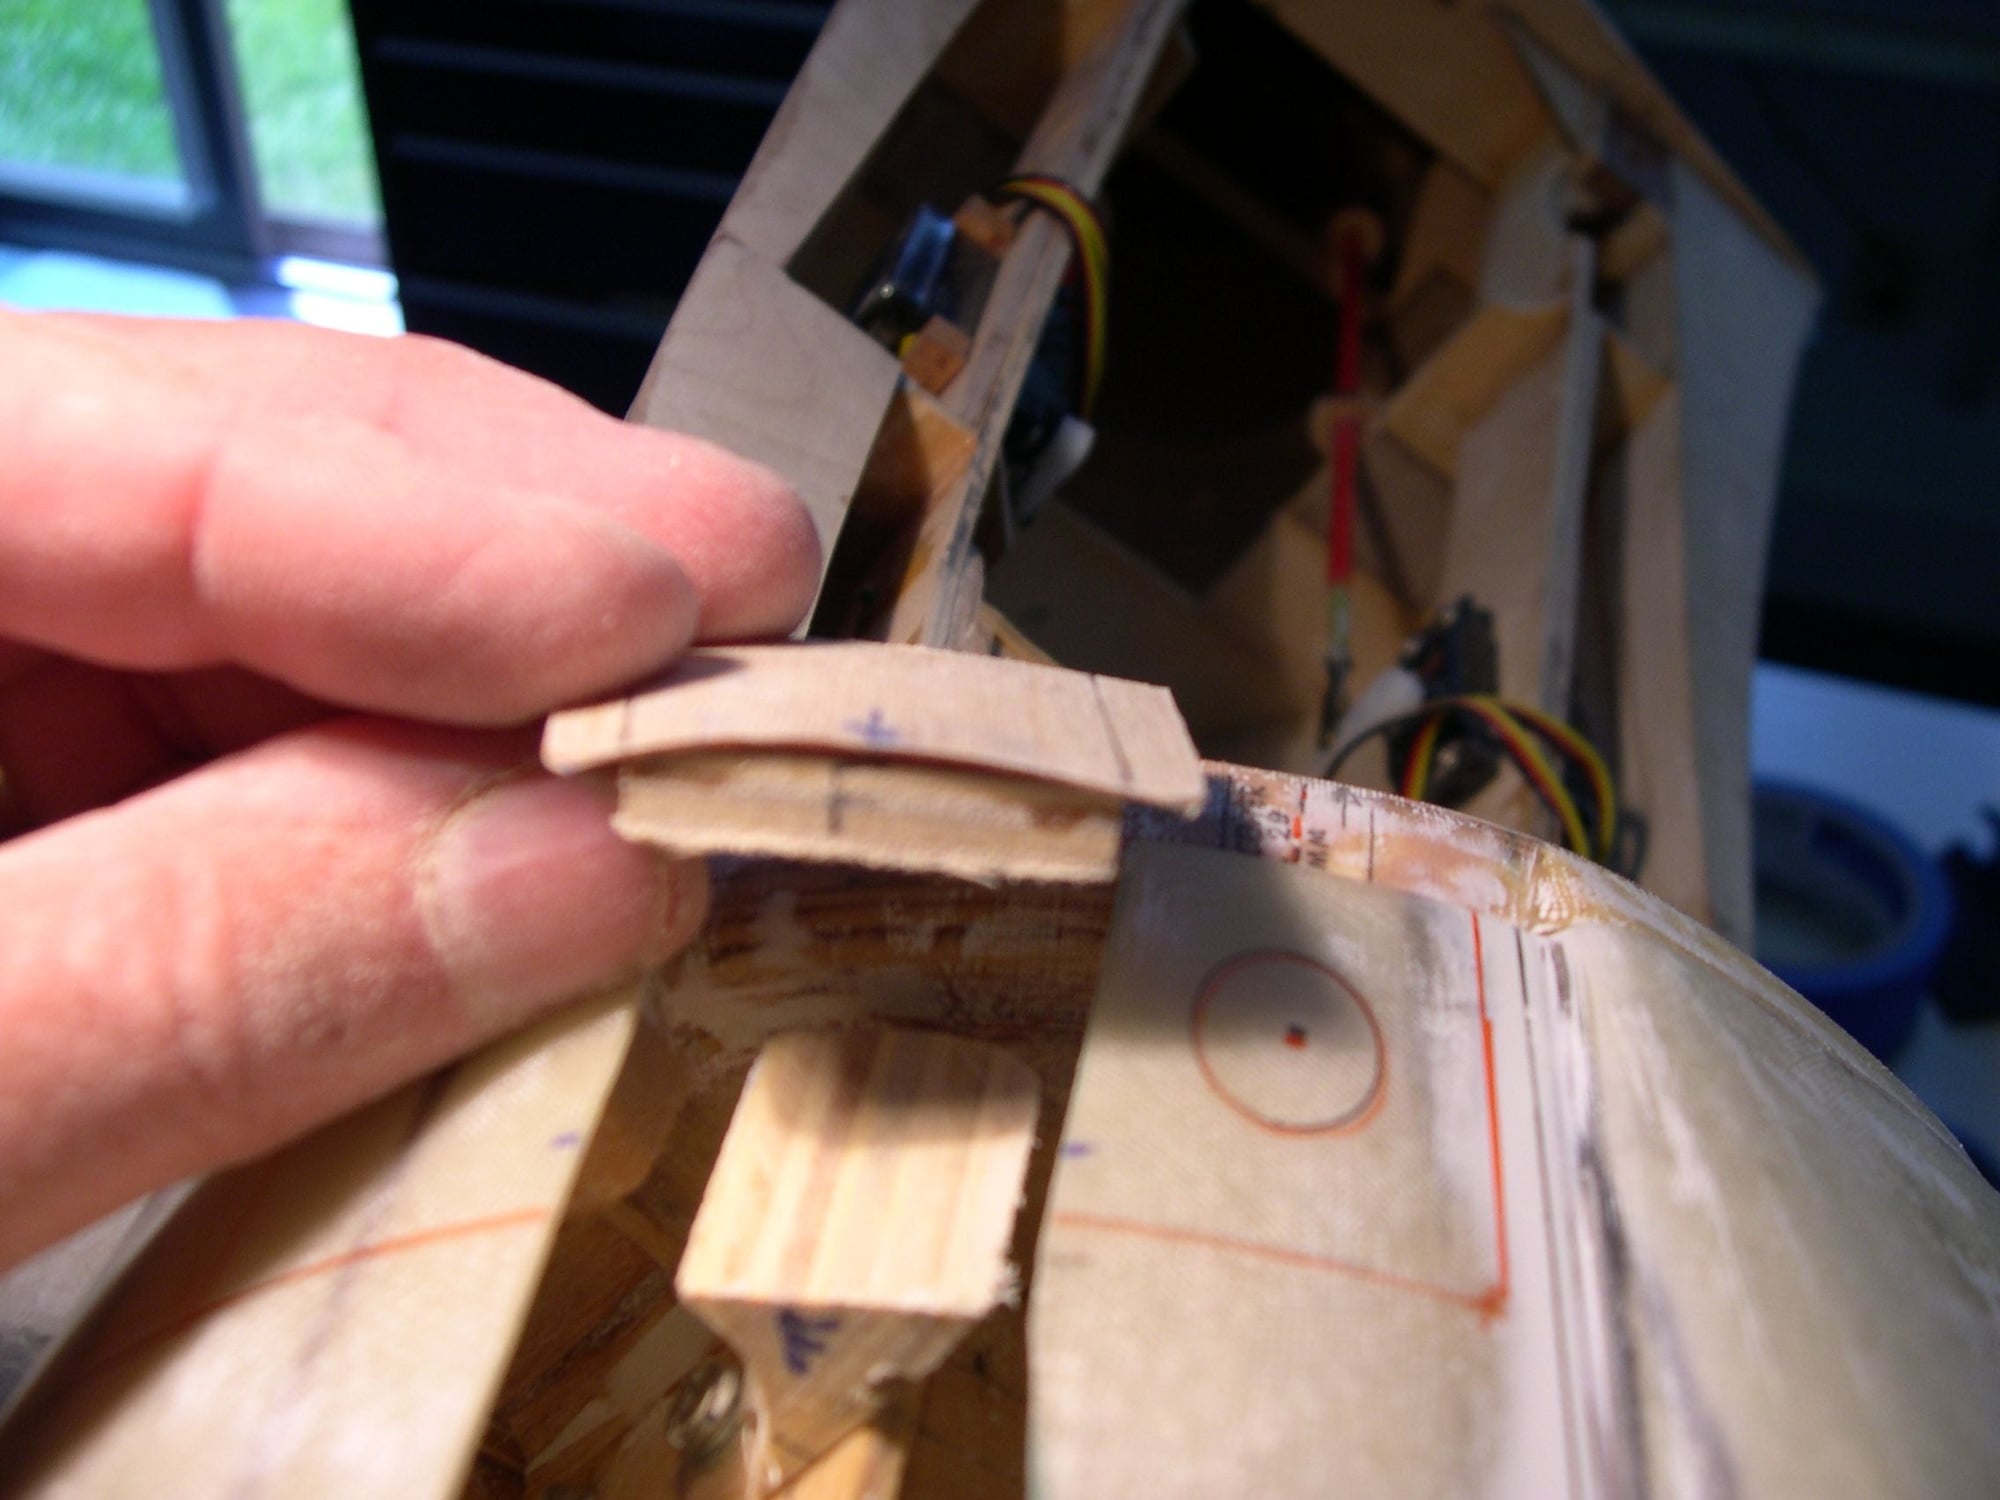
Outer face assembly about to be glued.
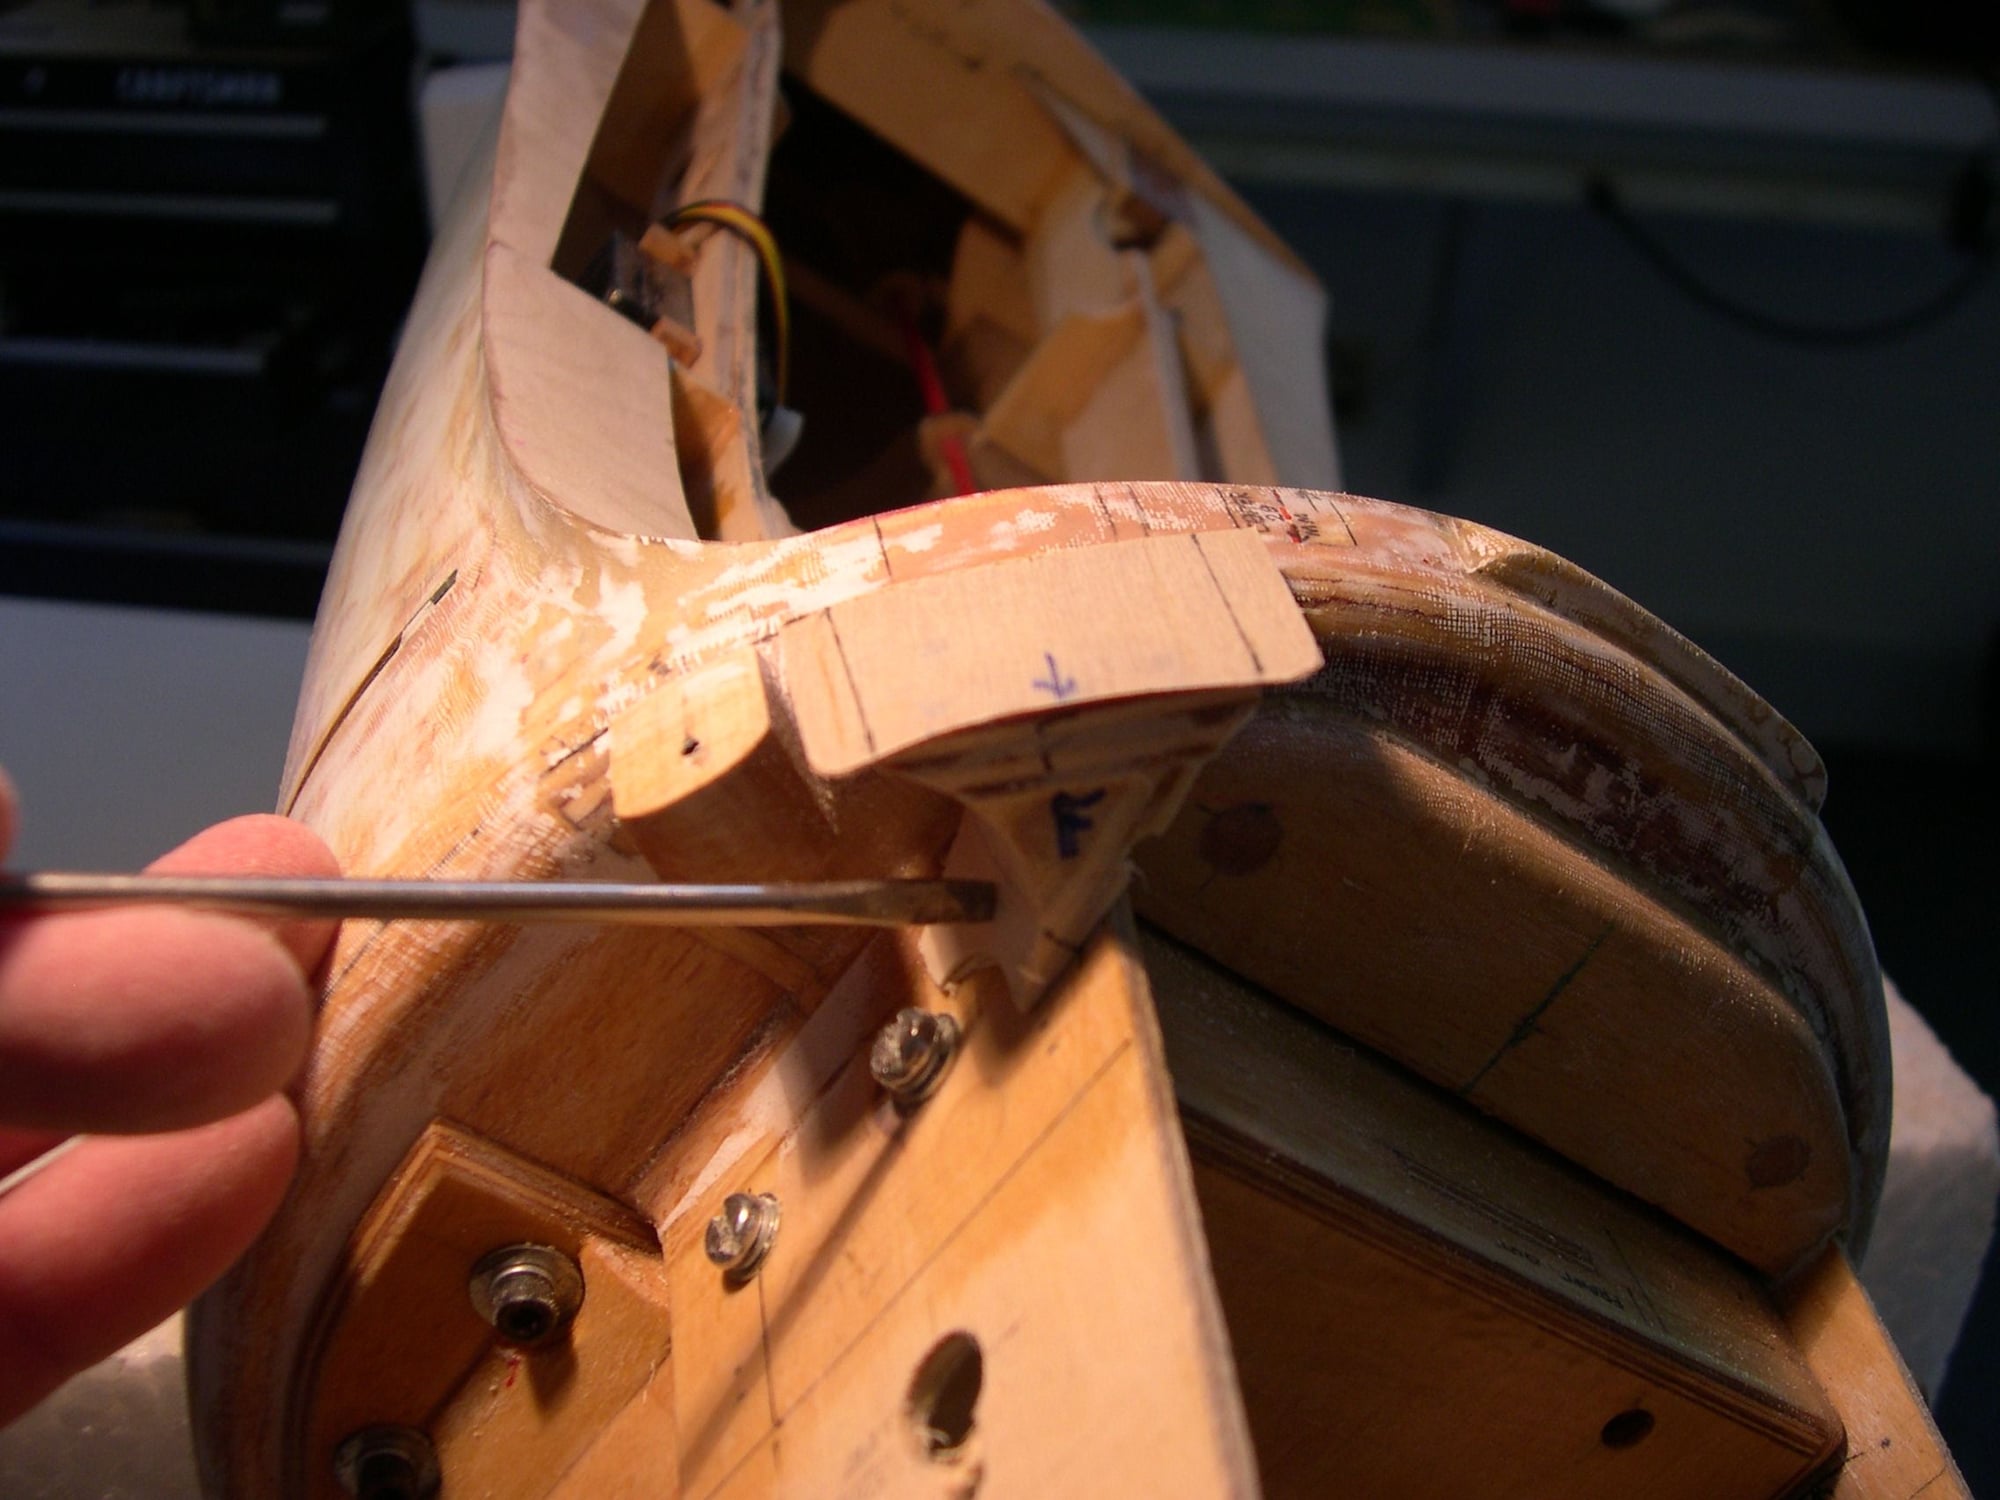
At this point, 1/64th ply gets glued to the 1/4" support plate. The sub-mount that the screw driver is touching gets cemented in place.
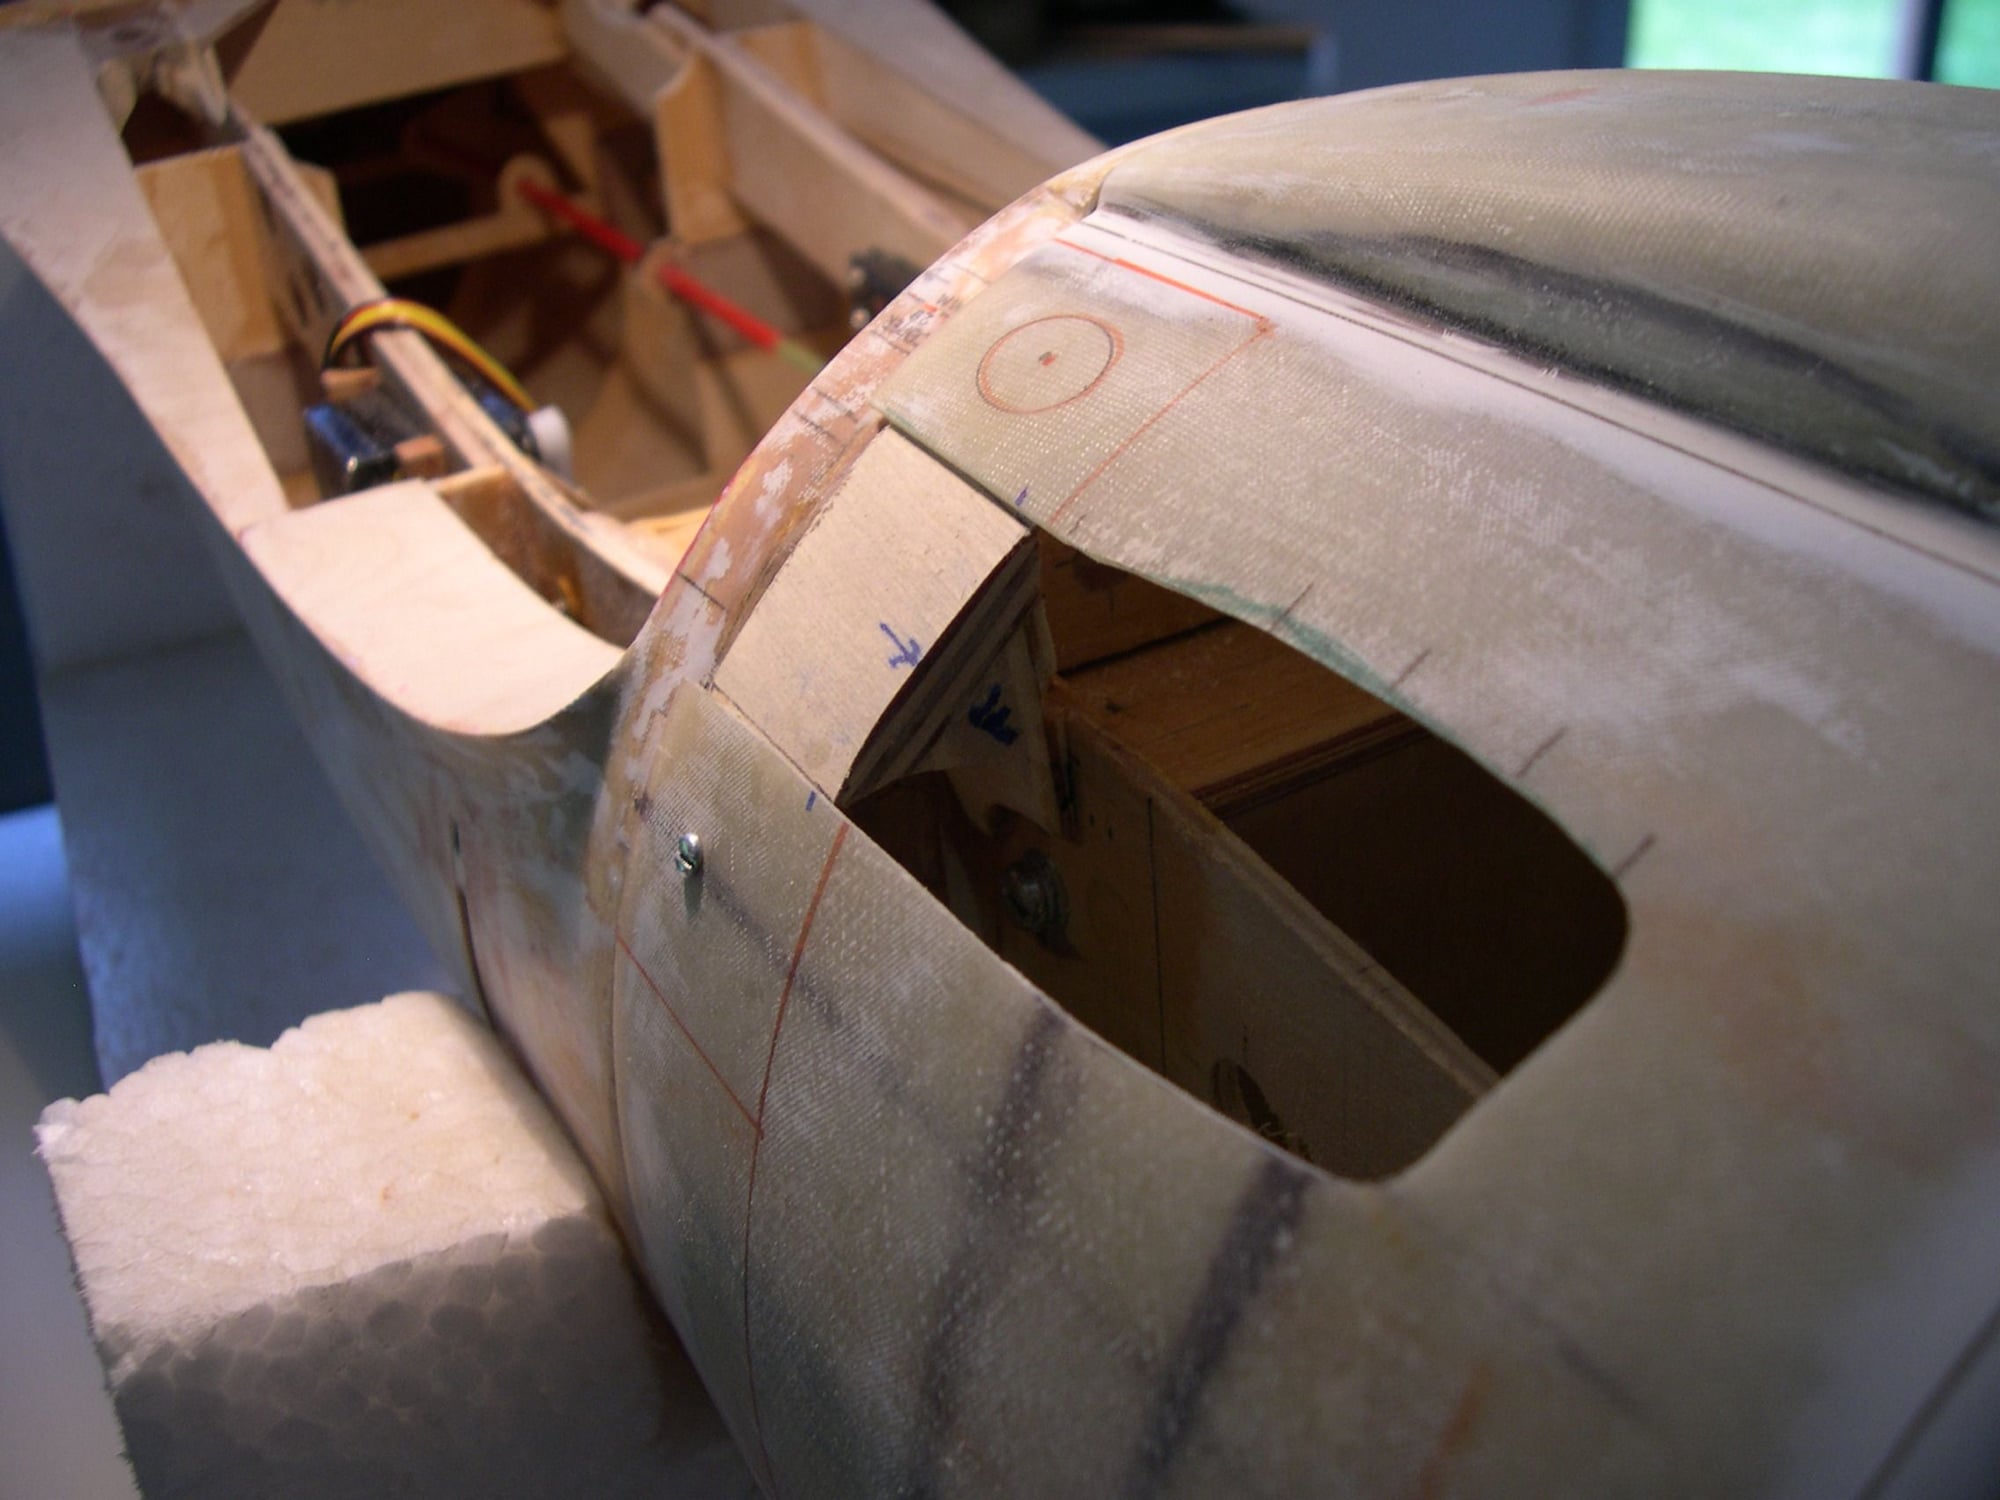
With cowl in place, the support assembly for the stationary aft cowl flap.
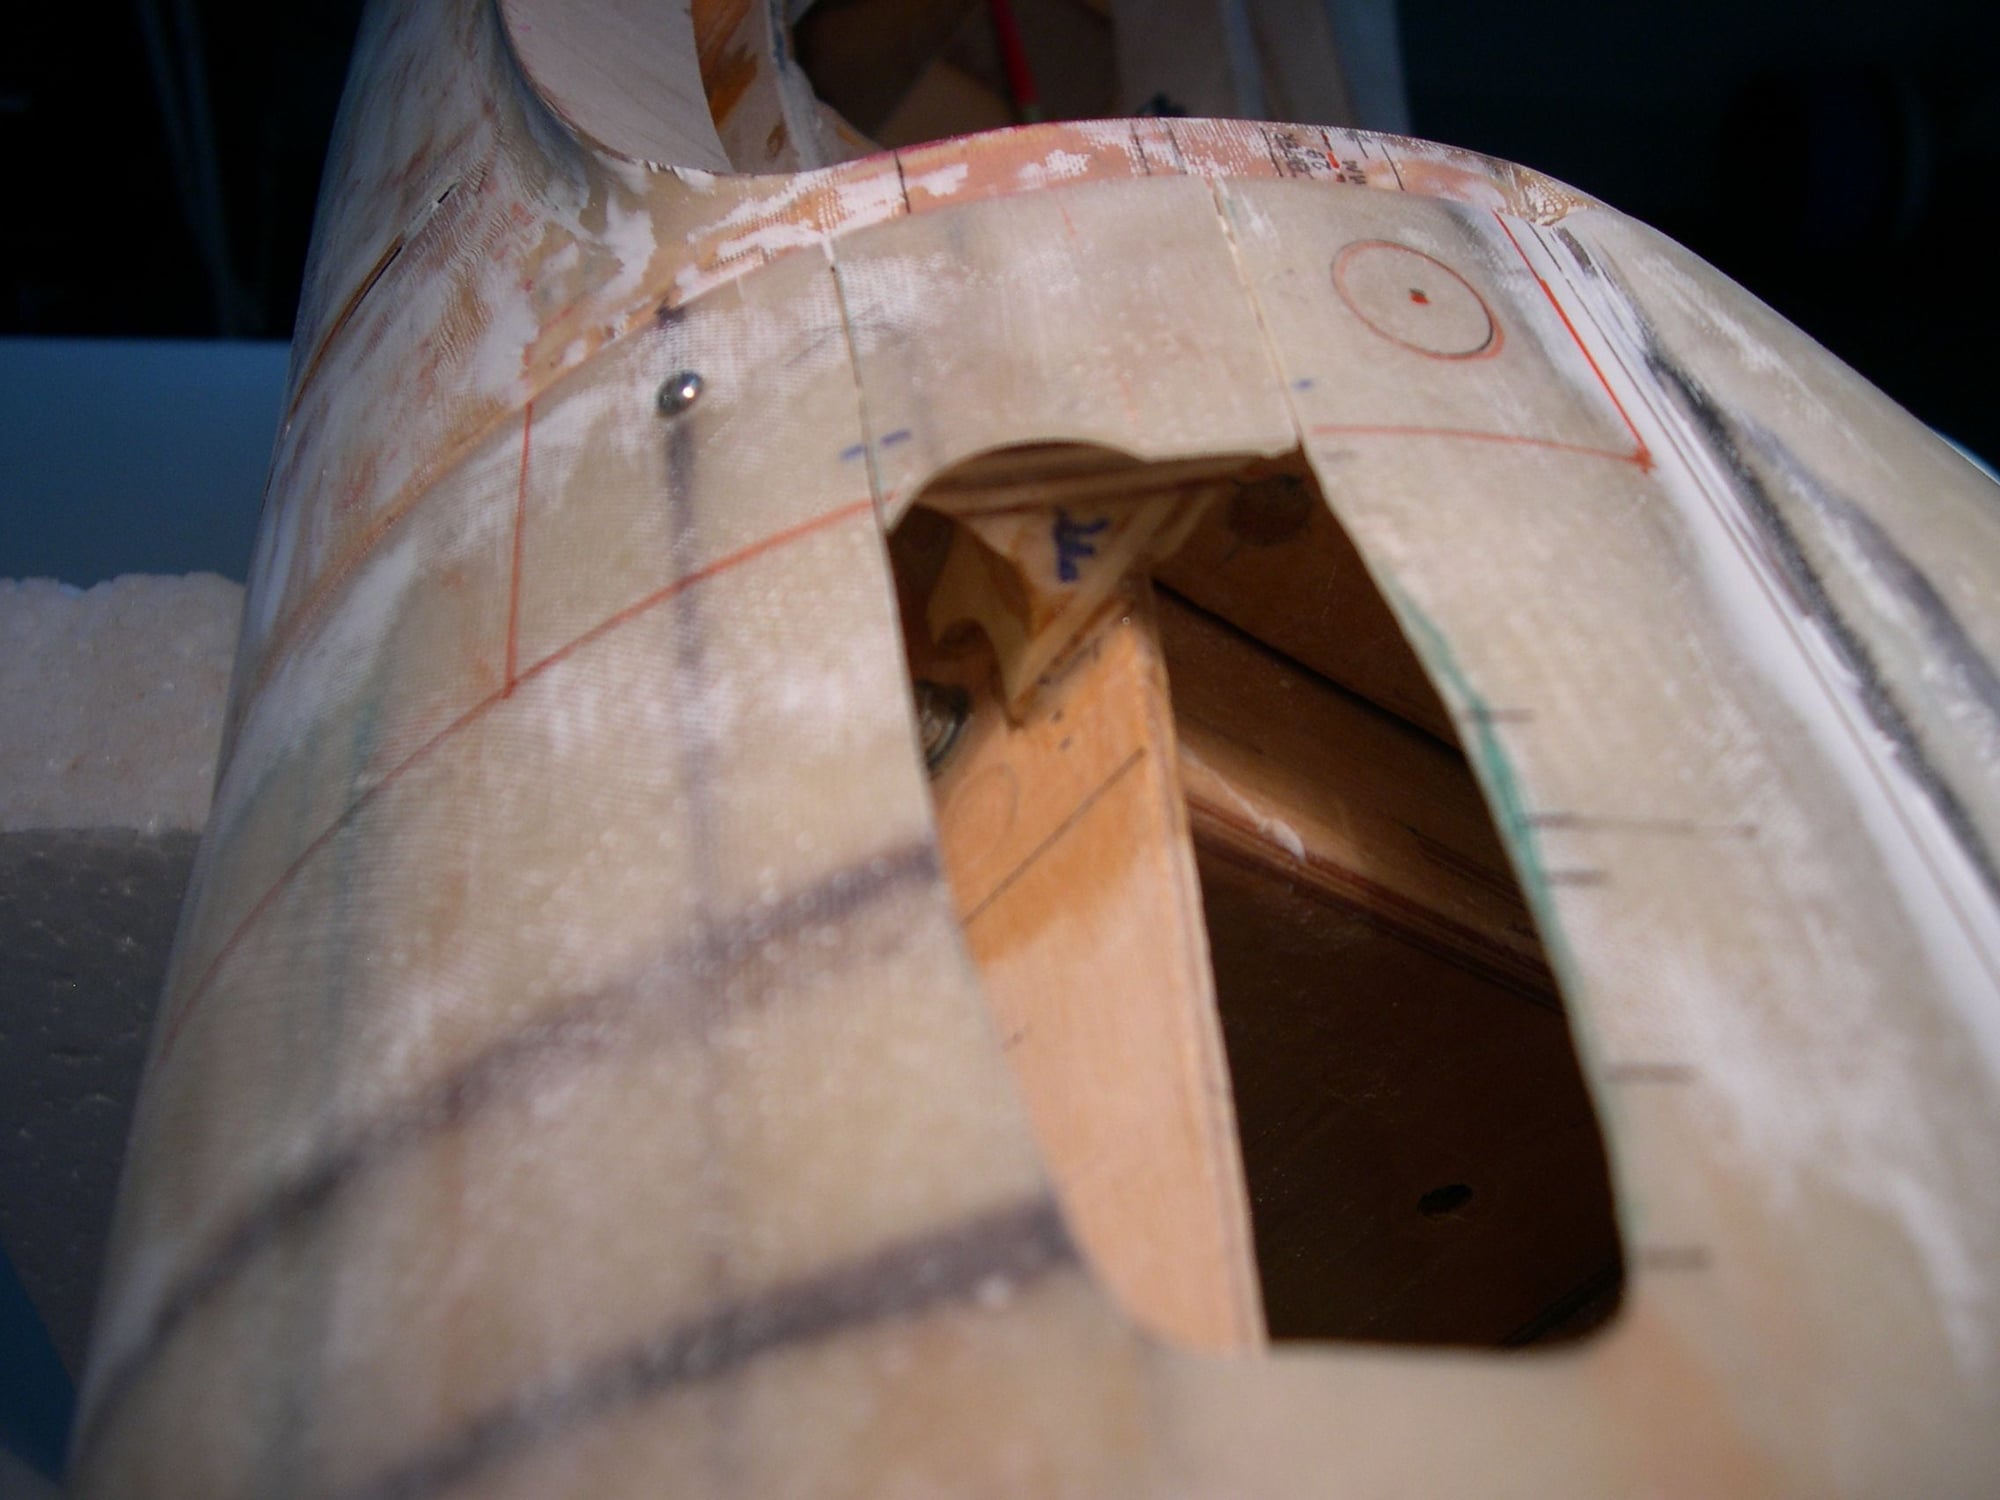
......And there it is.

The lower portion of the cut-out needed to be filled in as too much was unfortunately cut away. 64th" ply glued in place to make a back-stop for the fill area.

Milled fiberglass & resin was trowelled in place, Gorilla-taped wax paper in place over the uncured resin and everything pressed down and allowed to dry.
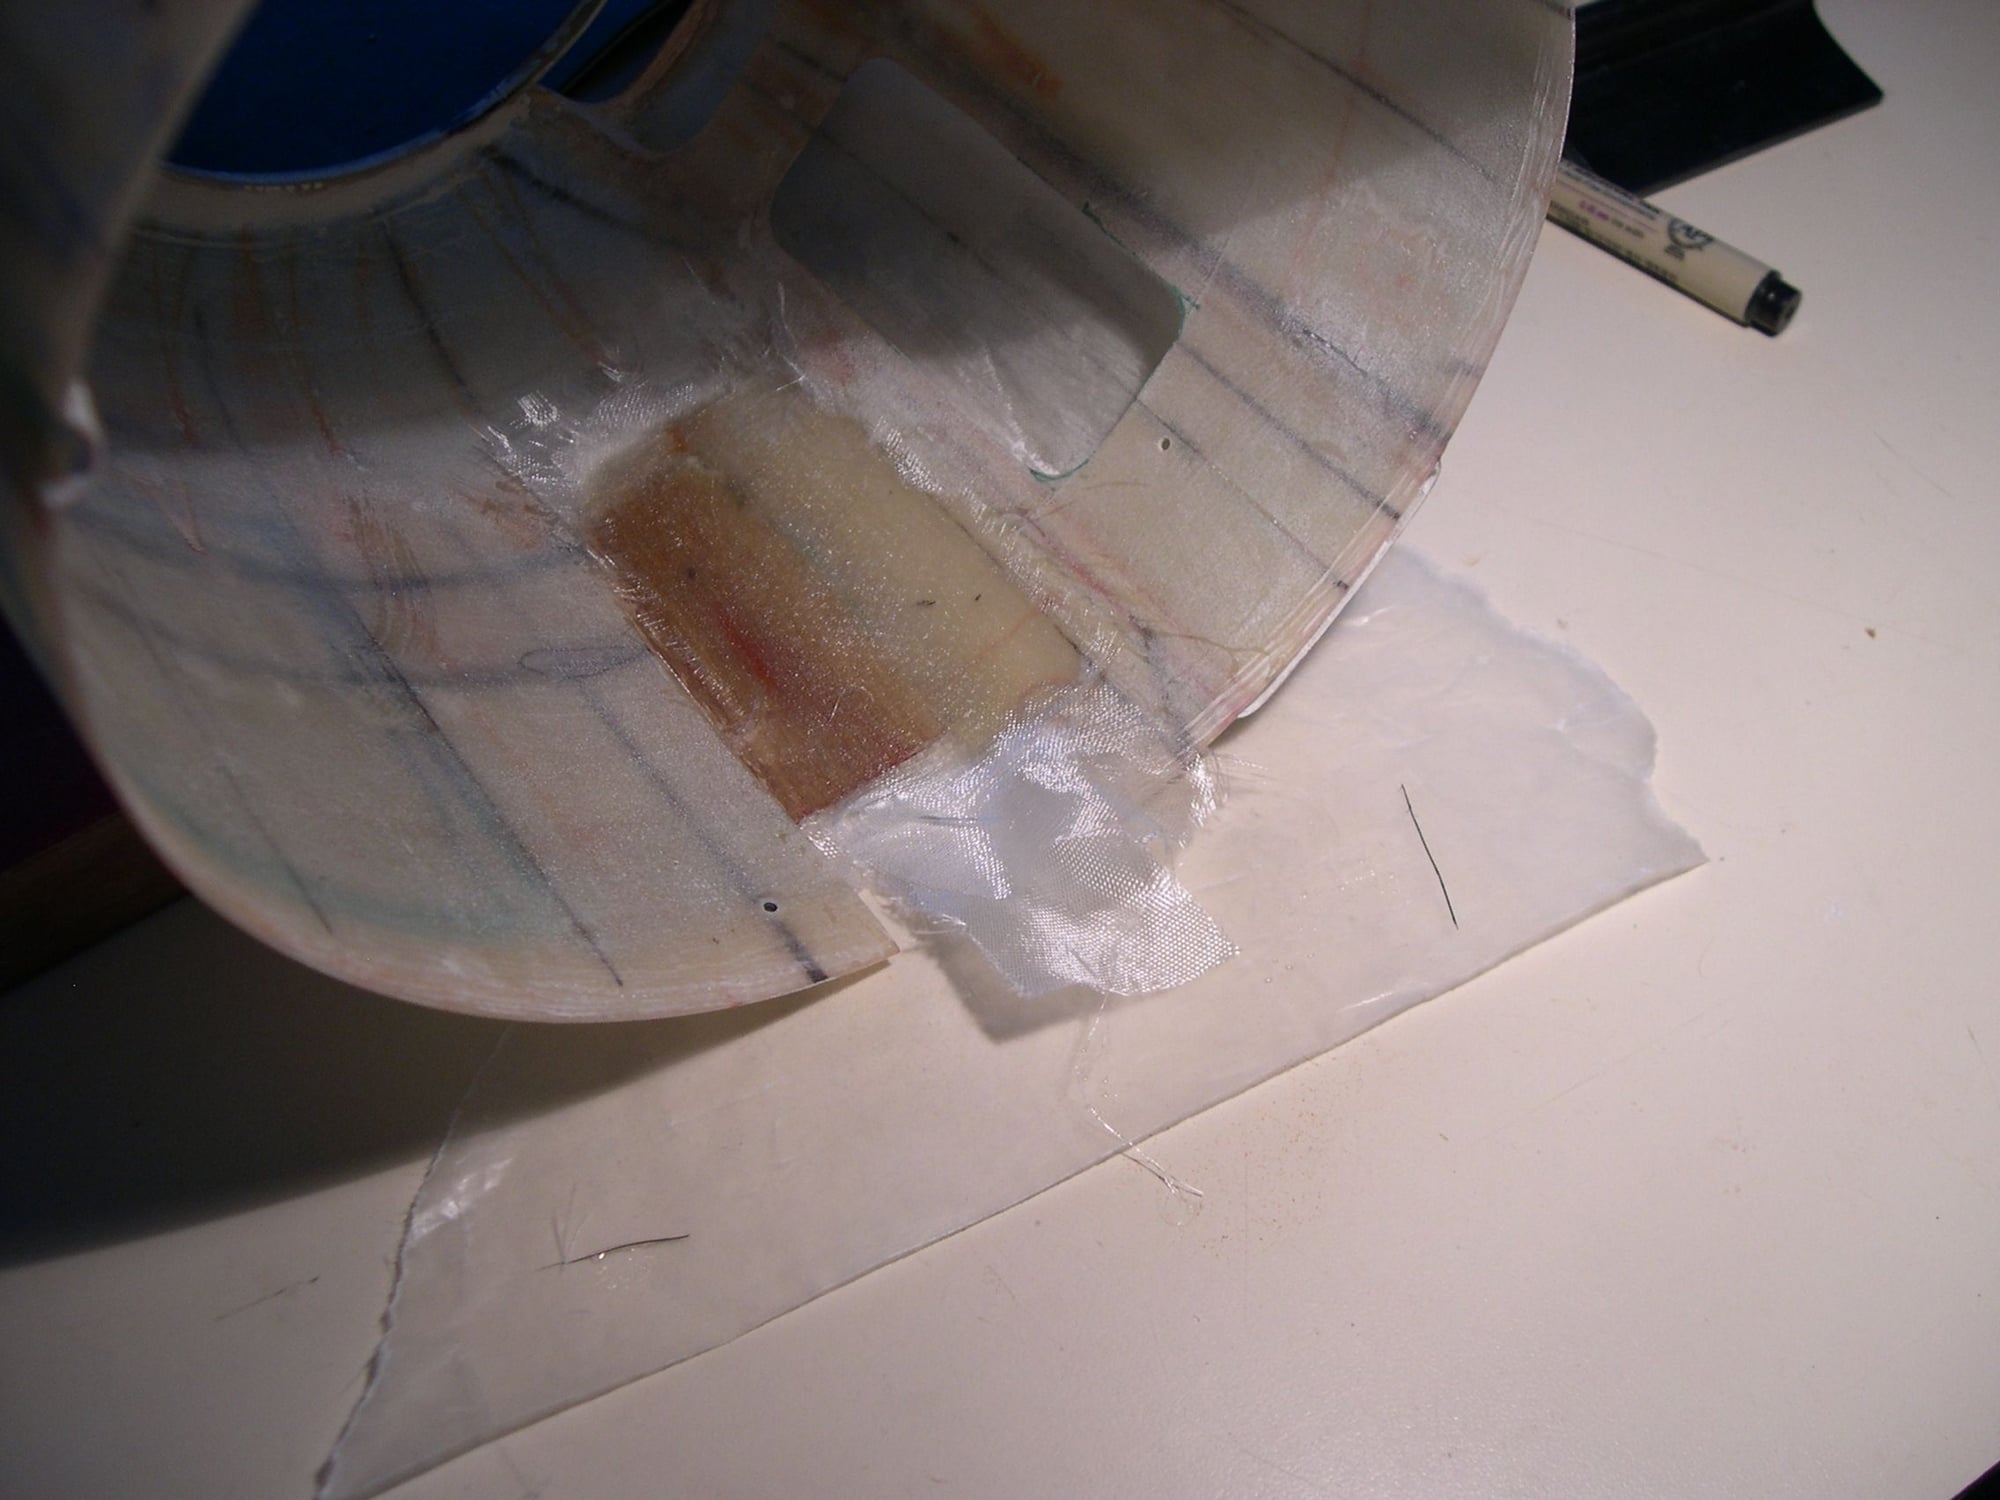
At this point, several layers of fiberglass get applied over the works to add strength to solidify everything for the next step.
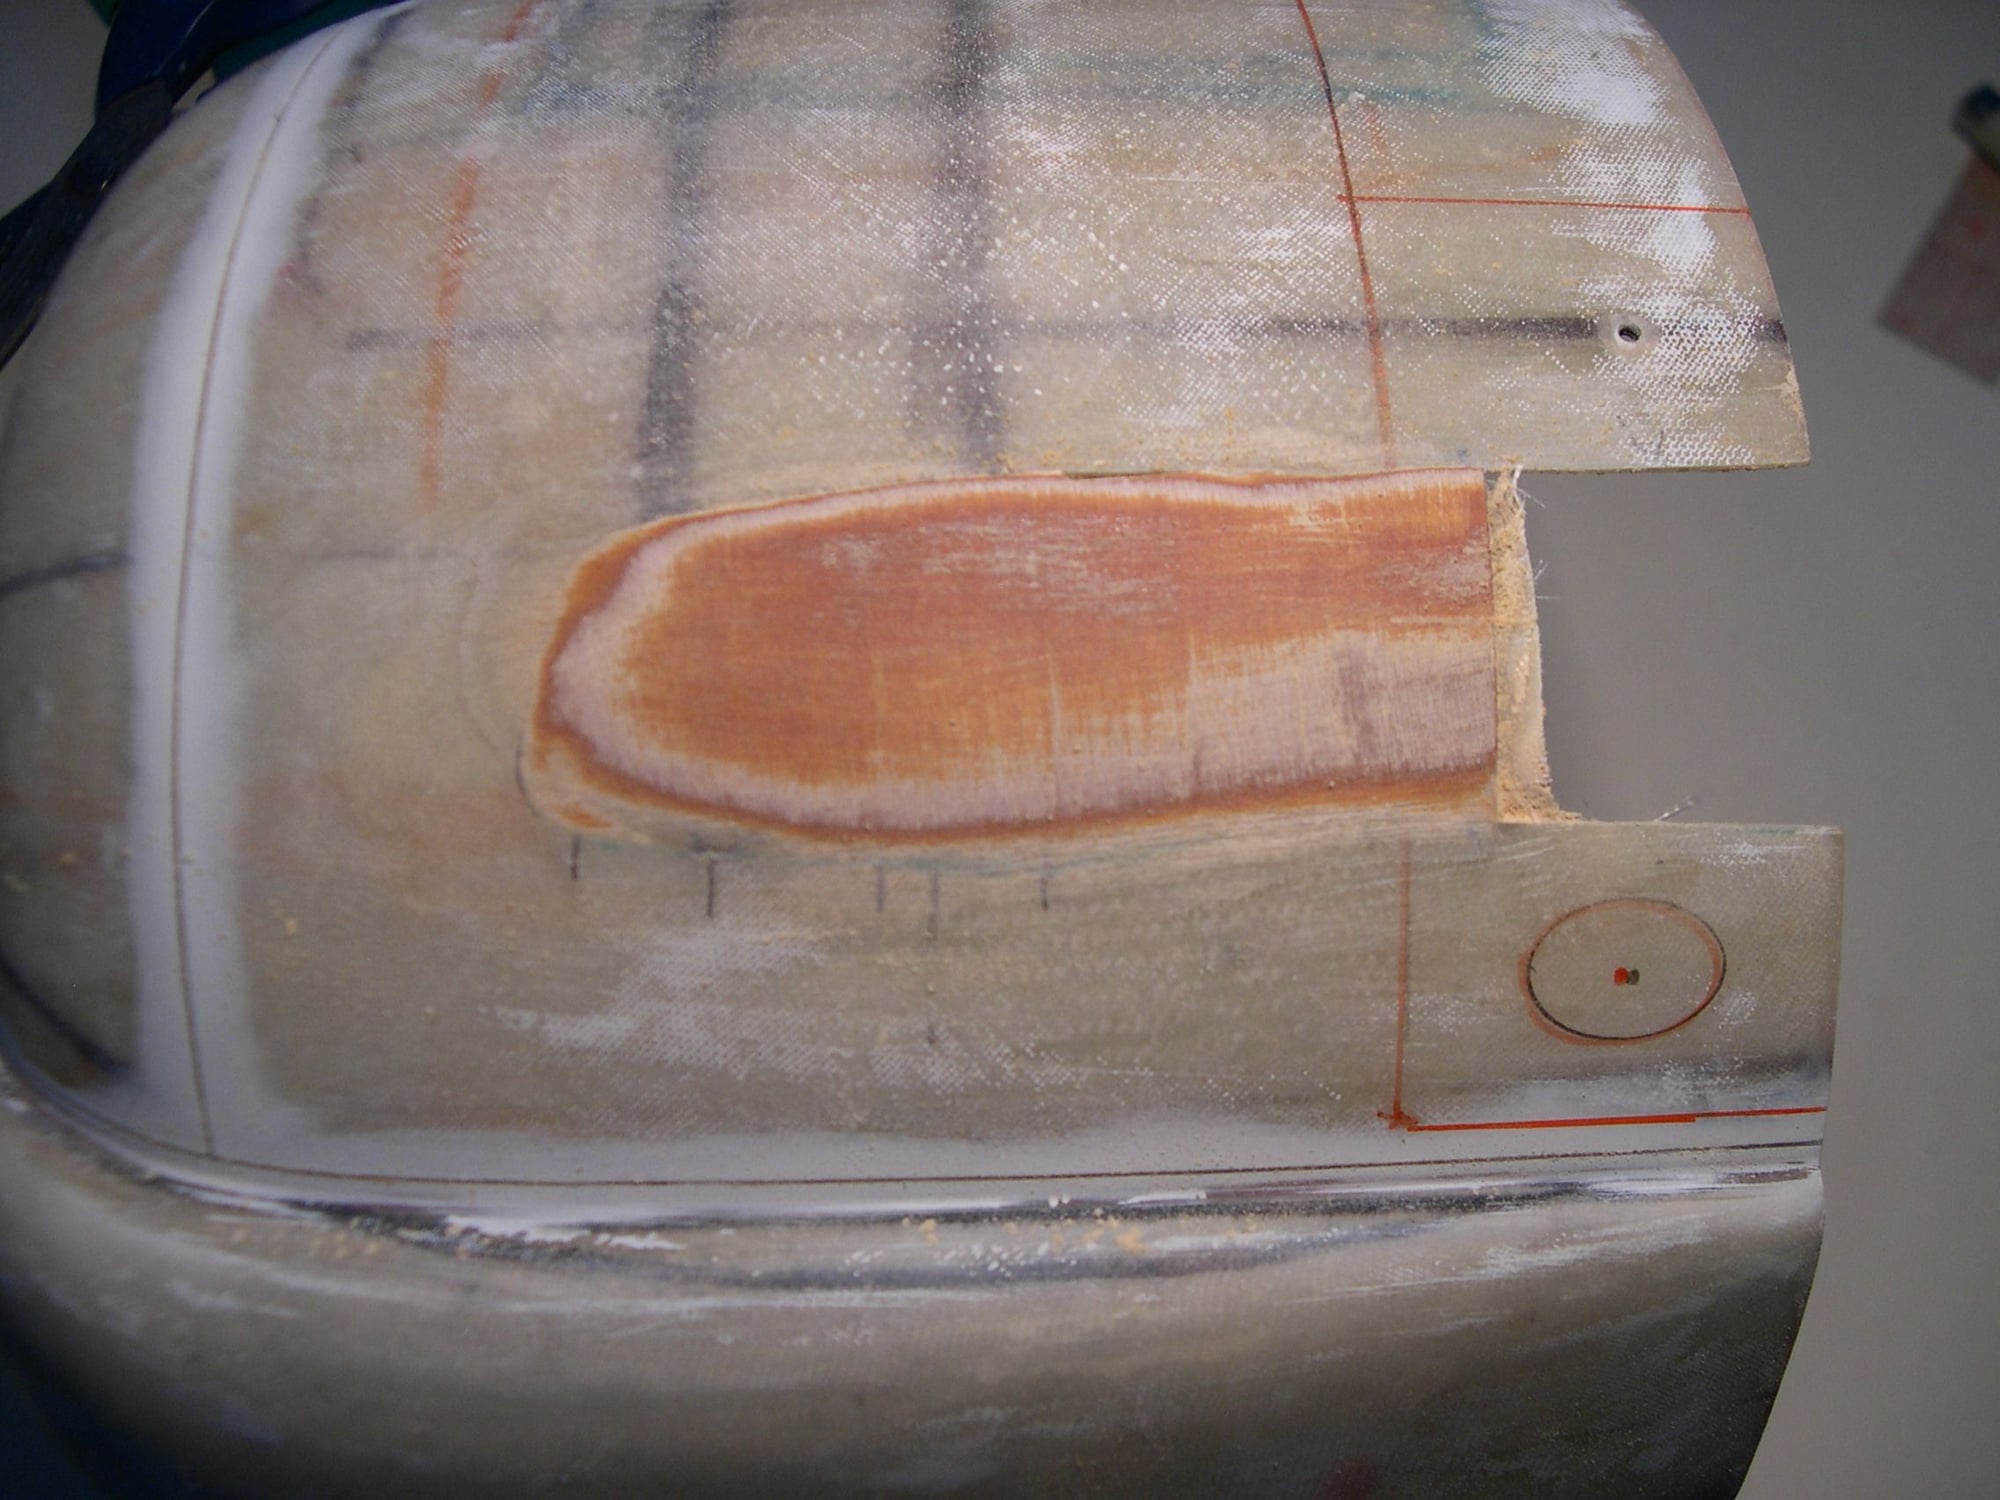
Outer 64th ply gets sanded and blended into cowl's outer curvature. Not shown: Upper portion of ply removed to cowls inside edge. Remaining lower portion carefully shaped.
With cowl slid back on, more fitting was done until a decent fit to the rear fixed flap was achieved.
A tidy, clean fit all around.
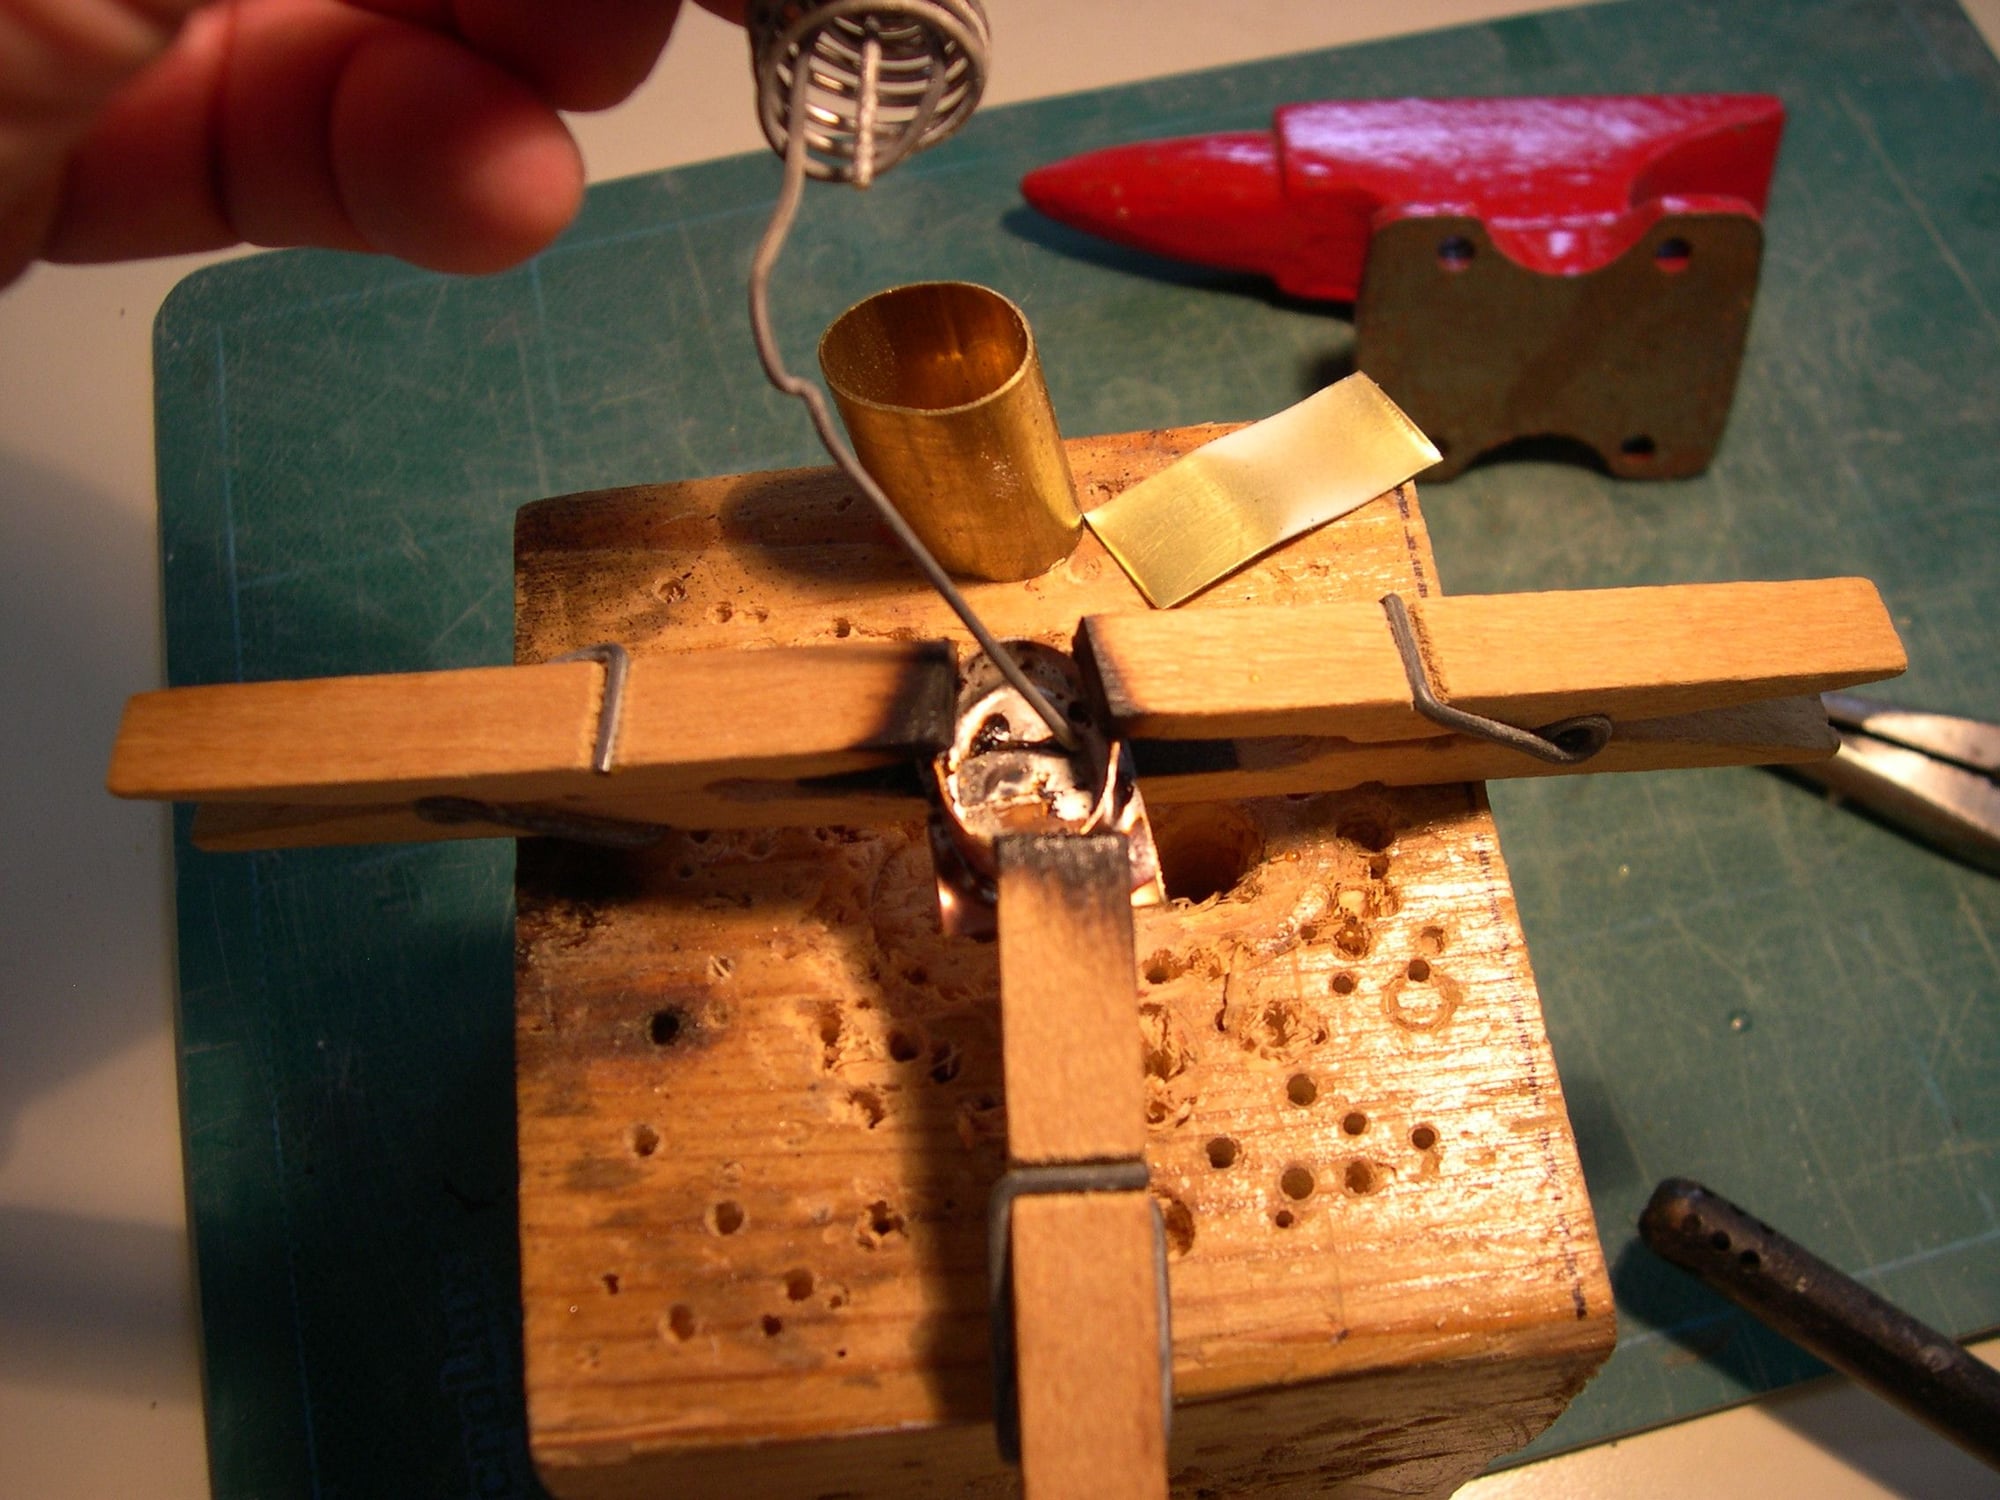
Round brass tubing, compressed into an oval, getting silver soldered to a brass backplate.
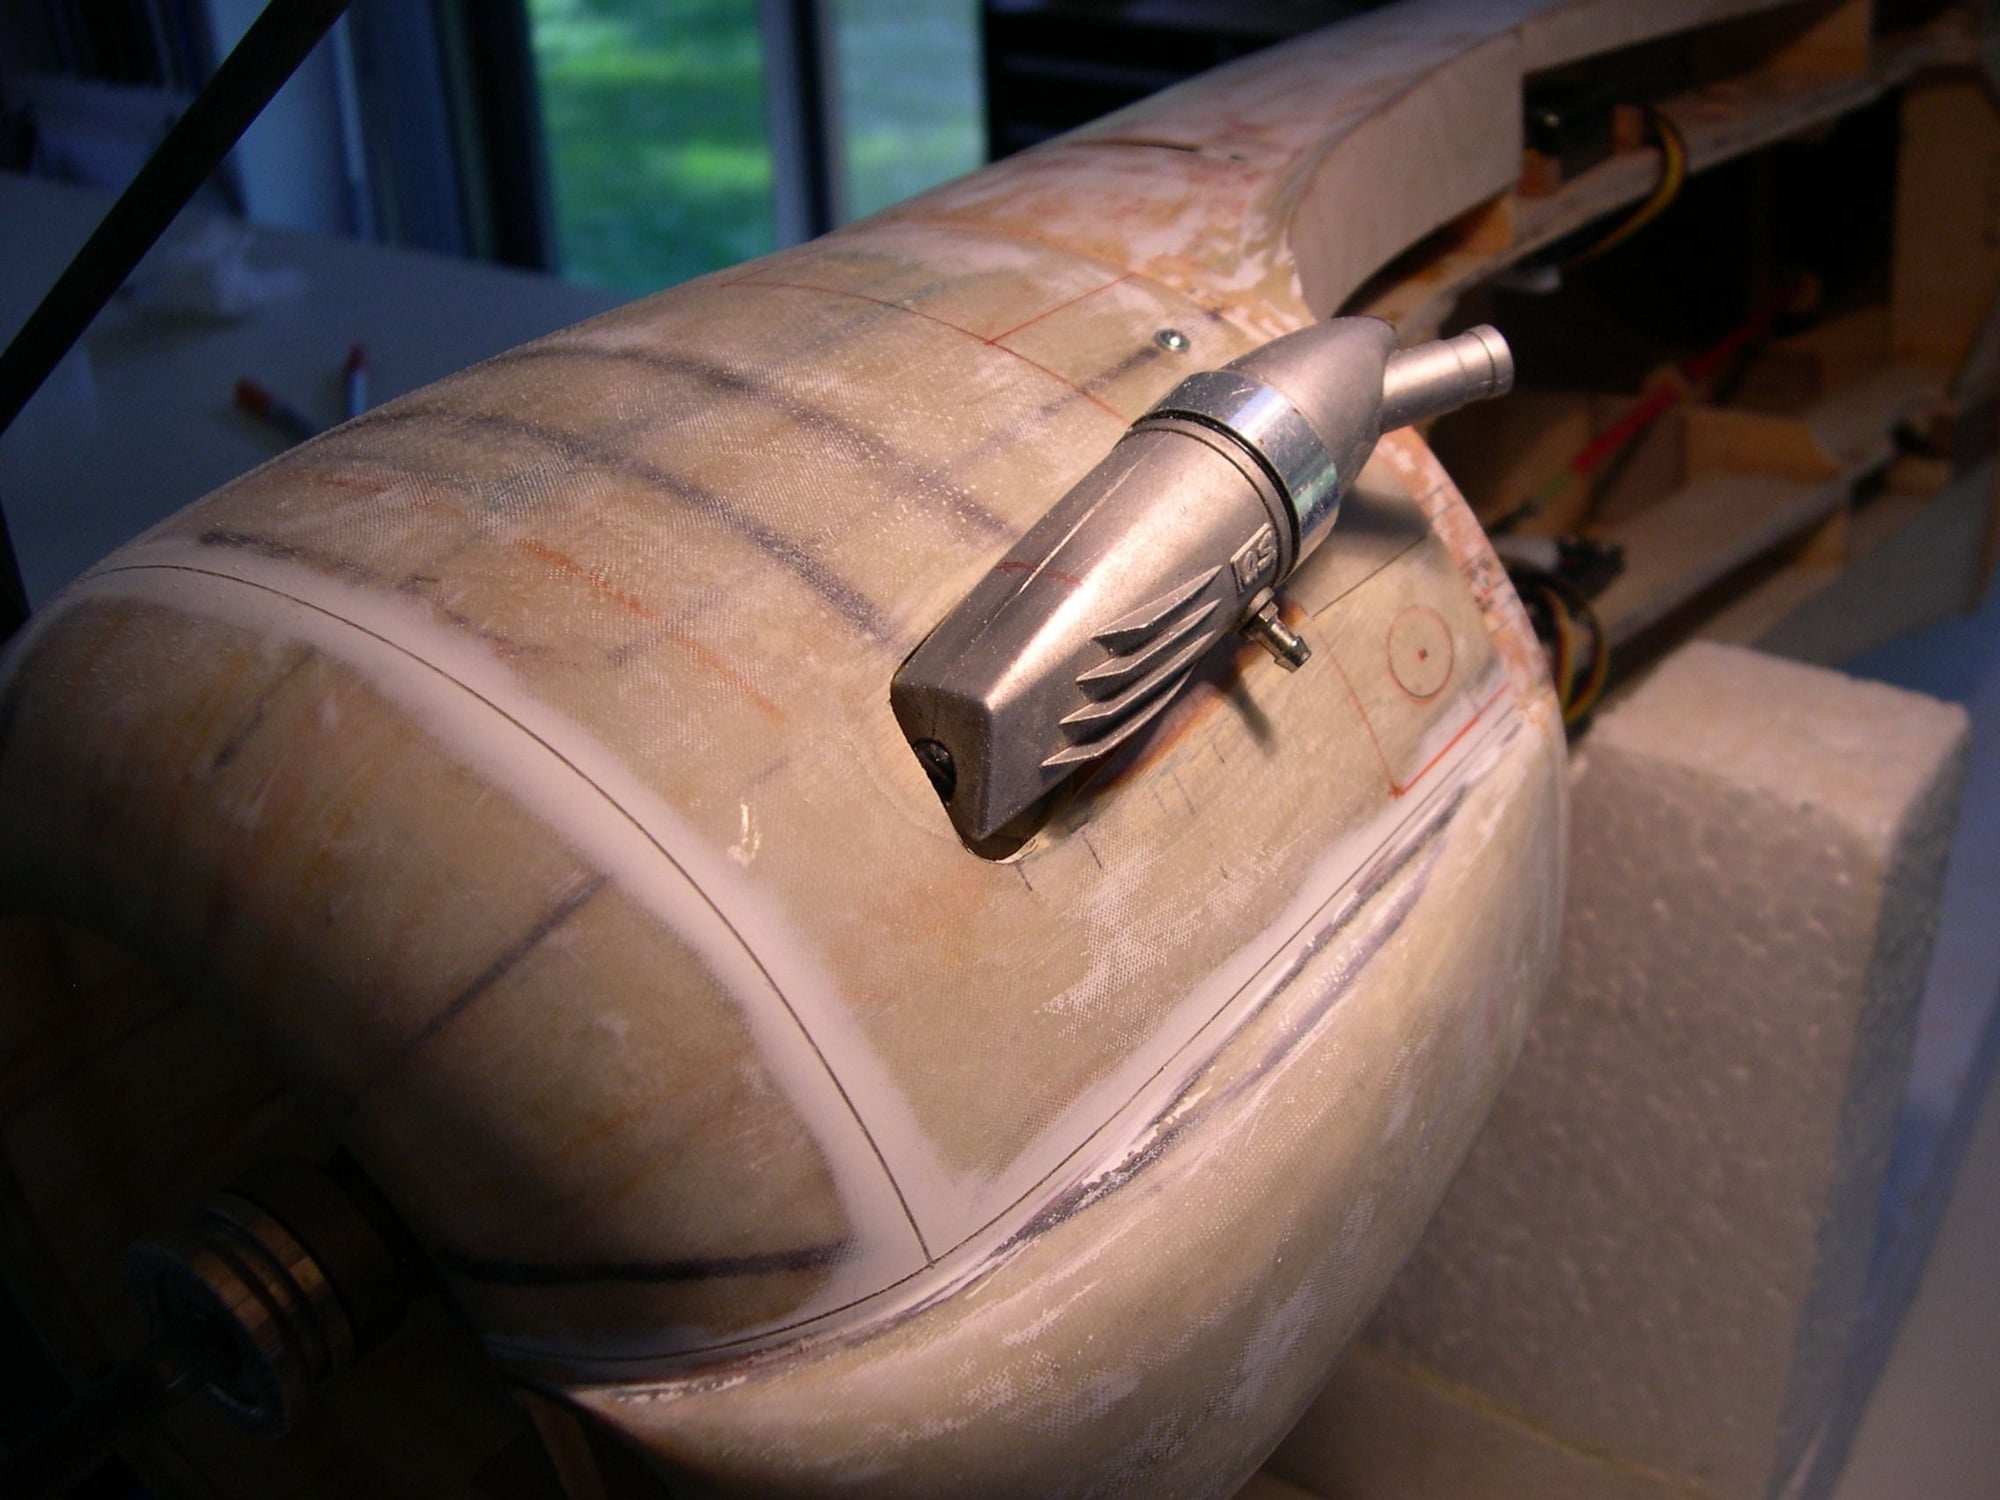
Side view of finished product, shown along the cut-out on the opposite ( starboard )side of the fuselage from where the stack in hand will be installed.
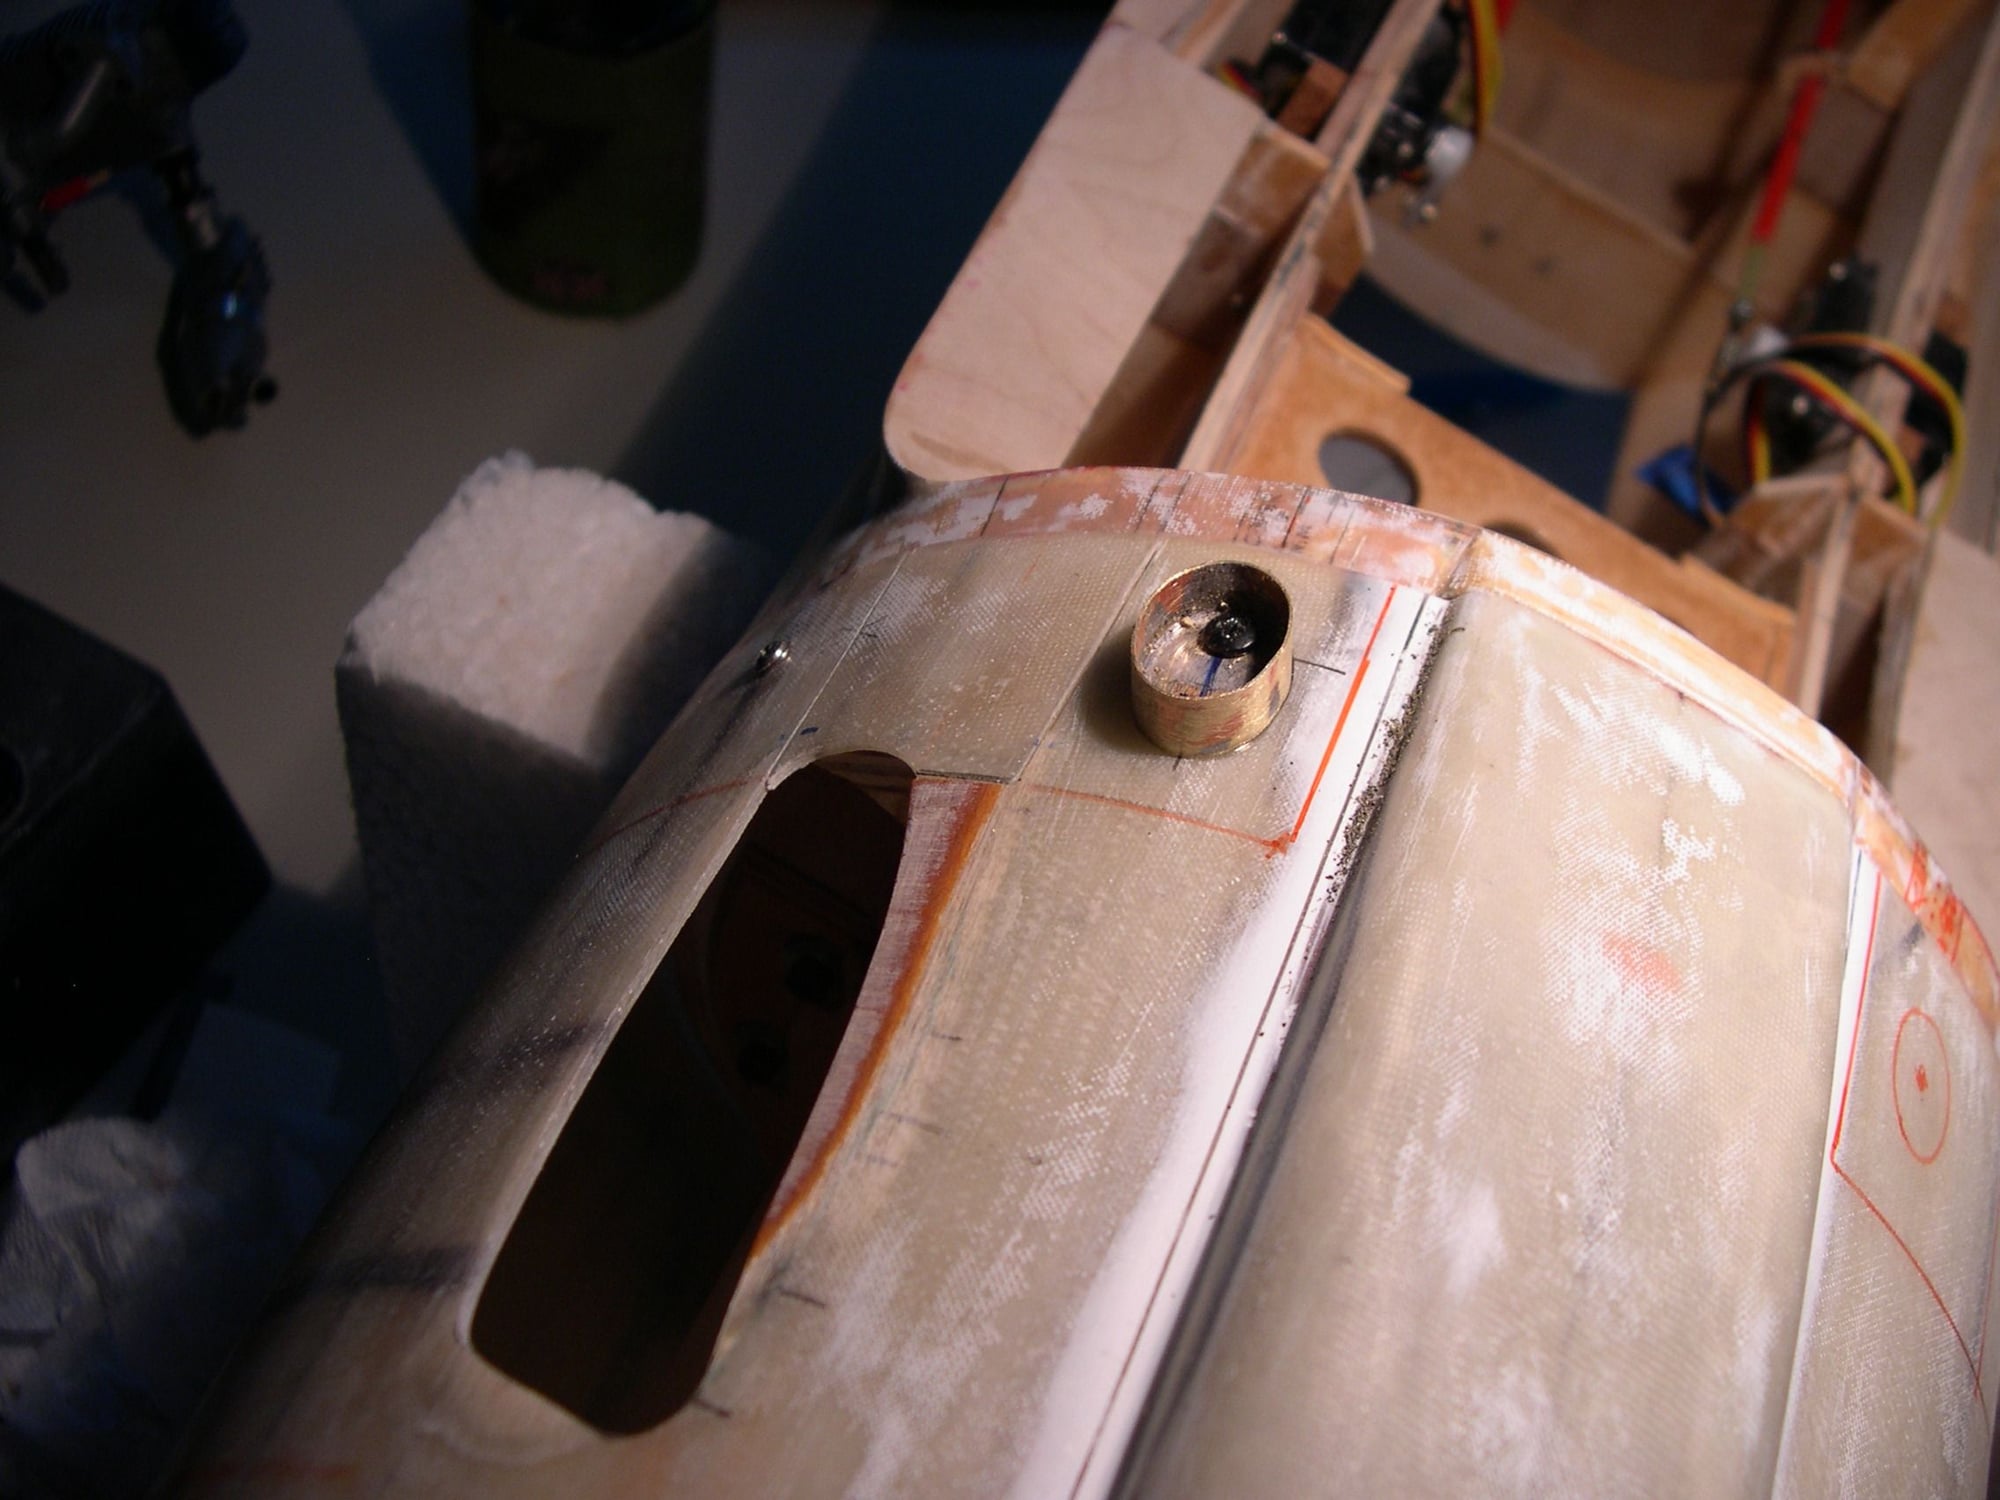
Port exhaust stack, drilled and glued in place on a hardwood mount installed beneath. Stack serves as double duty in hiding screw head.

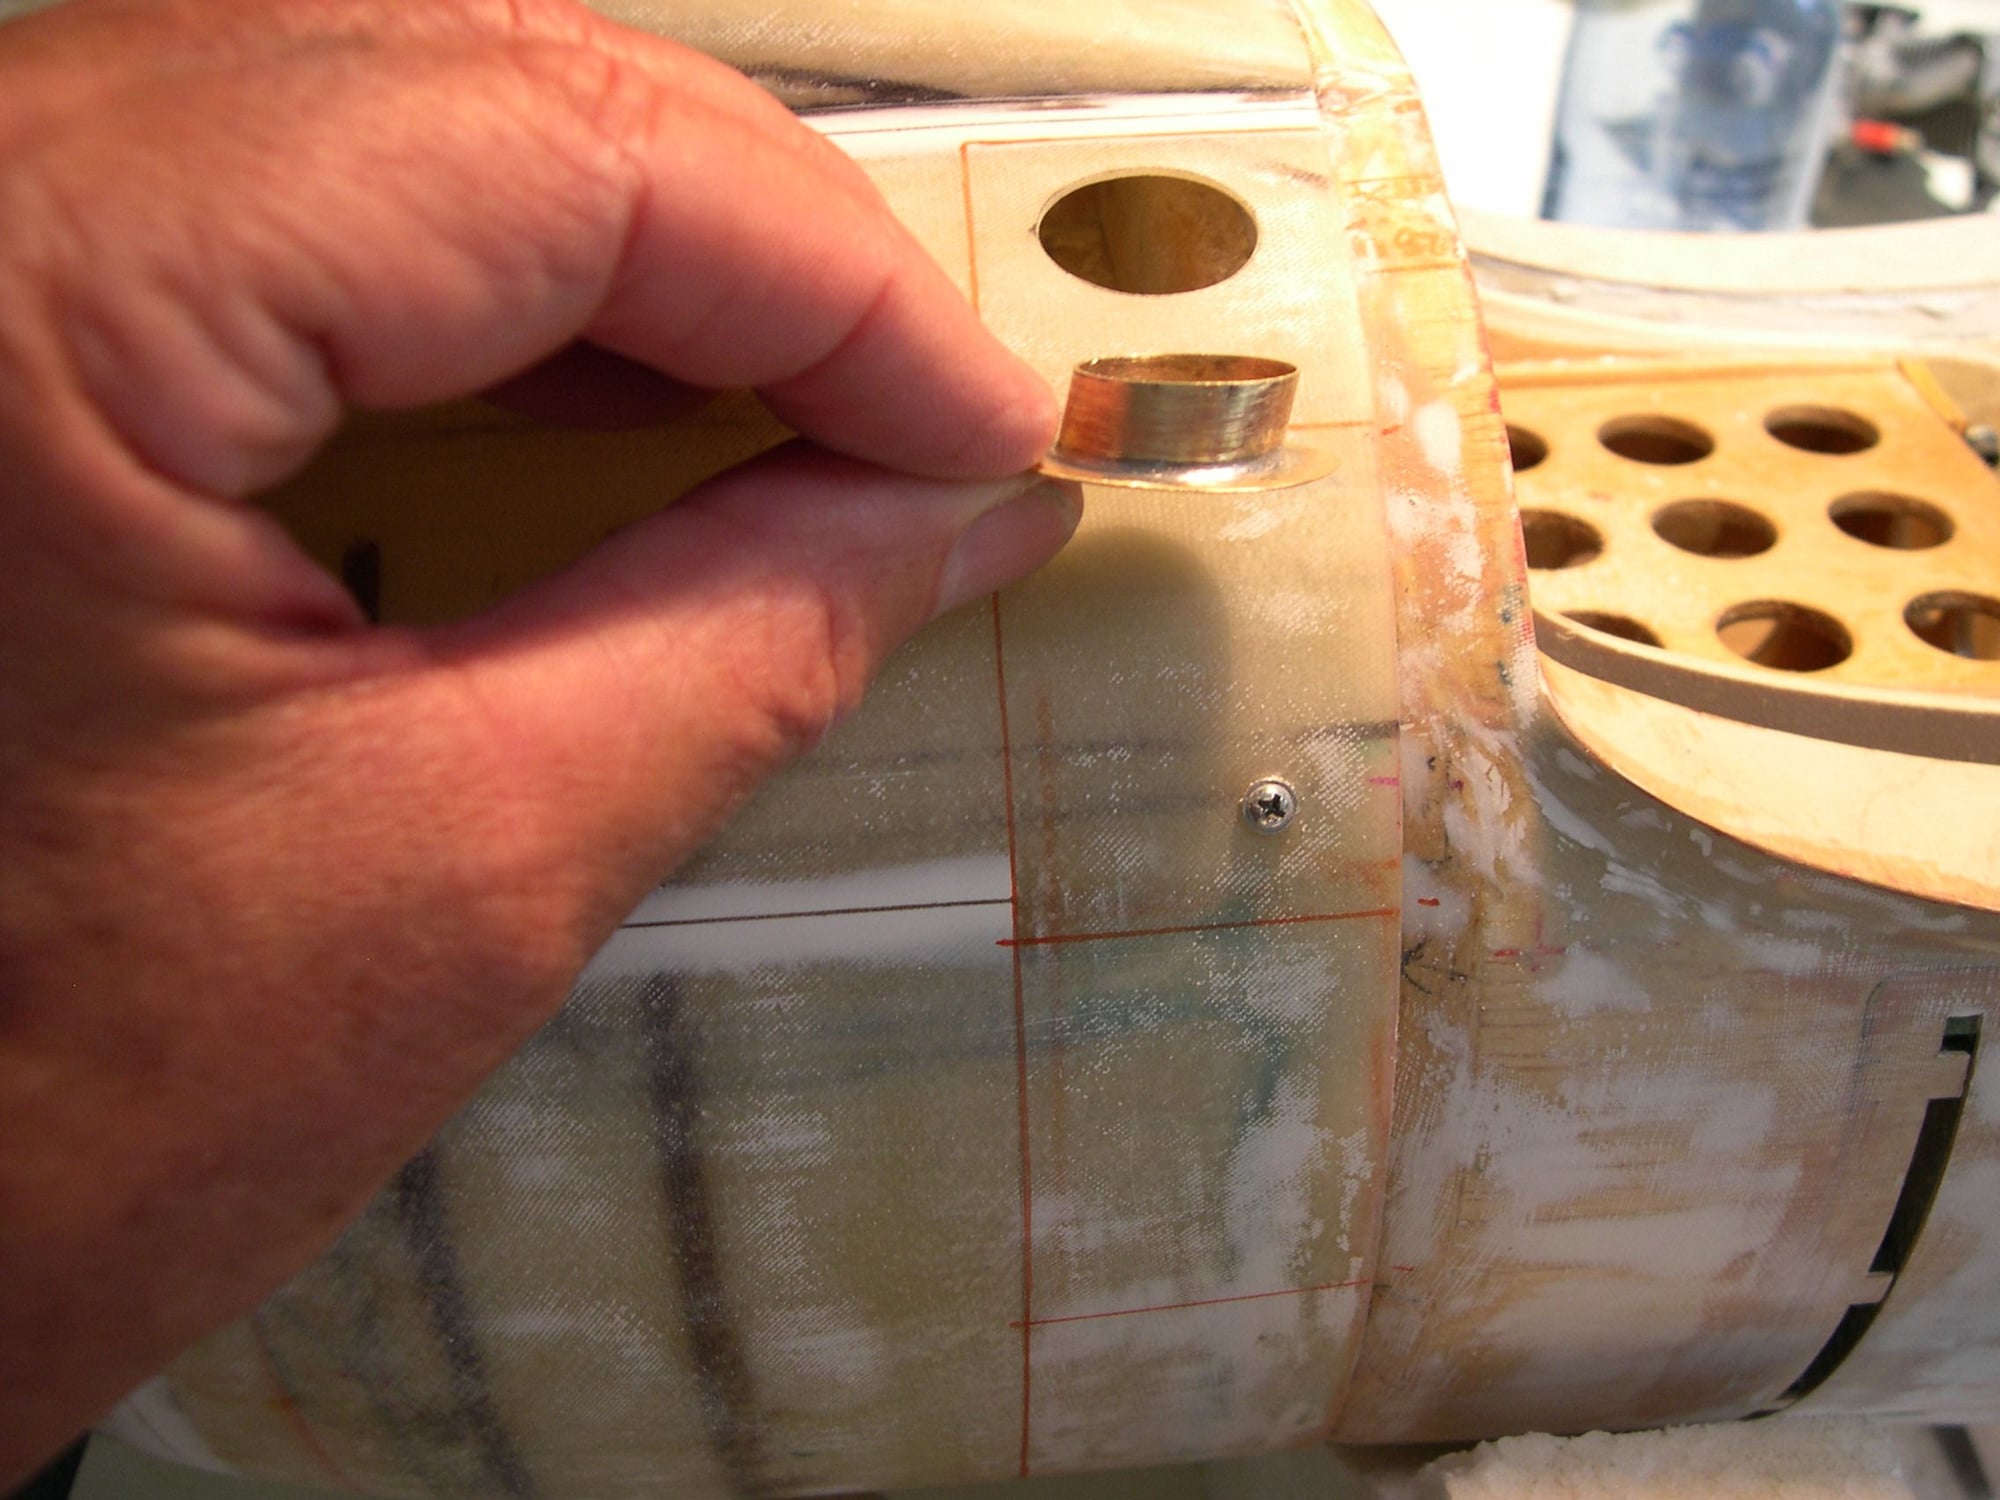
Starboard side of cowling, which had cut-out made, shows opposite stack, made with a larger base flange, glues in from behind, getting epoxied in place, held with clamps.
Trying one more time to post recent progress... wish me luck!!! G.
 12-31-2019, 02:51 PM
#260
Cowling Latches: A layer of painters tape covered w/ masking tape w/ latch outlines pre-cut. Resin & Micro-Balloon mix trowelled in. When dry, sanded flush to tape. Perfect!

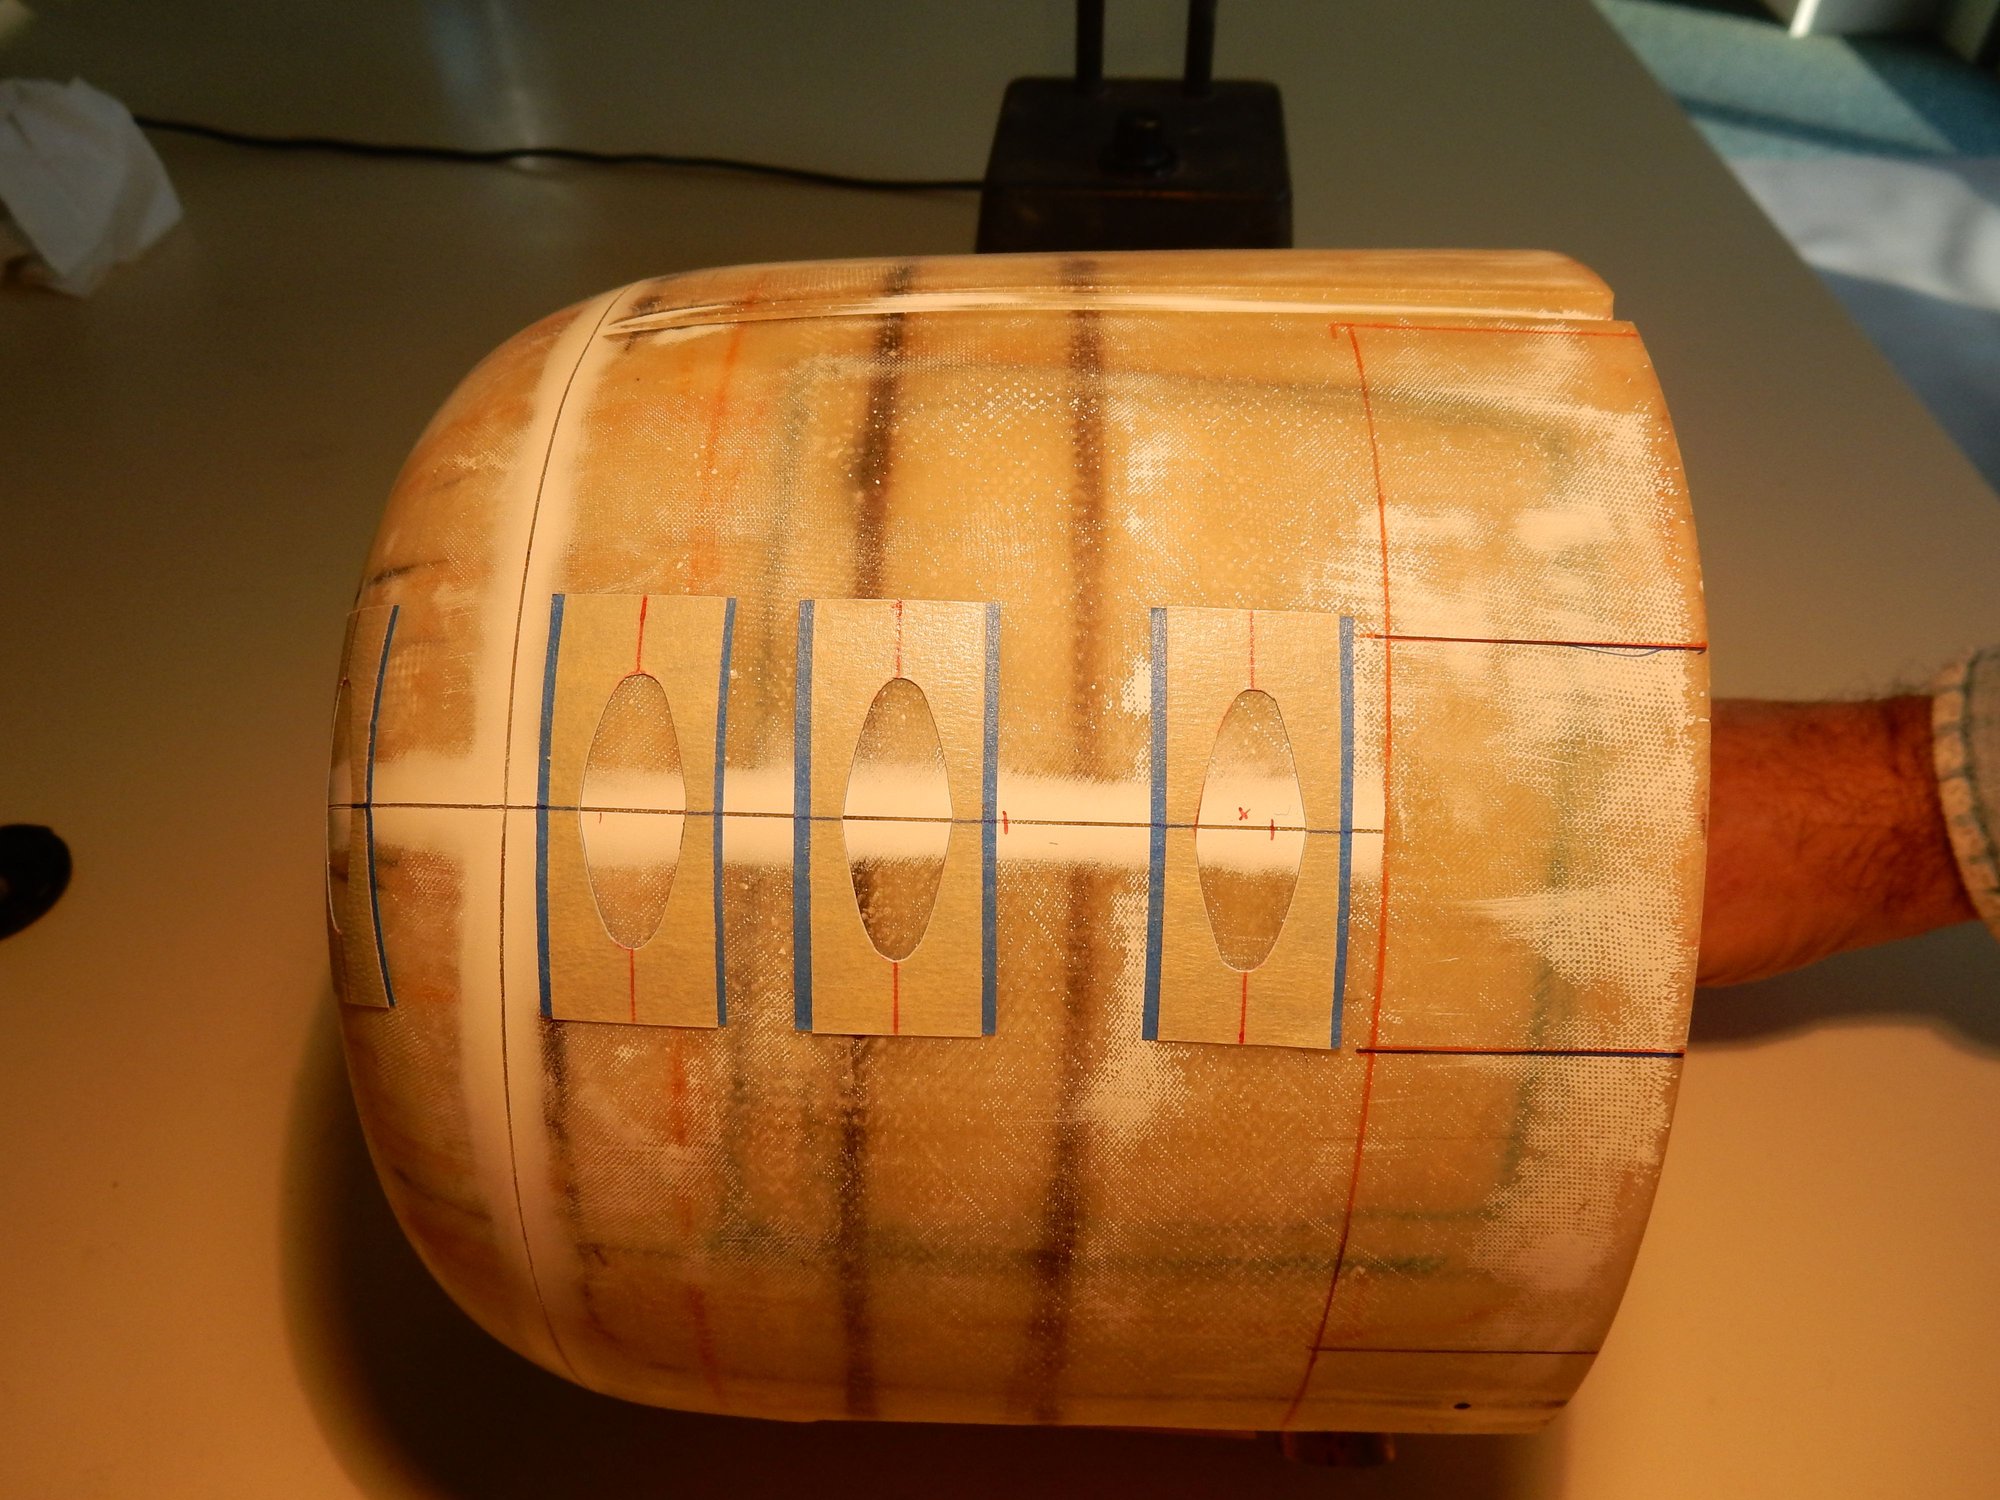
Tracing paper, panel lines already on it, laying in place on wing surface, ready to transfer. One tracing for wing top, another for wing bottom. Tracing flipped over for opp. wing.
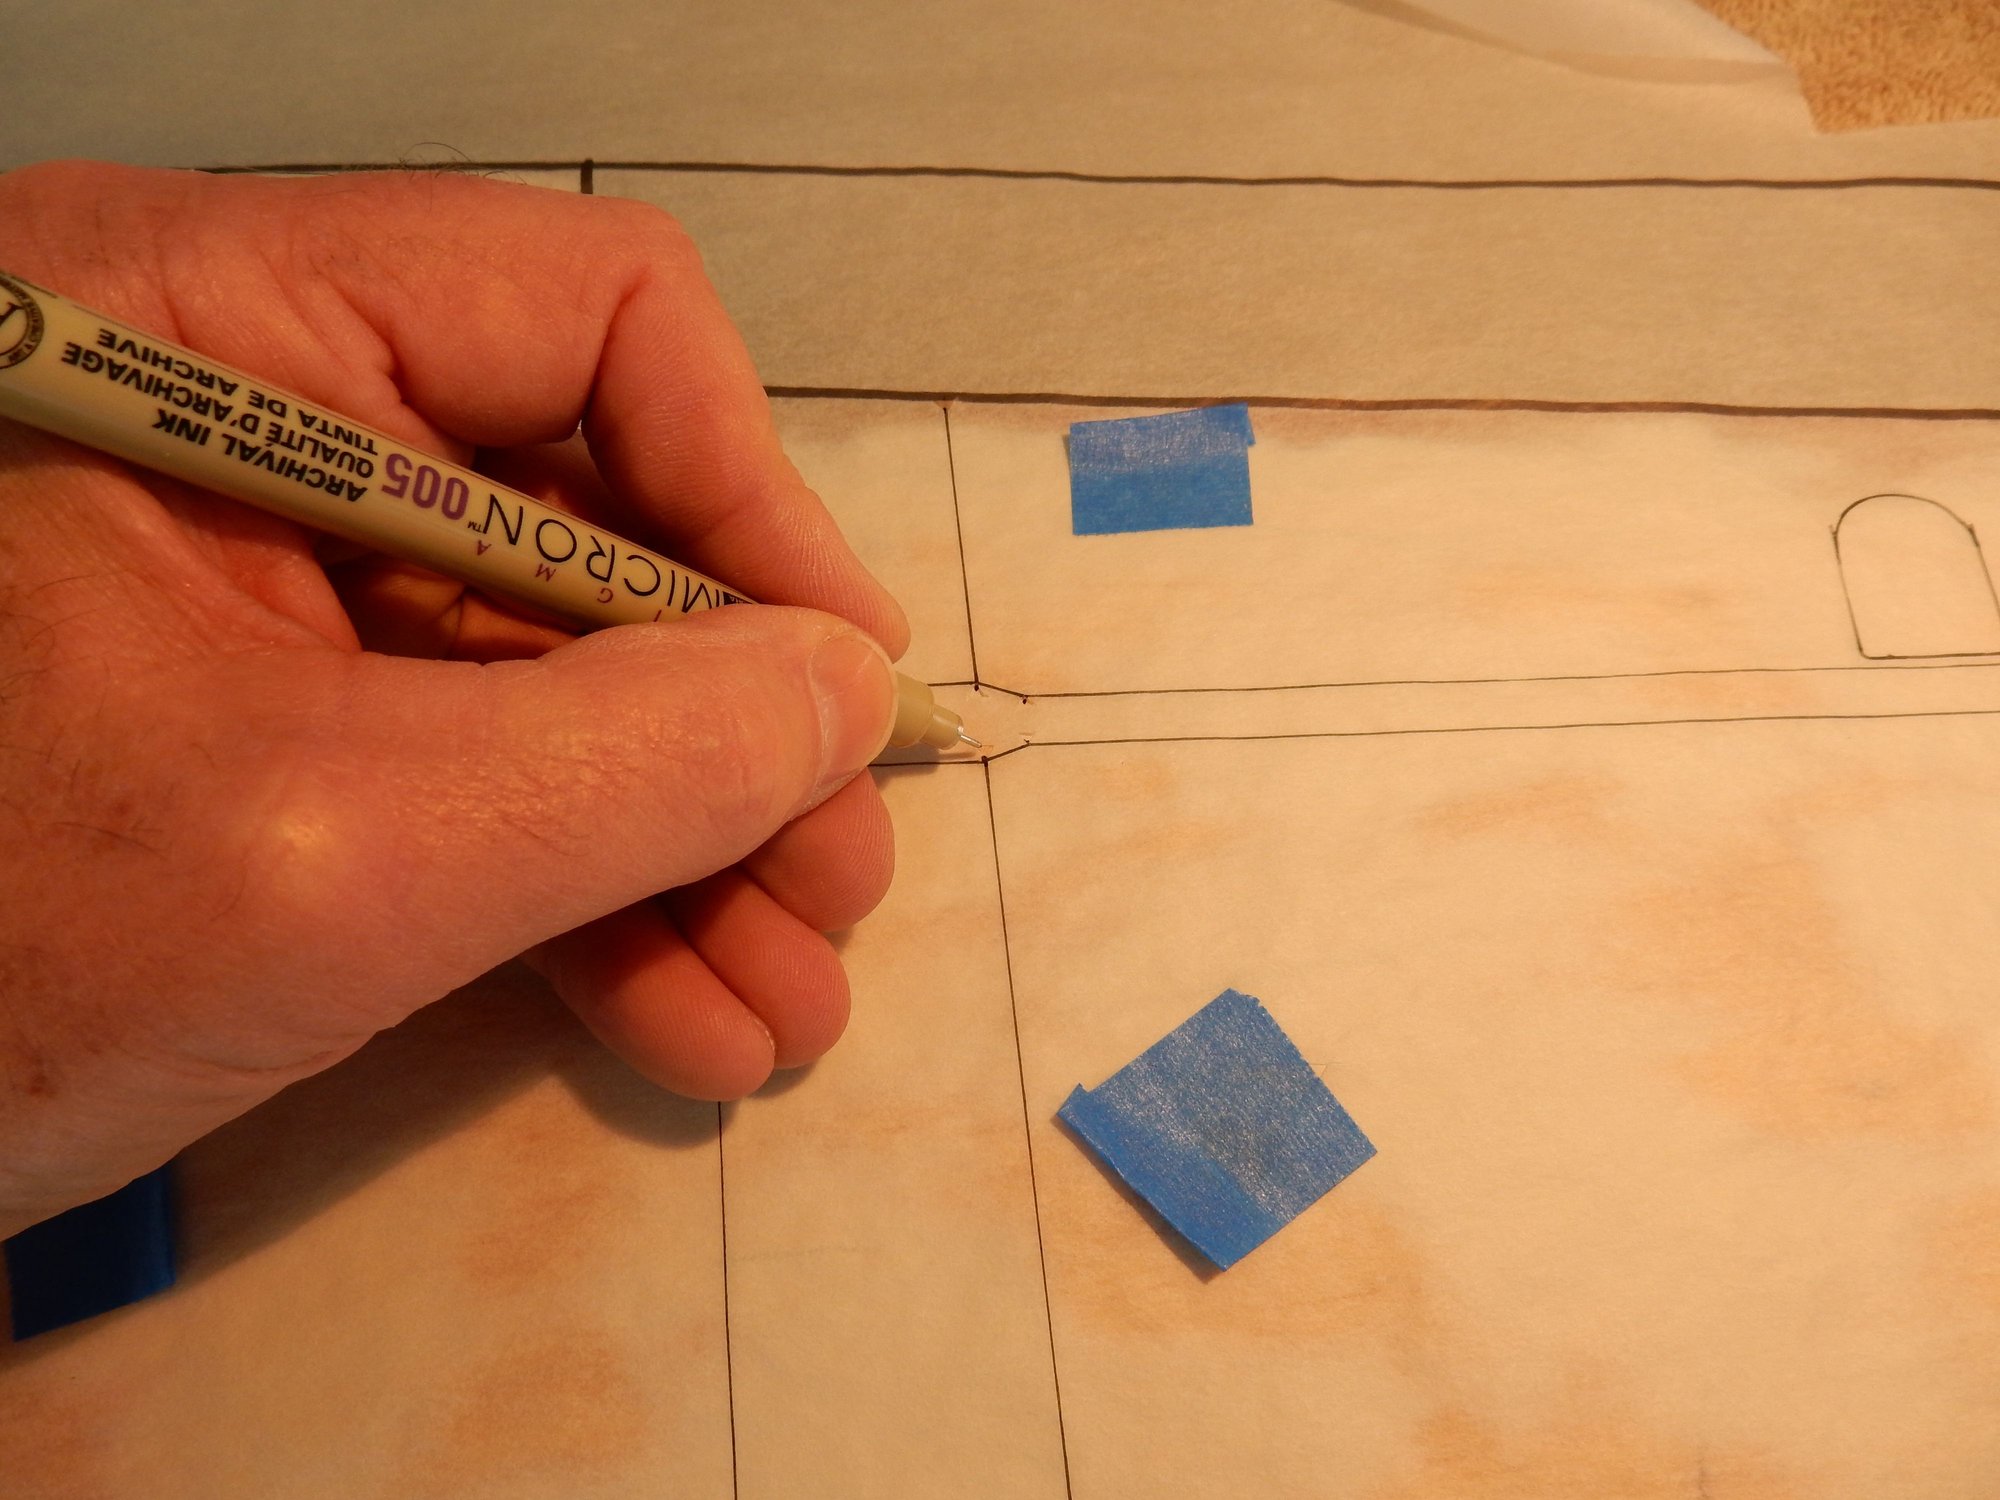
Blue tape over triangle cut-outs keep tracing in register. Fine marker used to tranfer reference marks to junction points on wing surface beneath.
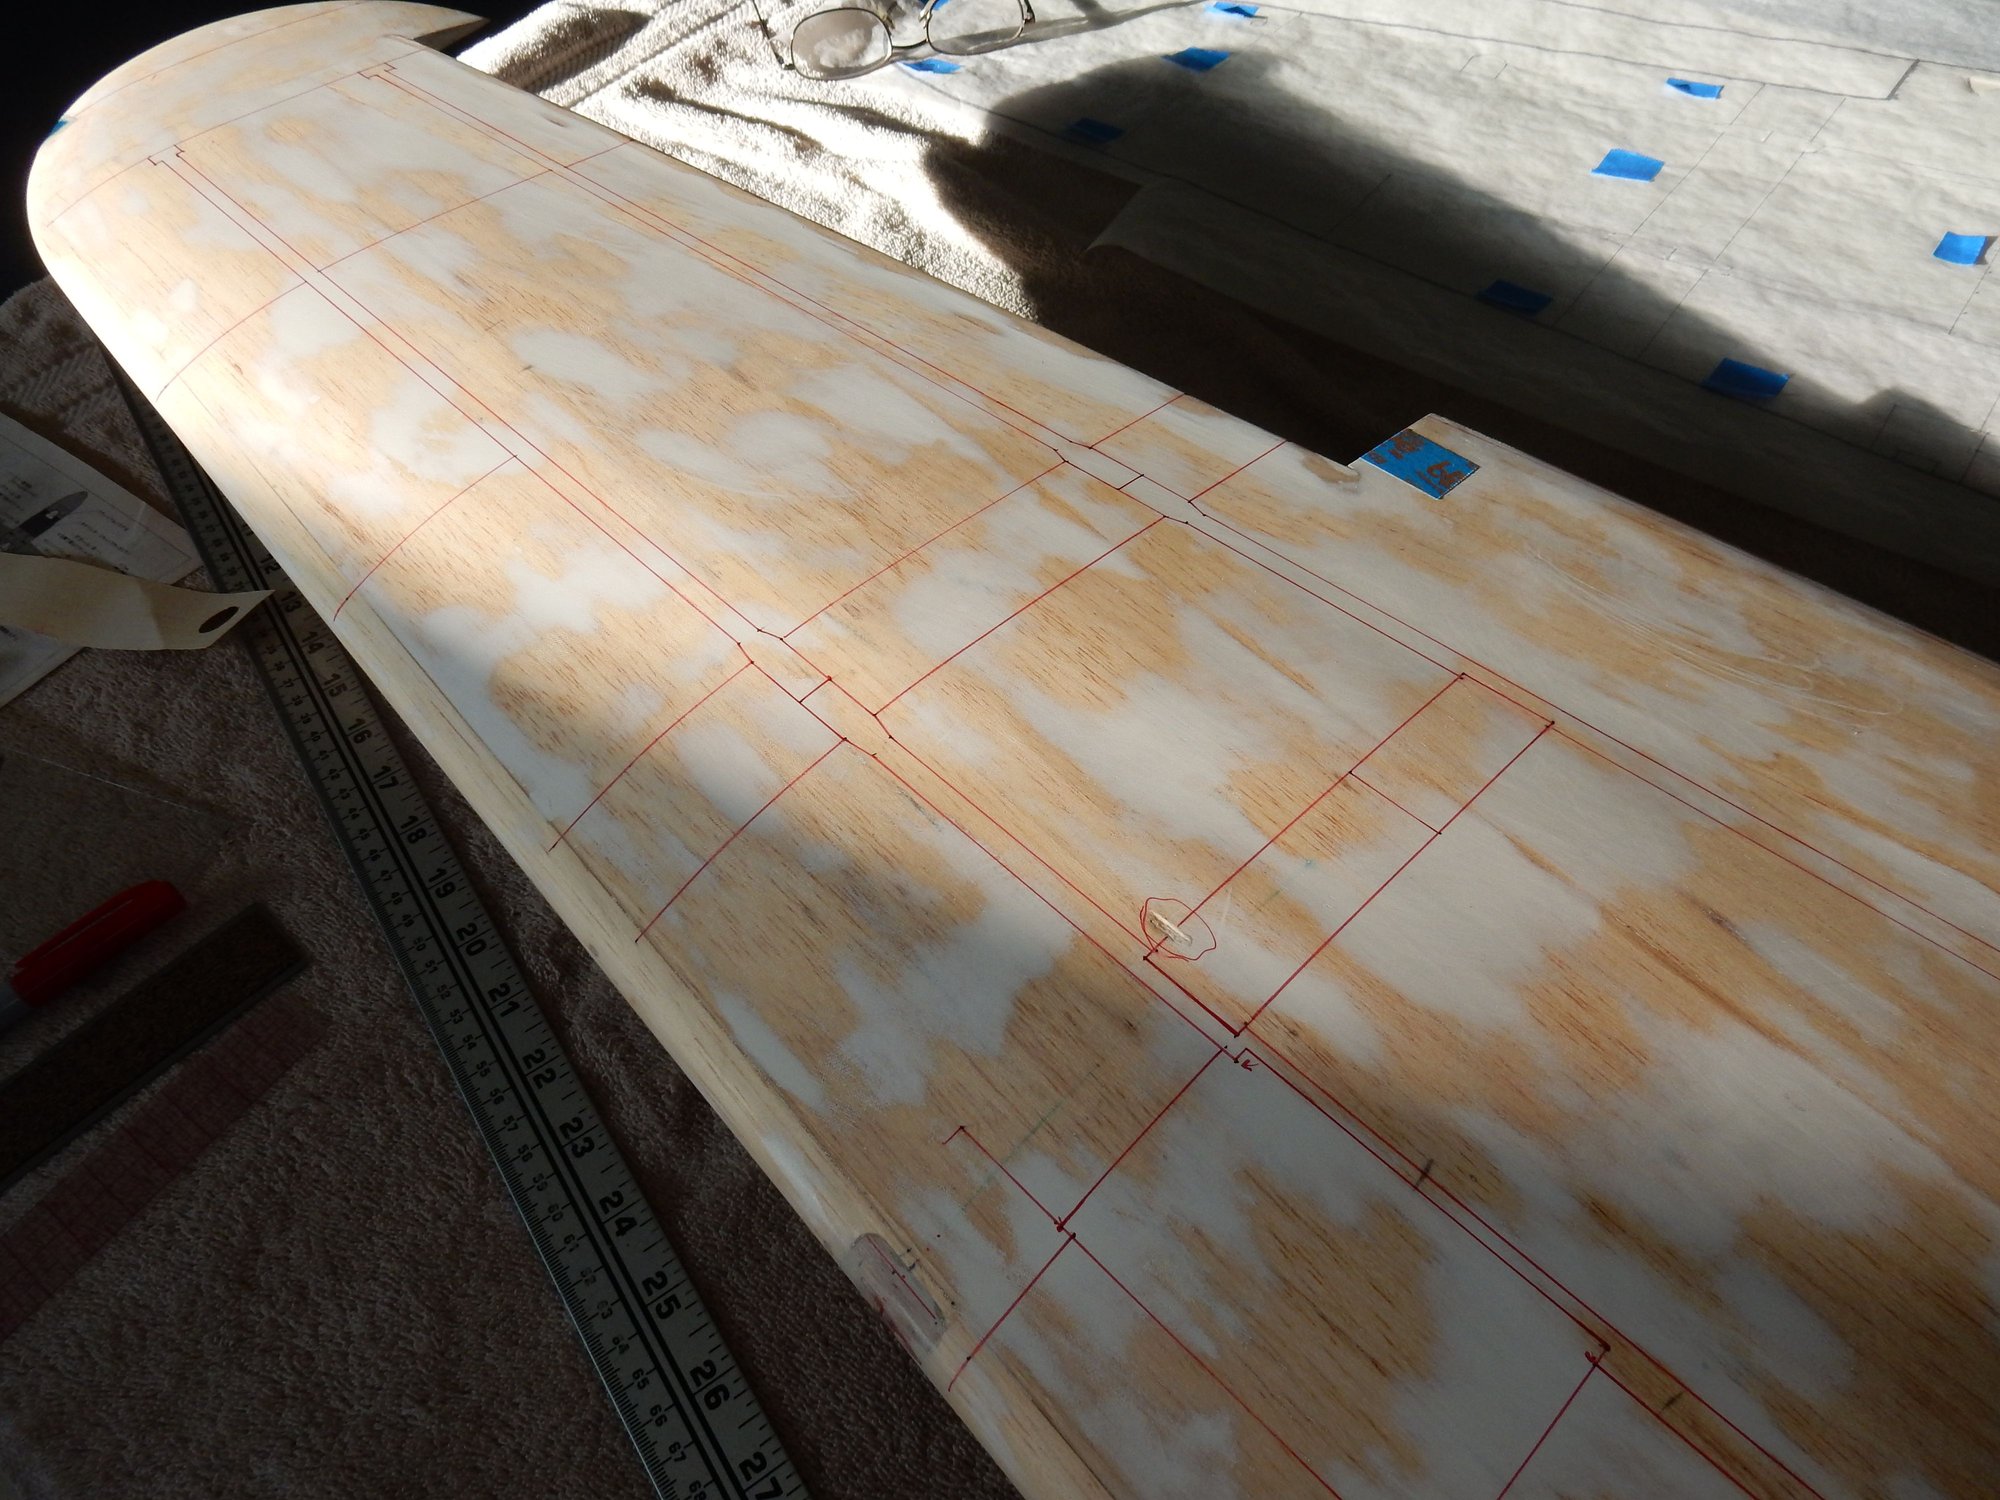
Red SHARPIE lines connect register point junctions. Ready to lay 1/64th panel tape directly over line work.
12-31-2019, 03:27 PM
#261
Cowling Latches: A layer of painters tape covered w/ masking tape w/ latch outlines pre-cut. Resin & Micro-Balloon mix trowelled in. When dry, sanded flush to tape. Perfect!
Tracing paper, panel lines already on it, laying in place on wing surface, ready to transfer. One tracing for wing top, another for wing bottom. Tracing flipped over for opp. wing.
Blue tape over triangle cut-outs keep tracing in register. Fine marker used to tranfer reference marks to junction points on wing surface beneath.
Red SHARPIE lines connect register point junctions. Ready to lay 1/64th panel tape directly over line work.
12-31-2019, 03:50 PM
#262

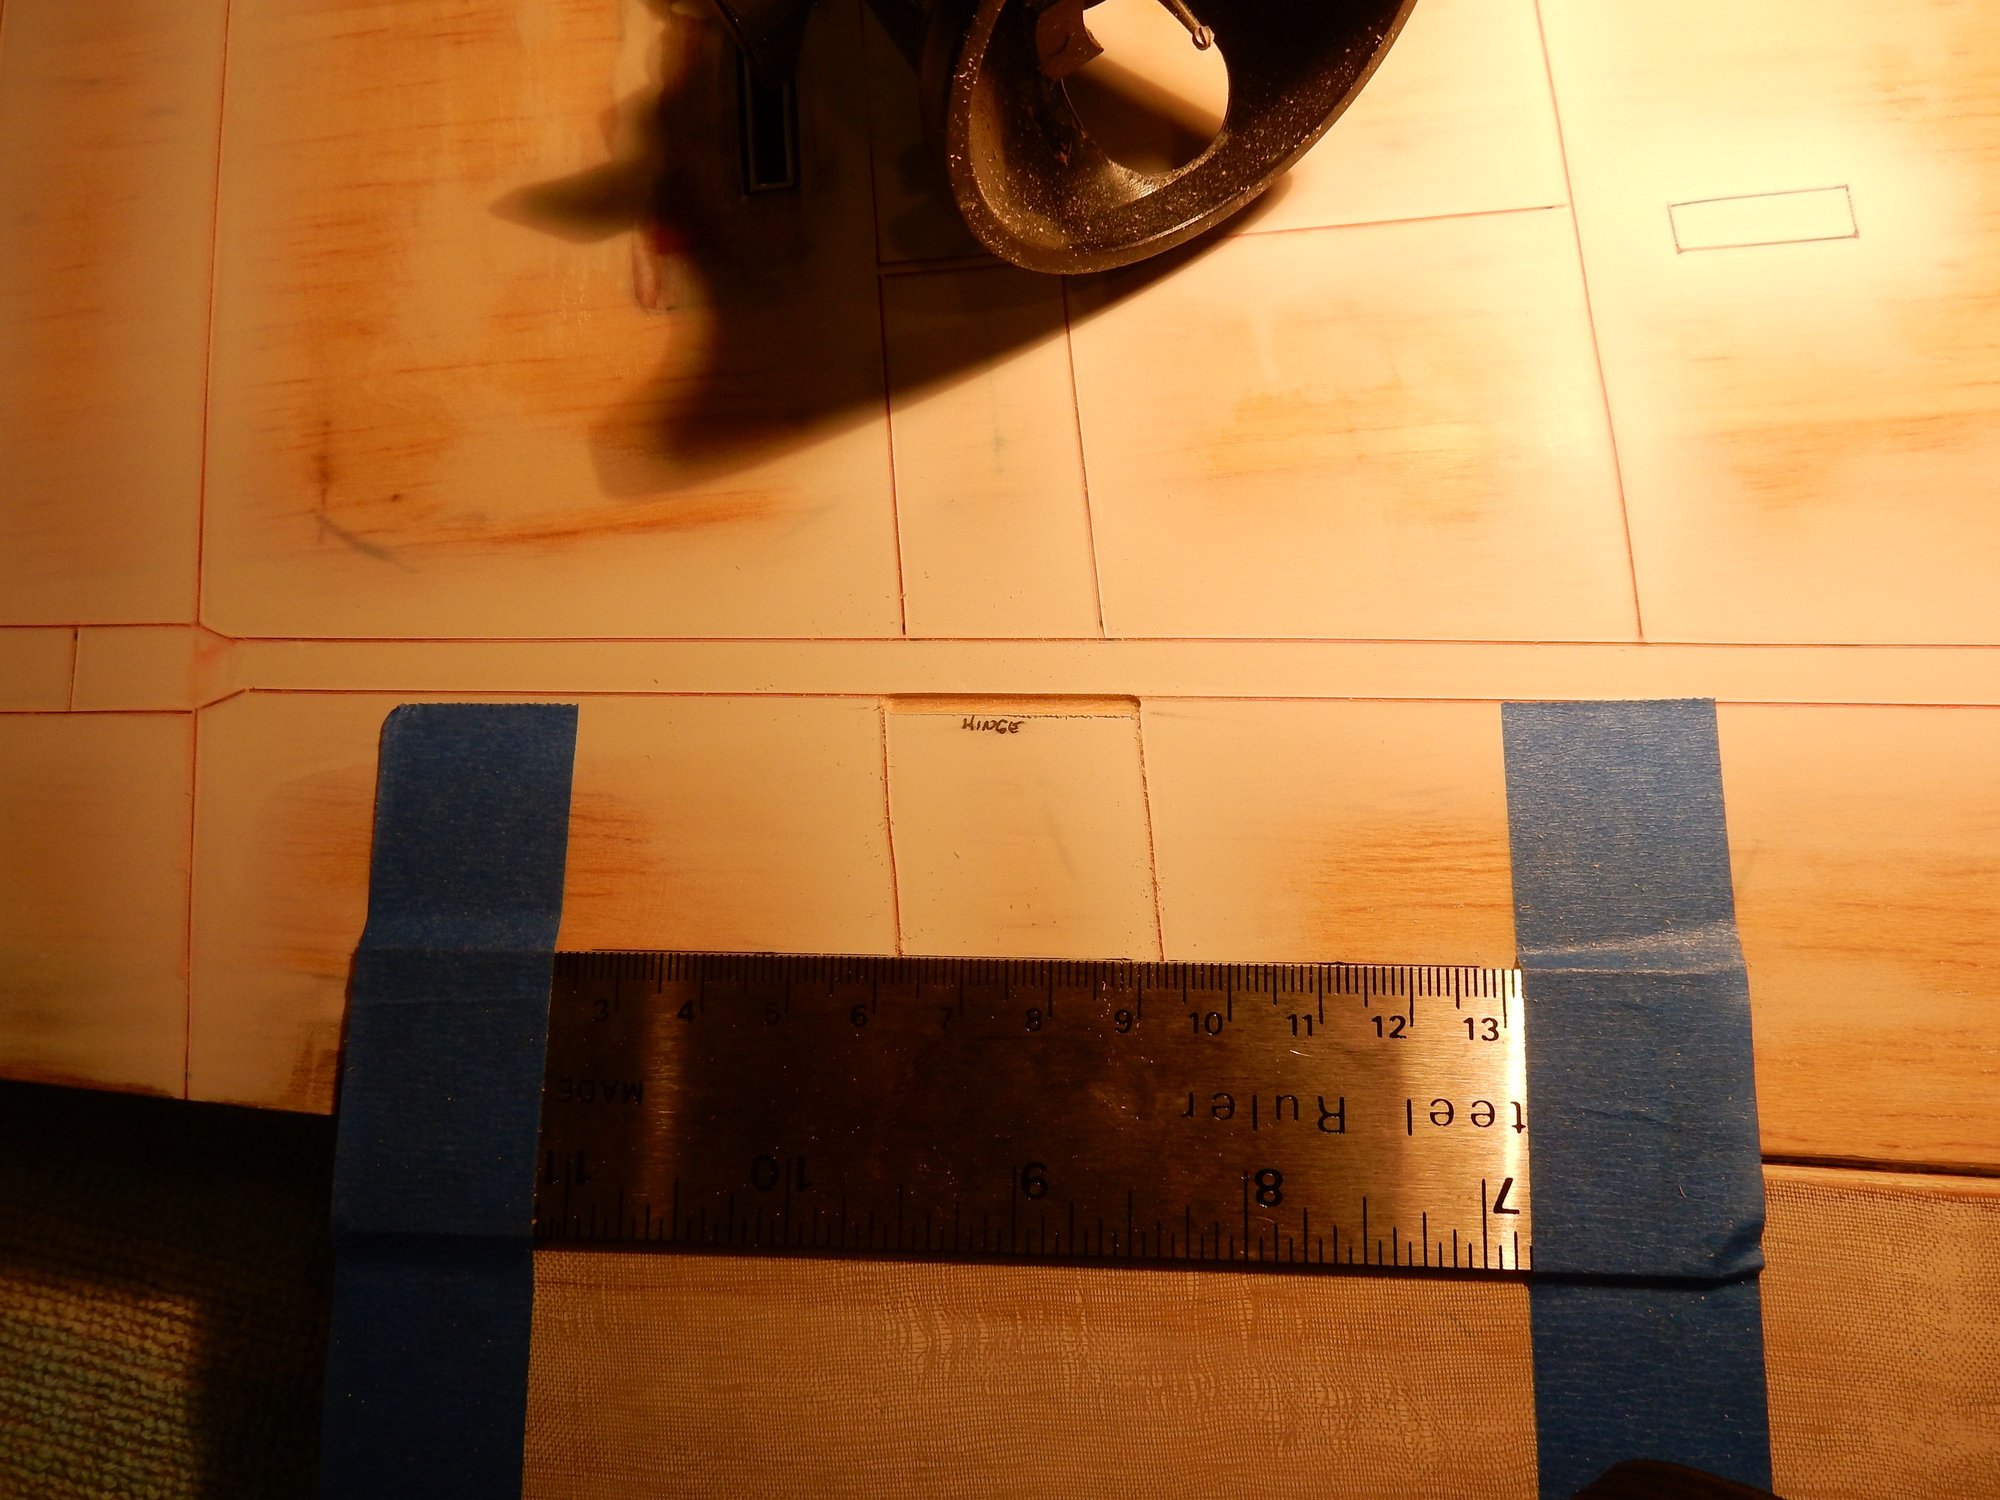
With"fence" ruler guide in place, ammo door piano hinge slot on underside of wing ready to router in a half-round channel to receive hinge.
Channel finished, ready for hinge.

Hinge cemented in place w/ half diameter proud of wing surface.
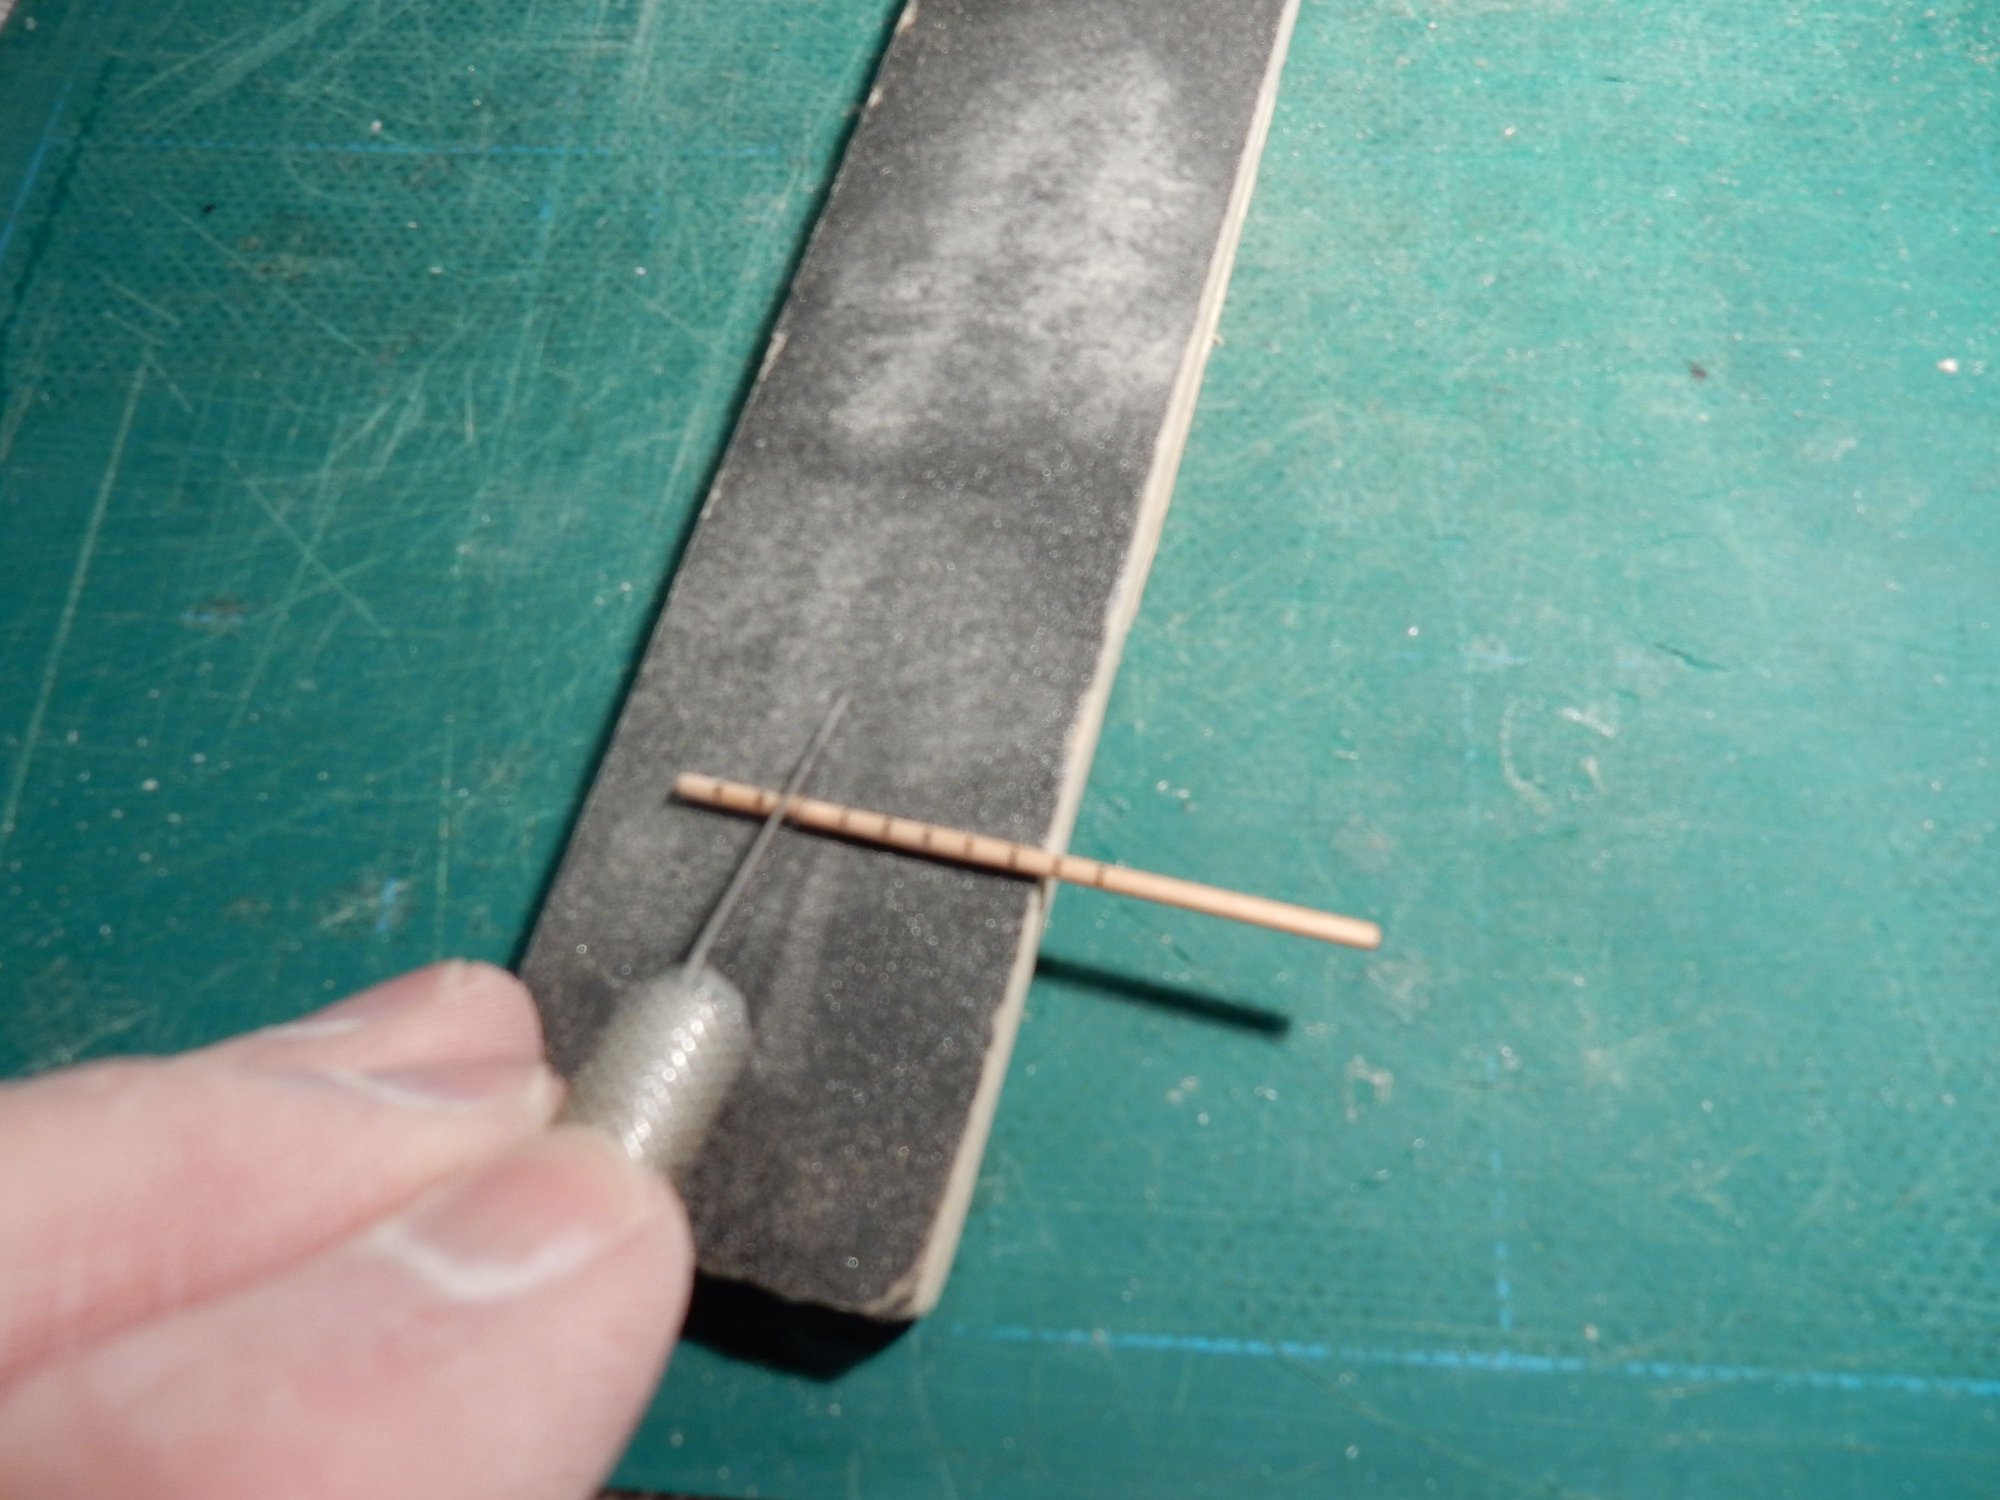
A 1/8" bamboo skewer, sanded down to 1.4mm dia. gets partial grooves cut into by rolling it under an X-Acto blade at 3mm intervals. Surface of dowel pre-treated w/ C/A.
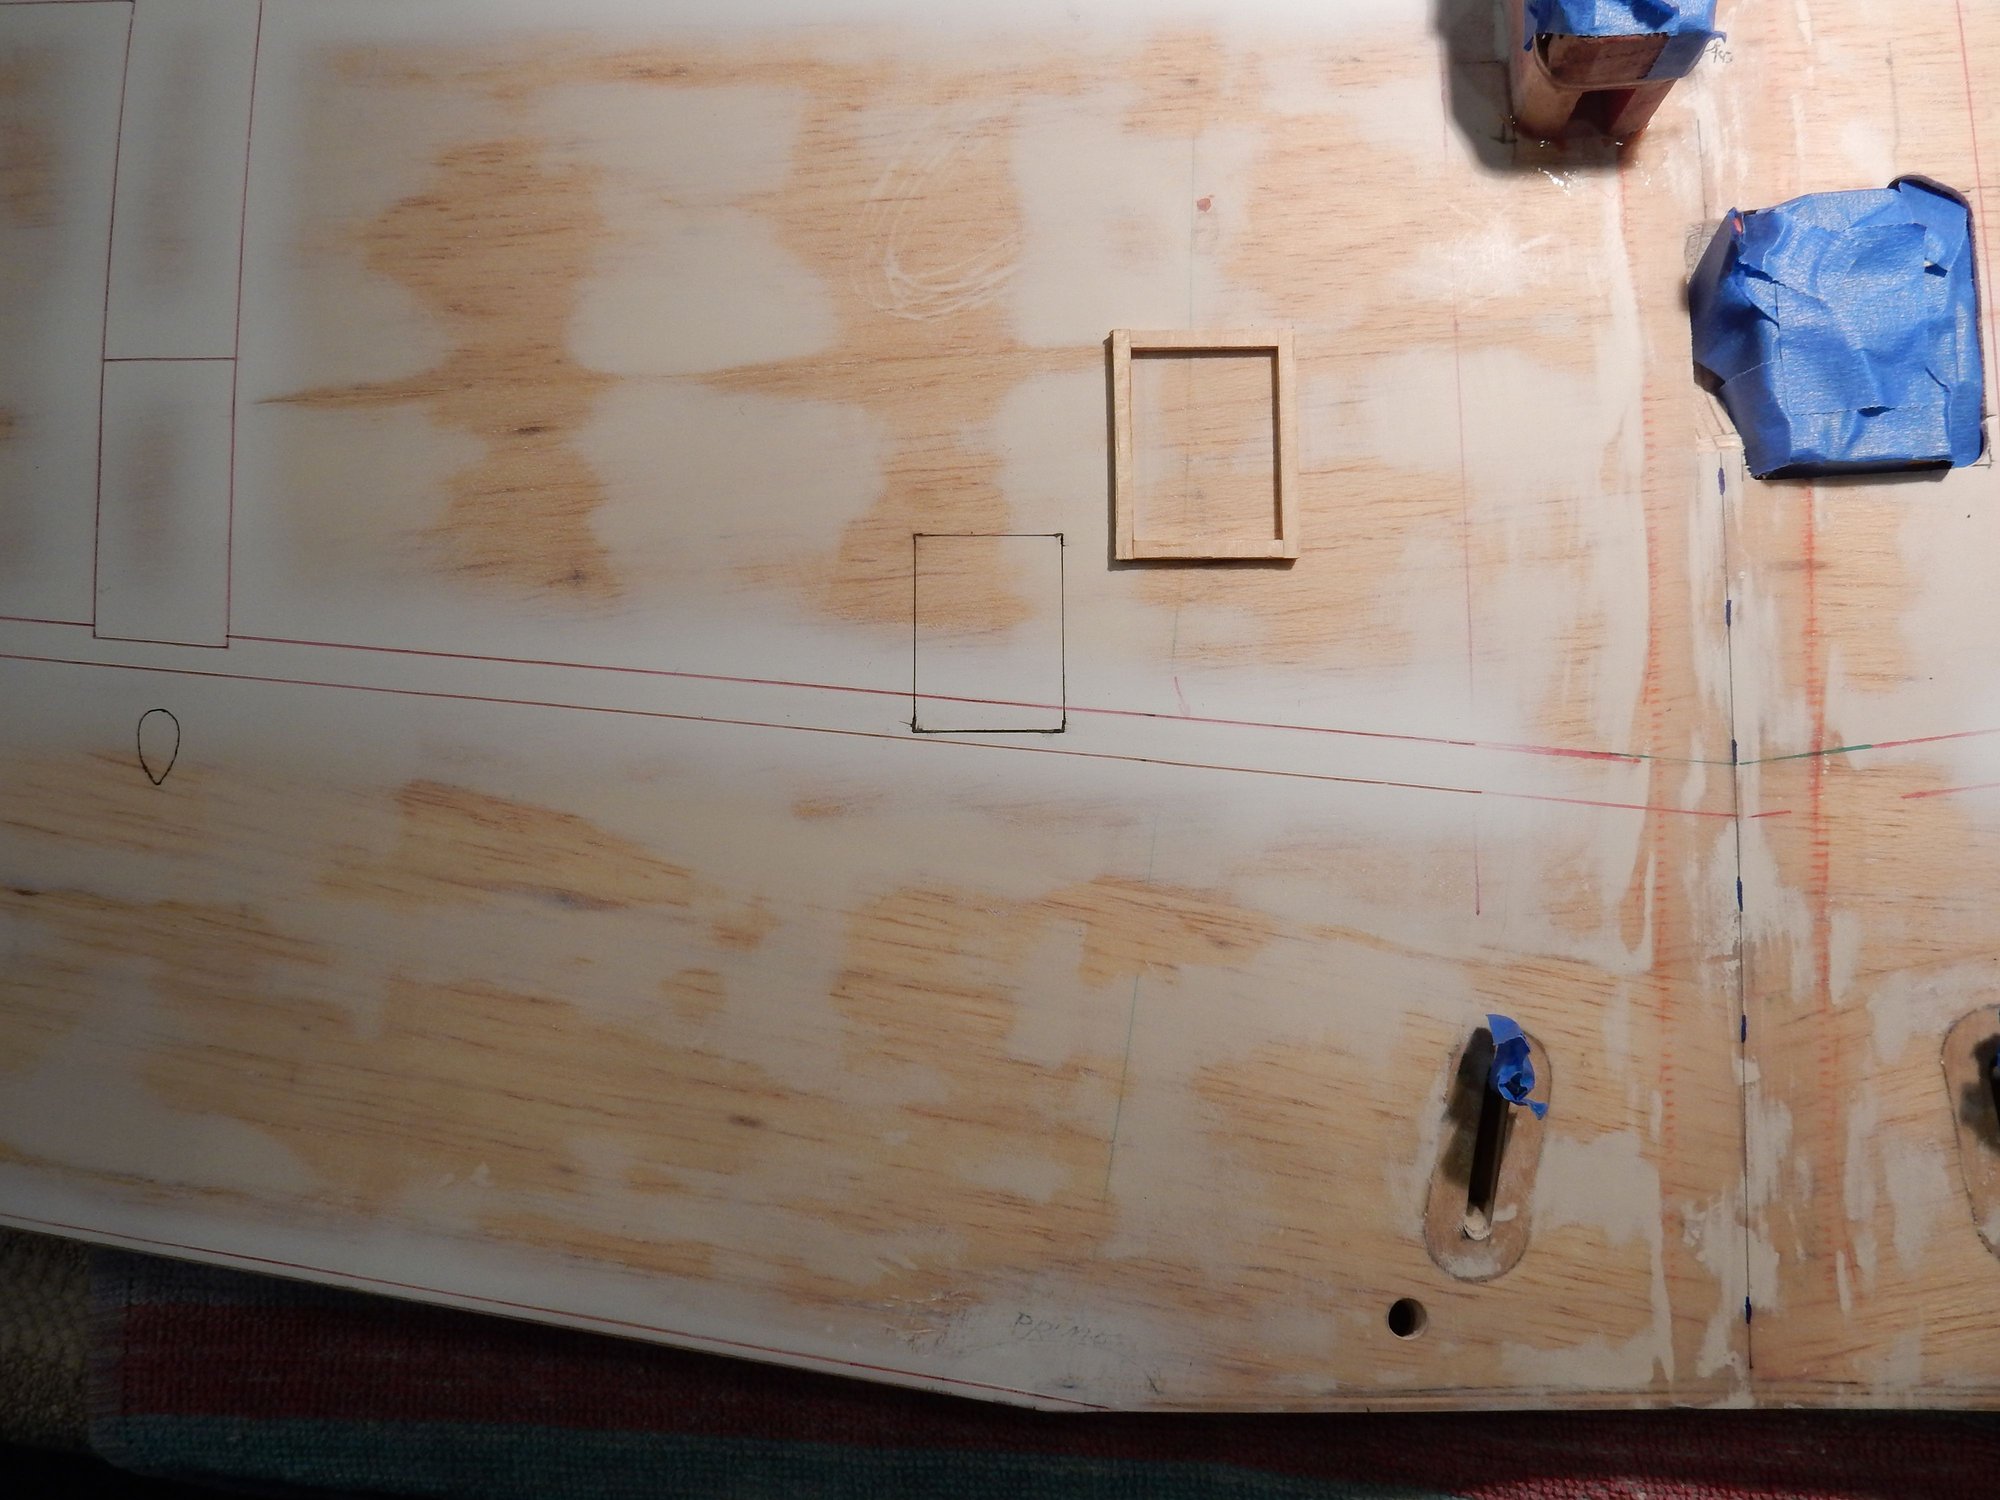
Wing-step box laying next to its intended position on port wing.

Box frame in place w/ 2-sided tape along perimeter. Resin & Micro-Ballon slurry troweled inside.

Sandpaper about to be placed face down on wet mix and covered w/ glass plate to even it out.
01-01-2020, 04:26 PM
#264
Thanks Joe! The encouragement is well appreciated. The progress this winter is very intense, what with my "real" work at a standstill. Serious time is being implemented in the "HANGAR" these days and at this rate, after working on this project since 2012, I'm looking forward to wrapping things up by Spring. More pics and text are in the works. Stay posted and please feel free to forward the website to Ned, Gary H. and whoever else might be interested. If all goes according to plan, the wings will get painted around this coming weekend. Then, on to the fuselage "cosmetics". G.
01-13-2020, 04:33 PM
#265
More Rufe

Clear plastic sheet getting heated under a heat gun until soft, ready to pull over form to make clear formation lights.

Plastic pulled over butt end of appropriately sized drill bit, ground to a teardrop shape to make bulb.
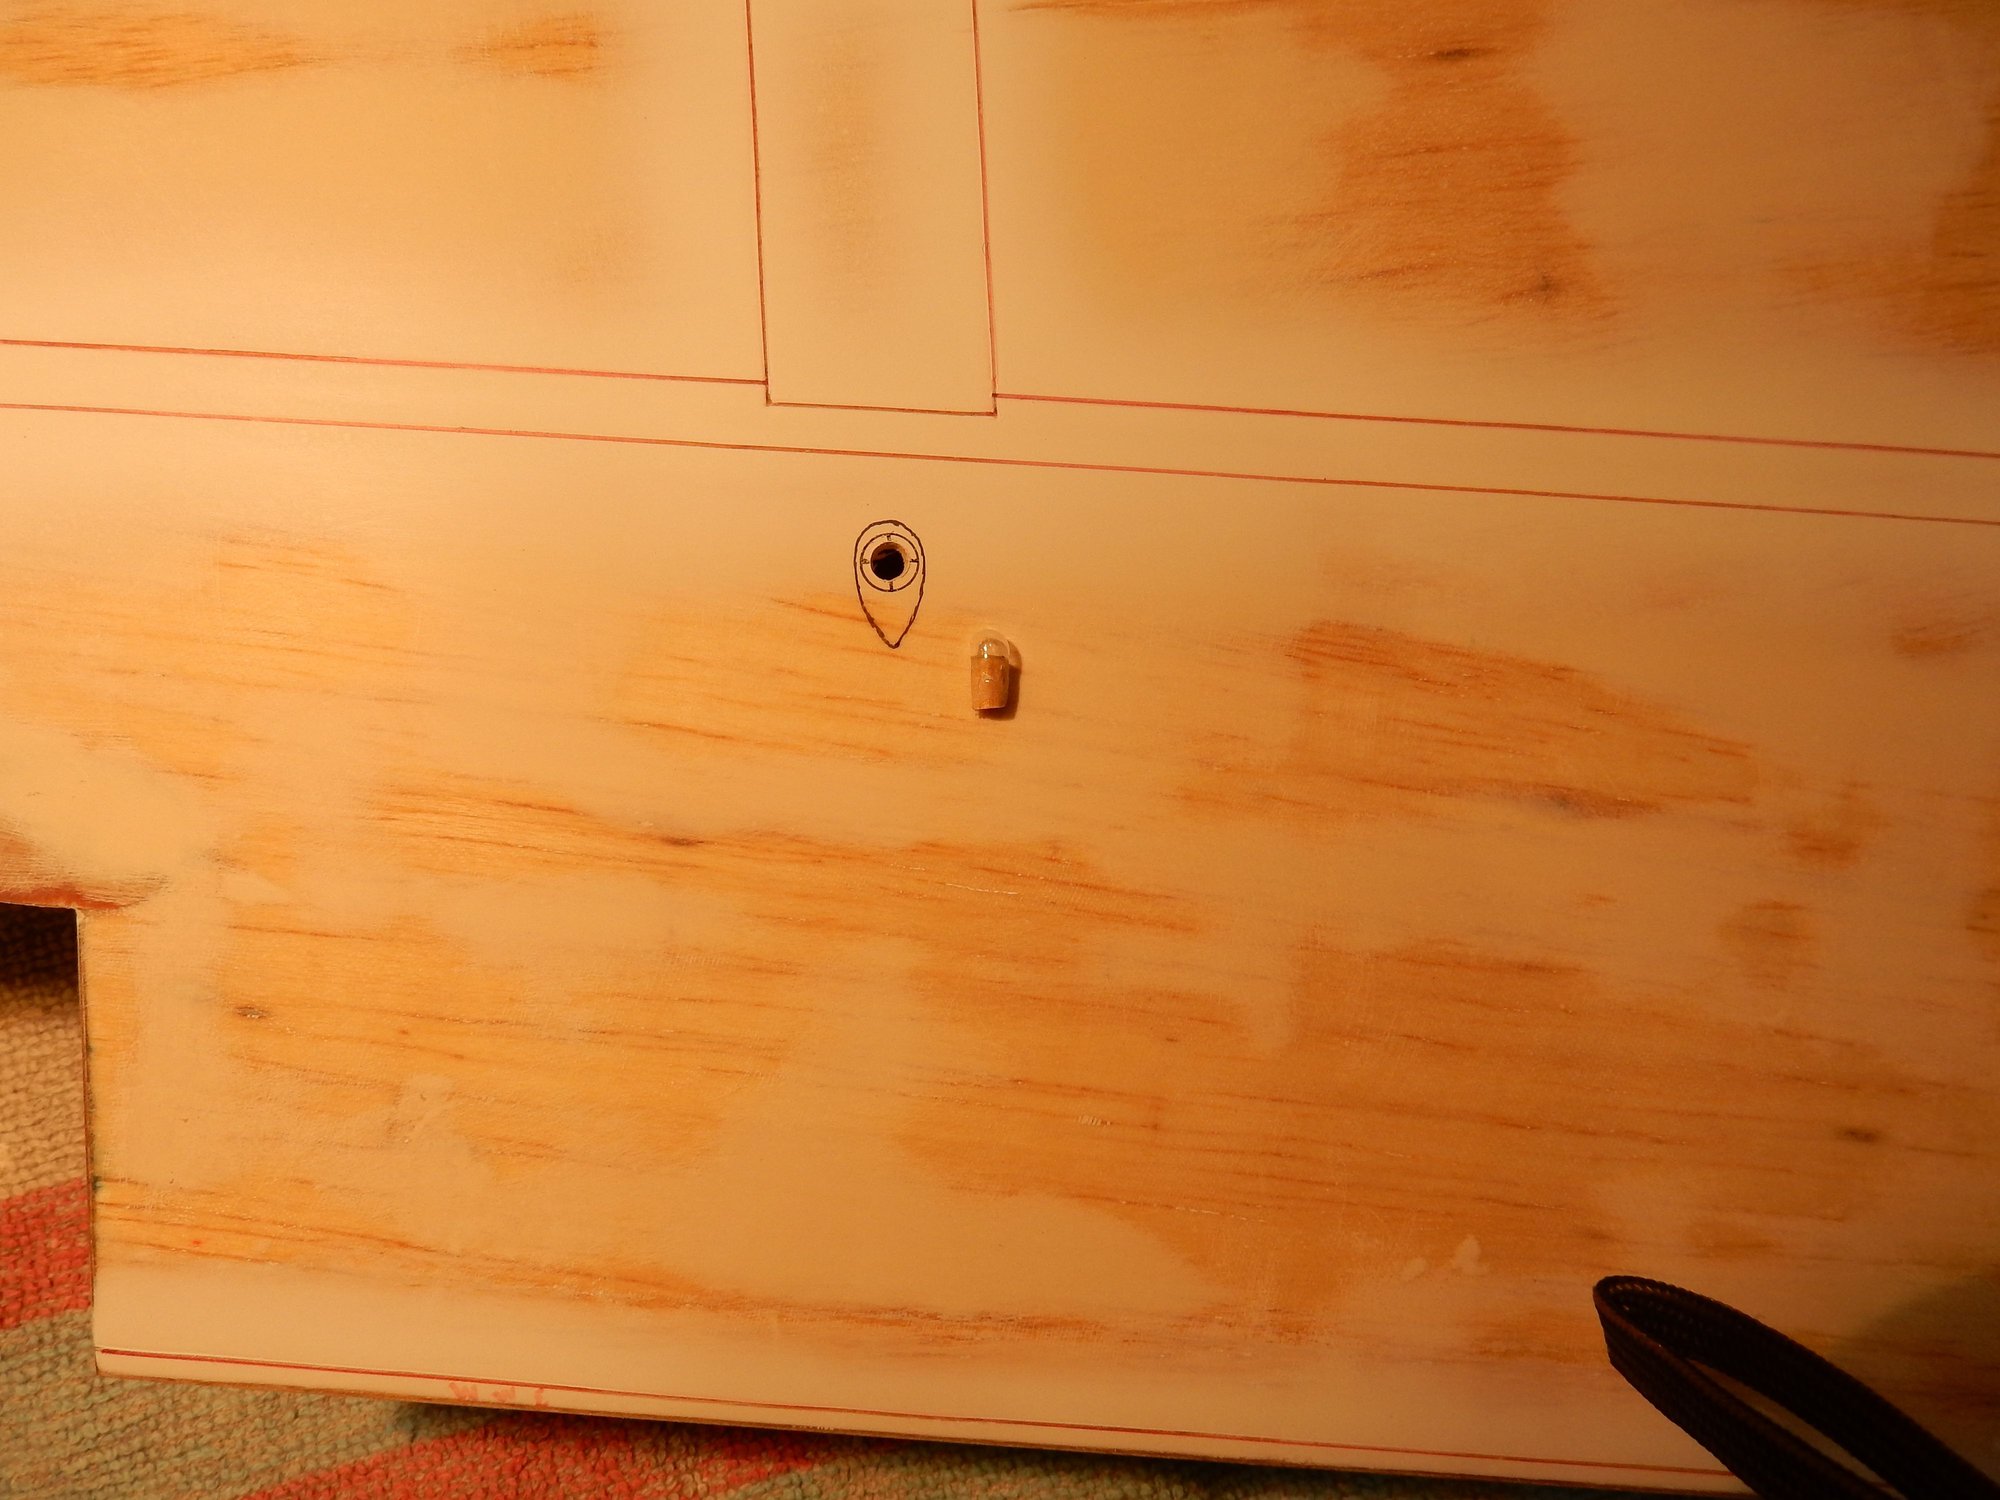
Inboard location of formation light, drilled and ready to cement bulb & dowel assembly into place.
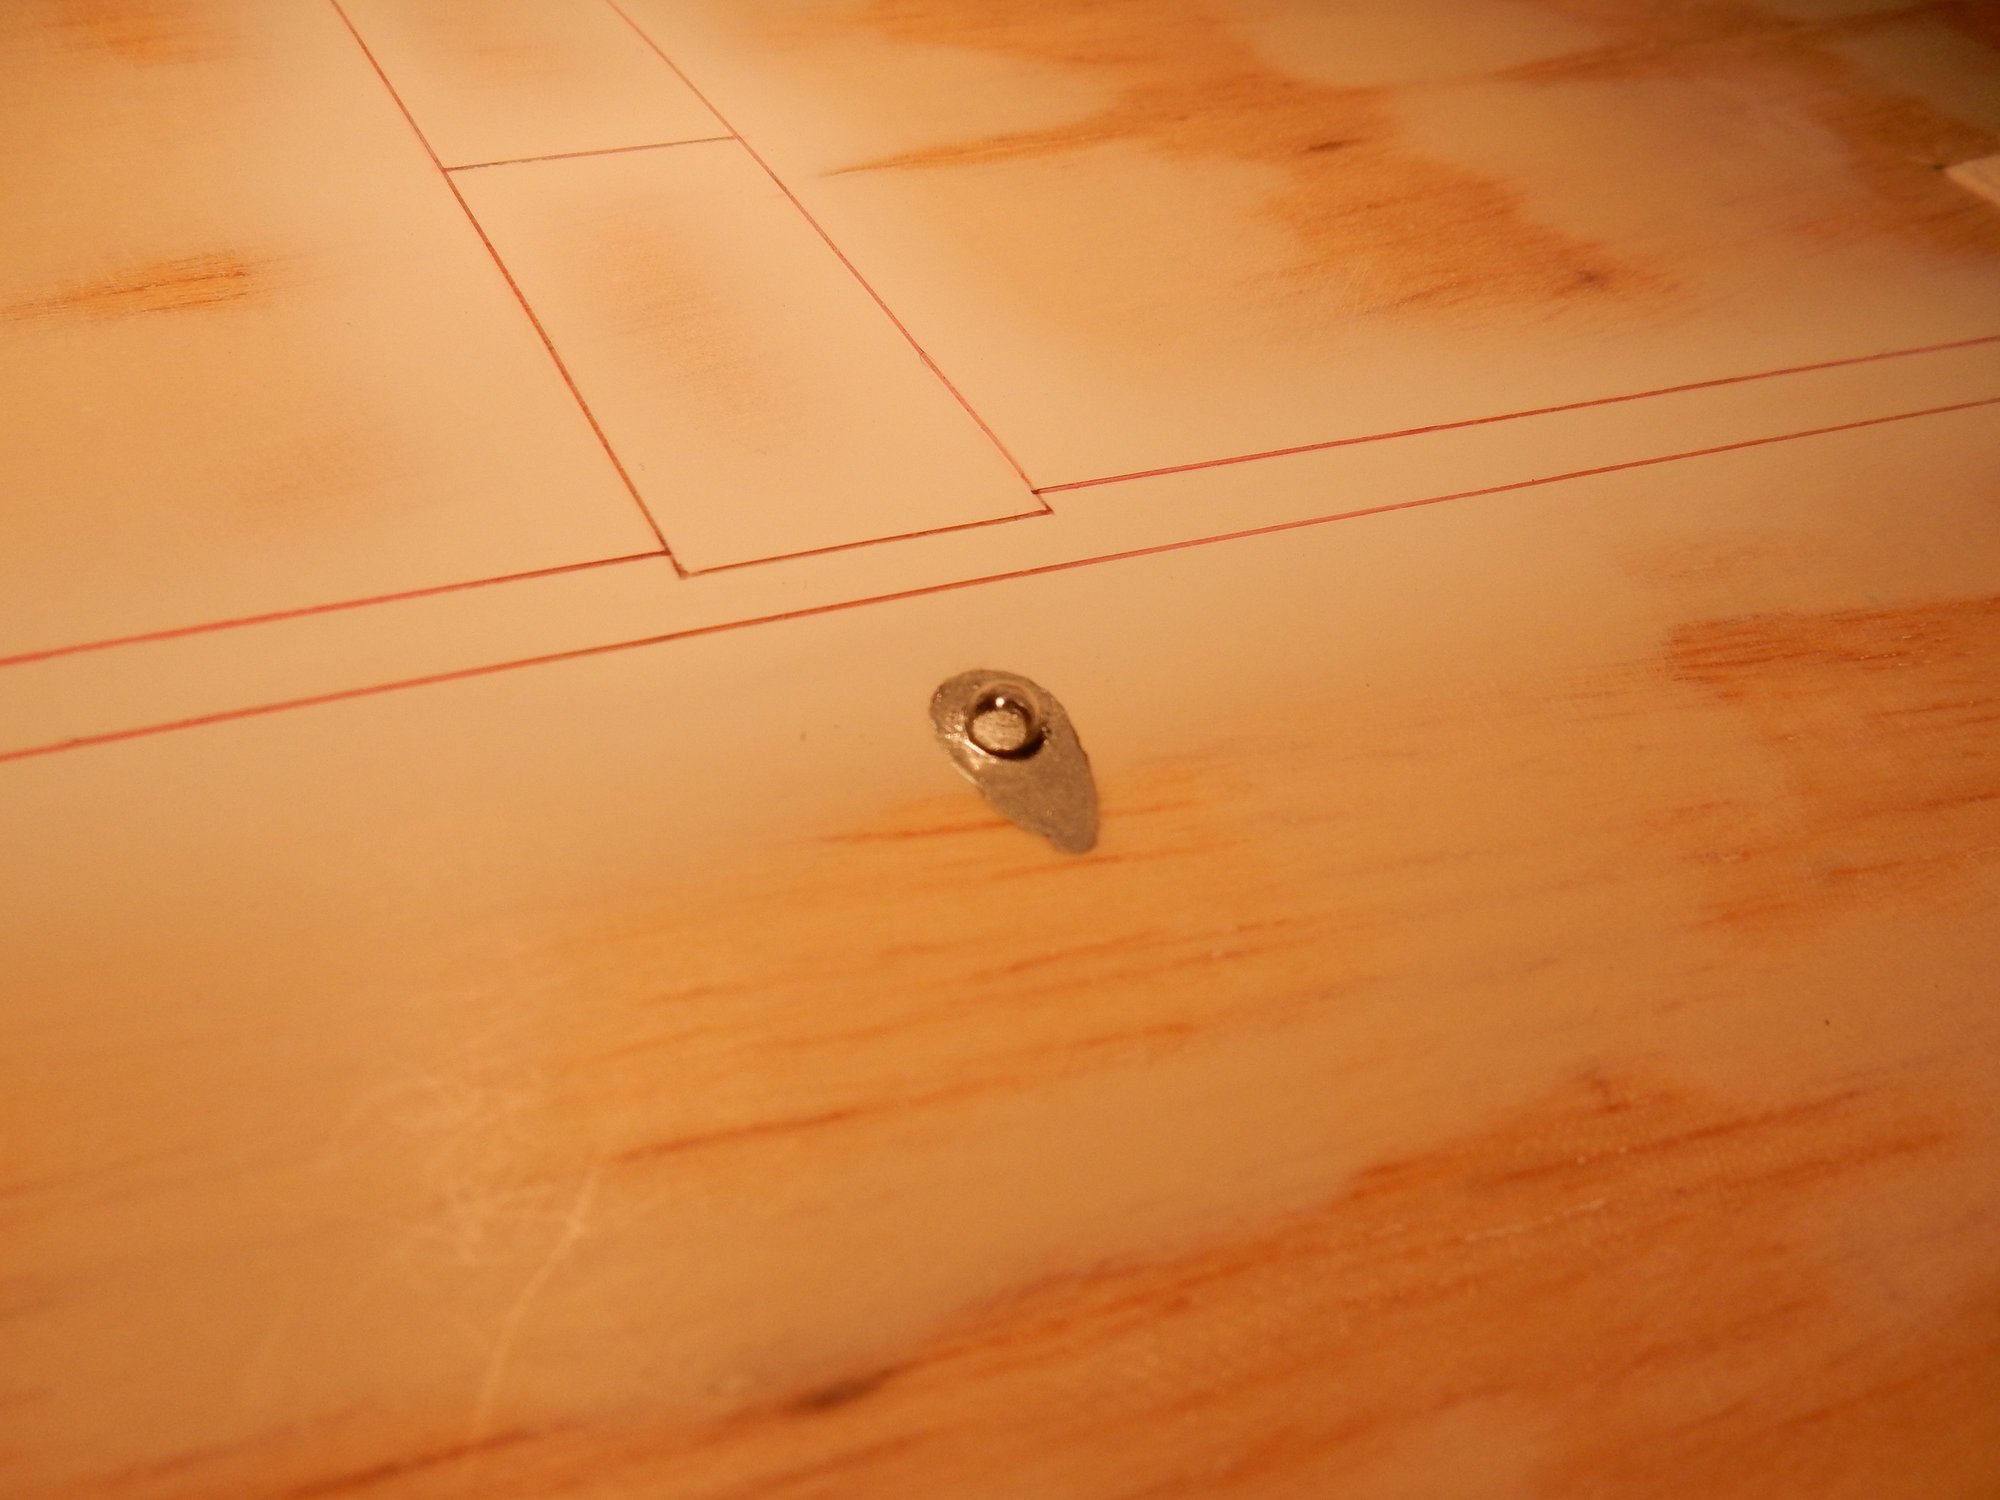
Bulb cemented into place. Top of dowel painted silver before unit cemented into place. Surrounding area painted silver to mimic aluminum wing skin under blister.
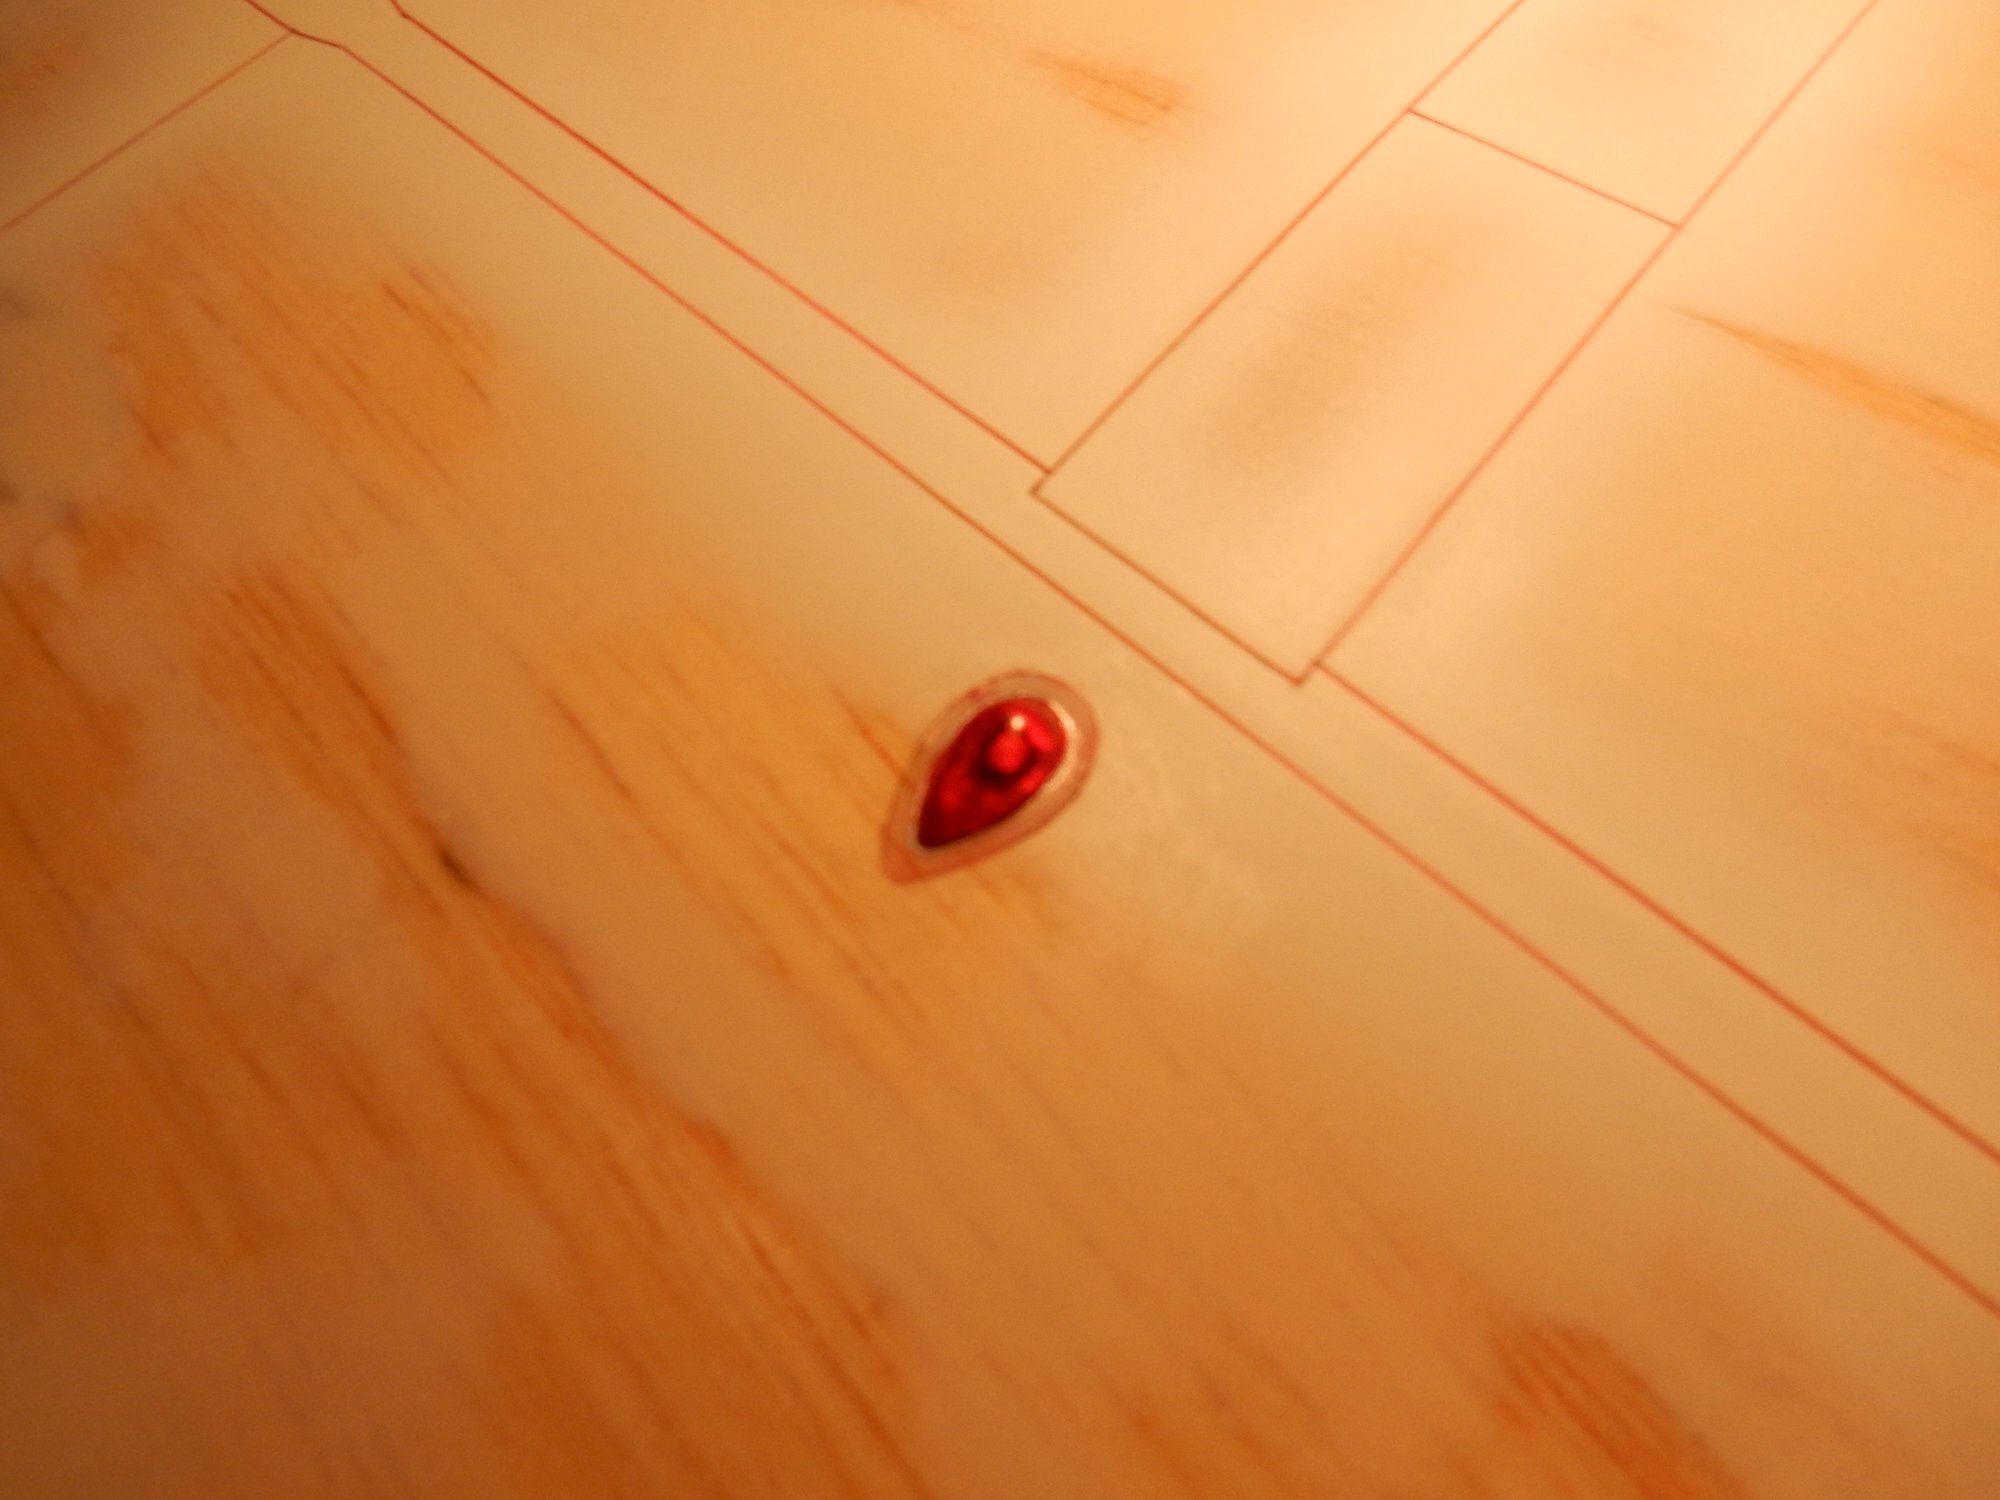
Unit in place. Inside of clear blister airbrushed w/ transparent acrylic red, then coated w/ epoxy to make it appear clear instead of \"frosted".
pics
Clear plastic sheet getting heated under a heat gun until soft, ready to pull over form to make clear formation lights.
Plastic pulled over butt end of appropriately sized drill bit, ground to a teardrop shape to make bulb.
Inboard location of formation light, drilled and ready to cement bulb & dowel assembly into place.
Bulb cemented into place. Top of dowel painted silver before unit cemented into place. Surrounding area painted silver to mimic aluminum wing skin under blister.
Unit in place. Inside of clear blister airbrushed w/ transparent acrylic red, then coated w/ epoxy to make it appear clear instead of \"frosted".
pics
The following users liked this post:
Joe. (01-18-2020)


 01-26-2020, 03:59 PM
#271
Here's the missing text to go with the latest photos: Sorry this is post-pic posting, but I hope the issue will be resolved by the next posting.
Photo 1: An actual sized card stock roundel was used for positioning reference. ( Note the hole in the middle to mark the wing w/ soft lead pencil as a positioning aid.
2: Locking compass w/ blade to cut a perfect circle in the center of a 9" X 9" square of Frisket paper.
3: With the center "peep hole" cut out and cut circle taped to the surrounding mask to re-join everything, everything gets pressed into place once the pencil dot on the wing is located. Though the paper backing was pulled away from the outside circle mask, the backing on the circle itself was left on to facilitate the circle's removal.
4: Ready to airbrush, now that the perimeter is burnished down, especially around the panel lines to prevent over or under spray.
5: Finished starboard wing bottom in the sun, showing panel lines, cannon breach blister, cannon shell ejection chute & hinges on ammo and cannon servicing doors.
6: Port top of wing w/ wing-walk pad, formation light blisters. ( Note lightening hole detail on inside rib of wingtip.)
7: Formation light blisters displaying transparency w/ clear bulb beneath.
8: Port aileron showing end detail, rib-taping & trim tab.( Rib-taping was simulated using primer as the ailerons are solid balsa. Fabric "sag" was sanded in between rib locations for a more realistic open bay effect. )
01-27-2020, 06:07 AM
#273
Thanks! I'm hell-bent for leather in getting this "saga" finished in this, my 7th winter building season. After "sea trials" and flight evaluation, assuming all goes well, I'm hoping for some coverage in the trade magazines and competing in local scale contests where "small" planes usually don't stand a chance in the " go big or go home" arena. G.D.
The following users liked this post:
scale only 4 me (01-27-2020)
 01-27-2020, 01:02 PM
#275

My Feedback: (60)
Join Date: Dec 2001
Location: Litchfield Park,
AZ
Posts: 7,677
Likes: 0
Received 25 Likes
on
23 Posts
[QUOTE=southpaw50;12579260 After "sea trials" and flight evaluation, assuming all goes well, I'm hoping for some coverage in the trade magazines and competing in local scale contests where "small" planes usually don't stand a chance in the " go big or go home" arena. [/QUOTE]
Glad to hear I am not the only one who enjoys the challenge of competing against the "big guns" with a smaller model. I was doing pretty good with my 1/8th scale Hellcat until I started having some health issues. Have not been able to do any flying for a couple of years now but I hope to get back to it very soon. Good luck with your Rufe!
Glad to hear I am not the only one who enjoys the challenge of competing against the "big guns" with a smaller model. I was doing pretty good with my 1/8th scale Hellcat until I started having some health issues. Have not been able to do any flying for a couple of years now but I hope to get back to it very soon. Good luck with your Rufe!