


Royal Zero Kit Build into Rufe

 05-27-2020, 03:51 PM
#302


Mag. compass housing made from various thicknesses of sheet styrene. Knobs made from toothpicks. Shaped hardwood form in vise to smash-mold bubble for dial containment.

Clear bubble made and test-fitted in place w/ excess ready to be trimmed away.

Completed outer module glues in place. Degree markings around base of bubble made from an oversized instrument face perimeter.

Completed module with inner "floating" dial bedded in resin to give it a liquid setting, which also keeps it firmly in place.

Lower quadrant added. Left to Right:Primer knob,cannon shell counter, magneto switch, ignition booster toggle switch and oil cooler shutter control.
The following users liked this post:
Joe. (05-27-2020)
06-15-2020, 05:40 PM
#304

Type 98 Reflector Gunsight: Main body of balsa, clad w/ sheet styrene. Brass tubing used for reflector housing. Adjustment knob on face made from turning stacked styrene sandwich glued to a dowel and turned on a hand drill. Crash pad in center and gunsight sighting post made from large pin inserted in dowel and turned in hand drill.

Ring sight brass tubings held in place on plywood, steel wire pre-soldered to center, then outer ring soldered in place.

Finished sighting ring.

Right side of finished gunsight.

Left side, weathered edges to highlight detailing.
The following users liked this post:
Joe. (06-15-2020)
07-02-2020, 02:50 PM
#306

Instrument panel featuring gun breeches and gunsight.

Cockpit as seen from the front. ( Note "pulley" mechanism behind seat back used to raise pilot's seat, made from dowels and plastic strip.)

Control stick made from dowel and ply cap before being sanded to final shape. On cockpit floor, fuel tubing anchored in place to allow stick to be flexible enough to be cemented into pilot's hand.

Radio mast "sandwich". Carbon fiber strip in center, flanked by 1/64th ply outer layers. ( Note outer ply blanks w/ black Magic Marker coloring.)

Ply radio mast sandwich, epoxied and clamped together.

Finished blank, ready to be sanded down to side view outline.

Mast airfoil sanded.

The bottom part of the mast base that is inside the canopy got relief sanded. 4 pieces of 1/32nd ply carefully glue and sanded around it as a form-fitting scabbard. Mast fitted with a screw and base fitted with a shaped magnet.

Canopy was dry fitted ( taped down ) and mast assembly alligned w/ base epoxied in place and left to dry. With canopy removed in this shot, mast base in place, ready for primer.
The following users liked this post:
Joe. (07-02-2020)
07-14-2020, 04:22 PM
#307

Hatch outline drawn up for internal on-off switch and charging receptacle.

Hatch outline drawn up on card stock and transferred to designated area on starboard side.

Outline enhanced w/ razor point pen and Saran Wrap stretched over area and taped down.

Eight layers of 3/4 and 1oz. fiberglass cloth resined in place.

Finished hatch cover trimmed and sanded to final outline being fitted to cut-out in fuselage.
The following users liked this post:
Joe. (07-14-2020)
08-08-2020, 06:15 AM
#308

Fiberglass access hatch for hidden on-off switch and charging jack. Hatch sides reinforced with 3/32nd ply. Hinge consists of steel rod and Ny-Rod.

Switch & chg. jack temp. installed on backplate.

Note metal plate installed on inside top of hatch door and ground down magnet above switch plate.

Door closed & primed. Fingernail cut-out at top to allow door opening. Smooth skin w/ no bumps or latches to protrude into airstream.

FINALLY, fuselage painted overall JNAF grey, ready to be pre-treated w/ 0000 steel wool before fuse markings are painted on.
The following users liked this post:
Joe. (08-08-2020)
08-13-2020, 11:04 AM
#309

Meet JNAF Flight Lt.(jg) Keizo Yamazaki as he looks out from behind his type 98 gunsight.

Dry assembled for the first time for "armchair flying" w/ canopy taped in place, ready for radio installation and engine run-up. Serious weathering to follow to highlight panel lines.

Left side view from rear, flaps deployed.

Squadron bands & tail markings of Yamazaki's plane. ( Note 3 hatchet marks above the 118 to denote 3 kills.)

Cannon ports & cockpit air intake on wing leading edge. Starboard faux exhaust stack at bottom of cowl near oil cooler intake at top of main pontoon strut. Faux radial cylinders can be seen behind flying spinner & prop.
The following users liked this post:
Joe. (08-13-2020)
08-13-2020, 02:32 PM
#312
I have FMS Zero (1400mm) which I converted into Rufe.... Handling my model during take off is tricky, In fact it works only in still water. Yours is bigger, should perform much better.
01-29-2021, 08:06 AM
#315
MAX, I'm definitely waiting for early summer for "sea trials" and flight tests. Canopy is finally on and I'm working on displaying it in the open position/closed for flying.
Panel lines have been graphite enhanced, now 3 more stages of weathering to follow. After that, getting the radio gear in and I'm good to go. G.
Panel lines have been graphite enhanced, now 3 more stages of weathering to follow. After that, getting the radio gear in and I'm good to go. G.
The following users liked this post:
I-fly-any-and-all (02-12-2021)
07-30-2021, 07:55 AM
#318

Final Touch: Static Display Propeller. Having already turned a blue foam scale spinner on a hand drill several yrs. ago, I covered it with 2 layers of panty hose knotted at the base, resined, primed & sanded.

Once the blade length was determined & drawn, the outline was transferred in triplicate to 1/4" ply.

The ply stack, "tack" glued together with 2-sided tape and disc sanded as one unit.

Each blade was laminated at the base on both sides w/ 1/8th" ply. Here, one of the blades is shown on end with a circular template used to make the correct root profile to insert into the hub.

Sanding begins on both sides. The ply laminations help to show uniformity between blades.

Among the blanks is the spinner & prop from a Tamiya 1/48th scale RUFE to help show the airfoil twist of each blade.

Blades mounted to scrap pine, ready for the double application of resin. ( The far blade on the right was a trial blank that didn't have the typical blade twist and was rejected.)

Blades mounted in a pine hub, positioned at 120 degrees and then jigged uniformly to the same pitch.

Ready for some airbrushed KlassKote silver.

Silver treatment completed.

Prop tips painted.

Backside of blades painted in anti-glare brown, typical of Japanese aircraft. Some of the blue foam shell can still be seen between the pine hub and outer spinner shell. Blades were later weathered and will be shown in future posts, featuring glamor shots at the pond. Sea trials begin next week!
07-30-2021, 10:14 AM
#322
Be that as it may, I've got too many planes to build and never enough time. Truth be told, I've never considered anything in the way of molds or replication of any kind as there just isn't any need and it is not as though I have to turn any aspect of my hobby endeavors into money making ventures. My scrimshaw already serves that purpose.
I was seriously considering some kind of mold-making for the prop blades at first but when I reviewed the process from an article I saved years ago from M.A.N., it was too involved and I knew I could cut and sand 3 individual blades by hand much faster and end the project. I really enjoy sanding and find it somewhat therapeutic.
I was seriously considering some kind of mold-making for the prop blades at first but when I reviewed the process from an article I saved years ago from M.A.N., it was too involved and I knew I could cut and sand 3 individual blades by hand much faster and end the project. I really enjoy sanding and find it somewhat therapeutic.

 08-17-2021, 08:11 AM
#324

As promised, a few "glamour" shots by the water's edge before the maiden flight.
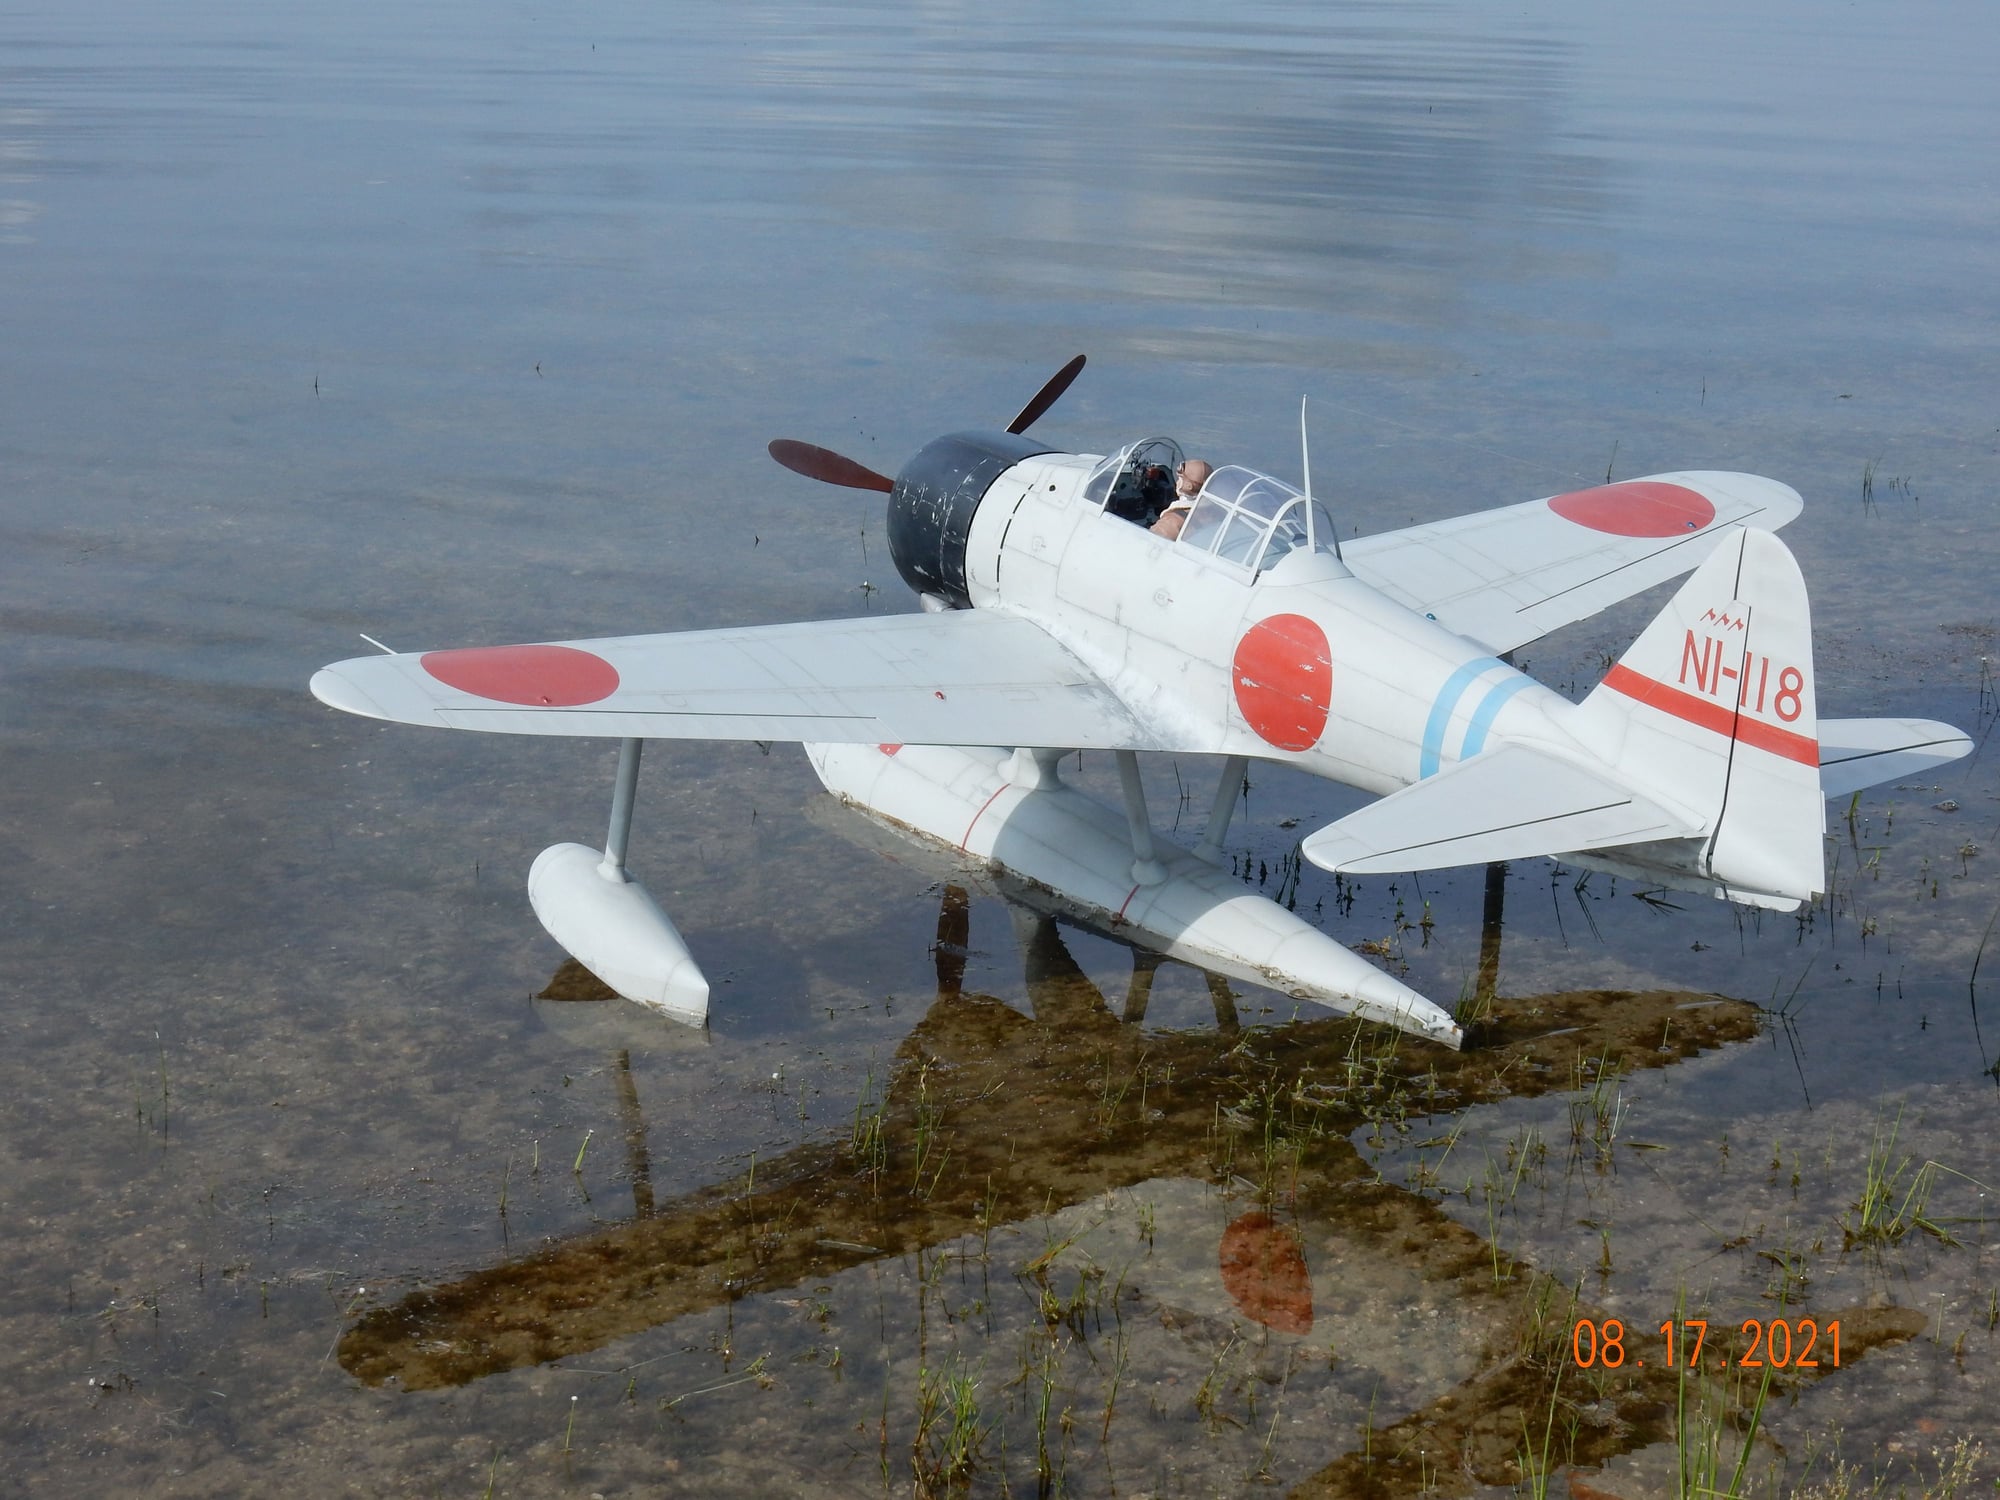
If not for the muffler and pond scum on the pontoons, it might pass for a real plane.

White beach sand and palm trees in the background would really help with the illusion.

Some instrument panel detail can be seen here.

OK, it floats!

Again, some white sand to mimic coral (without the pond vegetation) definitely would have helped.

Legs and muffler spoil this shot somewhat but better to be quiet at the pond and have supporters witness the maiden flight.

Ready to go! Antenna and pitot tube was removed along with the scale prop. Flying prop and spinner were then mounted and off she went. Video and flight report to follow. Success!!