


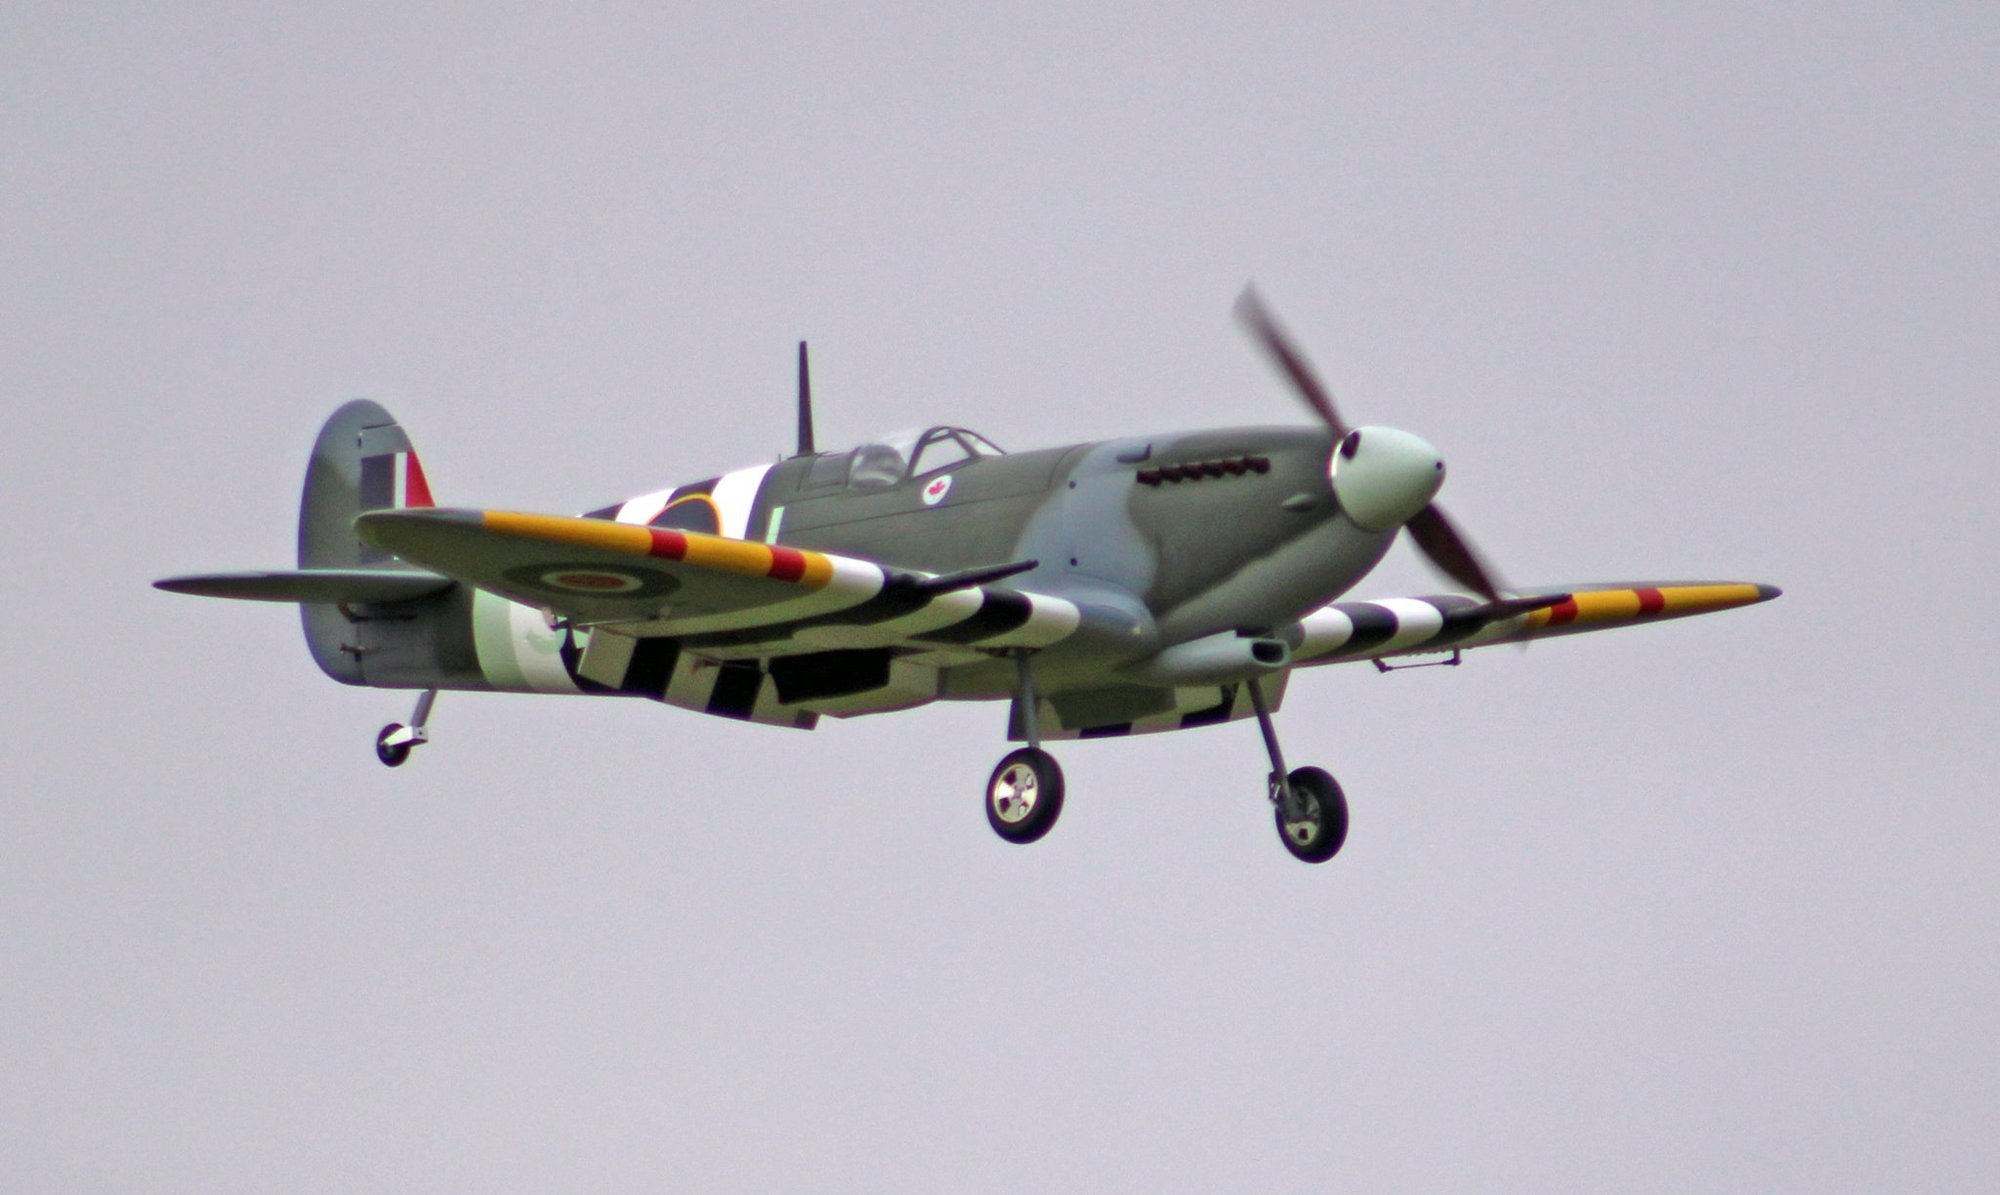
Top RC Models MkIV full Composite Spitfire-a game changer

 05-09-2018, 04:01 PM
#652

Two more flights on the Spitfire today. About 90 degrees F. No indications of overheating, so I guess my additional cooling mods work. I twicked the elevators some, a little less throw and slightly more expo. Good takeoffs, maneuvers and landings. A quartering cross-wind. Later the cross wind increased and more cross, so I quit flying. A club member videoed the last flight. He will send me the video eventually and I will try to post here. The DA 32cc is adequate, but if I were putting together the plane, I would use a larger engine and less lead weight. Maybe 45 - 55cc. I don't think there is room for anything larger.
05-14-2018, 08:47 AM
#653
My Feedback: (71)
spitfire cowl is not open like some other warbirds to shove a big motor in there without hacking up the cowl.
That's why I prefer to fly warbirds with radial cowl to allow big motors shoved in there and fly with authority.
Zero is the best air frame for allowing big motor and good flying characteristics.
Others are P40 with enlarged mouth below to hide the cylinder head.
I love the G62 high reving motor, well balanced, needed weight. I found it's great match for the Topflite P47 or cmp zero.
Make sure you're running the APC T-6 racing prop for maximum performance. Don't bother with wood props.
05-23-2018, 05:47 PM
#654
We had light winds, more or less down the runway. Had three more flights on the Spitfire. Flying and running good. I usually try to take off and land on the grass parallel to the paved runway. I landed on the grass close to the edge and rolled onto the paved part, tail still in the air. Hard keeping her straight on the pavement with the small rudder and narrow gear. Other than that, no problems. I agree with above, a lot easier to cool an engine in a big radial cowling. Total of 12 flights on the Spitfire, just beginning to get comfortable with her. It seems it always takes me a while with a new plane.
05-24-2018, 11:38 AM
#655

So, I'm in. Mine arrived today, will be powering it with Hacker Q80 5L v1, 12S. Still working through the numbers on ecalc, but currently considering a 20x13 2 blade prop, which will produce 6500 W at 156A. Using 8000 mAh lipos provides almost 7 minutes flight time; if the AUW hits 22lbs, I'll still have a thrust - weight ratio of almost 2:1 
05-24-2018, 04:40 PM
#656
Sounds great Mike. With electric power you won't have to carve up the beautiful Spitfire cowl, at least not much. Mine has the Robart electric gear. Not cheap, but so far has worked good.
05-24-2018, 04:50 PM
#657
+1 on the cowl. It's such a great looking model, not having to cut it up was one of the main reasons for going electric. Glad to hear about the Robart retracts, that's what I am using too. Really like the wheels that came with them
05-24-2018, 06:56 PM
#658

My Feedback: (13)
Join Date: Dec 2001
Location: Corpus Christi,
TX
Posts: 254
Likes: 0
Received 0 Likes
on
0 Posts
So, I'm in. Mine arrived today, will be powering it with Hacker Q80 5L v1, 12S. Still working through the numbers on ecalc, but currently considering a 20x13 2 blade prop, which will produce 6500 W at 156A. Using 8000 mAh lipos provides almost 7 minutes flight time; if the AUW hits 22lbs, I'll still have a thrust - weight ratio of almost 2:1
05-25-2018, 10:38 AM
#660
I was lookng at the "Custom Slide in lipo tray" that I ordered with the plane...I see that it was designed to have the lipos fit side by side, but why not use them end to end, like they fit in the 700 size heli's? I realize that will nto get as much of the weight as far forward as possible, but it should still be in front of the CG, right?
07-05-2018, 12:42 PM
#662
So I'm getting much closer on this, should be maidening next weekend. I wound up mounting the wing servo's directly to the servo hatches. Going with the 12S 8000mAh will result in needing 7-8 oz of lead in the nose. Will be inserting them end to end, not side by side. Last bit of work is to attach the clear portion on the canopy to the rest of the hatch (canopy glue) and mount the antenna. Curious how others may have mounted theirs....just drill a hole thru the top of the fuse?
07-05-2018, 12:46 PM
#664
Join Date: Jul 2017
Location: Just East of Cleveland Ohio
Posts: 51
Likes: 0
Received 1 Like
on
1 Post
So I'm getting much closer on this, should be maidening next weekend. I wound up mounting the wing servo's directly to the servo hatches. Going with the 12S 8000mAh will result in needing 7-8 oz of lead in the nose. Will be inserting them end to end, not side by side. Last bit of work is to attach the clear portion on the canopy to the rest of the hatch (canopy glue) and mount the antenna. Curious how others may have mounted theirs....just drill a hole thru the top of the fuse?
07-12-2018, 07:07 AM
#666
Hoping for a maiden this weekend, although the weather's not looking great. Wound up drilling through the canopy hatch to mount the antenna. Not going to mount the gear doors, at least not yet...In cycling the retracts to note the change in the cg, one of the Robart actuators failed (maybe burned out, but it didn't smell like it) but Mike at Caimen sent a note to the guys at Robart who called me later the same day and have told me a new actuator is on its way, so if it arrives today/tomorrow then the chance for the maiden still holds. Very pleased with the customer service / responsiveness with both Mike and Robart.
07-23-2018, 06:26 AM
#667
Maidened on Saturday. CG'd at 130mm back from leading edge, with 2 6S 8000 mAh Lipos, AUW was 25 lbs. Needed a great deal of down elevator (approx 2 mm) and right aileron (again, approx 2mm). Seemed to fly nicely otherwise. Got a tad slow on landing and stalled it from about 6 inches above the runway. The resulting bounce ended up in a nose over, scratching the spinner and front of the wing tips, but otherwise no damage to the wings or fuse. 4 minute flight (mostly slow) left the lipos at 3.9 - 4.0 v per cell. With mixed throttle, should easily get 7 min flights. Robart retracts worked flawlessly. Looking forward to next weekend and another opportunity to get this airborn.
Last edited by MikePS; 07-23-2018 at 06:41 AM.
07-26-2018, 05:52 PM
#668
Congrats on the maiden. I use half flaps on landing because with full flaps, some times it slows too quick for me. Also carry just a little power all the way to touch down on the mains. Also take off and land on the grass next to the runway. The grass is more forgiving.
07-30-2018, 03:35 PM
#669
Join Date: Jul 2017
Location: Just East of Cleveland Ohio
Posts: 51
Likes: 0
Received 1 Like
on
1 Post
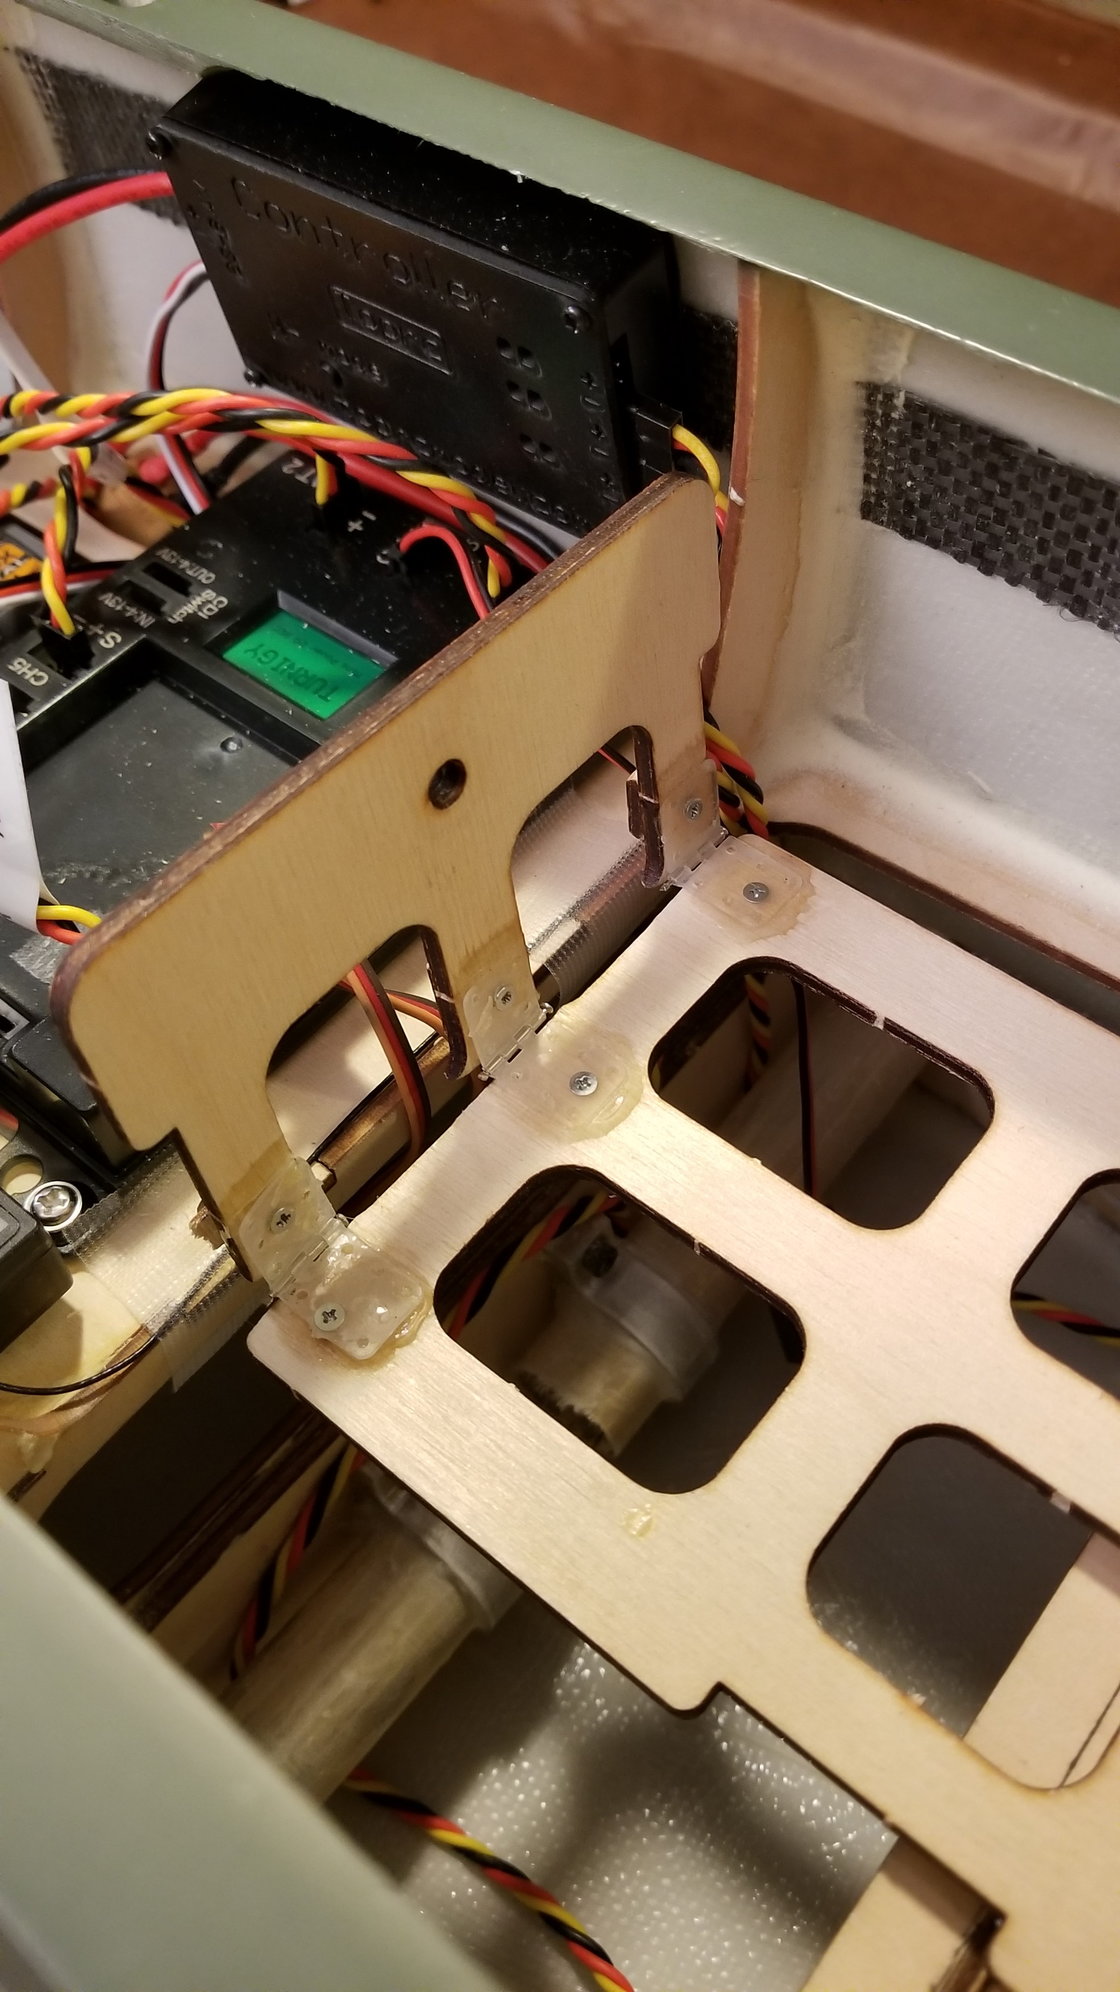
Most of the build has been completed for some time, but I thought I would share a couple tidbits which may help new builders.
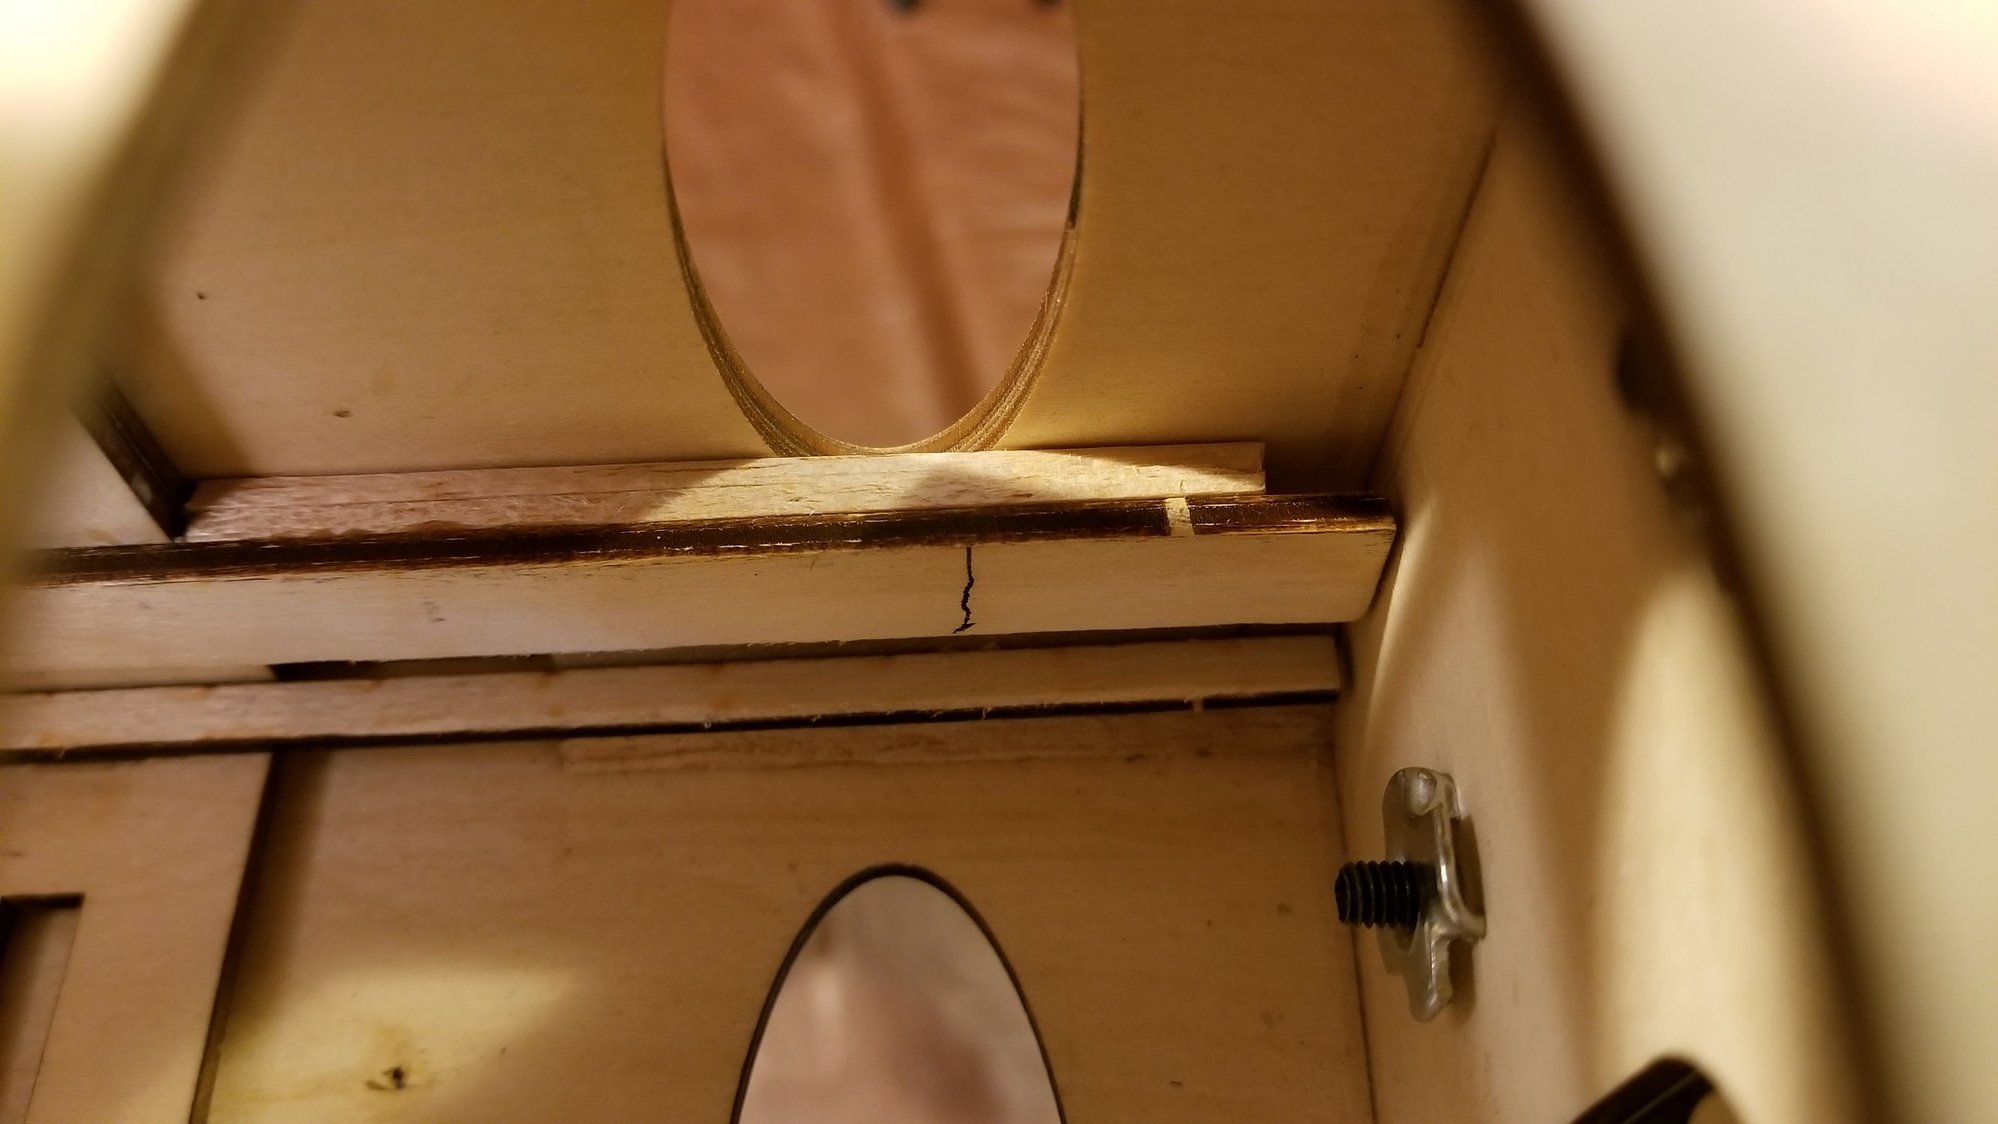
For the battery tray placement, there are a lot of ways to lay out the strips, but I found that the small narrow strip in the bottom, and the larger strip on top with clearance for the tray gave me the most satisfaction. I also beveled the back edge of the uppermost strip to allow the tray to slide in at an angle, makes it so much easier.
I also added further support up front so when inverted, there is more to hold the large batteries.
I hinged the back portion of the tray so that I could fold it, and lift it over all my electronics and power box. Yea, might be a bit of overkill, but that tray will only flex so much!
I decided to bolt rather than glue the motor box to the firewall with button head 4mmx16 screws. 15mm would also fit. The button head on the inside sits flush with the battery support strip so it wont be punching into your (well-secured) batteries.
BTW, with the side strips in place, there was only about 87mm width for batteries, and I found that my Zippy compacts 5s-5000 fit just fine, but my Zippy Flighmax 5000 were just too tight and wide.
Not too long I hope for the maiden, just a bit of soldering for the battery extensions, and some sort of duct upfront thru the scoop to aid in cooling.
Cheers, DSA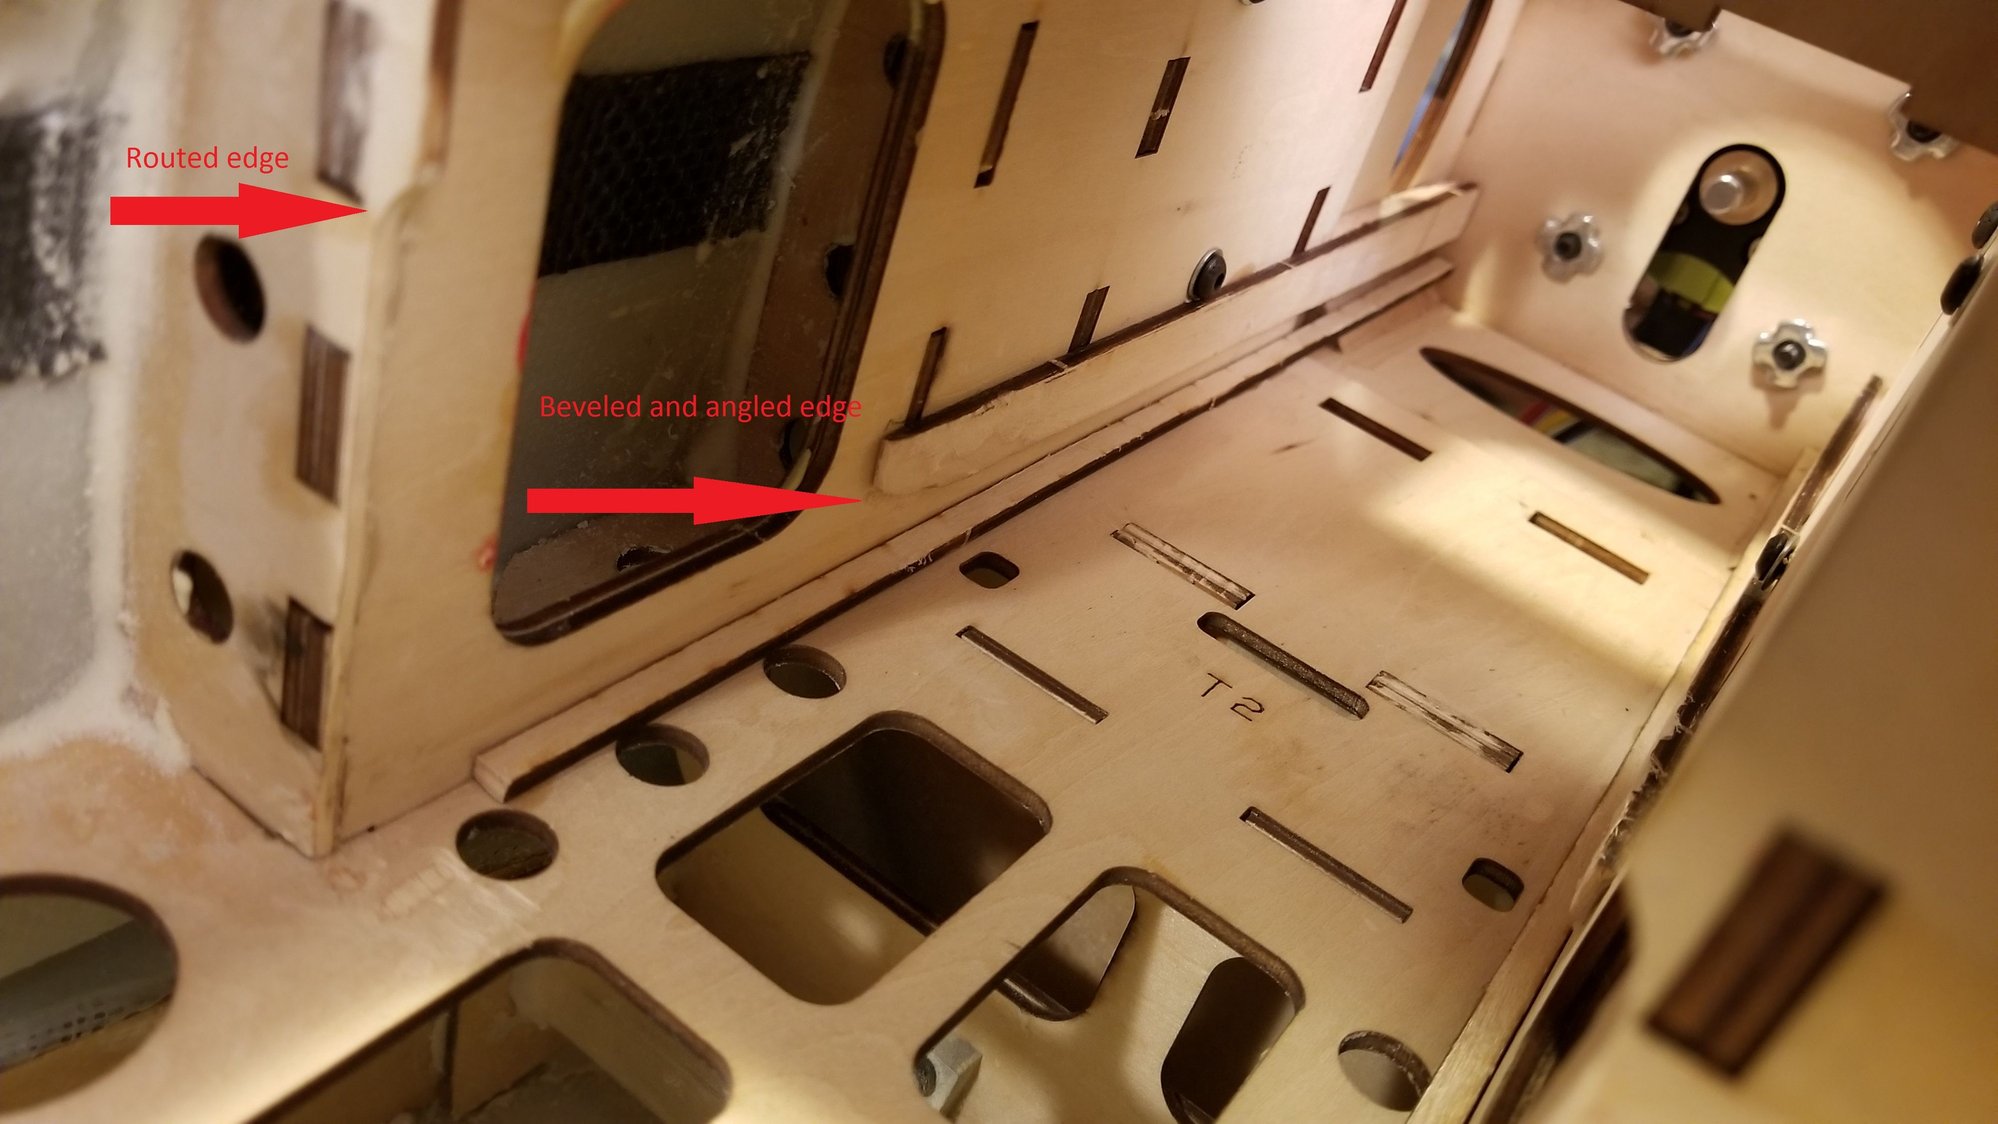
Bevel top strip and dremel-off/widen bulkhead
Extra support for front of top rail when you go inverted!
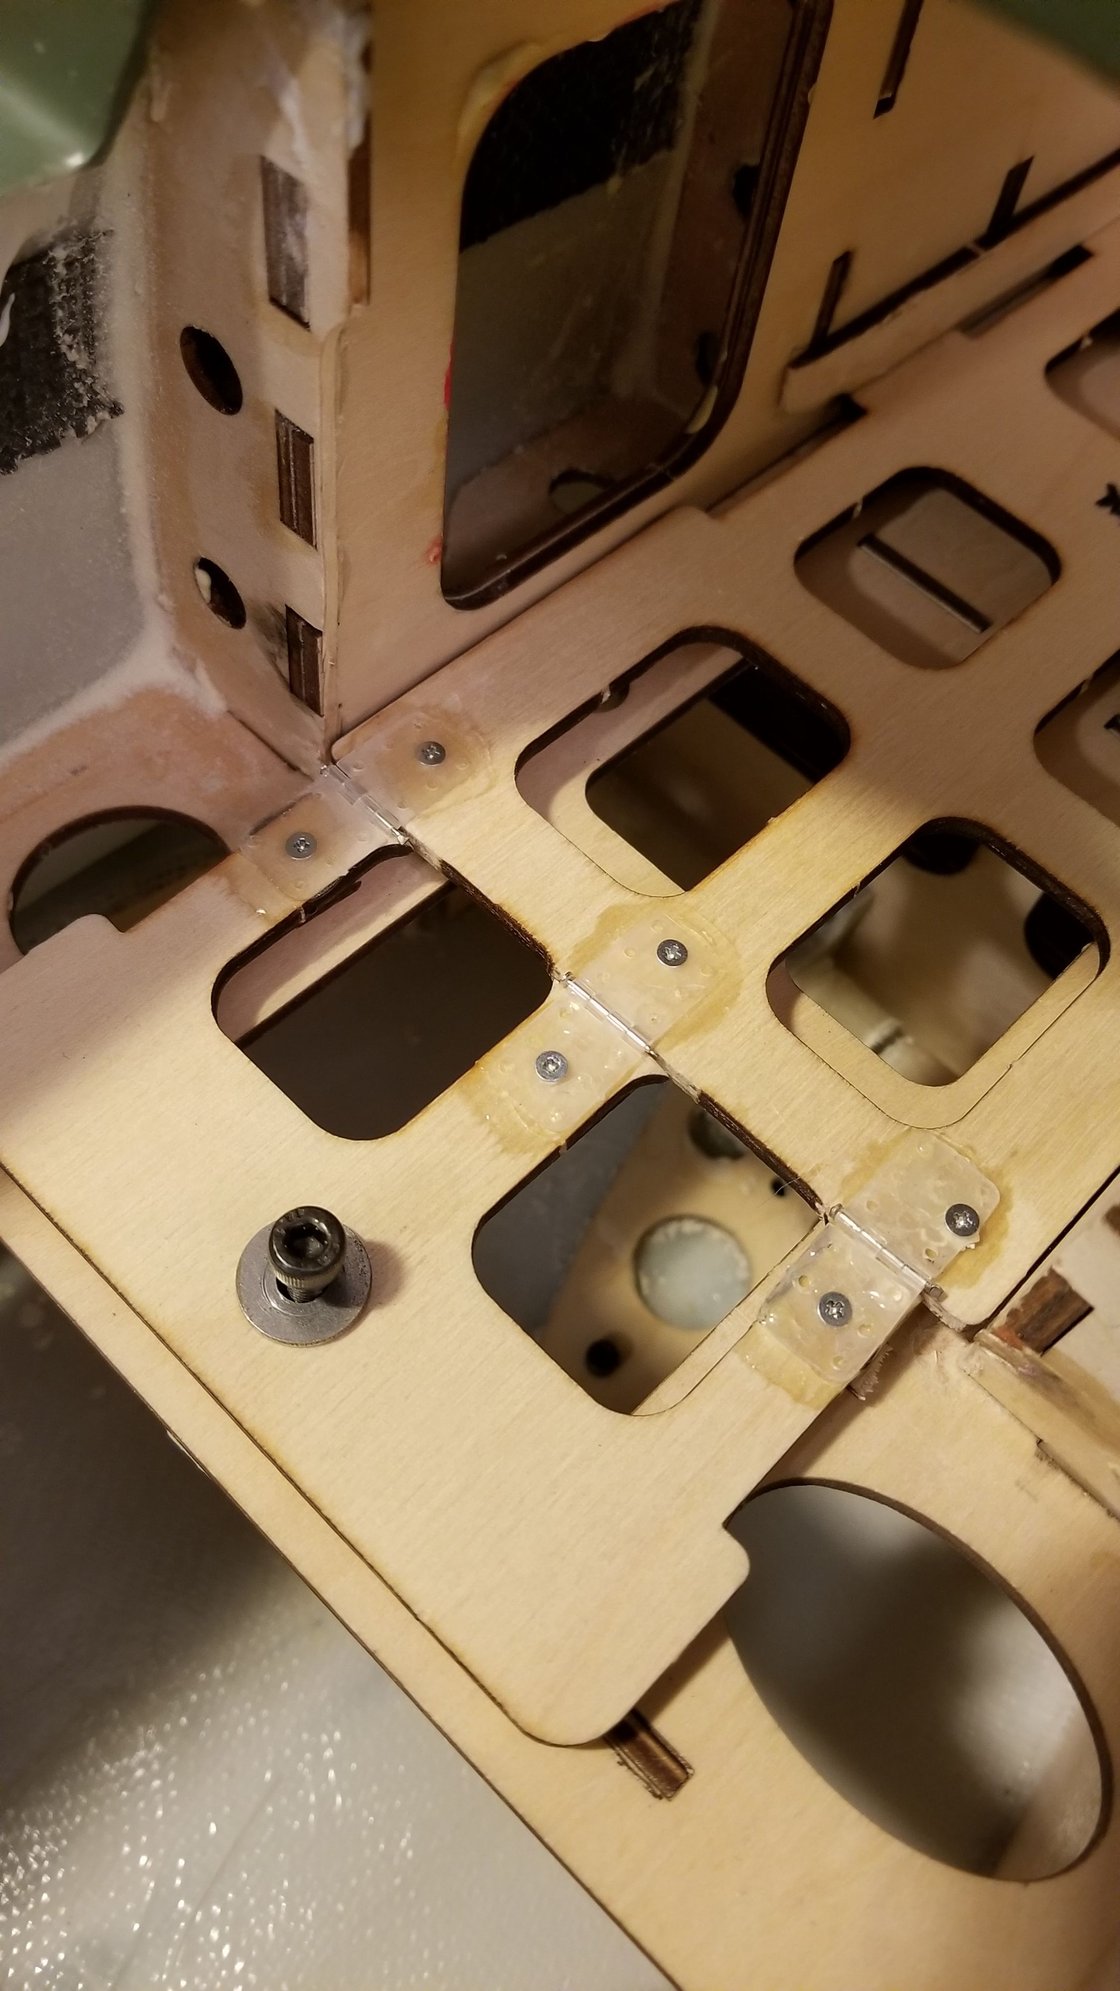
Hinged battery tray for easier removal....
...to clear the electronics.
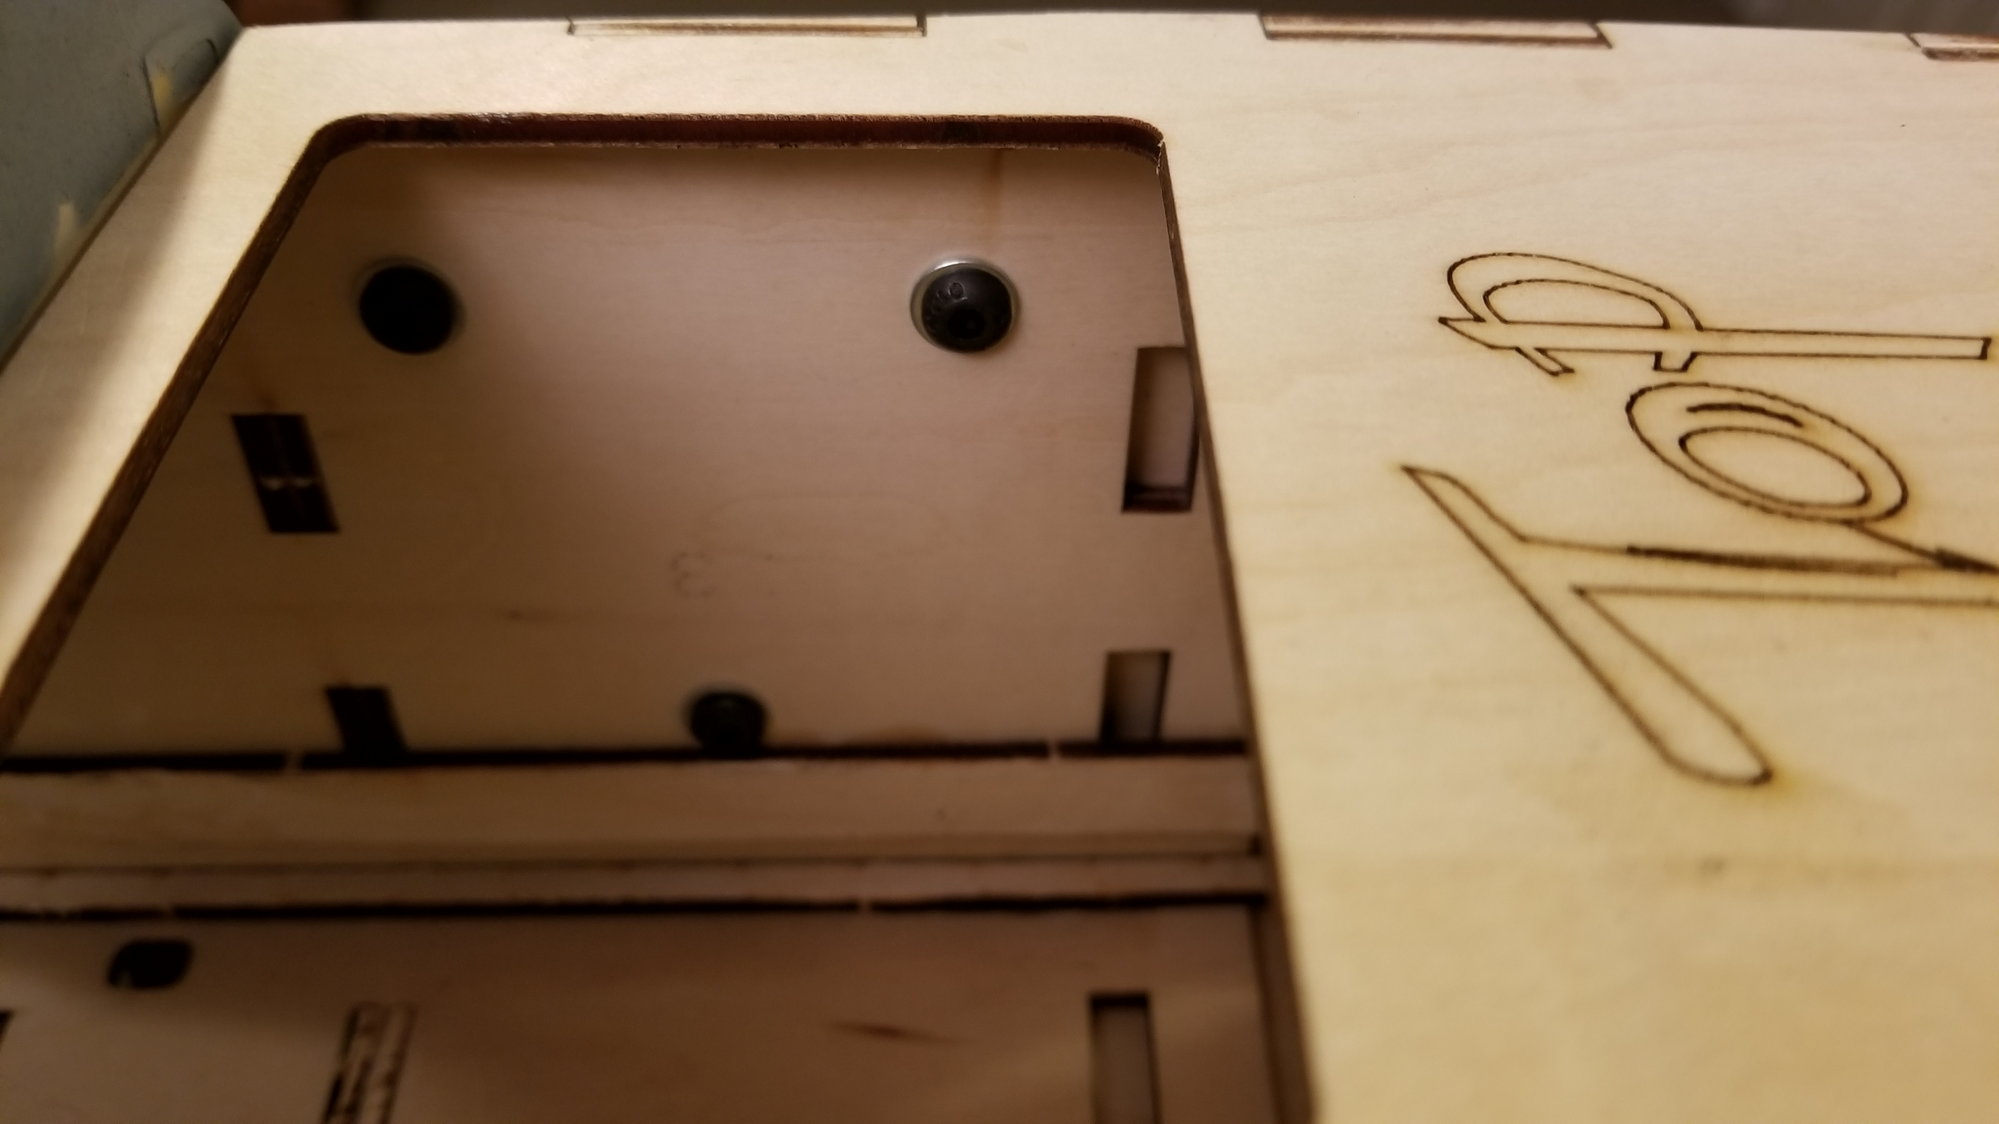
Button heads on the inside don't poke out any further than the strip.
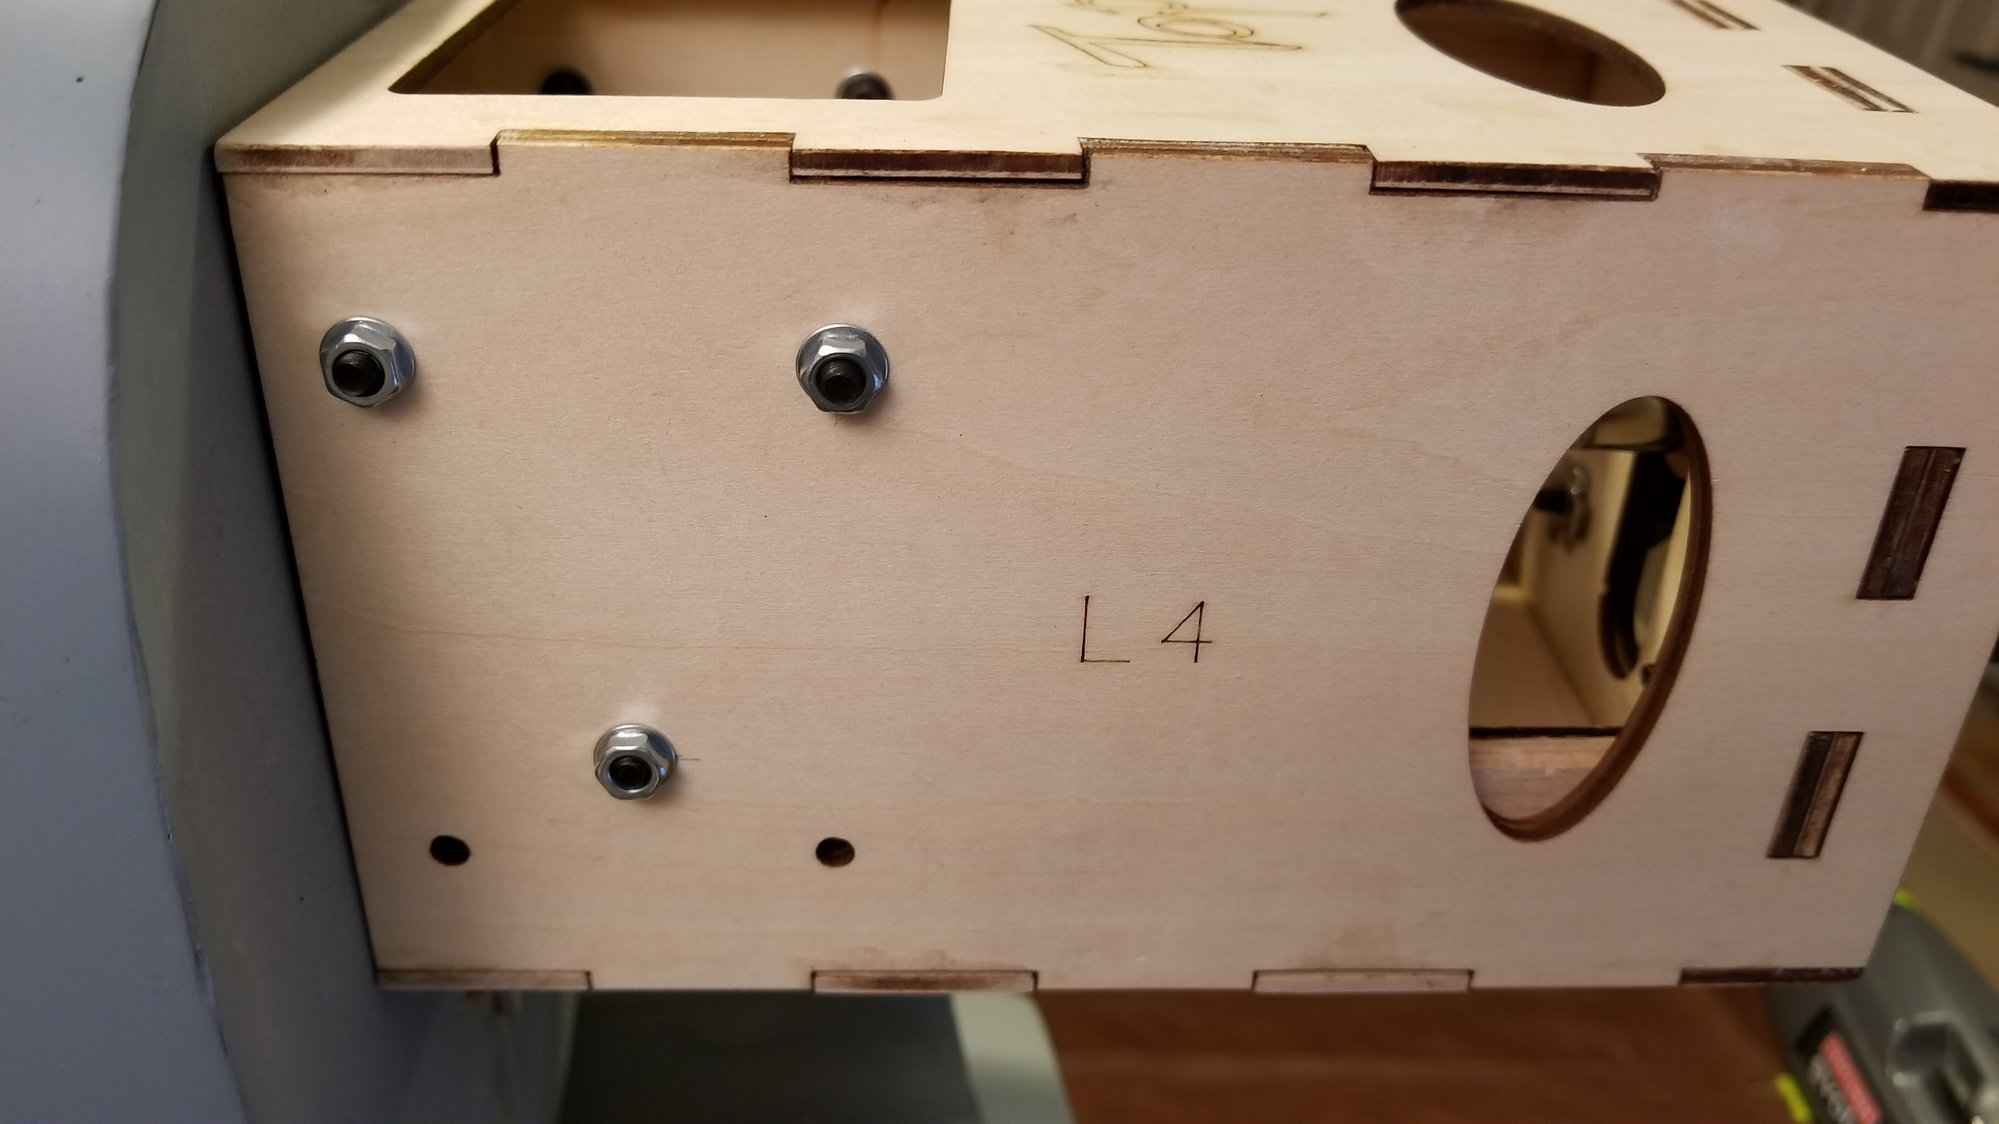
Nuts on the outside, with locktite.
For the battery tray placement, there are a lot of ways to lay out the strips, but I found that the small narrow strip in the bottom, and the larger strip on top with clearance for the tray gave me the most satisfaction. I also beveled the back edge of the uppermost strip to allow the tray to slide in at an angle, makes it so much easier.
I also added further support up front so when inverted, there is more to hold the large batteries.
I hinged the back portion of the tray so that I could fold it, and lift it over all my electronics and power box. Yea, might be a bit of overkill, but that tray will only flex so much!
I decided to bolt rather than glue the motor box to the firewall with button head 4mmx16 screws. 15mm would also fit. The button head on the inside sits flush with the battery support strip so it wont be punching into your (well-secured) batteries.
BTW, with the side strips in place, there was only about 87mm width for batteries, and I found that my Zippy compacts 5s-5000 fit just fine, but my Zippy Flighmax 5000 were just too tight and wide.
Not too long I hope for the maiden, just a bit of soldering for the battery extensions, and some sort of duct upfront thru the scoop to aid in cooling.
Cheers, DSA
Bevel top strip and dremel-off/widen bulkhead
Extra support for front of top rail when you go inverted!
Hinged battery tray for easier removal....
...to clear the electronics.
Button heads on the inside don't poke out any further than the strip.
Nuts on the outside, with locktite.
08-03-2018, 12:46 PM
#670
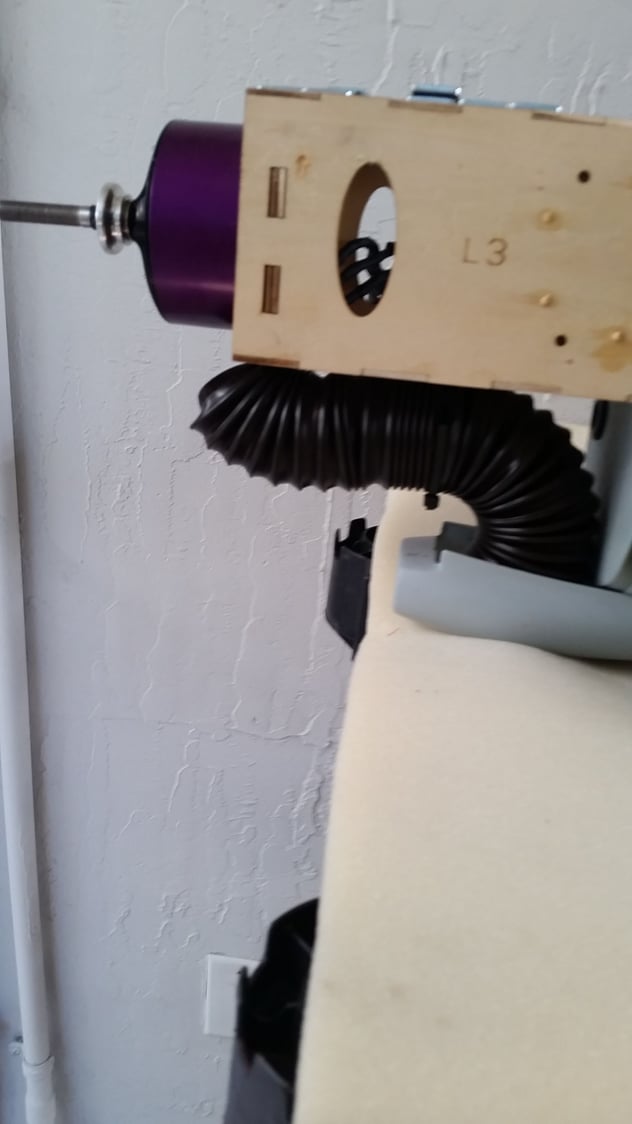
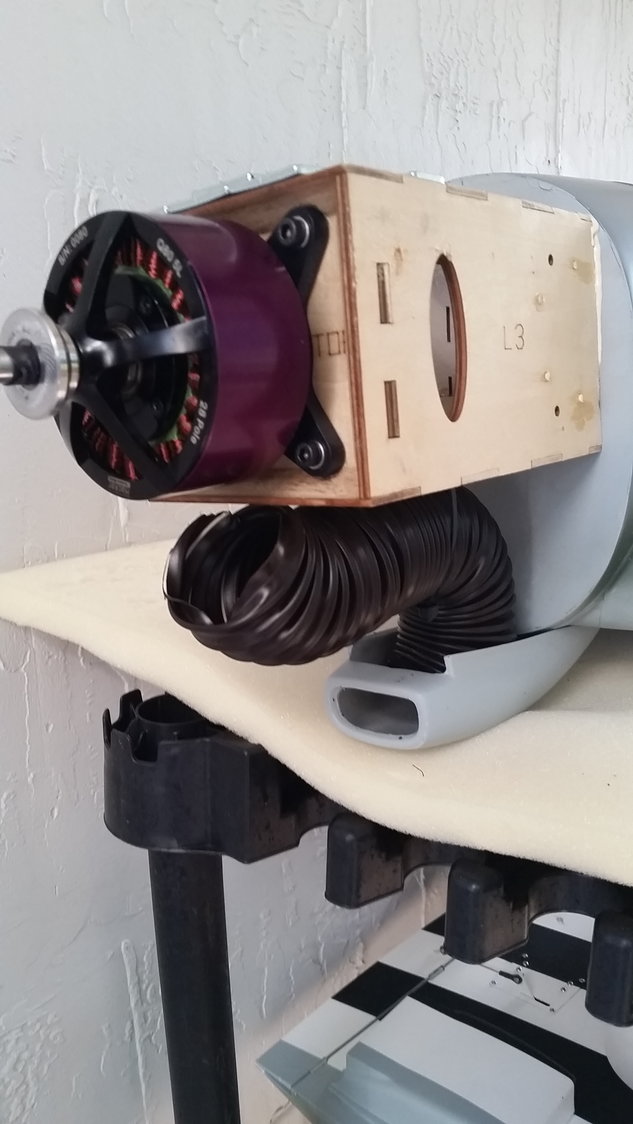
Only a couple flights on mine so far, but using this...
https://www.mcmaster.com/#catalog/124/276/=1dzzgmq
with one end at the actual intake at the bottom of the cowl and the other end pointed at the motor, has provided adiquate cooling so far fo rmy big hacker q80
https://www.mcmaster.com/#catalog/124/276/=1dzzgmq
with one end at the actual intake at the bottom of the cowl and the other end pointed at the motor, has provided adiquate cooling so far fo rmy big hacker q80
08-03-2018, 12:58 PM
#671
Join Date: Jul 2017
Location: Just East of Cleveland Ohio
Posts: 51
Likes: 0
Received 1 Like
on
1 Post
Only a couple flights on mine so far, but using this...
https://www.mcmaster.com/#catalog/124/276/=1dzzgmq
with one end at the actual intake at the bottom of the cowl and the other end pointed at the motor, has provided adiquate cooling so far fo rmy big hacker q80
https://www.mcmaster.com/#catalog/124/276/=1dzzgmq
with one end at the actual intake at the bottom of the cowl and the other end pointed at the motor, has provided adiquate cooling so far fo rmy big hacker q80
 08-09-2018, 07:19 PM
#674
I've been dealing with a bunch of BS lately. Have not flown for six weeks. Finally got the Spitfire out to the field today. It was hot and humid. 93 with heat index of over 100. I know, I must be crazy. Anyway, two flights went well. No over heating problems, so my little side scoop and small cowl flap did the job. I'm suppose to have some videos coming but haven't gotten them yet.
08-27-2018, 10:58 AM
#675
Join Date: Jul 2017
Location: Just East of Cleveland Ohio
Posts: 51
Likes: 0
Received 1 Like
on
1 Post
CG question..... Does anyone know what is reasonable CG with the gear extended? Manual and most here indicate around 130mm, but in general, I would infer that to be with gear retracted. The reason I ask, is that I will try to balance using small scales under each wheel with mathematical calculations so it would be nice to know what the CG should be with gear extended. Otherwise I would have to build a pillar for the front scales to position the plane with the gear retracted. I don't have access to a large-scale balancer, and my fingers are just not that accurate, especially since I am near 24lbs! (and the Vanessa rig is just too cumbersome and hard to hit a steady state)
Thx DSA
Thx DSA